Table of Contents
Advertisement
Quick Links
Advertisement
Table of Contents

Related Manuals for Heatmiser neo Stat Touch-e


Summary of Contents for Heatmiser neo Stat Touch-e
- Page 1 Models: Touch-e & neo Stat Touch-e Carbon...
-
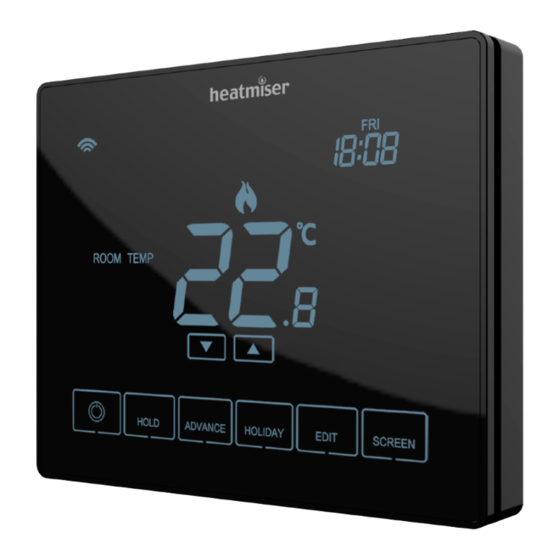
Page 2: Product Image
Models: Touch-e & neo Stat Touch-e Carbon Series Stat... -
Page 3: Table Of Contents
Table of Contents Product Image Holiday Table of Contents Optional Settings Explained 24-25 Optional Settings - Feature Table What is a Programmable Room Thermostat? Adjusting the Optional Settings Installation Procedure Recalibrating the Thermostat Mode Select Mode 1 - Thermostat Error Codes 9-10 Remote Probe Connections LCD Display... -
Page 4: What Is A Programmable
What is a Programmable Room Thermostat? A programmable room thermostat is both a programmer and a room thermostat. A programmer allows you to set “On” and “O ” periods to suit your own lifestyle. A room thermostat works by sensing the air temperature, switching on the heating when the air temperature falls below the thermostat setting, and switching it o once this set temperature has been reached. - Page 5 The way to set and use your programmable room thermostat is to nd the lowest temperature settings that you are comfortable with at the di erent times you have chosen, and then leave it alone to do its job. The best way to do this is to set the room thermostat to a low temperature –...
-
Page 6: Installation Procedure
Installation Procedure Mount the thermostat at eye level. Read the instructions fully so you get the best from our product. Don’t Do not install near to a direct heat source as this will a ect functionality. Do not push hard on the LCD screen as this may cause irreparable damage. This thermostat is designed to be ush mounted and requires a back box of 35mm (minimum depth) to be sunk into the wall prior to installation. - Page 7 Section Header Touch-e Stat...
-
Page 8: Mode Select
Mode Select The neoStat Touch-e can either be used as a thermostat, or time clock. Thermostat is the default setting. Do not use mode 2 for electric under oor heating! To change between thermostat & time clock modes, follow these steps. Press and hold the •... -
Page 9: Mode 1 Thermostat
Mode 1 Thermostat Touch-e Stat... - Page 10 1 2 3 4 Series Stat...
-
Page 11: Lcd Display
LCD Display Section Header 1. Holiday – Displayed when the thermostat is in holiday mode. 2. Frost Protection – Displayed when frost protection is enabled or activated by a Window/Door Switch. 3. Flame Symbol – Displayed when the thermostat is calling for heat and ashes when optimum start is active. -
Page 12: Set Up & Pairing
RED once the neoHub has connected to your network. • Once connected to the Heatmiser cloud server, the Link LED will turn GREEN. • Connect your smartphone or tablet device to the same WiFi network as your router. - Page 13 Set Up & Pairing Pairing the neoStat Touch-e The next step is to join the neoStat Touch-e to the neoHub. To add a neoStat Touch-e, follow these steps; • In the app, select ADD NEOSTAT, enter a preset or custom title, then press NEXT.
-
Page 14: Power On/O
Power On/O The heating is indicated ON when the ame icon is displayed. When the Flame Icon is absent, there is no requirement for heating to achieve the set temperature but the thermostat remains active. To turn the thermostat o completely, press and hold the key for approximately 3 seconds until the display shows ‘SETUP’... -
Page 15: Setting The Time And Date
Setting the Time and Date Section Header To set the clock, follow these steps. • Press and hold the key for 3 seconds ............... At this point the screen will go blank showing only , ‘CLOCK’ and ‘SETUP’ . • Tap the ‘CLOCK’ key ....................... The ‘Year’... -
Page 16: Temperature Display
Temperature Display This thermostat can be con gured for di erent sensor options such as built in sensor, oor sensor or both. The display will clearly indicate which sensor is being used by showing either ‘ROOM TEMP’ or ‘FLOOR TEMP’ to the left the actual value. Room Temperature Floor Temperature When the thermostat is set to use both the air &... -
Page 17: Temperature Control
Temperature Control Section Header The ‘Up/Down’ keys allow you to adjust the set temperature ......... When you press either key, you will see the words ‘SET TEMP ’ and the desired temperature value. Press ‘DONE’ to con rm temperature setting and return to the main display ... Until next programmed ‘Comfort Level’... -
Page 18: Edit Comfort Levels
Edit Comfort Levels This thermostat o ers three program mode options; Weekday/Weekend, 7 Day and 24 Hour programming. There is also the option to use the neoStat Touch-e as a manual thermostat. The thermostat is supplied with comfort levels already factory programmed, but these can be changed easily. - Page 19 • Use the ‘Up/Down’ key at the top to set the ‘Hours’ & ‘Minutes’ ......• Use the ‘Up/Down’ keys in the center to set the temperature ......• Press the ‘Right’ arrow key ....................‘LEAVE’ will now show with the current settings displayed. Repeat these steps above to set all comfort levels.
-
Page 20: Temperature Hold
Temperature Hold The temperature hold function allows you to manually override the current operating program and set a di erent temperature for a desired period. • Press the ‘Hold’ key once ....................• Use the ‘Up/Down’ keys to set the desired ‘Hold’ time..........•... -
Page 21: Thermostat Advance
Thermostat Advance This feature allows the next ‘Comfort Level’ setting to be brought forward and become active before its pre-programmed time. Note: Multiple advances aren’t allowed. To enable ‘Advance’ • Press the ‘ADVANCE’ key once ..................‘ADVANCED UNTIL’ time and the ‘SET’ temperature will now be displayed. •... -
Page 22: Frost Protection Standby
Frost Protection Standby The frost icon will toggle ON/OFF each time the key is pressed ....In this mode, the neoStat Touch-e will display the frost icon and will only turn the heating ‘ON’ should the room temperature drop below the set frost temperature. If the heating is turned ‘ON’... -
Page 23: Locking The Touch Display
Locking the Touch Display The neoStat Touch-e has a keypad lock facility. To activate the lock follow these steps. • Press and hold the ‘HOLD’ key for 10 seconds ............The display will show 0000. At this point enter a four digit pin number. •... -
Page 24: Holiday
Holiday In time clock mode; the schedule will be turned o during the holiday period, then return to the programmed settings once the holiday period nishes. In thermostat mode; the holiday function reduces the set temperature in your home to the frost mode temperature setting that is con gured in the setup menu. The thermostat will maintain this temperature for the duration of the holiday and will then automatically return to the program mode on your return. -
Page 25: Optional Settings Explained
Optional Settings Explained THE FOLLOWING SETTINGS ARE OPTIONAL AND IN MOST CASES NEED NOT BE ADJUSTED. Switching Di erential: This function allows you to increase the switching di erential of the thermostat. The default is 1°C which means that with a set temperature of 20°C, the thermostat will switch the heating on at 19°C and o at 20°C. - Page 26 Optimum Start: Optimum start will delay the start up of the heating system to the last possible moment to avoid unnecessary heating and ensure the building is warm at the programmed time. The thermostat uses the rate of change information to calculate how long the heating needs to raise the building temperature 1°C (with a rate of change of 20, the thermostat has calculated the heating needs 20 minutes to raise the building temperature 1°C) and starts the heating accordingly...
-
Page 27: Optional Settings - Feature Table
Optional Settings - Feature Table FEATURE DESCRIPTION SETTING Pairing Used to add zone to the neoHub Switching Di erential 00.5 = 0.5°C (Default) 01 = 1.0°C 02 = 2.0°C 03 = 3.0°C Frost Protection Temperature 05° - 17°C (12°C = Default) 00 - 15 Minutes (00 = Default) Output Delay Up/Down Temperature Limit... -
Page 28: Adjusting The Optional Settings
Adjusting the Optional Settings • Press and hold the key for 3 seconds ..............The display will go blank showing only ‘Setup’ and ‘Clock’ • Press the ‘SETUP’ key once....................Feature No. Feature Setting • Use the ‘Up/Down’ keys at the top to scroll through features ......•... -
Page 29: Recalibrating The Thermostat
Recalibrating the Thermostat This thermostat is factory set and doesn’t need re-calibrating under normal operation! To calibrate, follow the step below. Press and hold the • key for 3 seconds ..............The display will go blank showing only ‘Setup’ and ‘Clock’ . Press and hold the •... -
Page 30: Remote Probe Connections
Remote Probe Connections The neoStat Touch-e allows for up to two probe connections, remote oor and remote air. To enable remote probe connections, refer to the feature table on page 30. Probe Types Remote Floor Sensor Remote Air Thimble Sensor NTC Thermistor 10K3A1 NTC Thermistor 10K3A1 Input Connections... -
Page 31: Wiring Diagram
Wiring Diagram - neoStat Touch-e Model: neoStat Touch-e 230VAC MAINS SUPPLY Floor Sensor Sensor LOAD Air Sensor Floor Sensor Do not connect to electric under oor MATTING OR WIRE - 16 AMP MAX heating mat when using this device in mode 2 “Time Clock”. -
Page 32: Mode 2 - Time Clock
Mode 2 - Time Clock Series Stat... -
Page 33: Lcd Display
LCD Display Holiday – Displayed when the time clock is in holiday mode. Advanced Until - Displayed when the time clock is advanced to the next programmed comfort level. Day Indicator – Displays the day of the week. Hold Left – Displayed when a timer hold is active, the remaining time will be shown. Clock –... -
Page 34: Setting The Switching Times
Setting the Switching Times To program the ’Switching times’ , press the ‘EDIT’ key ............• Use the ‘DAY’ key to select day/period of week (the selection will ash) ... • Press ‘NEXT’ to con rm selection ..................‘WAKE’ will now ash and the ON time will be displayed. •... -
Page 35: Timer Advance
Timer Advance Section Header This feature allows the next ’Switching time level’ setting to be brought forward and become active before its pre-programmed time. Note: Multiple advances aren’t allowed. To enable ‘Advance’ • Press the ‘ADVANCE’ key once .................... The ‘ADVANCED UNTIL’ time and the output status will now be displayed. •... -
Page 36: Timer Override
Timer Override To override the timed output ‘ON/OFF’ , follow these steps. • Press the ‘Hold’ key once ........................ • Use the ‘Up/Down’ keys to set the desired ‘Hold’ time............• Use the ‘Up/Down’ keys in the center to adjust the output state ........Select: Timer On Timer O •... -
Page 37: Optional Settings Explained
Optional Settings Explained Program Mode: The time clock o ers three programming modes. Weekday/ Weekend - 4 Switching times for Monday - Friday. 4 di erent switching times for Saturday - Sunday. 7 Day Program Mode - Each day of the week has 4 switching times that can be programmed independently. -
Page 38: Adjusting The Optional Settings
Adjusting the Optional Settings • Press and hold the key for 3 seconds ............... The display will go blank showing only ‘Setup’ and ‘Clock’ • Press the ‘SETUP’ key once ....................Feature No. Feature Setting • Use the ‘Up/Down’ keys at the top to scroll through features ....... •... -
Page 39: Wiring Diagram
Wiring Diagram - Time Clock Mode Model: neoStat Touch-e 230VAC MAINS SUPPLY Floor Sensor Sensor LOAD Do not connect to electric under oor heating mat when using this device in LOAD 16 AMP MAX mode 2 “Time Clock”. This product must only be installed by a quali ed electrician and comply with local installation regulations. -
Page 40: Want More Information
Units 1-5 Hurstwood Court, Mercer Way Shadsworth Business Park, Blackburn, Lancashire, BB1 2QU, United Kingdom. Hereby, Heatmiser UK Ltd. declares that the radio equipment type (designation of type of radio equipment) is in compliance with Directive 2014/53/EU. Rev. 1.3 RF Frequency: 2.4ghz 3.54dBm...
Need help?
Do you have a question about the neo Stat Touch-e and is the answer not in the manual?
Questions and answers