Table of Contents
Advertisement
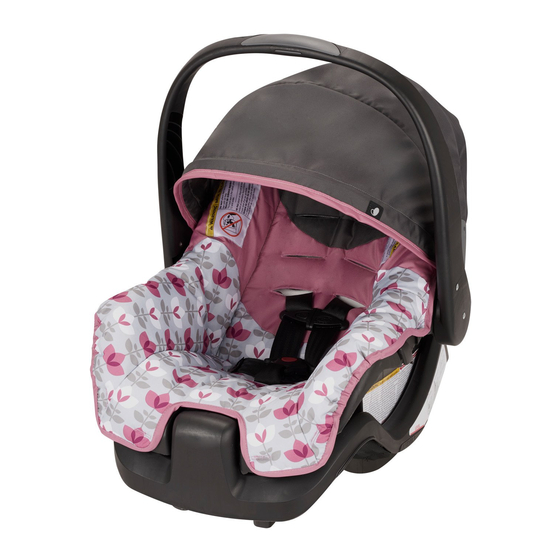
Nurture™
Infant Car Seat
Owner's Manual
Keep for future use
Rear-facing
2.3 to 10 kg
(5 to 22 lbs)
48 to 74 cm
(19 to 29 in.)
* See page 2
for complete
requirements.
Para instrucciones en Español,
llamar al: 1-800-233-5921
WARNING:
To reduce the risk of serious injury
or death, read this owner's manual prior
to installing and using this child restraint.
© 2017 Evenflo Company
25701287
8/17
Advertisement
Table of Contents

Related Manuals for Evenflo Nurture


Summary of Contents for Evenflo Nurture
- Page 1 Nurture™ Infant Car Seat Owner’s Manual Keep for future use Rear-facing 2.3 to 10 kg (5 to 22 lbs) 48 to 74 cm (19 to 29 in.) * See page 2 for complete requirements. Para instrucciones en Español, llamar al: 1-800-233-5921...
-
Page 2: Table Of Contents
Child Restraint Features ..........14 your child and to increase the chances for your child’s Using the Nurture Handle ........... 16 survival in most crashes. Proper Installation WITH the Base Installing the Convenience Base with the Lower Anchor U.S. -
Page 3: Premature Infant Use
CHILD REQUIREMENTS PREMATURE INFANT USE Warning: Failure to follow these Child Requirements could Before using this child restraint for preterm or low birth result in serious injury or death. weight infants, ensure the Child Requirements are met and This child restraint is designed for use by children in rear-facing follow the guidelines in this section. -
Page 4: Warnings
WARNING WARNING General Warnings Air Bag Warnings • Failure to follow the Child Requirements for use of this • DO NOT use this restraint in the front seat of a vehicle child restraint could result in serious injury or death. equipped with an air bag. -
Page 5: Latch Warnings
WARNING WARNING Location Warnings Vehicle Seat Belt Warnings – cont. • ALWAYS read and follow exactly the instructions that • DO NOT loosen the vehicle seat belt to provide more accompany your vehicle and child restraint. leg room as this may keep the child restraint from •... - Page 6 WARNING WARNING LATCH Warnings - cont. Usage Warnings - cont. • In addition to these instructions, read and follow your • In cold weather, DO NOT dress the child in bulky vehicle owner’s manual regarding installation of the clothing, like snowsuits, if the child is riding in a child child restraint and LATCH.
-
Page 7: Recall Information For U.s. Customers
Recall Information for U.S. Customers Storing Your Instructions • Child restraints could be recalled for safety reasons. You must register this restraint to be reached in a recall. Send your name, address, e-mail address if available, and the restraint’s model number and manufacturing date to: Evenflo Company, Inc. -
Page 8: Visual Glossary
Seat Crease Front Seat components. IMPORTANT: Retractor If your vehicle has side air bags, please refer to the warnings on page 5. Nurture Convenience Base Bottom Nurture Convenience Base Lower anchor connector assembly Vehicle seat belt/lower anchor connector... -
Page 9: Child Restraint Features
Child Restraint Features Child Restraint Features Front View Description Handle Harness Straps Buckle Release Seat Pad Canopy Chest Clip Convenience Base Harness Adjuster Handle Release Seat Release Handle Harness Slots Crotch Strap Slots Back View Locking Clip... -
Page 10: Using The Nurture Handle
Using the Nurture Handle Using the Nurture Handle To change handle positions, squeeze both Handle IMPORTANT: Always secure the child in the carrier. Refer Releases and rotate the handle to the desired position to “Securing the Child in the Carrier” on page 31. -
Page 11: Proper Installation With The Base
Proper Installation WITH Installation Checklist the Convenience Base WARNING Child Requirements Child’s head MUST be at least 25mm (1 in.) below the top of the carrier. • Weight: 2.3 – 10 kg (5 – 22 lbs) • Height: 48 – 74 cm (19 – 29 in.) and top of child’s 1. -
Page 12: Installing The Convenience Base With The Lower Anchor Connector Assembly System
Installing the Convenience Base with Before you begin, be sure the vehicle is on a level surface. the Lower Anchor Connector Assembly Place the base on the System vehicle seat. WARNING • This lower anchor connector assembly system is intended to be used ONLY as described in these instructions. -
Page 13: Installing The Convenience Base With The Vehicle Seat Belt
Installing the Convenience Base with the Pull the shoulder belt Vehicle Seat Belt tightly to remove all slack from the lap portion of the WARNING vehicle seat belt and, at the same time, push down on the base using your full •... -
Page 14: Placing The Carrier In The Base
Canadian OR U.S. Models Placing the Carrier in the Base U.S. Models ONLY Secure the infant restraint to the base by placing the Position 1 Position 4 front of the seat under the hook and snapping seat into place. The carrier MUST locked firmly into the base. -
Page 15: Proper Installation Without The Base
Proper Installation Installation Checklist WITHOUT the WARNING Convenience Base Child’s head MUST be at least 25 mm (1 in.) below the top of the carrier. Child Requirements 1. Place the child in the carrier. • Weight: 2.3 – 10 kg (5 – 22 lbs) •... -
Page 16: Installing The Carrier Without The Convenience Base
Installing the Carrier Without the LAP BELT Convenience Base Route ONLY lap portion of the vehicle seat belt through the belt slots on the carrier. In vehicles with a LAP AND SHOULDER BELT lap and shoulder After securing the infant, place the restraint into your DO NOT belt vehicle. -
Page 17: Securing The Child In The Carrier
Push down on the bottom of the seat using your full weight. WARNING If the level line is not level to the ground, use • NEVER use this child restraint in the forward-facing a tightly rolled towel or small blanket beneath position. -
Page 18: Removing The Child From The Carrier
Facing the front of the buckle, place the left buckle tongue on top of the right buckle tongue Then insert both tongues in the nested position, into the buckle opening until you hear an audible click. Pull up on the harness strap to ensure the buckle tongues are engaged. -
Page 19: Changing The Harness Position
Changing the Harness Position Choose the appropriate slots As your child grows, you will need to change the harness for the new harness strap position so that the harness straps are routed position. Push the through the slots closest to the child’s shoulders. The harness anchor shoulder harness straps should ALWAYS... -
Page 20: Changing The Crotch Strap Position
Changing the Crotch Strap Position Removing the Lower Anchor Connector Assembly System As your child grows, you will need to change the crotch strap position so that it is in the slot closest to your child. The lower anchor connector assembly system that The crotch strap should ALWAYS be as close as possible to,... -
Page 21: Using The Locking Clip
Using the Locking Clip Push down on the base To watch a video about installing a locking clip, go to while pulling the www.evenflo.com. shoulder belt tightly to remove all slack Install Locking Clip, from the lap portion of if necessary. the belt. -
Page 22: Using As An Infant Carrier
WARNING Using as an Infant Carrier • NEVER place this child restraint near the edges of Secure the child in the carrier by following “Securing the counter tops, tables, or other high surfaces. The child’s Child in the Carrier” on page 31. movements can cause the carrier to slide or fall. -
Page 23: Securing Your Child Restraint In Aircraft
Securing Your Child Restraint in Aircraft • If you decide to obtain an additional base for your Nurture® child restraint, make sure it displays a sku/ The Federal Aviation Administration (FAA) recommends part number beginning with “640.” that you secure your child for air travel in an appropriate •... - Page 24 Installing Child Restraint in Aircraft Installing Child Restraint in Aircraft Fasten the aircraft seat belt Rotate the handle to Position 1 or Position 4 by squeezing both handle releases at the same time. The aircraft seat belt must be as tight as possible. Route the excess seat belt strap back through the belt slots...
-
Page 25: Care And Cleaning
Care and Cleaning Replacement Parts Not available on all models. Styles may vary. • DO NOT lubricate or immerse in water the LATCH connectors, the buckle, or any other part of this child To order replacement parts, you can order online at restraint, unless rinsing is permitted, as stated on the www.evenflo.com or contact Evenflo. -
Page 26: Limited Warranty
EXCEPT TO THE EXTENT PROHIBITED BY APPLICABLE LAW, ANY IMPLIED WARRANTY OF MERCHANTABILITY OR FITNESS FOR A PARTICULAR PURPOSE ON THIS PRODUCT IS HEREBY DISCLAIMED. EVENFLO SHALL NOT BE LIABLE FOR ANY INCIDENTAL, CONSEQUENTIAL, SPECIAL OR PUNITIVE DAMAGES OF ANY KIND FOR BREACH OF THE EXPRESS LIMITED WARRANTY ON THIS PRODUCT, OR ANY WARRANTY IMPLIED BY OPERATION OF LAW. - Page 27 • www.evenflo.com • USA: 1-800-233-5921 8 AM – 5 PM E.T. • Canada: 1-937-773-3971 • Mexico: 01-800-706-12-00...
Need help?
Do you have a question about the Nurture and is the answer not in the manual?
Questions and answers