Table of Contents
Advertisement
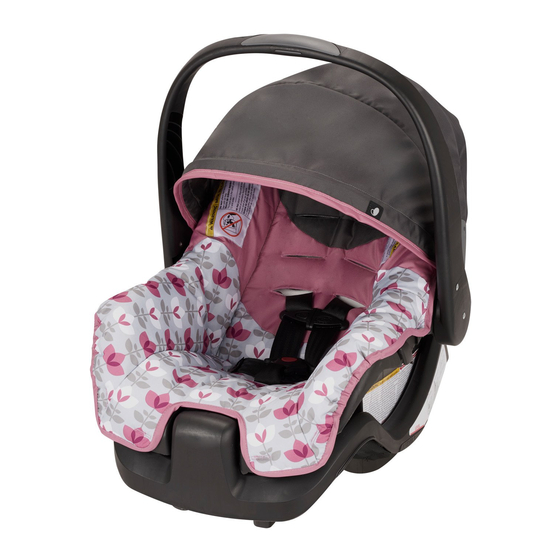
Nurture™
Infant Car Seat
Owner's Manual
Keep for future use
Rear-facing
2.3 to 10 kg
(5 to 22 lbs)
48 to 74 cm
(19 to 29 in.)
Para instrucciones en Español,
llamar al: 1-800-233-5921
WARNING:
To reduce the risk of serious injury
or death, read this owner's manual prior
to installing and using this child restraint.
© 2015 Evenflo Company
25700109
4/15
Advertisement
Table of Contents

Related Manuals for Evenflo Nurture


Summary of Contents for Evenflo Nurture
- Page 1 Nurture™ Infant Car Seat Owner’s Manual Keep for future use Rear-facing 2.3 to 10 kg (5 to 22 lbs) 48 to 74 cm (19 to 29 in.) Para instrucciones en Español, llamar al: 1-800-233-5921 WARNING: To reduce the risk of serious injury or death, read this owner’s manual prior...
-
Page 2: Table Of Contents
Rear-facing Use ONLY Using the Nurture Handle..... 16 Proper Installation WITH the Base ... . . 18 Weight: 2.3 to 10 kg (5 to 22 lbs) -
Page 3: Premature Infant Use
Preterm and low birth weight infants Vehicles built prior to the 2002 model year: are at additional risk of breathing difficulties and heart problems when placed in a child restraint. Evenflo DO NOT use this restraint in a vehicle seating posi-... -
Page 4: Warnings
Consult vehicle owner’s manual, try a different seating stop or crash. Serious injury or death may result. These location, or call Evenflo at 1-800-233-5921 (U.S.) or instructions and the instructions in your vehicle owner’s 1-937-773-3971 (Canada). - Page 5 WARNING WARNING anchor bars by pulling hard on the lower anchor • DO NOT allow the vehicle seat belt release button assembly harness. If the connectors are not totally to touch the child restraint. Accidental contact may engaged, the lower anchor assembly system will not cause the seat belt to release.
-
Page 6: Recall Information For U.s. Customers
• DO NOT attach additional padding, toys, or other model number, and manufacturing date to: devices not made by Evenflo, or described in these Evenflo Company, Inc. 1801 Commerce Dr. instructions, to the child restraint. Items not tested Piqua, OH 45356 with the child restraint could injure the child. -
Page 7: Care And Cleaning
Care and Cleaning Storing Your Instructions • To clean pads, slide the plastic clips on the seat pad off the seat shell. • Machine wash the cloth pads and canopies separately in cold water, delicate cycle, and tumble dry 10 to 15 minutes in low heat. -
Page 8: Visual Glossary
Seat Crease Front Seat components. Retractor Nurture Convenience Base Bottom Nurture Convenience Base Lower anchor connector assembly harness Vehicle seat belt/lower anchor connector assembly... - Page 9 Visual Glossary This page has been left blank intentionally. Front View Handle Canopy Harness Straps Buckle Release Seat Pad Chest Clip Convenience Base Back View Handle Harness Adjuster Harness Adjuster Handle Handle Release Release Seat Release Harness Slots Handle Locking Clip Crotch Strap Slots...
-
Page 10: Using The Nurture Handle
Using the Nurture Handle Using the Nurture Handle To change handle positions, squeeze both Handle IMPORTANT: Always secure the child in the carrier. Refer to “Securing the Child in the Carrier” on page 31. Releases and rotate the handle to the desired position until it locks into place. -
Page 11: Proper Installation With The Base
The handle is in Position 1 (Canadian OR U.S. models) or Position 4 (U.S. models ONLY) (p. 25). (Position 4 shown at left.) -
Page 12: System
Installing the Convenience Base Before you begin, be sure the vehicle is on a level surface. with the Lower Anchor Connector Assembly System Place the base on the vehicle seat. WARNING • This lower anchor connector assembly system is intended to be used ONLY as described in these instructions. - Page 13 Installing the Convenience Base Pull the shoulder belt with the Vehicle Seat Belt tightly to remove all slack from the lap portion of the WARNING vehicle seat belt and, at the same time, push down on • The carrier MUST be locked firmly into the convenience the base using your full...
-
Page 14: Placing The Carrier In The Base
Placing the Carrier in the Base Position 1 Position 4 Secure the infant restraint to the base by placing the front of the seat under the hook and snapping seat into place. The carrier MUST Squeeze both handle releases and move the handle locked firmly into the to either Position 1 (Canadian OR U.S. -
Page 15: Proper Installation Without The Base
The handle is in Position 1 (Canadian OR U.S. models) or Position 4 (U.S. models ONLY) (p. 30). (Position 4 shown at left.) -
Page 16: Installing The Carrier Without The Base
Installing the Carrier Without LAP BELT the Base Route ONLY the lap portion of the vehicle seat belt through the belt slots on the car- rier. After securing the infant, place the restraint into your LAP AND SHOULDER BELT vehicle. Adjust the restraint so that the level line In vehicles with a level with the ground. -
Page 17: Securing The Child In The Carrier
Push down on the bottom of the seat using your full weight. WARNING If the level line is not level to the ground, use a NEVER use this child restraint in the forward-facing • tightly rolled towel or small blanket beneath the position. -
Page 18: Removing The Child From The Carrier
Removing the Child from the Carrier Insert the buckle tongues into the buckle. Pull up on the harness strap to ensure Press the red buckle the buckle tongues are release and remove engaged. the buckle tongues. IMPORTANT: The buckle strap should be snug against the baby’s crotch but never under the baby’s bottom. -
Page 19: Changing The Harness Position
Changing the Harness Position Choose the appro- priate slots for As your child grows, you will need to change the harness the new harness strap position so that the harness straps are routed through position. Push the the slots closest to the child’s shoulders.The shoulder har- harness anchor ness straps should ALWAYS... -
Page 20: Changing The Crotch Strap Position
Changing the Crotch Strap Position Removing the Lower Anchor Connector Assembly System As your child grows, you will need to change the crotch The lower anchor connector assembly system that strap position so that it is in the slot closest to your child. comes with your child restraint will be one of the The crotch strap should ALWAYS be as close as possible two types below. -
Page 21: Using The Locking Clip
Using the Locking Clip Push down on the To watch a video about installing a locking clip, go to base while pulling www.evenflo.com. the shoulder belt tightly to remove all Install Locking Clip, slack from the lap if necessary. portion of the belt. If your vehicle was Locking Clip built prior to model... -
Page 22: Using As An Infant Carrier
WARNING Using as an Infant Carrier • NEVER place this child restraint near the edges of Secure the child in the carrier by following “Securing the counter tops, tables, or other high surfaces. The child’s Child in the Carrier” on page 31. movements can cause the carrier to slide or fall. -
Page 23: Securing Your Child Restraint In Aircraft
Proper Disposal of This Child Restraint • You must use the internal harness when installing the • At the end of this child restraint’s useful life, Evenflo child restraint in aircraft. encourages you to dispose of it properly. Most of the Installing Child Restraint Rear-facing components in this child restraint are recyclable. -
Page 24: Installing Child Restraint Rear-Facing In Aircraft
Installing Child Restraint Rear-facing Installing Child Restraint Rear-facing in Aircraft in Aircraft Fasten the aircraft seat belt Rotate the handle to Position 1 or Position 4 by squeezing both handle releases at the same time. The aircraft seat belt must be as tight as possible. Route the excess seat belt strap back through the belt slots , as shown above. -
Page 25: Replacement Parts
(found on the back of sole obligation under this express limited warranty shall the child restraint). be, at Evenflo’s option, to repair or replace any Product that is determined to be defective by Evenflo and determined to be covered by this warranty. - Page 27 www.evenflo.com USA: 1-800-233-5921 8 AM – 5 PM E.T. Canada: 1-937-773-3971 Mexico: 01-800-706-12-00...
Need help?
Do you have a question about the Nurture and is the answer not in the manual?
Questions and answers