Kostal INVEOR Operating Manual
Drive controller
Hide thumbs
Also See for INVEOR:
- Operating manual (156 pages) ,
- Short manual (82 pages) ,
- Operating manual (28 pages)
Table of Contents
Advertisement
Quick Links
Advertisement
Table of Contents

Related Manuals for Kostal INVEOR


Summary of Contents for Kostal INVEOR
- Page 1 Operating manual INVEOR Drive Controller...
- Page 2 Exclus ion of li abi lity All names, trademarks, product names or other designations given in this manual may be legally protected even if this is not labelled as such (e.g. as a trademark). KOSTAL assumes no liability for their free usage.
-
Page 3: Table Of Contents
1.9.1 General information ....................16 1.9.2 Transport & storage ....................18 1.9.3 Langzeitlagerung der Geräte ( nur bei INVEOR A [1 x 230 V AC]) ......... 18 1.9.4 Information about commissioning ................19 1.9.5 Instructions concerning operation ................20 1.9.6 Maintenance and inspection .................. - Page 4 3.5.4 Power connection ...................... 79 3.5.5 Brake chopper ......................80 3.5.6 Control connections ....................80 Disassembly and assembly of the INVEOR fan, size "D” ..........80 3.6.1 Fan disassembly ......................81 3.6.2 Fan assembly ......................83 Commissioning ..................86 Safety instructions for commissioning ................. 87 Communication ......................
- Page 5 Classification acc. to IEC/EN 61800-3 ..............180 10.3 Standards and guidelines ..................181 10.4 UL approval ......................182 10.4.1 UL Specification (English version) ................182 10.4.2 Homologation CL (Version en française) ..............184 Operating manual for INVEOR | DOC01133971-0019 | 2017-03 | V2.08 EN...
- Page 6 Quickstart guide ..................186 11.1 Quickstart guide ....................... 187 11.2 Quickstart guide for synchronous motors ..............188 Index ......................189 Operating manual for INVEOR | DOC01133971-0019 | 2017-03 | V2.08 EN...
-
Page 7: General Information
1.9.1 General information ....................16 1.9.2 Transport & storage ....................18 1.9.3 Langzeitlagerung der Geräte ( nur bei INVEOR A [1 x 230 V AC]) ......... 18 1.9.4 Information about commissioning ................19 1.9.5 Instructions concerning operation ................20 1.9.6 Maintenance and inspection .................. -
Page 8: Information About Documentation
INVEOR. We assume no liability for any damage resulting from non-observance of this manual. This manual is an integral part of the product and applies exclusively to the INVEOR from KOSTAL Industrie Elektrik GmbH. Provide the operator of the system with this manual so it is available when needed. -
Page 9: Storing The Documentation
De-energise drive controller and secure it against being restarted. Fig. 1: Structure of the warnings Warning symbol Signal word Type of danger and its source Possible consequence(s) of failure to comply Corrective actions Operating manual for INVEOR | DOC01133971-0019 | 2017-03 | V2.08 EN... -
Page 10: Warning Symbols Used
Indicates a hazard with a moderate level of risk, which, if not avoided, will result in death or serious injury. CAUTION Indicates a hazard with a low level of risk, which, if not avoided, may result in minor or slight injury or property damage. Operating manual for INVEOR | DOC01133971-0019 | 2017-03 | V2.08 EN... -
Page 11: Information Notes
Fig. 2: Example of an information note Symbols within the information notes Symbol Meaning Important information Damage to property possible Other notes Symbol Meaning INFORMATION Enlarged view Operating manual for INVEOR | DOC01133971-0019 | 2017-03 | V2.08 EN... -
Page 12: Symbols Used In This Manual
Effect of a handling instruction Final result of a handling instruction List Fig. 3: Symbols and icons used Abbreviat ions used Abbreviation Explanation Tab. Table Fig. Figure Item Chapter Operating manual for INVEOR | DOC01133971-0019 | 2017-03 | V2.08 EN... -
Page 13: Labels On The Drive Controller
Danger due to electrical shock and discharge Danger due to electrical shock and discharge. Wait two minutes (discharge time of the capacitors) after shut-down Additional earth connection Observe and read operating manual Operating manual for INVEOR | DOC01133971-0019 | 2017-03 | V2.08 EN... -
Page 14: Qualified Staff
This drive controller may not be operated in areas where there is a danger of explosion! Repairs may only be performed by authorised repair bodies. Independent and unauthorised intervention may result in death, injury or property damage. The warranty provided by KOSTAL will be invalidated in such cases. -
Page 15: Responsibility
DIN EN 13849 “Safety of machinery – Safety-related parts of control systems”. 1.8 CE marking KOSTAL Industrie Elektrik GmbH hereby declares that the drive controller described in this document complies with the basic requirements and other relevant conditions of the directives listed below. -
Page 16: Safety Instructions
They contain important information on the installation and operation of the drive controller. In particular, note the information in the "Important information" chapter. KOSTAL Industrie Elektrik GmbH assumes no liability for damages arising from the non-observance of this operating manual. - Page 17 Always use the drive controller as intended. Do not modify the drive controller. Only use spare parts and accessories sold or recommended by the manufacturer. During assembly, ensure a sufficient distance from neighbouring parts. Operating manual for INVEOR | DOC01133971-0019 | 2017-03 | V2.08 EN...
-
Page 18: Transport & Storage
This applies to the motor connection as well as possible consumers and connections to the application. Perform this process once before commissioning. In all cases, observe the general requirements for storing drive controllers! Operating manual for INVEOR | DOC01133971-0019 | 2017-03 | V2.08 EN... -
Page 19: Information About Commissioning
FI protection switches, or RCDs (residual current-operated protective devices) to protect against direct or indirect contact. According to DIN VDE 0160 and EN 50178, the FI protection switch must be universal current sensitive (RCD type B). Operating manual for INVEOR | DOC01133971-0019 | 2017-03 | V2.08 EN... -
Page 20: Instructions Concerning Operation
De-energise drive controller and secure it against being restarted. DANGER! Risk of death due to revolving mechanical parts! Death or serious injury! De-energise drive controller and secure it against being restarted. Operating manual for INVEOR | DOC01133971-0019 | 2017-03 | V2.08 EN... - Page 21 T is ON by default. Motor overload protection can also be ensured via an external PTC. The drive controller may not be used as “Emergency stop equipment” (see DIN EN 60204- 1; VDE 01131:2007-06). Operating manual for INVEOR | DOC01133971-0019 | 2017-03 | V2.08 EN...
-
Page 22: Maintenance And Inspection
Measurement of insu lation resistan ce on power part The power part of an INVEOR is tested with 2.02 kV in the course of series testing. Should the insulation resistance have to be measured during a system test, this can be done under... -
Page 23: Repairs
Damage to property possible If the information is not observed, the drive controller could be damaged and destroyed during subsequent commissioning. Repairs to the drive controller may only be performed by the KOSTAL Service department. DANGER! Risk of death due to electrical shock! Death or serious injury! De-energise drive controller and secure it against being restarted. -
Page 24: Overview Of The Drive Controller
Model description (valid until end of February 2016) ............ 25 2.1.2 Model description (current) ..................26 Scope of delivery ....................... 27 MMI*/connecting cable PIN assignment ..............28 Description of the INVEOR drive controller ..............28 Operating manual for INVEOR | DOC01133971-0019 | 2017-03 | V2.08 EN... -
Page 25: Model Description
1.1; 1.5; 2.2; 3.0; 4.0; 5.5; 7.5; 11; 15; version 18.5; 22 kW Printed circuit boards: L00 – standard (without brake chopper); A00 – standard (without TTL evaluation); – standard (without field bus) Operating manual for INVEOR | DOC01133971-0019 | 2017-03 | V2.08 EN... -
Page 26: Model Description (Current)
Cover with foil keypad and potentiometer DK02 (only with GH02), (size D only with GH09) DK05 Cover with integrated MMI Model CO00 KOSTAL - standard INV Mx IVxx PWxx LPxx APxx GHxx DKxx COxx Operating manual for INVEOR | DOC01133971-0019 | 2017-03 | V2.08 EN... -
Page 27: Scope Of Delivery
Poly bag containing connecting material for terminal block Cable screw connections Seal (not part of the scope of delivery) Operating manual Motor (not part of the scope of delivery) Operating manual for INVEOR | DOC01133971-0019 | 2017-03 | V2.08 EN... -
Page 28: Mmi*/Connecting Cable Pin Assignment
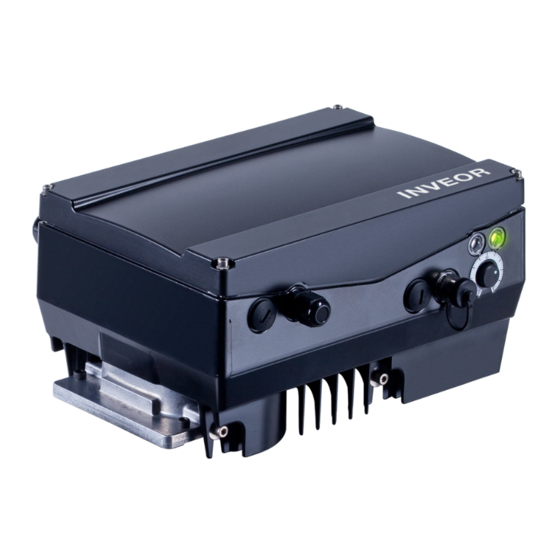
Fig. 9: RJ9 plug connector 2.4 Description of the INVEOR drive controller The INVEOR drive controller is a device for speed control in three-phase AC motors. The drive controller can be integrated in the motor (with the standard adapter plate) or fitted close to the motor (with the wall installation adapter plate). -
Page 29: Installation
Power connection ...................... 79 3.5.5 Brake chopper ......................80 3.5.6 Control connections ....................80 Disassembly and assembly of the INVEOR fan, size "D” ..........80 3.6.1 Fan disassembly ......................81 3.6.2 Fan assembly ......................83 Operating manual for INVEOR | DOC01133971-0019 | 2017-03 | V2.08 EN... -
Page 30: Safety Instructions For Installation
The cross-section of the supply line must be designed according to the transfer category and maximum permitted current. The contractor commissioning the device must ensure protection for the power line. Operating manual for INVEOR | DOC01133971-0019 | 2017-03 | V2.08 EN... -
Page 31: Installation Requirements
Check that the cover of the drive controller is closed and bolted down tightly. - Size A – C (4 x M4 x 28) 2 Nm, - Size D (4 x M6 x 28) 4 Nm. Continues on next page Operating manual for INVEOR | DOC01133971-0019 | 2017-03 | V2.08 EN... -
Page 32: Suitable Installation Location For The Motor-Integrated Drive Controller
Failure to comply with this requirement may eventually result in the loss of the protection class (particularly in respect to seals and fibre-optic elements). The INVEOR is supplied in black RAL 9005 (black) as standard. Disassembling the circuit boards (even for the purpose of painting the housing sections) renders... -
Page 33: Basic Connection Versions
I n s t a l l a t i o n 3.3.3 Basic connection versions Fig. 11: Star or triangle connection for drive controllers integrated in the motor Operating manual for INVEOR | DOC01133971-0019 | 2017-03 | V2.08 EN... - Page 34 Risk of death due to electrical shock! Death or serious injury! De-energise drive controller and secure it against being restarted. IMPORTANT INFORMATION Regularly check that the nuts (1) are secure! Operating manual for INVEOR | DOC01133971-0019 | 2017-03 | V2.08 EN...
- Page 35 Risk of death due to electrical shock! Death or serious injury! De-energise drive controller and secure it against being restarted. IMPORTANT INFORMATION Regularly check that the nuts (1) are secure! Operating manual for INVEOR | DOC01133971-0019 | 2017-03 | V2.08 EN...
-
Page 36: Short Circuit And Ground Protection
The contractor commissioning the device must ensure protection for the power line. 3.3.4 Short circuit and ground protection The drive controller contains an internal short circuit and ground protection. Operating manual for INVEOR | DOC01133971-0019 | 2017-03 | V2.08 EN... -
Page 37: Wiring Instructions
0.75 to 1.5 mm², fine-wired, AWG 18 to AWG 14 section: Connection cross- 0.5 to 1.0 mm², fine-wired section: (core end sleeves with and without plastic collars) Length of stripped 9 to 10 mm insulation: Operating manual for INVEOR | DOC01133971-0019 | 2017-03 | V2.08 EN... - Page 38 Power connections (sizes A – C) Sizes A - C The terminals for the mains cable are located inside the drive controller. The INVEOR also has the option of being equipped with terminals for connecting a brake resistor. The configuration may vary depending on the version.
- Page 39 Power connections (size D ) Size D The terminals for the mains cable are located inside the drive controller. The INVEOR also has the option of being equipped with terminals for connecting a brake resistor. The configuration may vary depending on the version.
-
Page 40: Preventing Electromagnetic Interferences
Proceed as follows to mechanically install the drive controller: Open the standard motor connection box. Disconnect the wires from the connection terminals. Memorise or write down the connection sequence. Continues on next page Operating manual for INVEOR | DOC01133971-0019 | 2017-03 | V2.08 EN... - Page 41 The standard adapter plate is a plate the underside of which is not reworked; i.e. no holes have been produced yet. You can order individually modified adapter plates from KOSTAL for selected motors. Modify the adapter plate (1) by producing the necessary holes (2) for mounting on the motor.
- Page 42 If spring elements (5) are not used when assembling the adapter plate, there must be an extra connection between the motor and drive controller to produce a correct protective conductor connection. Continues on next page Operating manual for INVEOR | DOC01133971-0019 | 2017-03 | V2.08 EN...
- Page 43 Fig. 13: Bridging contact If present, wire the connection cable of the motor PTC/Klixxon to the T1 and T2 terminals (1) (torque: 0.6 Nm). Continues on next page Operating manual for INVEOR | DOC01133971-0019 | 2017-03 | V2.08 EN...
- Page 44 Non-compliance may result in death or serious injury. 10. Plug the drive controller (3) onto the adapter plate (4) and fasten it evenly using the four lateral bolts (5) (sizes A – C) (torque: 4.0 Nm). Operating manual for INVEOR | DOC01133971-0019 | 2017-03 | V2.08 EN...
- Page 45 Extended screw option (for It. 7) Retaining bolts with spring elements Retaining bolts with spring elements option O-ring seal INVEOR/support retaining bolts INVEOR/adapter plate support Continues on next page Operating manual for INVEOR | DOC01133971-0019 | 2017-03 | V2.08 EN...
- Page 46 The standard adapter plate is a plate the underside of which is not reworked; i.e. no holes have been produced yet. You can order individually modified adapter plates from KOSTAL for selected motors. Modify the adapter plate (1) by producing the necessary holes (2) for mounting on the motor.
- Page 47 Secure the original junction plate (8), if necessary using the optional junction plate heightening part (7) and the optional extended screws (9), on the motor. Continues on next page Operating manual for INVEOR | DOC01133971-0019 | 2017-03 | V2.08 EN...
- Page 48 Connect the four lines (PE, U, V, W) of the corresponding cross-section (depending on rating of INVEOR used) to the original junction plate (8). INFORMATION The connecting lines (approx. 30 cm) needed to wire the motor junction plate/INVEOR are not included in the scope of supply! IMPORTANT INFORMATION Please ensure that the seal (3) sits perfectly! Screw the support (6) to the adapter plate (1) with four retaining bolts (4) incl.
- Page 49 I n s t a l l a t i o n Continuation Guide the four lines (PE, U, V, W) through the INVEOR's support. IMPORTANT INFORMATION Please ensure that the O-ring seal (5) sits perfectly! 10. Carefully attach the drive controller to the support (6) and secure it evenly with two M8 screws (11) (torque: max.
- Page 50 If the motor is fitted with a temperature sensor, this is connected to the T1 and T2 terminals (1). Remove the bridging contact (2) inserted for delivery for this purpose. When the bridge is in place, the temperature of the motor is not monitored! Operating manual for INVEOR | DOC01133971-0019 | 2017-03 | V2.08 EN...
-
Page 51: Power Connection
Unscrew the four screws from the drive controller's housing cover and take off the cover. Guide the mains connection cable through the cable screw connection (1). Continues on next page Operating manual for INVEOR | DOC01133971-0019 | 2017-03 | V2.08 EN... - Page 52 400 V connection Terminal no. Designation Assignment Mains phase 1 Mains phase 2 Mains phase 3 Protective conductor Tab. 2: 3 x 400 VAC terminal assignment X1 Continues on next page Operating manual for INVEOR | DOC01133971-0019 | 2017-03 | V2.08 EN...
- Page 53 Tab. 4: 1 x 230 VAC terminal assignment X1 Terminal no. Designation Assignment DC mains (+) 325 V DC mains (-) Protective conductor Tab. 5: DC feed 120 to 350 V terminal assignment X1 Operating manual for INVEOR | DOC01133971-0019 | 2017-03 | V2.08 EN...
- Page 54 Guide the mains connection cable through the cable screw connection. IMPORTANT INFORMATION The cable screw connection provides strain relief, and the PE connection cable must be connected in a leading fashion (considerably longer). Continues on next page Operating manual for INVEOR | DOC01133971-0019 | 2017-03 | V2.08 EN...
- Page 55 Mains phase 2 Mains phase 3 Protective conductor Tab. 6: 3 x 400 VAC terminal assignment X1 The protective conductor must be connected to the "PE" contact. Continues on next page Operating manual for INVEOR | DOC01133971-0019 | 2017-03 | V2.08 EN...
- Page 56 Tab. 7: DC feed 250 to 750 V terminal assignment X1 Terminal no. Designation Assignment Protective conductor Motor phase 1 Motor phase 2 Motor phase 3 Tab. 8: Motor connection assignment X4 Operating manual for INVEOR | DOC01133971-0019 | 2017-03 | V2.08 EN...
-
Page 57: Connections For Brake Resistor
Tab. 9 Optional terminal assignment for brake chopper 3.4.4 Control connections X5, X6, X7 Control connections of the standard appl ication boar d Fig. 18: Control connections of the standard application board Operating manual for INVEOR | DOC01133971-0019 | 2017-03 | V2.08 EN... - Page 58 Place the cover on the housing of the drive controller and bolt it tight to the following torque. Size Torque A - C 2 Nm (4 x M4 x 28) 4 Nm (4 x M6 x 28) Operating manual for INVEOR | DOC01133971-0019 | 2017-03 | V2.08 EN...
- Page 59 PID actual value (parameter 3.060) A GND (Ground 10 V) Ground A. In 2 Free (not assigned) A GND (ground 10 V) Ground Tab. 10: Terminal assignment X5 of the standard application board Operating manual for INVEOR | DOC01133971-0019 | 2017-03 | V2.08 EN...
- Page 60 Target value enable (parameter 1.131) Dig. In 1 Dig. In 2 Free (not assigned) Dig. In 3 Free (not assigned) Dig. In 4 Error reset (parameter 1.180) En HW (enable) Enable hardware Operating manual for INVEOR | DOC01133971-0019 | 2017-03 | V2.08 EN...
- Page 61 Normally open relay 1 Normally closed relay 1 Tab. 11: Terminal assignment X6 (relay 1) INFORMATION In the factory setting, relay 1 is programmed as “relay error” (parameter 4.190). Operating manual for INVEOR | DOC01133971-0019 | 2017-03 | V2.08 EN...
- Page 62 Normally open relay 2 Normally closed relay 2 Tab. 12: Terminal assignment X7 (relay 2) INFORMATION In the factory setting, “no function” is assigned to relay 2 (parameter 4.210). Operating manual for INVEOR | DOC01133971-0019 | 2017-03 | V2.08 EN...
- Page 63 Fault message (parameter 4.150) 10 V Out For ext. voltage divider 24 V Out Int. power supply 24 V Out Int. power supply En HW (enable) Enable hardware GND (ground) Ground Operating manual for INVEOR | DOC01133971-0019 | 2017-03 | V2.08 EN...
-
Page 64: Connection Diagram
L3) or a 565 V DC mains supply has been activated (on terminals L1 and L3). The drive controller can also be started up by connecting an external 24 V voltage. Operating manual for INVEOR | DOC01133971-0019 | 2017-03 | V2.08 EN... -
Page 65: Installing The Wall-Mounted Drive Controller
The following figure shows the assembly dimensions and the free spaces required for installing the drive controller. Fig. 21: Minimum clearances For the "wall mounting" version, the line length between the motor and INVEOR may not exceed 5 m (for exception, see Chapter 10.1 EMC limit classes). -
Page 66: Mechanical Installation Sizes A - C
Use a suitable EMC screw connection to attach the shielded cable to the motor connection box! Ensure that the shielding contact is in order (large surface)! Connect the prescribed PE connection in the motor connection box! Close the motor connection box. Operating manual for INVEOR | DOC01133971-0019 | 2017-03 | V2.08 EN... - Page 67 To achieve optimum self-convection of the drive controller, ensure that the (EMC) screw connection (5) is facing upwards during installation. If there is no additional ventilation for the INVEOR (optional for size C), only vertical installation is permitted.
- Page 68 Fasten the contact plate (2) using the screw (1) (torque: 1.2 Nm). INFORMATION After fastening the contact plate (2), ensure that it is mounted floating. Continues on next page Operating manual for INVEOR | DOC01133971-0019 | 2017-03 | V2.08 EN...
- Page 69 Risk of death due to electrical shock! Death or serious injury! The motor PTC is energised once the INVEOR is connected, therefore it must be connected using a separate insulated motor lead. Only motor PTCs corresponding to DIN 44081/44082 may be connected! Replace the dummy screw (8) with a suitable standard screw connection and guide both ends to T1 and T2 (6).
- Page 70 Fasten the drive controller (9) to the adapter plate (3) with the help of the screws (10) provided (torque: 4.0 Nm). Operating manual for INVEOR | DOC01133971-0019 | 2017-03 | V2.08 EN...
-
Page 71: Mechanical Installation Of Size D
Ensure that the shielding contact is in order (large surface)! Connect the prescribed PE connection in the motor connection box! Close the motor connection box. Continues on next page Operating manual for INVEOR | DOC01133971-0019 | 2017-03 | V2.08 EN... - Page 72 requirements" section. Mount the adapter plate (1) on the wall with four screws*. Continues on next page * The screws are not part of the scope of delivery. Operating manual for INVEOR | DOC01133971-0019 | 2017-03 | V2.08 EN...
- Page 73 Mount seal (2), along with support (3), on adapter plate (1). Use the retaining bolts (5) and spring elements (4) provided (torque 8.5 Nm). IMPORTANT INFORMATION Please ensure that the seal (2) sits perfectly! Continues on next page Operating manual for INVEOR | DOC01133971-0019 | 2017-03 | V2.08 EN...
- Page 74 Please ensure that the O-ring seal (6) sits perfectly! Unscrew the four screws (7) from the cover (8) of the drive controller (9). Take off the cover (8). Continues on next page Operating manual for INVEOR | DOC01133971-0019 | 2017-03 | V2.08 EN...
- Page 75 10. Carefully place drive controller (9) on support (3). 11. Evenly screw down both parts with the two M8 screws (10) (torque: max. 25 Nm). Continues on next page Operating manual for INVEOR | DOC01133971-0019 | 2017-03 | V2.08 EN...
- Page 76 (considerably longer). 13. Connect the cables with the terminals [X1] (13) as follows: 400 V connection The protective conductor must be connected to the "PE" contact. Continues on next page Operating manual for INVEOR | DOC01133971-0019 | 2017-03 | V2.08 EN...
- Page 77 Designation Assignment DC mains (+) 565 V) Not assigned DC mains (-) Protective conductor Tab. 14: DC feed 250 to 750 V terminal assignment X1 Continues on next page Operating manual for INVEOR | DOC01133971-0019 | 2017-03 | V2.08 EN...
- Page 78 15. Connect the cables with the terminals [X4] (16) as follows: Terminal no. Designation Assignment Protective conductor Motor phase 1 Motor phase 2 Motor phase 3 Tab. 15: Motor connection assignment X4 Continues on next page Operating manual for INVEOR | DOC01133971-0019 | 2017-03 | V2.08 EN...
-
Page 79: Power Connection
17. Screw down both parts with the four screws (7) (torque 4 Nm). 3.5.4 Power connection The power connections should be designed as described in section 3.4 ff. "Installing the drive controller integrated in the motor". Operating manual for INVEOR | DOC01133971-0019 | 2017-03 | V2.08 EN... -
Page 80: Brake Chopper
3.6 Disassembly and assembly of the INVEOR fan, size "D” Below you will find a description of how to replace the size "D" fan on the INVEOR. For your own safety, be sure to observe the safety notices and information provided. -
Page 81: Fan Disassembly
Fig. 34: Disassembly of fan, size D Unscrew the four screws (1) from the cover (2) of the drive controller. Take off the cover (2) of the drive controller. Continues on next page Operating manual for INVEOR | DOC01133971-0019 | 2017-03 | V2.08 EN... - Page 82 (5) "Motor terminal [X4]", (6) "Motor PTC/Klixon [X11]". Unscrew both screws (7). Carefully lift drive controller off support (8) and deposit on a clean, level surface. Continues on next page Operating manual for INVEOR | DOC01133971-0019 | 2017-03 | V2.08 EN...
-
Page 83: Fan Assembly
Plug M12 plug (12) of new fan unit (11) onto socket on drive controller. Insert new fan unit (11) in drive controller and screw together with screws (9) and (10). Continues on next page Operating manual for INVEOR | DOC01133971-0019 | 2017-03 | V2.08 EN... - Page 84 (see chapter 3.3.2 "Power connection/size D") (4) "Brake resistor [X2] (optional)" (see chapter 3.3.3) (5) "Motor terminal [X4]" (see chapter 3.3.2 "Power connection/size D") (6) "Motor PTC/Klixon [X11]" (optional) Continues on next page Operating manual for INVEOR | DOC01133971-0019 | 2017-03 | V2.08 EN...
- Page 85 I n s t a l l a t i o n Continuation Place cover (1) on housing of drive controller. Screw down both parts with the four screws (2) (torque: 4 Nm). Operating manual for INVEOR | DOC01133971-0019 | 2017-03 | V2.08 EN...
-
Page 86: Commissioning
Safety instructions for commissioning ................. 87 Communication ......................88 Block diagram ......................90 Commissioning steps ....................91 4.4.1 Commissioning using the PC: ..................91 4.4.2 Commissioning using PC, combined with MMI option ..........92 Operating manual for INVEOR | DOC01133971-0019 | 2017-03 | V2.08 EN... -
Page 87: Safety Instructions For Commissioning
Use suitable fuses with appropriate current values between the mains and drive controller (see technical data). The drive controller must be grounded with the motor according to relevant regulations. Non-compliance may result in serious injury. Operating manual for INVEOR | DOC01133971-0019 | 2017-03 | V2.08 EN... -
Page 88: Communication
The drive controller can be commissioned in the following ways: using the INVEORpc PC software Fig. 36: PC software – start screen using the INVEOR MMI handheld controller* Fig. 37: MMI handheld controller * Man-machine interface Operating manual for INVEOR | DOC01133971-0019 | 2017-03 | V2.08 EN... - Page 89 C o m m i s s i o n i n g using the MMI* in the cover (option) Fig. 38: MMI option * Man-machine interface Operating manual for INVEOR | DOC01133971-0019 | 2017-03 | V2.08 EN...
-
Page 90: Block Diagram
Revers Speed Motor current limit Ramps speed direction Reference Motor X(-1) speed control 1.150 1.020 1.021 5.070 5.071 1.051 1.050 1.053 1.052 Fig. 39: General structure of target value generation Operating manual for INVEOR | DOC01133971-0019 | 2017-03 | V2.08 EN... -
Page 91: Commissioning Steps
The commissioning can be performed using a PC communication cable USB at M12 plug with integrated interface converter RS485/RS232 (part no. 10023950) or using the INVEOR handheld controller MMI with connection cable RJ9 at M12 plug (part no. 10004768). -
Page 92: Commissioning Using Pc, Combined With Mmi Option
4.4.2 Commissioning using PC, combined with MMI option Install the INVEORpc software (you can obtain programming software from KOSTAL free of charge). Operating system required: Windows XP or Windows 7 [32 / 64 bit]). We recommend undertaking the installation process as an administrator. - Page 93 If communication is aborted or cannot be established within 25 sec., the "MMI option" switches from standby mode to normal mode. Turning the display 18 0° Depending on how the INVEOR is installed within the system, the display may have to be turned 180°. You can turn the display 180° using parameter 5.200 by setting the parameter value to "1"...
-
Page 94: Parameters
Motor data ....................... 137 5.4.2 T ........................... 141 5.4.3 Switching frequency ....................142 5.4.4 Controller data ......................142 5.4.5 Quadratic characteristic curve .................. 145 5.4.6 Synchronous motor controller data ................146 Operating manual for INVEOR | DOC01133971-0019 | 2017-03 | V2.08 EN... -
Page 95: Safety Instructions For Working With Parameters
Non-observance may result in death, serious injury or damage. Certain parameter settings and changing parameter settings during operation may result in the INVEOR drive controller restarting automatically after the supply voltage has failed, or in undesirable changes in the operating behaviour. - Page 96 PID process controller operating mode 3.070 3.071 stand-by function Limitation I part 3.050 Frequency Reference y imax reference mode channel 1.130 3.051 Inverted feedback 3.061 3.052 3.060 Fig. 40: PID process control Operating manual for INVEOR | DOC01133971-0019 | 2017-03 | V2.08 EN...
- Page 97 Once the actual value deviates from the target value by the set % value, the “PID stand-by hysteresis” (3.071), the control (the motor) is started again. Fig. 41: Stand-by function in PID process control Operating manual for INVEOR | DOC01133971-0019 | 2017-03 | V2.08 EN...
- Page 98 Fixed 40 Hz 2.057 frequency 5 2.051 to Fixed 45 Hz 2.057 frequency 6 2.051 to Fixed 50 Hz 2.057 frequency 7 Tab. 16: Logic table for fixed frequencies Operating manual for INVEOR | DOC01133971-0019 | 2017-03 | V2.08 EN...
-
Page 99: Structure Of The Parameter Tables
0 = switch drive controller off and to this parameter. on for transfer 1 = at speed of 0 2 = during operation Value range (from – to factory setting) Operating manual for INVEOR | DOC01133971-0019 | 2017-03 | V2.08 EN... -
Page 100: Application Parameters
Deceleration time 1 is the time that the drive controller needs to brake to 0 Hz from the max. frequency (1.021). If the set deceleration time cannot be reached, the fastest possible deceleration time is implemented. Operating manual for INVEOR | DOC01133971-0019 | 2017-03 | V2.08 EN... - Page 101 Run up time 2 is the time that the drive controller needs to accelerate from 0 Hz to the max. frequency. The acceleration time can be increased as a result of certain circumstances, e.g. if the drive controller is overloaded. Operating manual for INVEOR | DOC01133971-0019 | 2017-03 | V2.08 EN...
- Page 102 The rapid stop parameter prescribes the time that the inverter requires to brake to 0 Hz from the max. speed (1.021). If the set rapid stop time cannot be achieved, the fastest possible deceleration time is implemented. Operating manual for INVEOR | DOC01133971-0019 | 2017-03 | V2.08 EN...
- Page 103 6 = motor potentiometer 7= sum of analogue inputs 1 and 2 8 = PID fixed target values (3.062 to 3.069) 9 = field bus 10 = INVEOR soft PLC Operating manual for INVEOR | DOC01133971-0019 | 2017-03 | V2.08 EN...
- Page 104 13 = foil keypad (Start & Stop keys) 14 = MMI/PC 15 = virtual output (4.230) (V 03.70 and higher) 16 = foil keypad storing (V 03.70 and higher) Operating manual for INVEOR | DOC01133971-0019 | 2017-03 | V2.08 EN...
- Page 105 7 = analogue input 1 (must be selected in parameter 4.030) (V 03.70 and higher) 8 = analogue input 2 (must be selected in parameter 4.060) (V 03.70 and higher) Operating manual for INVEOR | DOC01133971-0019 | 2017-03 | V2.08 EN...
- Page 106 15 = foil keypad key I + II storing (V 03.70 and higher) 16 = foil keypad key I + II (only if motor is stationary) stores the last active direction of rotation (V 03.70 and higher) Operating manual for INVEOR | DOC01133971-0019 | 2017-03 | V2.08 EN...
- Page 107 In addition to the acknowledgement function (1.180), an automatic fault acknowledgement can be selected. = no automatic acknowledgement > 0 = time for automatic resetting of error in seconds Operating manual for INVEOR | DOC01133971-0019 | 2017-03 | V2.08 EN...
- Page 108 If an error occurs within the 160 sec., "error 22" is triggered on the 9th acknowledgement attempt. This error has to be acknowledged manually by switching off the mains. Operating manual for INVEOR | DOC01133971-0019 | 2017-03 | V2.08 EN...
-
Page 109: Fixed Frequency
The frequencies that are to be output at the digital inputs 1 - 3 specified in 1.100 parameter 2.050 depending on the switching patterns. 1.150 See chapter 5.2.1 Explanation of operating modes / fixed frequency. 2.050 Operating manual for INVEOR | DOC01133971-0019 | 2017-03 | V2.08 EN... -
Page 110: Motor Potentiometer
Unit: % Relationship to Parameter Transfer status: min.: Own value parameter: manual: (to be entered!) max.: P. xy 1.020 def.: 1.021 Increments at which the target value changes per keystroke. Operating manual for INVEOR | DOC01133971-0019 | 2017-03 | V2.08 EN... - Page 111 (to be max.: entered!) P. xy def.: Defines whether the target value of the motor potentiometer is retained even after power outage. 0 = disable 1 = enable Operating manual for INVEOR | DOC01133971-0019 | 2017-03 | V2.08 EN...
-
Page 112: Pid Process Controller
(to be entered!) max.: def.: (V 03.84 and higher) Switches can be made between PID modes here: 0: Standard (no consideration of actual frequency) 1: with consideration of actual frequency Operating manual for INVEOR | DOC01133971-0019 | 2017-03 | V2.08 EN... - Page 113 The PID fixed target values which are to be issued depending on the switching patterns at the digital inputs 1 – 3 specified in parameter 3.069 (has to be selected in parameter 1.130). Operating manual for INVEOR | DOC01133971-0019 | 2017-03 | V2.08 EN...
- Page 114 Condition for waking up the PID controller from stand-by. Once the control difference exceeds the set value as %, the control begins again, see also PID controller operating modes. Operating manual for INVEOR | DOC01133971-0019 | 2017-03 | V2.08 EN...
- Page 115 (V 03.70 and higher) After this set time, if the PID actual value has not reached at least 5 % and the controller is running at the max. limit, the INVEOR switches off with error no. 16 PID dry run.
- Page 116 Minimum frequency when PID target value is 0 % = 10 Hz Minimum frequency when PID target value is 50 % = 15 Hz Minimum frequency when PID target value is 100 % = 20 Hz Operating manual for INVEOR | DOC01133971-0019 | 2017-03 | V2.08 EN...
-
Page 117: Analogue Inputs
Specifies the maximum value of the analogue inputs as a percentage of the range. Example: 0…10 V and/or 0…20 mA = 0 %...100 % 2…10 V and/or 4…20 mA = 20 %...100 % Operating manual for INVEOR | DOC01133971-0019 | 2017-03 | V2.08 EN... - Page 118 Relationship to Parameter Transfer status: min.: Own value parameter: manual: (to be entered!) max.: P. xy def.: Function of analogue inputs 1/2 0 = analogue input 1 = digital input Operating manual for INVEOR | DOC01133971-0019 | 2017-03 | V2.08 EN...
- Page 119 Own value parameter: manual: (to be entered!) max.:+ 10000 P. xy 4.033 / 4.063 def.: 4.034 / 4.064 Selection of the upper limit of a physical value to be displayed. Operating manual for INVEOR | DOC01133971-0019 | 2017-03 | V2.08 EN...
-
Page 120: Digital Inputs
Transfer status: min.: Own value parameter: manual: (to be entered!) max.: P. xy def.: This parameter can be used to invert the digital input. 0 = disable 1 = enable Operating manual for INVEOR | DOC01133971-0019 | 2017-03 | V2.08 EN... -
Page 121: Analogue Output
Inner temperature Analogue input 1 Analogue input 2 Target frequency Motor rating Torque Field bus PID target value (V 03.60 and higher) PID actual value (V 03.60 and higher) Operating manual for INVEOR | DOC01133971-0019 | 2017-03 | V2.08 EN... -
Page 122: Digital Outputs
Intermediate circuit voltage Grid voltage Motor voltage Motor current Actual frequency value IGBT temperature Inner temperature Error (NO) Error inverted (NC) Limit steps enable Table continues on next page Operating manual for INVEOR | DOC01133971-0019 | 2017-03 | V2.08 EN... - Page 123 Target frequency value sum (V 03.70 and higher) Actual speed value sum (V 03.70 and higher) Motor current limit enabled (V 03.70 and higher) Nominal-actual comparison (para. 6.070 – 6.071) (V 03.70 and higher) Operating manual for INVEOR | DOC01133971-0019 | 2017-03 | V2.08 EN...
-
Page 124: Relay
Intermediate circuit voltage Grid voltage Motor voltage Motor current Actual frequency value IGBT temperature Inner temperature Error (NO) Error inverted (NC) Limit steps enable Table continues on next page Operating manual for INVEOR | DOC01133971-0019 | 2017-03 | V2.08 EN... - Page 125 Target frequency value sum (V 03.70 and higher) Actual speed value sum (V 03.70 and higher) Motor current limit enabled (V 03.70 and higher) Nominal-actual comparison (para. 6.070 – 6.071) (V 03.70 and higher) Operating manual for INVEOR | DOC01133971-0019 | 2017-03 | V2.08 EN...
- Page 126 Unit: Relationship to Parameter Transfer status: min.: Own value parameter: manual: (to be max.: 10000 entered!) P. xy 4.193 / 4.213 def.: Specifies the length of the switch-off delay. Operating manual for INVEOR | DOC01133971-0019 | 2017-03 | V2.08 EN...
-
Page 127: Virtual Output
Operation (mains supply on, HW enable set, motor running) Ready for operation + Ready Ready for operation + Ready + Operation Ready + Operation Motor rating Torque Fieldbus (V 03.84 and higher) Table continues on next page Operating manual for INVEOR | DOC01133971-0019 | 2017-03 | V2.08 EN... - Page 128 - 32767 Own value parameter: manual: (to be entered!) max.: 32767 P. xy 4.230 def.: If the set process variable exceeds the switch-on limit, the output is set to 1. Operating manual for INVEOR | DOC01133971-0019 | 2017-03 | V2.08 EN...
- Page 129 VO-Off delay Unit: Relationship to Parameter Transfer status: min.: Own value parameter: manual: (to be entered!) max.: 10000 4.233 P. xy def.: Specifies the length of the switch-off delay. Operating manual for INVEOR | DOC01133971-0019 | 2017-03 | V2.08 EN...
-
Page 130: External Fault
The maximum current-time zone is calculated from the product of the “motor current limit in s” parameter (5.071) and the fixed overcurrent of 50% of the required motor current limit. Continues on next page Operating manual for INVEOR | DOC01133971-0019 | 2017-03 | V2.08 EN... - Page 131 (to be entered!) max.: 1000 P. xy 33.034 def.: A gearbox factor can be set here. The mechanical speed display can be adjusted using the gearbox factor. Operating manual for INVEOR | DOC01133971-0019 | 2017-03 | V2.08 EN...
-
Page 132: Stall Detection
If the acceleration time is parameterised as > 30 seconds, half the acceleration time is used in place of the 30 seconds. 0 = Function disabled 1 = Function enabled Operating manual for INVEOR | DOC01133971-0019 | 2017-03 | V2.08 EN... - Page 133 The 2nd data set is only displayed in the PC software if this parameter is <> 0. The values of the data set currently selected are always displayed in the MMI. Operating manual for INVEOR | DOC01133971-0019 | 2017-03 | V2.08 EN...
- Page 134 A password can be allocated here, which is requested when expert mode is selected in the MMI. 0: Password request deactivated The password can be individually set in both data sets. * Man-machine interface Operating manual for INVEOR | DOC01133971-0019 | 2017-03 | V2.08 EN...
-
Page 135: Field Bus
For this address to be used, the address coding switches in the device must be set to 00. A change to the fieldbus address is only undertaken once INVEOR is restarted (V 03.80 and higher) Profibus devices are automatically set to the "Default 125" address with address coding setting "00"... - Page 136 As soon as the actual value is between 40 % and 60 %, the output is set. If the actual value is outside 40 % to 60 % for 1 sec., the output is reset. Operating manual for INVEOR | DOC01133971-0019 | 2017-03 | V2.08 EN...
-
Page 137: Performance Parameters
Relationship to Parameter Transfer status: min.: Own value parameter: manual: (to be entered!) max.: P. xy def.: If necessary, this parameter can be used to optimise the start-up behaviour. Operating manual for INVEOR | DOC01133971-0019 | 2017-03 | V2.08 EN... - Page 138 Own value parameter: manual: (to be entered!) max.: 55000 P. xy def.: A performance value [W] P has to be set here that corresponds to the nominal motor rating. Operating manual for INVEOR | DOC01133971-0019 | 2017-03 | V2.08 EN...
- Page 139 (to be max.: entered!) P. xy def.: Only for asynchronous motors. Here the leakage inductance can be optimised if the automatically calculated value (of motor identification) isn't sufficient. Operating manual for INVEOR | DOC01133971-0019 | 2017-03 | V2.08 EN...
- Page 140 (to be entered!) max.: P. xy def.: For synchronous motors only. The stator inductance can be optimised here if the automatically determined value (motor identification) is insufficient. Operating manual for INVEOR | DOC01133971-0019 | 2017-03 | V2.08 EN...
-
Page 141: I 2 T
Relationship to Parameter Transfer status: min.: Own value parameter: manual: (to be entered!) max.: 1200 P. xy 33.010 def.: Time after which the drive controller switches off with I²T. Operating manual for INVEOR | DOC01133971-0019 | 2017-03 | V2.08 EN... -
Page 142: Switching Frequency
Own value parameter: manual: (to be entered!) max.: P. xy 33.001 def.: 34.011 Selection of the control method: 100 = open-loop asynchronous motor 200 = open-loop synchronous motor Operating manual for INVEOR | DOC01133971-0019 | 2017-03 | V2.08 EN... - Page 143 The control boost of the speed controller can be optimised here, if the automatically determined results (of the motor identification) are insufficient. For synchronous motors: The control boost of the speed controller can be set here. Operating manual for INVEOR | DOC01133971-0019 | 2017-03 | V2.08 EN...
- Page 144 0 = 1410 rpm 1 = 1500 rpm 50 Hz is always displayed as the actual frequency. Deactivating slip compensation may result in stall detection no longer working reliably. Operating manual for INVEOR | DOC01133971-0019 | 2017-03 | V2.08 EN...
-
Page 145: Quadratic Characteristic Curve
Only for asynchronous motors. The percentage by which the flux is to be reduced can be set here. An overvoltage shutdown can occur if there are any major changes in operation. Operating manual for INVEOR | DOC01133971-0019 | 2017-03 | V2.08 EN... -
Page 146: Synchronous Motor Controller Data
(to be entered!) max.: P. xy 34.226 def.: 0.25 For synchronous motors only. Here the time during which the start up current 34.226 is stamped can be set. Operating manual for INVEOR | DOC01133971-0019 | 2017-03 | V2.08 EN... - Page 147 Relationship to Parameter Transfer status: min.: Own value parameter: manual: (to be entered!) max.: def.: (V 03.84 and higher) Grid monitoring can be deactivated here. 0: deactivated 1: activated Operating manual for INVEOR | DOC01133971-0019 | 2017-03 | V2.08 EN...
-
Page 148: Error Detection And Troubleshooting
6. Error detection and troubleshooting List of the LED flash codes for error recognition ............150 List of errors and system errors ................151 Operating manual for INVEOR | DOC01133971-0019 | 2017-03 | V2.08 EN... - Page 149 If damaged parts or components need replacing, only ever replace with original parts. Danger due to electrical shock and discharge. Wait two minutes (discharge time of the capacitors) after shut-down. Operating manual for INVEOR | DOC01133971-0019 | 2017-03 | V2.08 EN...
-
Page 150: List Of The Led Flash Codes For Error Recognition
Identification of motor data Initialisation Firmware update Bus error operation Bus error ready for operation Tab. 17: LED flash codes LED off LED on LED flashing LED flashing quickly Operating manual for INVEOR | DOC01133971-0019 | 2017-03 | V2.08 EN... -
Page 151: List Of Errors And System Errors
via fieldbus (CANOpen, Profibus DP, EtherCAT) The following section contains a list of possible error messages. Please contact the KOSTAL service department if you encounter errors that are not listed here. Error name Description of error... - Page 152 Bus time-out No response from bus sharing Check bus wiring unit or MMI/PC Acknowledgement error The number of maximum Check error history and automatic acknowledgements remedy error (1.182) was exceeded Operating manual for INVEOR | DOC01133971-0019 | 2017-03 | V2.08 EN...
- Page 153 / check reached wiring Excess motor Motor PTC has been triggered Overload of the motor (e.g. temperature high torque at low motor speed) / ambient temperature too high Operating manual for INVEOR | DOC01133971-0019 | 2017-03 | V2.08 EN...
- Page 154 Motor connection No motor current in spite of No motor connected or not disrupted control through frequency completely connected. converter Check phases or motor connections and connect correctly when necessary. Operating manual for INVEOR | DOC01133971-0019 | 2017-03 | V2.08 EN...
- Page 155 4 -5 acknowledgements permitted = 5 s waiting time > 5 acknowledgements permitted = 30 s waiting time The number of acknowledgements is deleted after 120 s without any errors! Operating manual for INVEOR | DOC01133971-0019 | 2017-03 | V2.08 EN...
-
Page 156: Disassembly And Disposal
7. Disassembly and disposal Drive controller disassembly ..................157 Information on correct disposal ................. 157 Operating manual for INVEOR | DOC01133971-0019 | 2017-03 | V2.08 EN... -
Page 157: Drive Controller Disassembly
Dispose of drive controller, packaging and replaced parts in accordance with the regulations of the country in which the drive controller has been installed. The drive controller may not be disposed of with household waste. Operating manual for INVEOR | DOC01133971-0019 | 2017-03 | V2.08 EN... -
Page 158: Technical Data
Derating of output power ..................162 8.2.1 Derating due to increased ambient temperature ............162 8.2.2 Derating due to installation altitude ................164 8.2.3 Derating due to switching frequency ................. 165 Operating manual for INVEOR | DOC01133971-0019 | 2017-03 | V2.08 EN... -
Page 159: General Data
(DIN EN 60068-2- 300 m/s² (DIN-EN-61800-3) Techncal data for 400 V devices INVEOR M (subject to technical changes) Recommended motor rating (4-pole asynchr. motor) is given based on the 400 VAC supply voltage. With 1LA7 asynchronous motor, motor-mounted Combined vibration test, part 4, severity 2 in accordance with FN942017... -
Page 160: General Technical Data For 230 V Devices
300 m/s² (DIN EN 60068-2-27) (DIN-EN-61800-3) Techncal data for 230 V devices INVEOR M (subject to technical changes) Recommended motor rating (4-pole asynchr. motor) is given based on the 230 VAC supply voltage. With 1LA7 asynchronous motor, motor-mounted Combined vibration test, part 4, severity 2 in accordance with FN942017... - Page 161 Auxiliary voltage U = 10 V DC Short-circuit proof Imax = 30 mA Tab. 19: Specification of interfaces * in terms of the UL 508C standard, the maximum allowed is 2 A! Operating manual for INVEOR | DOC01133971-0019 | 2017-03 | V2.08 EN...
-
Page 162: Derating Of Output Power
95 °C or a permissible inner temperature of 85 °C is exceeded, the drive controller shuts down. With the exception of the 22 kW controller (size D 130%), all INVEOR type drive controllers are designed for an overload of 150% for 60sec (every 10min). - Page 163 Fig. 44: Derating for drive controller fitted on wall (sizes A - C) 110% 100% ambient temperature [°C] Umgebungstemperatur [°C] Fig. 45: Derating for drive controller fitted on wall (size D with fan option) Operating manual for INVEOR | DOC01133971-0019 | 2017-03 | V2.08 EN...
-
Page 164: Derating Due To Installation Altitude
110% 100% 1000 1500 2000 2500 3000 3500 4000 installation altitude [m] Höhe über NN [m] Fig. 46: Derating of maximum output current as a result of installation altitude Operating manual for INVEOR | DOC01133971-0019 | 2017-03 | V2.08 EN... -
Page 165: Derating Due To Switching Frequency
The max. output values can be determined from the following characteristic curve. 120% 110% 100% switching frequency [kHz] Taktfrequenz [kHz] Fig. 48: Derating of maximum output current as a result of switching frequency Operating manual for INVEOR | DOC01133971-0019 | 2017-03 | V2.08 EN... -
Page 166: Optional Accessories
Foil keypad ......................174 MMI handheld controller including a 3 m RJ9 connection cable with M12 plug ... 178 PC communication cable USB on M12/RS485 plug (converter integrated) ....178 Operating manual for INVEOR | DOC01133971-0019 | 2017-03 | V2.08 EN... -
Page 167: Adapter Plates
Motor adapter plates A standard motor adapter plate (with an integrated terminal board for size A up to C) is available for each INVEOR size. Download the 3D files (.stp) for INVEOR and adapter plates from http://www.kostal-industrie-elektrik.com. INVEOR size Output 0.55 to 1.5... - Page 168 Optional accessor ies IMPORTANT INFORMATION KOSTAL Industrie Elektrik GmbH assumes no liability for the connection between the motor and INVEOR! Fig. 49: Hole pattern for size A standard adapter plate Fig. 50: Hole pattern for size B standard adapter plate...
- Page 169 Optional accessor ies Fig. 51: Hole pattern for size C standard adapter plate Fig. 52: Hole pattern for size D standard adapter plate Operating manual for INVEOR | DOC01133971-0019 | 2017-03 | V2.08 EN...
-
Page 170: Motor Adapter Plates (Specific)
When using cylindrical head screws (cf. DIN 912 / DIN 6912) or flat head screws (cf. DIN EN ISO 7380), the hole pattern must be drilled on the INVEOR mounting frame in compliance with the applicable drawing. The drill-hole centres should be on the respective centre lines of the slots illustrated. -
Page 171: Wand Adapter Plates (Standard)
0000 A00 000 1 0000 A00 000 1 0000 A00 000 1 Part no. 10023107 10026185 10025932 10098170 Fig. 53: Hole pattern for size A standard wall adapter plate Operating manual for INVEOR | DOC01133971-0019 | 2017-03 | V2.08 EN... - Page 172 Optional accessor ies Fig. 54: Hole pattern for size B standard wall adapter plate Fig. 55: Hole pattern for size C standard wall adapter plate Operating manual for INVEOR | DOC01133971-0019 | 2017-03 | V2.08 EN...
- Page 173 Optional accessor ies Fig. 56: Hole pattern for size D standard wall adapter plate Operating manual for INVEOR | DOC01133971-0019 | 2017-03 | V2.08 EN...
-
Page 174: Foil Keypad
Optional accessor ies 9.2 Foil keypad As an option, the devices of the INVEOR family are also available as a variant with an integrated foil keypad. This keypad can be used to operate the drive controller locally. Fig. 57: Standard foil keypad The following functionalities can be realised using the integrated foil keypad: Target value specification: A target value (parameter 1.130) can be specified using the... - Page 175 I and II integrated in the foil keypad (select foil keypad, key I clockwise/key II anti-clockwise always). The direction of rotation can be changed when the motor is running and stationary. The integrated LEDs indicate the current direction of rotation. Operating manual for INVEOR | DOC01133971-0019 | 2017-03 | V2.08 EN...
- Page 176 The integrated LEDs indicate when the minimum/maximum target value is reached. To activate this function, the target value specification (parameter 1.130) must be set to motor potentiometer! Operating manual for INVEOR | DOC01133971-0019 | 2017-03 | V2.08 EN...
- Page 177 Lights up when there is an error. Flashes as soon as an error can be acknowledged. INFORMATION To set parameters for these functions, you need PC software version 01.17 or higher. Operating manual for INVEOR | DOC01133971-0019 | 2017-03 | V2.08 EN...
-
Page 178: Mmi Handheld Controller Including A 3 M Rj9 Connection Cable With M12 Plug
9.4 PC communication cable USB on M12/RS485 plug (converter integrated) As an alternative to the MMI handheld controller, an INVEOR can also be put into operation using the PC communication cable (part no. 10023950) and the INVEORpc software. The INVEORpc software is available free of charge from the KOSTAL homepage at http://www.kostal-industrie-elektrik.com. -
Page 179: Approvals, Standards And Guidelines
Classification acc. to IEC/EN 61800-3 ..............180 10.3 Standards and guidelines ..................181 10.4 UL approval ......................182 10.4.1 UL Specification (English version) ................182 10.4.2 Homologation CL (Version en française) ..............184 Operating manual for INVEOR | DOC01133971-0019 | 2017-03 | V2.08 EN... -
Page 180: Emc Limit Classes
10.2 Classification acc. to IEC/EN 61800-3 The generic standard defines test procedures and severity levels for every environment in the drive controller category; these have to be complied with. Operating manual for INVEOR | DOC01133971-0019 | 2017-03 | V2.08 EN... -
Page 181: Standards And Guidelines
Industrial environments with their own supply network that is separated from the public low-voltage supply by a transformer. 10.3 Standards and guidelines The following specifically apply: Directive on Electromagnetic Compatibility (Directive 2014/30/EU) Low Voltage Directive (Directive 2014/35/EU) Operating manual for INVEOR | DOC01133971-0019 | 2017-03 | V2.08 EN... -
Page 182: Ul Approval
Enclosure intended for use with field-installed conduit hubs, fittings or closure plates UL approved in accordance to UL514B and CSA certified in accordance to C22.2 No. 18, environmental Type 1 or higher. Operating manual for INVEOR | DOC01133971-0019 | 2017-03 | V2.08 EN... - Page 183 INSTALLED ON THE LINE SIDE OF THIS EQUIPMENT AND SHALL BE RATED 277 V (PHASE TO GROUND), 480 V (PHASE TO PHASE), SUITABLE FOR OVERVOLTAGE CATEGORY III, AND SHALL PROVIDE PROTECTION FOR A RATED IMPULSE WITHSTAND VOLTAGE PEAK OF 2.5 kV Operating manual for INVEOR | DOC01133971-0019 | 2017-03 | V2.08 EN...
-
Page 184: Homologation Cl (Version En Française)
Boîtier prévu pour une utilisation avec entrées de conduit filetées installées sur le terrain, raccords ou plaques d'obturation approuvées UL conformément à UL514B et certifiées CSA conformément à C22.2 No. 18, étiquetage environnemental de type 1 ou plus. Operating manual for INVEOR | DOC01133971-0019 | 2017-03 | V2.08 EN... - Page 185 277 V (PHASE-TERRE), 480 V (PHASE-PHASE), EN COMPATIBILITÉ AVEC LA CATÉGORIE DE SURTENSION III, ET DOIT OFFRIR UNE PROTECTION CONTRE UN PIC DE TENSION ASSIGNÉE DE TENUE AUX CHOCS DE 2,5 kV Operating manual for INVEOR | DOC01133971-0019 | 2017-03 | V2.08 EN...
-
Page 186: Quickstart Guide
11. Quickstart guide 11.1 Quickstart guide ....................... 187 11.2 Quickstart guide for synchronous motors ..............188 Operating manual for INVEOR | DOC01133971-0019 | 2017-03 | V2.08 EN... -
Page 187: Quickstart Guide
10 on X5 Preset Analogue input A.In 1/2 reference clamps 17/19 on X5 Autotune Motor parameter Internal Fieldbus are calculated potentiometer Fig. 58: Block diagram for quick start ASM Operating manual for INVEOR | DOC01133971-0019 | 2017-03 | V2.08 EN... -
Page 188: Quickstart Guide For Synchronous Motors
Preset Analogue input A.In 1/2 reference clamps 17/19 on X5 Motor parameter are calculated Internal Fieldbus potentiometer n controller 34.090 / 34.091 Fig. 59: Block diagram for quick start Operating manual for INVEOR | DOC01133971-0019 | 2017-03 | V2.08 EN... -
Page 189: Index
Control connections ....................57 Control connections of the basic application board ............ 63 Control method ....................... 142 Control terminals (sizes A – D) ..................37 Controller data ......................142 Convection ........................ 65 Operating manual for INVEOR | DOC01133971-0019 | 2017-03 | V2.08 EN... - Page 190 Field bus ........................135 Field weakening ...................... 146 Fieldbus address ....................135 Fixed frequency ......................98 Flying restart ......................143 Foil keypad ......................174 Frequency ........................59 Frequency setting mode..................... 95 Operating manual for INVEOR | DOC01133971-0019 | 2017-03 | V2.08 EN...
- Page 191 Installation ....................32, 65, 171 Installation altitude....................31, 164 Instructions concerning operation ................20 Label on the drive controller ..................13 Leakage inductance....................139 LED flash codes ....................... 150 Legal notice ......................... 2 Operating manual for INVEOR | DOC01133971-0019 | 2017-03 | V2.08 EN...
- Page 192 Motor rating ......................138 Motor speed ......................139 Motor voltage ....................137, 140 Operating mode ...................... 103 Optional accessories ....................166 Overcurrent ......................154 Overload ......................151, 153 Overvoltage ..................... 151, 153 Operating manual for INVEOR | DOC01133971-0019 | 2017-03 | V2.08 EN...
- Page 193 Quadratic characteristic curve .................. 145 Quickstart guide ....................... 186 Ramp ......................100, 102 Relay ......................61, 62, 124 Repairs ........................23 Rotation direction ....................106 Rotation speed ....................... 139 Operating manual for INVEOR | DOC01133971-0019 | 2017-03 | V2.08 EN...
- Page 194 Technical data ......................158 Transport & storage ....................18 Triangle connection variant ..................34 UL ........................... 182 Undervoltage ....................151, 153 Wall adapter plates ....................171 Wiring instructions ...................... 37 Operating manual for INVEOR | DOC01133971-0019 | 2017-03 | V2.08 EN...
- Page 195 Notes Operating manual for INVEOR | DOC01133971-0019 | 2017-03 | V2.08 EN...
- Page 196 KOSTAL Industrie Elektrik GmbH Lange Eck 11 58099 Hagen Germany Service-Hotline: +49 2331 8040-848 Phone: +49 2331 8040-800 Fax: +49 2331 8040-602 www.kostal-industrie-elektrik.com...
Need help?
Do you have a question about the INVEOR and is the answer not in the manual?
Questions and answers