
Subscribe to Our Youtube Channel
Related Manuals for Konica Minolta MULTI GLOSS 268


Summary of Contents for Konica Minolta MULTI GLOSS 268
- Page 1 MULTI GLOSS 268A MULTI GLOSS 268 UNI GLOSS 60A UNI GLOSS 60 UNI GLOSS 60CT UNI GLOSS 60S Instruction Manual Instruction Manual Betriebsanleitung Mode d´emploi...
- Page 2 MULTI GLOSS 268A UNI GLOSS 60A UNI GLOSS 60CT UNI GLOSS 60S Instruction Manual 260 023 933 E 1609 Patent pending...
-
Page 4: Table Of Contents
Table of content Table of content Safety Symbols ..................6 Safety Precautions ................. 7 Notes on Use ................... 8 System description ................13 Power supply ..................14 Power supply battery-operated ............14 Changing the battery ................15 External power supply ................15 Controls .................... - Page 5 Table of content 10.2 Statistics ....................30 10.2.1 Number of measurements ............31 10.2.2 Display ..................31 10.2.3 Exit block ..................33 10.2.4 Delete block ................. 33 10.2.5 Delete measurement ..............33 10.3 Continuous ..................... 34 10.4 Basic mode .................... 35 11 Geometry ....................
- Page 6 Table of content 18. Accessories ................... 49 19. Errors and warning messages ............50 20. Cleaning and maintenance ..............52 21. Copyright ....................53...
-
Page 7: Safety Symbols
Safety Symbols 1. Safety Symbols The following symbols are used in this manual and the instrument to prevent accidents which may occur as a result of incorrect use of the instrument. • Denotes a sentence regarding a safety warning or note. Read the sentence carefully to ensure safe and correct use. -
Page 8: Safety Precautions
Safety Precautions 2. Safety Precautions To ensure correct use of this instrument, read the following points carefully and adhere to them. After you have read this manual, keep it in a safe place where it can be referred to anytime a question arises. If you pass this instrument to somebody else, make sure to include these instructions. -
Page 9: Notes On Use
Notes on Use 3. Notes on Use • The measurement unit consists of sensitive precision optical and electronic parts. Do not drop it. Protect it from being bumped or jostled. • Do not hold the unit by the measurement aperture. You should not allow any foreign objects to get into this opening. - Page 10 Please contact our customer service department in such cases. • Do not use accessories other than those specified by KONICA MINOLTA INC. • Pollution degree 2: Use it in areas where there is no metal dust and no possibility of condensation.
- Page 11 Notes on Use For EU member states only: This symbol means: Do not dispose of this product together with your household waste. Please refer to the information of your local community or contact our dealers regarding the proper handling of end-of-life electric and electronic equipment.
- Page 12 Notes on Use accordance with your national legislation and the Directive 2006/66/EC. For more detailed information about recycling of products or batteries, please contact your local municipality, collection/recycling services or shops where you purchased the product. For China only...
- Page 13 System description 4. System description Measurement units of the portable glossmeter family can be used to determine the gloss level of paint coatings, plastics, ceramics and metal surfaces. Light is directed at the surface of the sample at a defined angle and the reflected light is measured photoelectrically (reflectometer).
-
Page 14: System Description
System description Comes complete with: Measurement device Protective holder with integrated calibration tile Traceable certificate USB-cable Quick user guide and Safety instructions Battery Carrying case. Additionaly, Software and Operating manual can be downloaded from the support section of the instrument suppliers website. -
Page 15: Power Supply
Power supply 5. Power supply Before operating the instrument for the first time, please read the operating instructions and pay attention to the Safety Precautions in Chapter 2. Unpack the device and check to make certain all pieces have been included with delivery (for scope of delivery, see section System description). -
Page 16: Changing The Battery
Power supply 5.2 Changing the battery To insert or change the battery open the battery compartment. The easiest way to do this is by turning the cover with a coin one-eighth of a rotation to the left. Turn the device back around and allow the old battery and the battery compartment cover to slide into your hand. -
Page 17: Controls
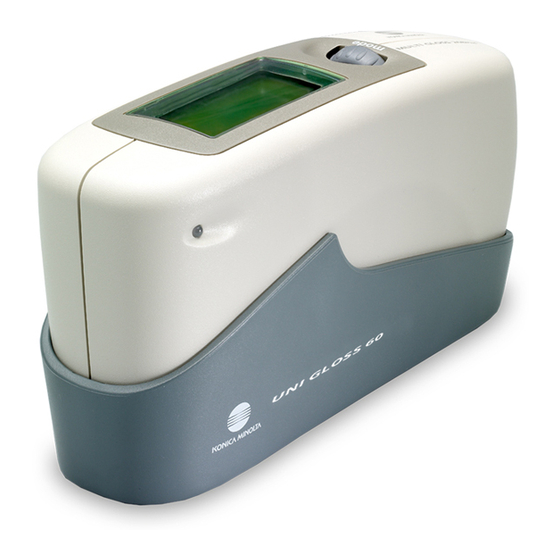
Controls 6. Controls Measurement unit and protective holder Mode scroll wheel: used to turn the unit on and for menu selection Display for user guidance and displaying measurement values Signal lamp: green: measurement active red: error Operate button: used to activate measurements Protective holder with integrated calibration standard Mark for the measurement aperture USB interface for connecting to a PC... - Page 18 Controls The basic system consists of the measuring device and the protective holder. The protective holder is used for calibration and to store the measurement unit. Calibration is performed inside the holder automatically at the touch of a button. The gloss standard required for this purpose is kept in the holder and is positioned in such a manner that calibration is always performed at the same point.
-
Page 19: Getting Started
Getting started 7. Getting started 7.1 Turning on the unit and measuring To turn on the unit, press the mode scroll wheel. Information on the date and last certification appears in the display. If the device was turned on in its holder, the autodiagnosis test is performed (see the section on Calibration). -
Page 20: Navigation
Getting started 7.2 Navigation All control functions are controlled by the mode scroll wheel. Pressing the wheel causes a menu to appear in the display. Turning the wheel allows you to move the black mark to the desired function and to select or activate it by pressing the wheel. -
Page 21: Change Names/Numbers
Getting started 7.3 Change names/numbers For some functions, you can enter or change the date or name. The arrow pointing upward marks the position that can be changed. To change the character, turn the scroll wheel. When you press the wheel, the arrow jumps to the next character. -
Page 22: Overview Of Main Menu
Getting started 7.4 Overview of main menu Mode Measurement without statistical evaluation. Sample mode Multiple measurement with statistics. Statistics Continuous measuring with adjustable interval. Continous Measuring without statistics, saving and difference. Basic mode Reactivates all menues and functions when Basic Advanced mode mode was activated. -
Page 23: Calibrate
Calibrate 8. Calibrate The holder with the integrated glass standard is used for calibration. Always keep the measurement unit in the holder. This protects the measurement optics and ensures that the standard is always at hand. If you have several devices of this type, you must put the unit in the holder which belongs to the unit (see the serial number). -
Page 24: Calibrate
Calibrate 8.2 Calibrate You should recalibrate the device if ambient conditions have changed. This applies especially when changing location if major changes in temperature and relative humidity may be expected as a result (for example inside/outside). When moving from cold areas to warm areas, there is a danger of condensation. -
Page 25: Change Cal.values
Calibrate 8.2.2 Change cal.values The gloss values of the calibration standard in the holder included with delivery are saved in the measuring device. During automatic calibration, this data is assigned to the standard in the holder. In some cases it will be necessary to enter data for a new calibration standard, for example if the previous standard has been damaged or scratched. -
Page 26: Status
Calibrate After you have entered the new value, a warning message appears again in the display. You can again abort the process with operate. If you confirm the new value by pressing the scroll wheel, the value will be accepted. After you have changed all necessary values, you should recalibrate the measurement device as usual. -
Page 27: Calibrating Standards
Calibrate 8.3 Calibrating standards To ensure exact calibration, only original standards from the manufacturer should be used. These are calibrated against tested primary standards. Their surface must not be touched and must be protected against scratches. Due to environmental influences, however, the values of standards can change over the course of time even if they are handled gently. -
Page 28: Measurement Techniques
Measurement techniques 9. Measurement techniques In accordance with the standard, the reflectometer value is related to a black glass standard at a defined index of refraction (generally 1.567) which is thus equal to 100 units. Reflectometers are differentiated by the angle of incidence of the illuminating mechanism. -
Page 29: Anodized Aluminum And Other Metal Surfaces
Measurement techniques 9.2 Anodized aluminum and other metal surfaces The measuring unit is equipped with an extended measuring range for measuring samples with a very high reflectance. The reflectance of non-metallic surfaces increases with the angle of incidence. The reflective properties of metals do not always behave in this manner. -
Page 30: Measurement Modes
Measurement Modes 10. Measurement Modes You can select different types of measurement in the Mode menu. The mode that is activated is identified by a check mark. 10.1 Sample mode Single measurements can be performed without statistical evaluation in Sample mode. The results can be saved and compared with a standard (refer to Memory or Difference). -
Page 31: Statistics
Measurement Modes 10.2 Statistics You can make multiple measurements with each sample in Statistics mode. These measurements will be evaluated statistically and displayed. The results can be saved and compared with a standard. These functions must be previously activated (refer to Memory or Difference). When Memory is turned on, a name is suggested after all measurements of a sample (block). -
Page 32: Number Of Measurements
Measurement Modes 10.2.1 Number of measurements You can adjust the number of measurements per sample or per block with this option, from 2 - 99. You can find this value in the measurement display by looking for “n=” after the forward slash. The number of measurements (which increases by one each time a measurement is performed) appears before the slash. - Page 33 Measurement Modes Std. Dev.: The standard deviation of the sample Difference*: The difference between the sample and a target value. Pass/Fail*: Pass is displayed if the sample value falls within the specified limits, or Fail if it falls outside. Off: Turns off the display of the selected column.
-
Page 34: Exit Block
Measurement Modes 10.2.3 Exit block This function terminates the block before it reaches the required number of measurements n. It is useful if you have selected a high number of measurements for n, for example in the case of large samples. If Save is turned on, a display appears to enter a block name for the sample. -
Page 35: Continuous
Measurement Modes 10.3 Continuous You can use this function to perform up to 99 measurements at an adjustable measurement interval. This is helpful when you are covering large samples and you want to evaluate the homogeneity of the surface. Activate Continuous under Mode from the Main menu. -
Page 36: Basic Mode
Measurement Modes The measuring interval can be changed before a sequence is started. Therefore press the mode wheel to open the Continuous submenu. The longest measurement interval possible is 9 seconds, the shortest 0 seconds for continous measuring. 10.4 Basic mode The selection options are limited to the most essential in Basic mode. -
Page 37: Geometry
Geometry 11 Geometry In this menu, you can select the geometry for the gloss measurement. 11.1 Geometry selection Choose Gloss Geometry from the Geometry menu. You can choose between the representation of one, two or all three geometries in the display. The currently set angle combination is indicated in the Geometry menu by a check mark. -
Page 38: Memory
Memory 12. Memory To save measurement values, you must activate the Memory function before measuring or else select or create a memory. Up to 999 measurements can be stored. A fixed memory area is already created for each geometry or combination (e.g. M60°). These memory areas cannot be deleted. -
Page 39: Create Memory
Memory 12.3 Create memory Users can set up their own memory areas with this function. Select the required geometry before you activate this function. Then you must enter the name of a memory area. You can confirm the suggested name directly with the operate button or change it with the scroll wheel. - Page 40 Memory The values of the first measurement appear in the display. The sample name is displayed in the highlighted field. Turning the wheel switches the display to the next sample with its corresponding values. Which values are displayed in the columns (for example mean value, min., max.) depends on the display currently selected for Statistics.
-
Page 41: Difference Measurement And Pass/Fail
Difference measurement and Pass/Fail 13. Difference measurement and Pass/Fail You can compare the readings of samples with the value of a previously measured or saved standard. For saved standards, you can also display whether the test specimen falls within the limits (Pass) or outside (Fail). -
Page 42: Select Standard
Difference measurement and Pass/Fail The measured standard values are saved as the target values. At the same time, Difference measurement is turned on and the measured standard is activated. If you want to define limit values additionally , you can use the “Change standard”... -
Page 43: Create Standard
Difference measurement and Pass/Fail 13.4 Create standard Standards can also be saved by entering the target and limit values with the scroll wheel. Move the mark to “Create standard” and activate the function. A display appears in which you must assign a name for the new standard. -
Page 44: Change Standard
Difference measurement and Pass/Fail 13.5 Change standard You can use this function to change target values and limit values of saved standards. You can also use it to define limit values subsequently (for example for a measured standard). Use the scroll wheel to move the mark to Change standard and press the wheel. -
Page 45: Setup
Setup 14. Setup You can make general settings in the Setup menu, for example Language or Display time. 14.2 Date/Time The unit contains an integrated clock. This makes the date and time of the measurement available for data transfer to a PC. The date and time are not lost even when the battery is changed. -
Page 46: Language
Setup 14.5 Language You can use this menu to select the display language. Use the scroll wheel to move the mark to the desired language and press the wheel. 14.6 Info You can use this menu option to find the following information: •... -
Page 47: Interface
Interface 15. Interface The measurement device is equipped with a USB interface that allows direct communication with a For data transfer use the USB cable included with delivery. Measurement data can be transferred into the gloss software, which is available for download from the support section of the instrument suppliers website. -
Page 48: Standards
Standards 16. Standards ISO 2813 Paints and varnishes - Determination of specular gloss of non-metallic paint films at 20°, 60° and 85° ASTM D 523 Standard Test Method for Specular Gloss ASTM D 2457 Standard Test Method for Specular Gloss of Plastic Films and Solid Plastics DIN 67530 Reflektometer als Hilfsmittel zur Glanzbeurteilung an... -
Page 49: Specifications
Specifications 17. Specifications Model MULTI GLOSS 268A UNI GLOSS 60A UNI GLOSS 60CT UNI GLOSS 60S Measurement geometry 20°, 60°, 85° 60° Size of measurement 20°: 10 x 10mm 60°A, CT: 9 x 15mm spot 60°: 9 x 15mm 60°S: 2 x 4mm 85°: 5 x 38mm Standard compliance... -
Page 50: Accessories
Accessories 18. Accessories Model MULTI GLOSS 268A UNI GLOSS 60A UNI GLOSS 60CT UNI GLOSS 60S Standard accessories Calibration holder TRI Calibration holder 60°A (High gloss tile) Calibration holder 60°CT Calibration holder 60°S (High gloss tile) USB-cable Carrying case Gloss Data Software (Downloadable from internet;... -
Page 51: Errors And Warning Messages
Errors and warning messages 19. Errors and warning messages Memory full Transfer the content of memory to a PC and then delete the contents of memory. Reference memory full A maximum of 50 references can be saved. It may be necessary to delete old references. You will also find an error number for the following messages in the Calibration/ Status menu to provide support for diagnostics: Tolerance... - Page 52 Errors and warning messages Fluctuations in measurement values Was the same point on No. Check how high the deviations are on the sample used for all the sample itself. measurements? Yes. It may help to test Calibration not correct: the calibration with an Recalibrate and clean the standard if additional standard if necessary.
-
Page 53: Cleaning And Maintenance
Cleaning and maintenance 20. Cleaning and maintenance • Do not insert any objects into the measurement aperture for cleaning. The instrument could get damaged - affecting a proper and safe operation. • The instrument housing is resistant to a number of solvents, but cannot be guaranteed to withstand all chemicals. -
Page 54: Copyright
Copyright 21. Copyright...
Need help?
Do you have a question about the MULTI GLOSS 268 and is the answer not in the manual?
Questions and answers