
Related Manuals for Heli-Max Novus CP


Summary of Contents for Heli-Max Novus CP
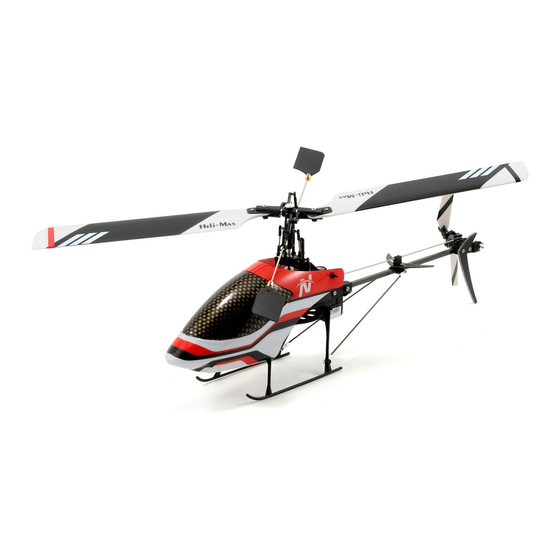
- Page 1 ™ Novus CP Specifi cations Length: 10.7 in [272mm] Flying Weight: 2.41 oz [68.4g] Width: 2 in [50mm] (with supplied Height: 3.74 in [95mm] fl ight battery) Rotor Span: 12 in [305mm] Entire Contents © Copyright 2009 HMXE0804 Mnl 01...
- Page 2 IMPORTANT PRECAUTIONS IMPORTANT PRECAUTIONS ● Only use the included charger with the included battery or replacement battery (GPMP0408). ● Do not attempt to use this charger with NiCd or NiMH battery packs. ● Never charge in excess of 4.20V per cell. ●...
- Page 3 Further, Heli-Max reserves the right to change or modify this warranty without notice. In that Heli-Max has no control over the fi nal assembly or material used for fi nal assembly, no liability shall be assumed nor accepted for any damage resulting from the use by the user of the fi...
-
Page 4: Table Of Contents
Max web site at: www.helimax-rc.com Open the “Helicopters” link, and then select the Novus CP link. If there is new technical information or changes to this model a “tech notice” box will appear in the upper left corner of the page. - Page 5 ● The spinning blades of a model helicopter can cause serious injury. When choosing a fl ying site for your Novus CP Helicopter, stay clear of buildings, trees and power lines. AVOID fl ying in or near crowded areas. DO NOT fl y close to people, children or pets.
-
Page 6: Additional Items Required
(2) SANP3500 Sanyo AA Alkaline Battery (4 pack) ORDERING REPLACEMENT PARTS ORDERING REPLACEMENT PARTS Replacement parts for the Heli-Max Novus CP Helicopter are available using the order numbers in the Parts List on page 27. The fastest, most economical service can be provided by your hobby dealer. -
Page 7: Kit Inspection
KIT INSPECTION KIT INSPECTION Before starting assembly, take an inventory of the Novus CP to make sure it is complete, and inspect the parts to make sure they are of acceptable quality. If any parts are missing or are not of acceptable quality, or if you need assistance with assembly, contact Product Support. -
Page 8: Assembly Instructions
ASSEMBLY INSTRUCTIONS ASSEMBLY INSTRUCTIONS ❏ Remove the battery cover from the back of the transmitter and remove the battery box. Install eight (8) “AA” batteries into the battery box. Double-check the polarity of each battery before placing the battery box back into the transmitter and replacing the battery cover. -
Page 9: Get The Model Ready To Fly
GET THE MODEL READY TO FLY Charging the Flight Battery WARNING!! The charger supplied with the Heli-Max Novus CP Helicopter contains protective circuitry. If you experience any diffi culties while charging the battery, please disconnect the battery from the charger and unplug the charger from the power source. -
Page 10: Lithium Battery Handling & Usage
WARNING!! Do not leave the battery connected to the charger if the charge indicator is solid red. This may over-discharge the battery, possibly causing damage to the battery or the charger. Once the battery has been disconnected from the charger, contact technical support immediately for further assistance. -
Page 11: Electric Motor Warning
Land your model immediately when the battery begins to lose power. Recharge the battery before attempting another fl ight. A dangerous situation can occur when attempting to recharge an over-discharged battery! ● ALWAYS charge the battery inside a fi reproof container placed in a fi... -
Page 12: Preflight
Installing the Flight Battery ❏ Slide the fl ight battery into the Novus CP Helicopter as shown. PREFLIGHT PREFLIGHT Turning the Model On ❏ The Novus CP Helicopter uses a 2.4GHz system that requires a binding process when the unit is powered up. This process involves connecting the fl... -
Page 13: Controls
Novus CP Helicopter before operating the throttle. Do not hold the model while operating the throttle. A safe start is built into the Novus CP Helicopter that prevents the motor from activating unless the collective stick has been lowered to the lowest position. - Page 14 Moving the cyclic stick right will cause the helicopter to tilt right and start moving that direction. Helicopter Moves Right Helicopter Moves Right Moving the cyclic stick left will cause the helicopter to tilt left and start moving that direction. Helicopter Moves Left Helicopter Moves Left Moving the cyclic stick...
- Page 15 Moving the cyclic stick forward (away from you) will cause the helicopter to tilt forward and start moving that Helicopter Moves Forward Helicopter Moves Forward direction. Moving the collective stick up (away from you) will cause the helicopter to climb higher.
- Page 16 Moving the tail rotor stick towards the left will cause the helicopter nose to rotate left (counterclockwise). Nose Rotates Left Nose Rotates Left Moving the tail rotor stick towards the right will cause the helicopter nose to rotate right (clockwise). Nose Rotates Right Nose Rotates Right...
-
Page 17: Flying
fl ying it in a large area of at least 35 feet [10.5m] square with no obstacles. The Novus CP will not fl y well in ground effect (air disturbance when the model is hovered below 1 foot [30cm]). Please maintain a minimum altitude of 1foot [30cm] to avoid ground effect. -
Page 18: Basic Maneuvers
Basic Maneuvers Once you become comfortable with hovering at different orientations and landing, it’s time to move on to more advanced maneuvers. Slow Pirouettes – Add a small amount of tail rotor (left or right) and try rotating the helicopter slightly sideways and see if you can hold it there. If you feel uncomfortable, then bring the tail back toward you. -
Page 19: Maintenance & Repair
Precision Phillips Screwdriver 00x75mm is recommended for the Novus CP. Although the Novus CP is a sturdy helicopter, on occasion it will be necessary to replace damaged parts after a crash. Please use this section as a guide to performing these steps. - Page 20 fl ybar is centered. Tighten the fl ybar carrier screws and reinstall the paddles. Ensure that the paddles are equal distances out on the fl ybar and tighten the fl ybar paddle collar screws. NOVUS CP – REPLACING THE MAIN GEAR Remove the lower retaining pin from the main gear using needle nose pliers.
- Page 21 NOVUS CP – REPLACING THE TAIL SHAFT AND TAIL ROTOR Use a fl at blade screw driver to carefully pry the tail rotor retainer from the tail rotor shaft. Slide the tail rotor off of the shaft. Slide the tail rotor shaft out the opposite side of the tail rotor case.
-
Page 22: Transmitter Settings
NOVUS CP – REPLACING A MOTOR Unplug the motor from the E-Board and remove motor mounting screws. Remove the old motor and install the new motor. Reinstall the motor mounting screws and plug the motor connector back into the E-Board. - Page 23 Throttle Position and Servo Exponential Adjustment Remove the switch cover from the back of the transmitter. With the transmitter turned off and the fl ight battery disconnected from the helicopter, set both the V1 and V2 dials to 0. Set the Flight Mode Switch to NORM. Set switch 10 to On and turn the transmitter on to enable Throttle Curve and Servo Exponential Adjustment.
-
Page 24: E-Board Adjustments
Gyro gain and Revolution Mixing Adjustment Remove the switch cover from the back of the transmitter. With the transmitter turned off and the fl ight battery disconnected from the helicopter, set both the V1 and V2 dials to 0. Set switch 12 to On and turn the transmitter on to enable Gyro gain and Revolution Mixing Adjustment. - Page 25 Notes:...
-
Page 26: Exploded View
™ Heli-Max Novus CP Exploded View Rotor Head Main Frame Canopy Tail Rotor Heli-Max Novus CP Exploded View... -
Page 27: Parts List & Optional Parts
28. HMXG8011 Main Drive Motor Novus CP 29. HMXG8012 Tail Drive Motor Novus CP 30. HMXM2024 Servos 3g (3) Novus CP 31. HMXM2025 3 in 1 E-Board Novus CP 32. HMXJ2026 6 Channel Transmitter Novus CP 33. GPMP0408 1S LiPo 400 mAh Battery Novus CX/FP/CP ™... - Page 28 Optional products available for the Novus CP CNC Aluminum Head CNC Main Blade Grips Conversion Kit - Novus CP Novus CP HMXE7476 HMXE7472 CNC Head Block CNC Swashplate Assembly Novus CP Novus CP HMXE7473 HMXE7474 CNC Bell Mixer Brushless Upgrade Kit RX,...
- Page 29 Notes:...
- Page 30 Other fine products Heli-Max Axe ™ EZ EP Mini RTF ✱✱ HMXE05 Heli-Max Novus CX HMXE0803 Heli-Max AXE CPv3 Micro ✱✱ HMXE07 Heli-Max Axe CX Micro Coaxial RTF ✱✱ HMXE09...
- Page 31 Heli-Max Kinetic 50 ARF ™ HMXE0250 Heli-Max Novus FP HMXE0802 Heli-Max AXE 400 3D RTF HMXE0800 Heli-Max AXE 400 3D RxR HMXE0801...
- Page 32 This device complies with Part 15 of the FCC Rules. Operation is subject to the following two conditions; (1)、This device may not cause interference, and (2)、This device must accept any interference received, including interference that may cause undesired operation of the device. Any changes or modifications not expressly approved by the party responsible for compliance could void the user's authority to operate the equipment.
Need help?
Do you have a question about the Novus CP and is the answer not in the manual?
Questions and answers