Table of Contents

Related Manuals for Vicon VC2650-DSP


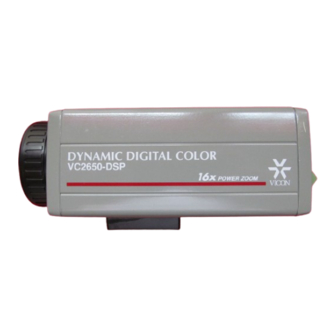
Summary of Contents for Vicon VC2650-DSP
- Page 1 MODEL VC2650-DSP AND VC2650C-DSP COLOR DIGITAL CCD CAMERAS TEL: 5 16-952-CCTV(ZZ88) . FAX: 5 16-95 1 -CCTV(ZZ88) TOLL FREE: l-800-645-91 16 UK: 44/(O) 1489-566300 INFOFAX: 1-800-287-l 207 WORLD WIDE WEB: www.vicon-cctvcom Section 2...
- Page 2 Copyright0 1998 Vicon Industries Inc. All rights reserved. Product specifications subject at change without notice. Vicon and its logo are registered trademarks of Vicon Industries Inc.
- Page 3 RISK OF ELECTRIC SHOCK DO NOT OPEN THE RISK OF ELECTRIC SHOCK, DO NOT CAUTION : TO REMOVE COVER (OR BACK). NO USER-SERVICEABLE PAR-IS INSIDE. REFER SERVICING TO QUALIFIED SERVICE PERSONNEL The lightning flash, with an arrowhead symbol, within an equilateral triangle, is intended to alert the user to the presence of uninsulated “dangerous voltage”...
-
Page 4: Important Safeguards
IMPORTANT SAFEGUARDS. IMPORTANT SAFEGUARDS I. Read all of these instructions. 2. Save these instruction for later use. 3. Unplug this appliance system from the wall outlet before cleaning Do not use liquid cleaners or aerosol cleaner. Use a damp cloth for cleaning. - Page 5 and openings for ventilation, to insure reliable operation of the appliance, and to protect from overheating. These openings should never be blocked by placing the appliance on never be placed near or over a radiator or heat register. This appliance should not be place in a built-in installation such as a bookcase, unless proper ventilation is provided.
- Page 6 IMPORTANT SAFEGUARDS c. If the appliance does not operate normally by following the operating instructions. Adjust only those controls that are covered by the operating instructions, as improper adjustment of other controls may result in damage and will often require extensive work by a qualified technician to restore the appliance to normal operation.
- Page 7 Before Starting This user’s guide is the basic guide for users of the VC2650-DSP is used in this guide to refer to both models unless specifically stated otherwise. Information regarding part names and functions, installation procedures, and Setup of the VC265ODSP is included in this guide.
- Page 8 Before Starting Chapter Summary Chapter 1 : Overview The VC2650-DSP Overview provides a brief description of the functionality and performance of the VC2650-DSP. A detailed product description of part names and their functions is included. Chapter 2 : VC2650-DSP Installation This chapter explains environment setup, installation methods, and operation methods.
-
Page 9: Table Of Contents
CONTENTS 1: The VC265o-DSP Overview ......l - l - 1 - 6 ...............l-2 Introduction of the VC2656-DSP Chapter 2: VC2650-DSP Installation ......2-1-2-l 6 of the Checking Contents of a Package ............2-2 Precautions ............2-3 Installing and Using Preparing the Cables .................. - Page 10 Adjusting the White Balance (AWB) ..........4-17 Selecting the Vertical Synchronization Mode (V-SYNC) ....4-20 Reversing Images (VIDEO +/-) ............4-21 Compensating the GAMMA Constant (GAMMA) ......4-21 Exiting the Setup Menu (EXIT) ............4-21 Appendix A: VC2650-DSP Product Specification ..A-l -A-2...
- Page 12 Chapter 1 The VC2650-DSP Overview...
- Page 13 Chapter 1 Chapter 1 The VC2650-DSP Overview This chapter provides a brief description of the functions and performance of the VC2650-DSP. Part names and detailed descriptions of each function are provided.
- Page 14 There are 16 different shutter speeds to provide maximum performance under various shooting conditions. The VC2650-DSP corrects bright background lights or spot light problems which can make the objects too dark. This corrective function enables each object to be seen clearly even in bright background conditions.
- Page 15 Chapter 1 The VC2650-DSP Overview The VC2650-DSP Parts and Functions Mount adapter mounting screw holes Camera lens Mount adapter mounting screw holes The mount adapter is used to mount the camera to a wall. Camera lens The lens is fixed on the camera.
- Page 16 Vertical phase i Right/Left switches Camera control terminal Up/Down switches Power supply [Enter] switch LED indication Video output terminal Lens cible input terminal Power terminal...
- Page 17 Chapter 1 The VC2650-DSP Overview Camera control terminal The terminal is used for camera control at the factory. Vertical phase controller Select “line” from the “V-SYNC” main menu in the “Setup” menus. It is used for adjusting the vertical synchronization phase.
- Page 18 Operation Mode : : These switches are used for Zoom-Tele(in) / Zoom-Wide(out) operation. : These switches are used for Focus-Far/Focus- Near operation. switch [Enter] menu. Setup Menu Mode : : These switches are used to move the cursor up switches or down.
-
Page 19: Chapter 2: Vc2650-Dsp Installation
Chapter 2... - Page 20 Chapter 2 Chapter This chapter discusses the installation procedures for the VC2650-DSP. Installation precautions, Setup methods, and the specific installation environment are discussed. Read the following steps carefully to ensure proper installation.
-
Page 21: Of The Checking Contents Of A Package
VC26504XP Checking Contents of the Package Please check the following list to ensure complete package contents. The VC2650-DSP camera Screws User’s Guide The VC2650-DSP camera User’s Guide Screws... -
Page 22: Installing And Using Precautions
Avoid rough use of the product. Note that the product can be damaged if handled or stored improperly. Do not install the VC2650-DSP in wet or damp (high humidity) locations. If the VC2650-DSP gets wet, turn the ower switches off immediately and contact the Vicon. - Page 23 A neutral detergent can be used to clean the unit if it is soiled. Mount the VC2650-DSP in a dry place where the sun will not shine directly on the unit. Make sure that all precautions are o p e r a t e d n e a r s p o t l i g h t s , o r i n conditions where there are bright lights.
- Page 24 Chapter 2 VC2650-DSP Installation The VC2650-DSP has to operate in an area where the temperature and humidity level are maintained. Temperature : 14*F - 122QF (10°C - 50gC ) Humidity level : Below 90% The power specifications for the VC2650-DSP follow.
-
Page 25: Preparing The Cables
Preparing the Cables Video output terminal Lens cable input terminal Power terminal Power adapter cable The power adapter cable is connected to the power terminal. It has the rated capacity of 24 VAC and 300 mA. -
Page 26: Lens Cable
Chapter 2 VC2650-DSF Installation Lens cable (needed when the remote lens controller is used) When the remote lens controller is used, the lens cable (as shown below) is needed connect the input terminal to the remote lens controller. The lens cable is usually provided with the lens remote controller. In case it is not provided, users may assemble the lens cable themselves in accordance with the following specifications. -
Page 27: Video Cable
Video cable The BNC cable (as shown below) is used to connect the video output terminal of the VC2650-DSP to the monitor. -
Page 28: Installation Of The Vc265Odsp
Chapter 2 VC2650-DSP Installation Installation of the VC2650-DSP After deciding the proper installation location for the VC2650-DSP, follow the procedures and precautions as stated below. Connecting Cables Connect all prepared cables to the appropriate terminals of the VC2650- DSP. 1) First, connect one end of the BNC cable to the video output (VIDEO OUT) terminal. - Page 29 video input terminal on the backside of monitor video out terminal...
- Page 30 Chapter 2 VC2650-DSP Installation 3) The lens cable is only used to connect the outside lens remote controller. Connect the lens cable to the VC2650-DSP. See the picture below. CAMERA SET UP V . P H A S E CAMERA SET UP V.PHASE...
- Page 31 4) The power adapter has two lines attached to it. Connect one line to the power input terminal of the VC2650-DSP as shown below. Adj. V.PHASE Power adapter cable V.PHASE Power adapter cable 5) Finally, plug in the power adapter into the power source.
-
Page 32: Adjusting The Vertical Phase Controller
Chapter 2 VC2650-DSP installation Adjusting the Vertical Phase Controller When two or more cameras are connected to one monitor, the scanning synchronization of each camera may vary. If the images from the cameras are viewed concurrently on one monitor, the screen will display the images as each camera sends them in. -
Page 33: Using The Automatic Focus Adjusting Function
Using the Automatic Focus Adjusting Function After connecting the appropriate cables and adjusting the vertical synchronization, turn on the power. The images sent from the VC2650- DSP camera will appear on the monitor. If the camera is not focusing on the objects, push the right/left switches together at the same time for approximately one second. - Page 34 Chapter 2 VC2650-DSP Installation After the focus is correctly adjusted, the message “OK!” will appear on the screen as shown below. If there is no object to focus on or it is too dark to focus, then the following message will appear on the screen.
- Page 35 If the vertical phase controller is set properly and the cables are connected, the environment for the VC2650-DSP can be adjusted using the Setup menus. All methods for setting up the environments are in detail in Chapter 3.
-
Page 36: Chapter 3 Setup Menu Overview
Chapter 3 Setup Menu Overview... - Page 37 Chapter 3 Chapter 3 Setup Menu Overview This chapter provides an overview of the Setup menus for the VC2650- DSP. This chapter will provide an overview of the composition of the menus and their functions, along with the selection methods of Setup menus.
-
Page 38: Setup Menu Component
Setup Menu Components The composition of the diagram below enables the user to view all Setup menus at a glance is shown below. LENS CONTROL LENS POSITION FOCUS SPEED Assigning CAMERA ID the camera ID . ..ON/OFF and position Specifying PRESET value . -
Page 39: Control Switch Usage
Chapter 3 Setup Menu Overview Control Switch Usage A Setup menu item can be selected and a value for each item can be assigned by using one of the five switches on the back of the VC2650- DSP. Switches Each switch serves a different function depending on the selected Setup menu item. - Page 40 They are used to move the cursor up or down on the Setup screen. They are used to change the values of Setup items, as well as move the cursor right or left. They are also used to view the assigned values from the Setup menu.
-
Page 41: General Structure Of The Setup Menu
Chapter 3 Setup Menu Overview General Structure of the Setup Menu In order to enter the SETUP menu, press the [Enter] switch located at the center of the operation switches for approximately two seconds. The Setup menu will appear on the monitor as follows. Item with submenu Values can be Main menu... -
Page 42: Selecting The Main Menu Item
Selecting the Main Menu Item In order to select the values on the Main menu, the cursor has to move to select that main menu. This is done by pushing the Up/Down switches. It is easy to identity which menu has the cursor on that menu because that menu blinks. -
Page 43: Changing The Menu Item Values
Chapter 3 Setup Menu Overview Changing the Values of the Menu Item In order to change the values of the Main menu, move the cursor to the corresponding main menu. Push the Right/Left switches to change the values. To change the values of submenus, move the cursor again to select the submenu, then press the [Enter] switch repeatedly to change... -
Page 44: Setup Menu Item Overview
Setup Menu Item Overview There are various types of SETUP menus. The functions for the SETUP menu vary as well, so that you can Setup the VC2650-DSP to suit your own needs. LENS SET Menu SHUTTER CAMERA ID AUTO V-SYNC... -
Page 45: Shutter Menu
Focusing can be done more effectively by assigning the controllable focus width. If the lens is operated while the VC2650-DSP is in the normal mode, the current focus and zoom can be shown on the screen by selecting the Lens Position submenu. -
Page 46: Camera Id Menu
[Enter] the box screen appear on the screen, where an ID of the VC2650-DSP can be assigned. A camera ID can consist of no more than 12 characters using alphabets, numerals, and several special characters. The ID can be moved and... - Page 47 Chapter 3 Setup Menu Overview A B C D E F G H I J K L LOCATION................... . Note : If a hyphen is used in the it will not display on the monitor.
-
Page 48: Blc Menu
BLC Menu LENS SHUTTER CAMERA D O N . . . AUTO V-SYNC GAMMA 0.45 EXIT QUIT? If bright background lights, such as a spot light or sunlight, appear behind the focused object, the pictured object will appear to be much darker on the screen than it really is. - Page 49 Chapter 3 Setup Menu Overview At night During the day Select “ON” from the BLC Setup menu and depress the [Enter] switch. The submenu screen composed of the Preset and Window submenus will appear on the screen as follows.
- Page 50 If the VC2650-DSP is used and the Preset submenu item is selected, the objects will appear...
- Page 51 Chapter 3 Setup Menu Overview When the “Preset” submenu is turned “ON” At night In some cases when the main objects are not in the center of the screen, the user can designate the area of the screen where the BLC function is applicable.
- Page 52 When Preset is turned and the left side of the screen is selected “OFF” During the day...
-
Page 53: Agc Menu
Chapter 3 Setup Menu Overview AGC Menu LENS SET SHUTTER CAMERA ID AUTO V-SYNC 0.45 GAMMA QUIT? EXIT In the AGC (Automatic Gain Control) menu, the gain can be automatically controlled or manually operated. Turn it “ON” to be automatically controlled and turn it “OFF” to release the function. . -
Page 54: Awb Menu
AWB Menu The lights are generally represented by the color temperature which is LENS SET SHUTTER denoted by Kelvin(‘K). The color CAMERA ID schemes are as follows. V-SYNC 0 . 4 5 GAMMA EXIT QUIT? 10000°K Blue sky 9000°K 8000°K Cloudy 7000°K 6000°K... - Page 55 ‘White Balance” function can be activated by using the “AWB”(Auto White Balance) submenu. If the “AUTO” mode is selected for AWB menu items, the VC2650-DSP will continuously monitor the color temperature of lights and automatically activate the ‘White Balance” function in accordance with...
- Page 56 If the “MANUAL” mode is selected, you can directly set the “White Balance” according to the current lighting situation. The “MANUAL” mode in the “AWB” submenu consists of three items, “Preset.” “R Gain.” and “B Gain.” If “Preset” is selected, the “White Balance” function is activated at the color temperatures of 3,ZOO”K and 5,60O”K, which are the preset values at the time of manufacturing.
-
Page 57: V-Sync Menu
EXIT From the V-SYNC menu, the vertical synchronization method can be selected. The vertical synchronization signal for the VC2650-DSP supplied by the internal clock or by the frequency of the outside power source. If you want to use the vertical synchronization signal from the internal clock of the VC2650-DSP, then select the “INT”... -
Page 58: Video +/- Menu
VIDEO +/- Menu LENS S HU T T E R OF F CAMERA OF F B LC OF F A GC The ‘VIDEO +/-” menu enables the actual image on the monitor screen to be reversed. If “POSI” item is selected for “VIDEO +/-” menu, the normal image will appear on the screen, but if “NEGA”... -
Page 59: Gamma Menu
Chapter 3 Setup Menu Overview GAMMA Menu R E M LENS O F F SHU TT ER O F F CAMERA AG C A U T O AW B I N T V- SY NC D O . 4 5 Q U I T ? EX IT If the image shot by a camera is transmitted to a monitor without any... -
Page 60: Exit Menu
EXIT Menu LENS SET SHUTTER CAMERA ID AUTO V-SYNC GAMMA a.45 DQUIT? The “Exit” menu is used to return to normal mode, after the use of the SETUP menu. Select “SAVE” to store all the changed values you have made. If you want to restore the previously selected Setup values, erasing all the values you have put in, then select the “QUIT’... -
Page 61: Chapter 4 Using The Setup Menu
Chapter 4 Using the Setup Menu... -
Page 62: Using The Setup Menu
Chapter 4 Chapter 4 Using the Setup Menu This chapter discusses the use of all the SETUP menus explained in Chapter 3. Adjust the VC2650-DSP to suit your specific environment and need. -
Page 63: Sequence To Setup
Sequences to Setup Follow these steps when using the SETUP menus. Enter the “Setup” menu screen. 2) Setup the lens. 3) Set the shutter speed. 4) Assign the camera ID. Setup the background light compensation function 6) Setup the Gain control function. 7) Setup the White Balance function. -
Page 64: Setting Up The Vc2650-Dsp
Using the Setup Menu Chapter 4 Setting Up the VC2650-DSP In this section, SETUP menu usage is described in detail, employing all the functions of the SETUP menu, which have been mentioned in Chapter 3. Starting the Setup Menu First, check the power source connected to the monitor to ensure proper connection. -
Page 65: Setting The Lens (Lens Set)
Setting the Lens (LENS SET) Access the LENS SET menu before accessing any other SETUP menus , S H U T T E R O F F O F F B L C O F F AG C AW B A U T O V- S Y N C I N T... - Page 66 Chapter 4 Using the Setup Menu <<LENS MODE>> LENS CONTROL.. LENS POSITION FOC U S S P E E D RE T On the <LENS MODE> screen, there are a few submenus needed for setting up the lens. 3) Move the cursor to the “LENS CONTROL..” submenu by using the Up/Down switches and press the [Enter] switch.
- Page 67 You can move the focus to the desired direction by pressing the Right/Left switches. Press the “Up” switch for Zoom-Tele and press the altered focus “Down” for Zoom-Wide. Because the image with zoom is displayed on the screen, you can easily find and assign the suitable values for focus and...
- Page 68 This will make [Enter] the display which shows the status of focus and zoom appear on the monitor screen, if you control the lens while the VC2650-DSP is operating in normal mode. After setting up the lens, select the “RET” submenu and press the switch to exit from the <LENS MODE>...
- Page 69 Assigning Shutter Speed (SHUTTER) Select the electronic shutter speed of the VC2650-DSP by using the CAMERA ID AUTO V-SYNC GAMMA 0.45 EXIT QUIT? In the VC2650-DSP, a shutter speed can be selected from 16 different levels, second, and it can be assigned as follows.
-
Page 70: Naming A Camera Id (Camera Id)
Naming Camera ID (CAMERA ID) Once you have assigned the appropriate shutter speed, assign a suitable ID for the VC2650-DSP by using the “CAMERA ID” menu. 1) Move the cursor to the “CAMERA ID” menu by pressing the Up/Down switches. - Page 71 If you turn the CAMERA ID menu “ON,” then the current ID will appear on the screen in the location in which you selected it to appear. T change the ID or its location, press the [Enter] switch while the “CAMERA ID”...
- Page 72 Chapter 4 Using the Setup Menu ID to the suitable location on the screen using the Move the “LOCATION...” menu. Move the cursor to “LOCATION...” and press the switch. [Enter] Using the Up/Down switches and the Right/Left switches, move the CAMERA ID to the desired location anywhere on the screen;...
-
Page 73: Compensating A Back Light (Blc)
Compensating Back Light (BLC) Back light effects can be corrected by using the “BLC” menu for the following the steps below: Move the cursor to the “BLC” menu on the SETUP menu using the Up/Down switches; then press the Right/Left switches. The “ON” and “OFF”... - Page 74 Chapter 4 Using the Setup Menu 2) The <BLC MODE> screen, consists of the “PRESET” and “WINDOW AREA SET...” will appear on the monitor as shown below: WINDOW AREA SET... PRESET The “WINDOW AREA SET...” submenu will be blinking on the <BLC MODE>...
- Page 75 4) The screen will appear divided into 48 squares, as shown in the following figure: Some of the 48 squares will have a white dot in them, which means that the BLC function is activated in these areas of the screen. If the “PRESET”...
- Page 76 Chapter 4 Using the Setup Menu 6) The divided screen, which Setup while the “PRESET” reappear. menu was turned “OFF,” will Screen areas which are not selected Screen areas which are selected At this time, you can choose the areas in which the BLC function can be activated by moving the cursor to the desired location with the Up/Down and Right/Left switches and by pressing the [Enter] switch.
- Page 77 In summary, if the PRESET menu is turned “ON,” then only the areas already designated at the time of manufacturing can be applied with the BLC function. They cannot be changed. When the PRESET menu is turned “OFF,” the areas that were previously designated are applied with the BLC function.
-
Page 78: Adjusting The White Balance (Awb)
Chapter 4 Using the Setup Menu Adjusting White Balance (AWB) from the shown on the monitor naturally, without the interference of lights. the Right/Left switches to view the items of the “AWB” menu. want the white balance value to be controlled automatically in accordance “MANU...”... - Page 79 2) If you press the [Enter] switch after selecting “MANU...” then the screen, which is composed of “R Gain” and “B Gain,” will appear as shown in the figure below: PRESET The PRESET menu shows the preset color temperature, which are balance function can be applied exactly.
- Page 80 Chapter 4 Using the Setup Menu If you choose no1 to use the w-et wkte balance function at 3,2O(Y% and color tcmperatu~*es, suit P RE SET GAIN GAIN Move the cursor to the “R Gain” or “B Gain” menus by using the Right/Left switches;...
-
Page 81: Selecting The Vertical Synchronization Mode (V-Sync)
Up/Down switches. Press the Right/Left switches, and the items “LINE” and “IN77 will appear on the screen. If you want to use the vertical synchronization signal by the internal clock of the VC2650-DSP, then select “INT.” If you want to adjust the vertical synchronization signal... -
Page 82: Reversing Images (Video +/-)
Chapter 4 Using the Setup Menu Reversing Image (VIDEO +/-) The “VIDEO +/-” metlu enables the actual image on the monitor to be reversed. Move the cursor to the “VIDEO +/-” menu with the Select “NIX%” with the Right/Left switches and then the select “POSI”... - Page 83 (This page is blank.)
-
Page 84: Appendix A: Vc2650-Dsp Product Specification
Appendix A Contents Items CCTV camera Kind of Product Type Broadcasting Active Screen Element Effective Pixel Scanning Method : Horizontal : Scan Line Frequency Lock) Lock) Synchronization Method Resolution S/N Ratio Min. Object Illumination Auto / Manual Mode Color Temperature (Preset 3200°K, Preset 5600”K, USER) Signal Output Composite (1.0 Vpp, 75 hms, BNC) - Page 85 Items Kinds of Product CCTV camera Rated Capacity Rated Energy PAL Specification Color System Broadcasting Type Active Screen Element Effective Pixel Scanning Method Scan line frequency Lock) Vertical : Lock) ..Synchronization Method Internal/Line’...
- Page 86 Vicon Industries Inc. Offices Corporate Headquarters 89 Arkay Drive Hauppauge, New York 11788 (2288) I-800-645-91 16 Fax: 516-95%CCTV (2288) Atlanta Office Business Park Drive Norcross, Georgia 30071 770-449-0499 I-800-824-8479 Fax: 7704468779 Vicon U.K. Brunel Way PO1 5 5TX United Kingdom...
Need help?
Do you have a question about the VC2650-DSP and is the answer not in the manual?
Questions and answers