
Related Manuals for LINK-MI LM-EP36


Summary of Contents for LINK-MI LM-EP36
- Page 1 Operating Instructions H.264 HDMI Extender over IP Extender With LED, Remote, POE, RS232 Operating Instruction...
- Page 2 Operating Instructions Introduction This HDMI over IP Extender use the advanced H.264 as the compression type, which makes it occupy lower bandwidth and transmit over the LAN more smoothly. It supports 120m over single cat5e/6 cable at point to point, as well as point to many and many to many over Ethernet switch.
-
Page 3: Operating Instructions
Operating Instructions 2. 1 Specifications Performance Protocol H.264 encoder over TCP/IP Support Video format 480i/480p/576i/576p/720p/1080i/1080p@60HZ Support Audio format LPCM, Audio sampling rate 48KHZ Streaming Bit Rate 15Mbps HDCP Compliant IR Frequency 38 -56 KHZ RS232 Baud rate Default 2400bps, total 8 kinds optional IP setting &Group ID setting Default IP TX: 192.168.1.11 ;... - Page 4 Operating Instructions 2. 1 Supported input resolution Frequency Resolution 576i 576P 50Hz 720P 1080P 1080i 480i 480P 60Hz/59.94Hz 720P 1080P 30Hz/29.97Hz 1080P 24Hz 1080P 25Hz 1080P VESA Resolution Frequency Resolution 576i 576P 50Hz 720P 1080P 1080i 480i 480P 60Hz/59.94Hz 720P 1080P 30Hz/29.97Hz 1080P...
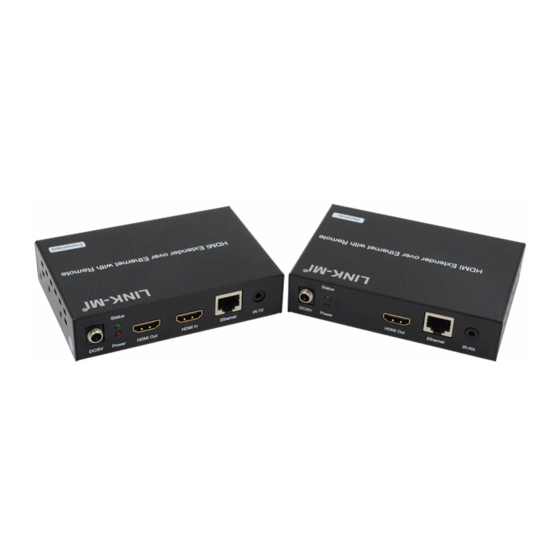
- Page 5 Operating Instructions 3. Packing content 1). 1x Transmitter 2). 1x Receiver 3). 1x IR-TX cable 4). 1x IR-RX cable 5). 2X IR Ext Cable 6). 1x Manual 7). 8x screws 8). 4x detachable mounting ears 9). 2x Phoenix plugs for RS232 cable termination 10).
- Page 6 Operating Instructions 2). RX 1) DC 5V 1A input 2) Green indicator of data status 3) Red indicator of power input 4) HDMI output 5) CAT5e/6 input 6) IR-RX 7) RS232 port 8) IR-Ext 9) LED to show the Group ID 10) Press the button for the previous Group ID 11) Press the button for the next Group ID 12) Reset button...
- Page 7 Operating Instructions 4.1. Panel Drawing Transmitter Receiver...
- Page 8 Operating Instructions 5. Installation and Configuration 5.1 Setup HDMI TX and RX When connecting point to point, no need to configure TX and RX, When connecting point to many, many to point and many to many, please make sure every TX and RX has unique IP and MAC address, every TX has unique group ID.
- Page 9 Operating Instructions Step 1: Make sure the Transmitter and PC are in the same domain. Access the Network Setting Control Panel in Windows and locate your Lan connection. Under Windows 7, this can be done by clicking Start > Control Panel >Network Sharing center>Change adapter settings > Properties >Internet Protocol Version4 (TCP/IPv4).
- Page 10 Operating Instructions 5.1.2 Choose the Group ID and Baud Rate by Remote controller (When the LED shows “00”, it’s ready to work) ① Press the button, switch to choose the Group ID or Baud rate. ② Factory reset. Press the button for 3 seconds, the LED will flicker then turn to “00”, you have successfully finished the factory reset.
- Page 11 Operating Instructions 5.1.3 Set the group ID for TX and RX via web browser Step 1: Make sure the Transmitter and PC are in the same domain. (Refer to 5.1.1) Step 2: Use an Ethernet Cable to connect the PC (or laptop) and the Extender.
- Page 12 Operating Instructions 3. Connect another HDMI display and the HDMI Receiver unit with HDMI Cable. 4. Connect the Transmitter and Receiver with Cat5e/6 cable 5. Connect the IR TX cable into “IR TX” port of the transmitter; Connect the IR RX cable into “IR RX”...
- Page 13 Operating Instructions 3. Connect the HDMI looping output of the Transmitter to the local HDMI Display. 4. Connect the transmitter and the switch/router with cat5e or cat6 cable. 5. Connect all the Receivers and the switch/ router with Cat5e/6 cable. 6.
- Page 14 Operating Instructions 10. Choose the source by Remote controller or Web browser as instructed above (5.1.2) ※ Daisy chain the switch if its RJ45 port is not enough. ※ The quantity of Transmitter is no more than 64 pcs. ※ The total quantity of Transmitter and Receiver is less than 256 pcs.
- Page 15 Operating Instructions from TX to RX or from RX to TX, connect to your RS232 devices, such as PC, IP Camera, Creston control panel, Smart Matrix, printer and Scanner and so on. It works when TX, RX and your RS232 devices baud rate is the same. The default baud rate of TX and RX is 2400 which is frequently used for most devices.
- Page 16 Operating Instructions 9. PC Tool Instructions Step 1: Make sure the Transmitter and PC are in the same domain. (Refer to 5.1.1) Step 2: Open the PC Tool. Step 3: Click “Start Scan”.
- Page 17 Operating Instructions Step 4: Choose the TX or RX Name. 9.1 Firmware Upgrade Upgrade for TX Step 1: Click “Firmware Upgrade”.
- Page 18 Operating Instructions Step 2: Click “Upgrade Encoder FW” first.
- Page 19 Operating Instructions Step 3: After the step 2 is finished, click “Firmware Upgrade” again, then click “Upgrade TX FW”. Upgrade for RX Step 1: Click “Firmware Upgrade”.
- Page 20 Operating Instructions Step 2: Click “Upgrade Rx FW”.
- Page 21 Operating Instructions 9.2 Other settings Step 1: Change the IP/Netmask/Gateway/DHCP/Uart Baudrate/Group ID/Mac Address/ Device name on the PC tool interface. Step 2: Click “Update”, after “Update” is finished, click “Reboot”.
- Page 22 Operating Instructions 9.2 Click “Factory Reset” on TX or RX. 10. After sale Service and Warranty.
- Page 23 Operating Instructions 11. How to use VLC Step1: Make sure the Transmitter and PC are in the same domain. (Refer to 5.1.1) Step2: Connect the HDMI Source without HDCP with the transmitter and power on the device. Step3: Connect the transmitter to the PC. Step4: Check the Multicast Group on the web (refer to 5.1.3).
- Page 24 Operating Instructions Step 6: Click “Next”. Step 7: Choose “RTP / MPEC Transport Strcan”.
- Page 25 Operating Instructions Step 8: Click “Next”. Step 9: Click “Stream”.
- Page 26 Operating Instructions Step 10: Click “Open Network Stream”, then you can click “Play” to view the video.
- Page 27 Operating Instructions WARRANTY If your product does not work properly because of a defect in materials or workmanship, our Company (referred to as "the warrantor" ) will, for the length of the period indicated as below, (Parts(2)Year, Labor(90) Days) which starts with the date of original purchase ("Limited Warranty period"), at its option either(a) repair your product with new or refurbished parts, or (b) replace it with a new of a refurbished product.
Need help?
Do you have a question about the LM-EP36 and is the answer not in the manual?
Questions and answers