Table of Contents
Advertisement
Advertisement
Table of Contents

Related Manuals for REMEHA iSense


Summary of Contents for REMEHA iSense
- Page 1 Installation and Service manual...
-
Page 2: Table Of Contents
Restore connection to iBase (iSense RF only) ........ - Page 3 Digital input ..................25 13.1 Operation .
-
Page 4: Introduction
Remeha iSense Introduction The Remeha iSense is a timer thermostat with many enhanced functions. The iSense is supplied in OpenTherm and RF variants: • iSense OpenTherm • iSense RF (wireless), with the iBase RF transmitter This installation and service manual describes all the functions... -
Page 5: Overview
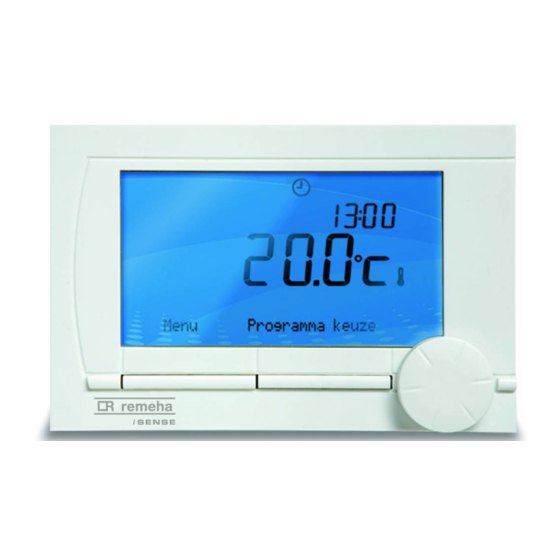
Overview The iSense is menu-controlled, which means it is very simple to operate: it only has three buttons. Textbox Pictograms Temperature Time 2.1 Display menus Pictograms Clock program active Clock program A active Clock program B active Continuous day temperature... -
Page 6: Installation
The iSense is set to room control by default, which means that the inside temperature is used to control the central heating. That is why it is best to locate the iSense on an internal wall in the room in which you spend the most time, such as the living room. - Page 7 These are not provided. The batteries ensure that the clock keeps running when the boiler is switched off. The batteries also power the backlight for the iSense for boilers that do not have OpenTherm Smart Power. If you have a boiler with Smart Power, then the backlight for the iSense also works without batteries.
-
Page 8: Location Of The Outside Sensor
3.3 Location of the outside sensor An outside temperature sensor is not supplied as standard with the iSense. You only require this sensor if you want weather- compensated control of the inside temperature. The following guidelines apply with regard to choosing a location for an outside temperature sensor: •... -
Page 9: Prior To First Use
4.2 Default setting Room control The iSense is set to room control by default (central heating is controlled on the basis of the inside temperature). Weather- compensated control of the boiler (on the basis of the outside temperature) is also possible (with outside sensor). -
Page 10: Setting
You can adjust the default clock program or enter a completely new program. The iSense starts pre-heating prior to the set time by default, so that the room has reached the desired temperature at the correct time. -
Page 11: Setting Continuous Temperatures
You can use the Remove button to remove the selected switch time. 4. Use button C to set the time and the corresponding desired temperature. 5. Once you have set all switch times for a particular day, you can copy the settings for that day to other days: Go to the day. - Page 12 Remeha iSense You can set a maximum of 16 holiday programs. You do this via Menu > Program > Holiday prog.: • Select View to look at the holiday programs set. • Select Change to change or remove programs. •...
-
Page 13: Using The Isense
6.3 Fireplace mode Once the temperature has reached the desired level in the room where the iSense has been positioned, the central heating switches off. This may be inconvenient if, for example, you have an open fire or if a lot of people are present in that room. Other rooms in the house are also no longer heated in this situation. -
Page 14: Information
Remeha iSense This switches off the built-in room sensor in the iSense. The temperature of the central heating water at that point is then maintained. If it becomes too cold or too hot in the other rooms, you can increase or decrease the room temperature there using push- turn button C on the iSense. -
Page 15: Changing Usage Settings
Light time-out: set how many seconds the backlight must remain on after the last button is touched. 7.2 Setting button locking Button locking ensures that the buttons are locked if the iSense T001037-06-C has not been used for 30 seconds. -
Page 16: Calibration
You can then enter an adjustment here of -0.5°C. 7.7 Restore connection to iBase (iSense RF only) You must restore the connection if the iSense RF or the iBase is replaced. Proceed as follows: 1. Put the iBase in connection mode. Consult the iBase manual for this. -
Page 17: Comfort Correction
Comfort correction It feels more comfortable when the radiators in the home are hot (between 50°C and 90°C): the "perceived temperature" is higher than the real temperature due to the radiant heat. The comfort correction ensures that the central heating does not heat to a temperature that is higher than the desired "perceived temperature". -
Page 18: Hot Water Settings
You can set whether and when the temperature of the tap water may drop in order to save energy. This can be done at night, for example, when the demand for hot tap water is lower. The iSense has two settings for this: • Standby •... - Page 19 Tap water temperature 1. Select Menu > Settings > DHW > DHW temp. 2. Select one of the following options: Temperature: select the temperature that the hot tap water must have continuously. Clock program: use a clock program to determine the temperature of the tap water.
-
Page 20: Central Heating Settings
This is not the maximum temperature of the boiler. Note: if this concerns a safety function this must be set on the boiler. The engineer installing the iSense can set a number of specific settings. -
Page 21: Selecting The Control Strategy
Selecting the control strategy 11.1 Five control strategies The iSense can be used as a weather-compensated controller or as a room thermostat (room control). Five control strategies are available: 1 RTC (Modulating) room control The control measures the room temperature in the reference... -
Page 22: Setting The Control Strategy
This control strategy prevents the boiler from being switched on unnecessarily during the night. 11.2 Setting the control strategy The iSense lets you use the room control and/or weather- compensated control strategies in various ways. You select one of the controls described in paragraph 11.1 via Menu >... -
Page 23: Heating Curve - An Example
The heating curve is based on a desired room temperature of 20°C. Increasing the desired room temperature shifts the heating curve upwards. The degree of shift is influenced by the setting RT effect. • RT effect: room temperature factor influencing shift in the heating curve •... -
Page 24: Frost Protection
Remeha iSense Frost protection 12.1 "System" frost protection You use the "system" frost protection to protect radiators in frost-sensitive rooms against freezing. For example: the temperature in the home at night does not drop below 19°C, which means the pump does not come on. The radiator in the annex (which gets colder) then runs the risk of freezing. -
Page 25: Digital Input
You can have an external module to send a command to the iSense. This is done via the digital input. For example: the iSense can be ordered to start the day program if a movement detector detects a person. For iSense OpenTherm, the digital input is on the iSense, next to the OpenTherm connection. - Page 26 Remeha iSense Water pressure switch FUNCTION If a water pressure switch is connected, then the symbol appears on the display if the water pressure is too low. SETTING Connect a water pressure switch to the digital input and set the digital input as follows: •...
-
Page 27: Installer Settings
14.2 Service messages on or off You can set whether service messages from the boiler can be shown on the iSense. Select Menu > Settings > Installer > Service report. 14.3 Pin code for menus for the installer and system You can protect the Installer and System menus with a permanent pin code (0012). -
Page 28: Messages
Remeha iSense Messages This is what a fault message or service message looks like: No connection Fault indication to outside sensor Display text Menu Program T000063-06-A 15.1 Fault messages F200: No connection to outside sensor Fault indication Fault code F200 are lit up. -
Page 29: Service Message
Consult the iBase manual for this. On the iSense select Menu > Settings > Users > Connection. If this does not solve the problem, look for another location for the iSense and/or iBase or remove “obstacles” that could interfere with the RF signal. -
Page 30: Problems And Solutions
Remeha iSense Problems and solutions Problem The central heating is coming on too early in the morning. Solution Adjust the Max. pre-heat setting (see the installation and service manual). The home may well not be up to temperature on time as a result. - Page 31 T001025-06-A Problem The display does not function. Solution iSense Open Therm: Check that the wiring is correct and that the plug for the boiler is in the wall socket. iSense RF: insert (full) batteries. T001026-06-A Problem The backlight for the display does not work.
-
Page 32: Menu Structure
Remeha iSense Menu structure Program Clock prog. Clock prog. A Clock prog. B Day temp. {20°C} Night temp. {15°C} Frost temp. {6°C} Holiday prog. Settings Users Display Info line small Time Info line large Act. room temp Light time-out {15}... -
Page 33: Technical Specifications
Setting accuracy Temperature: 0.5°C. Clock program: 10 minutes Wireless range (iSense RF) The range of the iSense RF in buildings is generally 30 metres. (see paragraph 3.1) Operation Menu-controlled using push buttons and a push-turn button Installation Directly on the wall using screws or built-in junction box as per standards. - Page 34 Remeha iSense...
- Page 36 © Copyright No part of this publication may be reproduced and/or made public, in any form whatsoever, without our written permission. Subject to amendment. 120666 - 110209...
Need help?
Do you have a question about the iSense and is the answer not in the manual?
Questions and answers