Sign In
Upload
Download
Table of Contents
Contents
Add to my manuals
Delete from my manuals
Share
URL of this page:
HTML Link:
Bookmark this page
Add
Manual will be automatically added to "My Manuals"
Print this page
×
Bookmark added
×
Added to my manuals
Manuals
Brands
YOKOGAWA Manuals
Controller
FX103
User manual
YOKOGAWA FX103 User Manual
Hide thumbs
1
2
3
4
5
6
7
8
Table Of Contents
9
10
11
12
13
14
15
16
17
18
19
20
21
22
23
24
25
26
27
28
29
30
31
32
33
34
35
36
37
38
39
40
41
42
43
44
45
46
47
48
49
50
51
52
53
54
55
56
57
58
59
60
61
62
63
64
65
66
67
68
69
70
71
72
73
74
75
76
77
78
79
80
81
82
83
84
85
86
87
88
89
90
91
92
93
94
95
96
97
98
99
100
101
102
103
104
105
106
107
108
109
110
111
112
113
114
115
116
117
118
119
120
121
122
123
124
125
126
127
128
129
130
131
132
133
134
135
136
137
138
139
140
141
142
143
144
145
146
147
148
149
150
151
152
153
154
155
156
157
158
159
160
161
162
163
164
165
166
167
168
169
170
171
172
173
174
175
176
177
178
179
180
181
182
183
184
185
186
187
188
189
190
191
192
193
194
195
196
197
198
199
200
201
202
203
204
205
206
207
208
209
210
211
212
213
214
215
216
217
218
219
220
221
222
223
224
225
226
227
228
229
230
231
232
233
234
235
236
237
238
239
240
241
242
243
244
245
246
247
248
249
250
251
252
253
254
255
256
257
258
259
260
261
262
263
page
of
263
Go
/
263
Contents
Table of Contents
Troubleshooting
Bookmarks
Table of Contents
Safety Precautions
Checking the Contents of the Package
How to Use this Manual
Table of Contents
Chapter 1 Explanation of Functions
Overview of the FX100
Functions of the Input Section
Alarm Function
Display Function
Data Storage Function
Computation Function and Report Function (/M1, /PM1 Option)
Fail/Memory End Output Function (/F1 Option)
Remote Control Function (/R1, /PM1 Option)
Other Functions
Chapter 2 Installation and Wiring
Chapter 3 Names of Parts, Display Modes, and Common Operations
Chapter 4 Measurement Input and Alarm Setup Operations
Chapter 5 Operations on the Operation Screens
Change the Group Settings
Chapter 6 Operations for Changing the Displayed Contents
Handling Precautions
Installation
Measurement Input Terminal Wiring
Optional Input/Output Terminal Wiring
Wiring the Power Supply
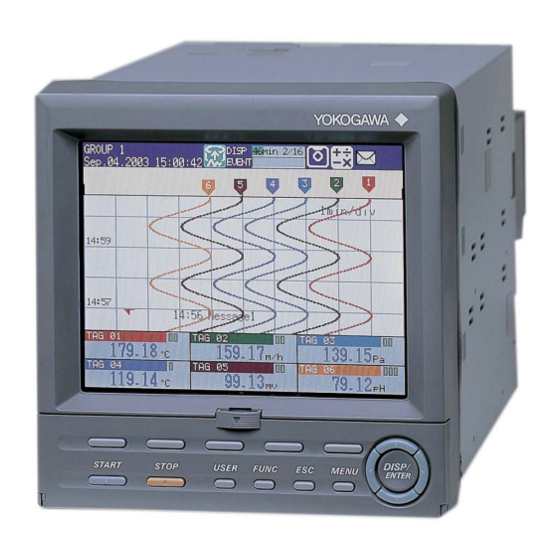
Names of Parts and Functions
Basic Key Operations
Setting the Date and Time
Setting the Brightness of the Display and the Backlight Saver Function
Initializing the Setup Data and Clearing the Internal Memory
Changing the Displayed Language
Changing the Time Zone
Confirming the System Configuration, Firmware Version Number, and MAC Address of the FX100
Inserting and Ejecting the External Storage Medium
Setting Parameters Related to Measurement Inputs
Setting Alarm Related Parameters
Setting Pulse Input (/PM1 Option)
Displaying Measured Data in Waveform, Numerical Values, or Bar Graph (Trend, Digital, and Bar Graph Screens)
Displaying All Channels on a Screen (Overview Screen)
Displaying Information List (Alarm Summary, Message Summary, and Memory Summary)
Displaying Measured Data Previously Acquired (Historical Trend)
Displaying Tag Names for Channels
Changing the Display Update Rate of the Trend Screen
Writing Messages on the Trend Screen
Displaying a Line to Indicate a Particular Value of Interest (Trip Line) on the Trend Screen
Changing the Channel Display Color
Displaying Waveforms in Separate Zones on the Trend Screen
Setting the Scale
Setting the Waveform Display Direction, Background Color, Waveform Line Width, Trip Line Width, and Grid
Changing the Display of Bar Graphs
Switching the Displayed Groups Automatically at a Specified Time Interval (Scroll Time)
Displaying Partially Expanded Waveforms
Chapter 7 Data Save/Load Operations
Assigning Computation Channels and Setting Computing Equations, Constants and Tags
Chapter 8 Computation and Report Function Related Operations
Setting Measured Data Acquisition to the Internal Memory and Data Save to the External Storage Medium
Starting/Stopping the Acquisition to the Internal Memory
Saving Data to the External Storage Medium (Only for Models with an External Storage Medium Drive)
Saving Measured Data at Arbitrary Times (Manual Sample)
Saving the Screen Image Data (Snapshot)
Loading the Measured Data on the External Storage Medium (Historical Trend)
Managing Files and Checking the Free Space on the External Storage Medium
Clearing the Data in the Internal Memory
Saving and Loading Setup Data
Starting, Stopping, and Resetting the Computation
Setting Computation Channel Alarms
Setting the Timer for Statistical Computations (TLOG Computation) and Data Save (TLOG Data)
Setting the Rolling Average
Creating Reports
Assigning an Action to the USER Key and Using the USER Key
Chapter 9 Operations of Other Functions
Disabling Certain Keys (Keylock Function)
Using Key Login/Logout Function
Displaying a List of Record of Errors and Operations (Displaying Logs)
Monitoring the Remaining Space in the Internal Memory, and Outputting Alarms (/F1 Option)
Setting the Remote Control Function (/R1, /PM1 Option)
A List of Messages
Chapter 10 Troubleshooting
Maintenance
Troubleshooting Flow Chart
Periodic Inspection
Calibration
Replacement of Parts
Chapter 11 Maintenance
Chapter 12 Specifications
Input Specifications
Alarm Function Specifications
Display Specifications
Data Storage Specifications
Specifications of Optional Functions
General Specifications
Dimensional Drawings
Appendix 1 Time Estimate for Writing Display/Event Data to the Internal Memory
Appendix 2 Meaning and Syntax of Equations
Appendix 3 Pulse Measurement Setting Example (Pulse Sum Value Reset if It Exceeds a Fixed Value) (/PM1 Option)
Appendix 4 Types of Data Created on the FX100 and Their Uses
Appendix 5 Data Formats of ASCII Files
Appendix 6 List of Parameters
Advertisement
Quick Links
1
Overview of the Fx100
2
Chapter 2 Installation and Wiring
Download this manual
User's
Manual
Yokogawa Electric Corporation
Model FX103/FX106/FX112
Model FX103/FX106/FX112
FX100
FX100
IM 04L20A01-01E
4th Edition
Table of
Contents
Previous
Page
Next
Page
1
2
3
4
5
Advertisement
Table of Contents
Troubleshooting
Chapter 10 Troubleshooting
199
Troubleshooting Flow Chart
207
Need help?
Do you have a question about the FX103 and is the answer not in the manual?
Ask a question
Questions and answers
Related Manuals for YOKOGAWA FX103
Controller YOKOGAWA FX106 User Manual
(263 pages)
Controller YOKOGAWA FA-M3 Vitesse Maintenance Manual
Basic troubleshooting for f3sp7 series (14 pages)
Controller Yokogawa FA-M3 System Upgrade Manual
(33 pages)
Controller YOKOGAWA FA-M3 Technical Information
Widefield2 for ladder (126 pages)
Controller YOKOGAWA Revolution FA-M3 R Technical Information
Range-free multi-controller (57 pages)
Controller YOKOGAWA STARDOM FCN-500 Engineering Manual
(226 pages)
Controller YOKOGAWA Vitesse FA-M3V User Manual
(272 pages)
Controller YOKOGAWA FA-M3V e-RT3 Plus Hardware Manual
(274 pages)
Controller YOKOGAWA YS1000 Series User Manual
Programmable /indicating controller (96 pages)
Controller YOKOGAWA UT32A User Manual
Digital indicating controller (236 pages)
Controller YOKOGAWA UT35A Operation Manual
Digital indicating controllers (13 pages)
Controller YOKOGAWA UT Series Instruction Manual
Pc link driver (14 pages)
Controller YOKOGAWA MC43 User Manual
Pneumatic indicating controller (44 pages)
Controller YOKOGAWA UP55A User Manual
Program (516 pages)
Controller YOKOGAWA UT350-01 User Manual
Digital indicating controllers (90 pages)
Controller YOKOGAWA UT35A-L User Manual
Digital indicating controller (limit control type) (150 pages)
This manual is also suitable for:
Fx106
Fx112
Table of Contents
Save PDF
Print
Rename the bookmark
Delete bookmark?
Delete from my manuals?
Login
Sign In
OR
Sign in with Facebook
Sign in with Google
Upload manual
Upload from disk
Upload from URL


Need help?
Do you have a question about the FX103 and is the answer not in the manual?
Questions and answers