
Subscribe to Our Youtube Channel
Related Manuals for Larson Davis HVM200


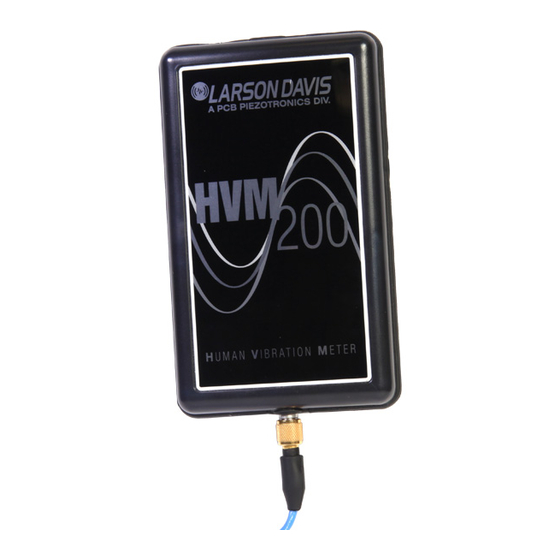
Summary of Contents for Larson Davis HVM200
- Page 1 Model HVM200 Human Vibration Meter Manual Vertrieb für Österreich : nbn Elektronik Handelsgesellschaft m. b. H. www.nbn.at Riesstraße 146, 8010 Graz | Tel. +43 316 40 28 05 | Fax +43 316 40 25 06...
- Page 2 Larson Davis HVM200 Reference Manual IHVM200.01 Rev C...
- Page 3 1681 West 820 North Provo, Utah, USA 84601-1341 where it will be accepted for disposal. Contact Larson Davis Website: www.larsondavis.com Worldwide Corporate Headquarters Larson Davis - a PCB Piezotronics division Toll-free (in the US):888-258-3222 Phone:716-926-8243 USA fax:716-926-8215 E-mail: sales@larsondavis.com HVM200 Reference Manual...
-
Page 4: Table Of Contents
2.2 Powering the HVM200 ..................... 2-1 2.3 Power Button Operation ....................2-3 2.4 Downloading the HVM200 Control App ................2-3 2.5 Connecting the HVM200 to a Mobile Device ..............2-4 2.6 Connecting HVM200 to G4 LD Utility ................2-7 2.7 Connecting the Accelerometer ..................2-9... -
Page 5: Module 1
Optional Kits .....................1-2 1.3.2 Optional Accessories ................1-2 1.1 Overview This module describes the features and options available on the HVM200. 1.2 Features The Larson Davis HVM200 Human Vibration Meter is designed for use in assessing vibration as perceived by human beings. -
Page 6: Standard Contents
Case, CCS048-L Hand/Arm Vibration Arm Band, SEN041F accelerometer, ADP081A Hand Adapter, and SWW-G4-HVM software license 1.3.2 Optional Accessories SWW-G4-HVM License to enable HVM100 and HVM200 support in G4 LD Utility HVM200-OB3 1/1 and 1/3 Octave Band Analysis firmware HVM200-RAW Record sampled raw data files... - Page 7 HVM200 accessories, includ- Adapters for accelerometer placement ing sensors, see “Adaptor Resonance & Frequency Response” on page B-1 CBL217-05, CBL216, and CBL217-01 Cables for connection between accelerometers and HVM200 meter 394C06 Hand-held Shaker for vibrational measurement verification HVM200 Reference Manual Standard Contents...
-
Page 8: Module 2
Connecting the Accelerometer ................2-9 2.1 Overview This module provides instructions for setting up and configuring HVM200 meters for use with the HVM200 Control app and G4 LD Util- ity. 2.2 Powering the HVM200 Before using your HVM200, charge the battery completely by following... - Page 9 Slide the back battery cover onto the HVM200. Step 3 Connect one end of the supplied USB cable to the HVM200 TAKE NOTE The Power LED dis- Step 4 plays a yellow color while charging.
-
Page 10: Power Button Operation
Wait until both LEDs go dark, this indicates that the meter is now off. 2.4 Downloading the HVM200 Control App Use your mobile device to find and download the HVM200 Control app ® from Google Play or the Apple App Store . -
Page 11: Connecting The Hvm200 To A Mobile Device
2.5 Connecting the HVM200 to a Mobile Device With the HVM200 Control app, you can make a direct WiFi connection to the HVM200 from your mobile device. 2.5.1 Mobile Device Connection Options One HVM200 to multiple mobile devices. FIGURE 2-5... -
Page 12: Connecting Hvm200 To Wifi Network
2.5.3 Connecting HVM200 to WiFi Network The HVM Control App will be able to connect to the HVM200 as long as the mobile device is connected to the same wireless local network as the HVM200. - Page 13 Enter the network password, if required, and click Add TAKE NOTE The HVM200 supports Step 4 WPA and WPA2 WiFi security. Lar- son Davis recommends using secure FIGURE 2-11 Enter Network Password WiFi networks. HVM200 Reference Manual Connecting the HVM200 to a Mobile Device...
-
Page 14: Connecting Hvm200 To G4 Ld Utility
In the connect screen of the HVM Control App, if the Step 6 HVM200 and your mobile device are both on the same local network, you will see it in the list. Select it to connect. 2.6 Connecting HVM200 to G4 LD Utility... -
Page 15: Connecting The Hvm200 Meter To G4 Ld Utility Via Usb
Click the Live View button. The Live View presents the Step 4 same interface as the HVM200 App for working with mea- surements. 2.6.3 Connecting the HVM200 meter to G4 LD Utility via IP Address Using previous instructions, connect meter to a WiFi net- LEARN MORE For more informa-... -
Page 16: Connecting The Accelerometer
Insert the accelerometer cable into the 4-pin connector on Step 1 information on selecting the proper the HVM200 and then rotate the nut on the cable until the accelerometer HVM200 connection is tight. meter. - Page 17 Select the accelerometer when it appears in the list and click Step 8 Select. The sensitivity values will automatically appear on the Sensor tab. Click Save. Use the Sensor List to quickly access and select stored sensors for future measurements. HVM200 Reference Manual Connecting the Accelerometer 2-10...
-
Page 18: Module 3
3.4.1 Working with RAW Data Files ..............3-12 3.1 Overview This module provides an example procedure for performing a vibration measurement with the HVM200 Control app and G4 LD Utility. The following example demonstrates procedures for measuring vibration, including: • Setting Up the Measurement •... - Page 19 ± 5%. • Values are green if the axis measurement is complete and the level is within ± 5% of the reference value. Repeat the process for each axis on the accelerometer. Step 8 HVM200 Reference Manual Setting Up the Measurement...
-
Page 20: Setting Up The Measurement
You can also create new setup files on the Settings list. To create a new setup file, follow these steps: Name the Setup File Tap the menu icon on the HVM200 app and then tap Set- TRY THIS The easiest way to create... - Page 21 Click Save. The supplied HVM200 memory card can store individual file sizes up to 2 GB and more than 6 hours of measurements with the Store Raw Data option enabled. When not enabled, the card can store approximately 8000 hours of measurements.
- Page 22 “Specifications” on page A-1. to any of the set- tings options at anytime. Set Measurement Schedule If needed, schedule the HVM200 to take a measurement TAKE NOTE When run duration is Step 5 set to 00:00:00 the HVM200 will run automatically by selecting the Enable Schedule option on until manually stopped.
- Page 23 Verify Sensor Settings If you are using an accelerometer with TEDS capability, the Sensor tab on the HVM200 settings (displaying serial number) are automatically specified. If your accelerometer does not have TEDS capability and you have not already specified the settings, refer to the section “Connecting the Accelerometer”...
-
Page 24: Making The Measurement
Connect CBL217-01 to the HVM200 on one end and the Step 2 to the accelerometer. seat adapter cable on the other end. Set the HVM200 meter in a secure location, where it will not Step 3 fall from its position. HVM200 Reference Manual... -
Page 25: Start/Stop The Measurement
3.3.3 Start/Stop the Measurement Start Measurement Click the Run button that appears on the HVM200 Control app or G4 LD TRY THIS You can also start the measurement manually by pushing Utility. the power button on the HVM200 for at least one second after it is stable... - Page 26 MIN and MAX are the minimum and maximum general vibration values. represents the summation of vibration values taken from the X, Y, and Z axes. The Summation display provides a real-time graphical representation of the current summed values from all three axes. HVM200 Reference Manual Making the Measurement...
- Page 27 An overload occurs when the signal from the accelerometer exceeds the LEARN MORE For information on overload indications on the Status input range of the meter. LED, see “Operational Characteris- tics” on page A-4. HVM200 Reference Manual Making the Measurement 3-10...
- Page 28 Z axes. Annotate the Measurement Click the Annotate button and type a note to include with the measure- ment (you do not need to stop the measurement to annotate). FIGURE 3-18 Annotate Button HVM200 Reference Manual Making the Measurement 3-11...
-
Page 29: Downloading Data
“Store Raw Data” on the Setup Tab, see “Figure 3-6 Opera- tion Settings” on page 3-5. While HVM200 is connected to G4, a RAW file can be downloaded from the Data Manager tab. The file will always be larger than an HVM file. - Page 30 RAW file. After parsed, "Weighting Filters for Raw Data" to adjust velocity or displacement if needed. weighting filters for hand arm or whole body vibration purposes. %% Example Matlab / GNU Octave code for parsing HVM200 raw data format close all;...
- Page 31 '-r'); plot(z_axis_filt, '-k'); hold off; title('HVM200 Data with Wk filter'); legend('x','y','z'); save(filteredsavename,'x_axis_filt','y_axis_filt','z_axis_filt','Sample_ Rate','Sample_Time'); Weighting Filters for Raw Data The "isofilwk()" function comes from sample code taken from the ISO 8041 standard, and can be modified for other weighting filters using the desired parameters from Table 3-1 'Parameters and transfer functions of the frequency weightings (source: ISO 8041)'.
- Page 32 % Apply filter to input signal vector x (output to signal vector y) filter (b2, a2, x); % Apply low-pass band limiting filter (b1, a1, y); % Apply high-pass band limiting filter (b3, a3, y); % Apply a-v transition HVM200 Reference Manual Downloading Data 3-15...
- Page 33 5 significant figures and parameter Q to 2 decimal places. The parameters specified here are the exact values. Table 3.1 Parameters and transfer functions of the frequency weightings (source: ISO 8041) HVM200 Reference Manual Downloading Data 3-16...
-
Page 34: Module 4
HVM200. 4.2 Setting/Syncing Meter Time and Date The HVM200 has a time feature that allows the meter’s internal clock to be either manually set or synced with your PC or mobile device. 4.2.1 Setting/Syncing Time via G4 LD Utility Ensure the meter is powered on. - Page 35 Date and Time 4.2.2 Setting/Syncing Time via HVM200 Control app Make sure the meter is powered on. Step 1 Launch app and connect the HVM200 meter to your device LEARN MORE For more informa- Step 2 tion on connecting the HVM200 to using an Access Point or WiFi network.
-
Page 36: Turning Off/On Wifi Signal
4.3 Turning Off/On WiFi Signal 4.3.1 Turn Off WiFi Signal To disable WiFi signal completely from the HVM200 meter, follow these steps: Launch the HVM200 Control app or the G4 LD Utility Live... - Page 37 An Alert will appear. Select Confirm. WiFi is now disabled. Step 5 4.3.2 Turn Back On WiFi Signal To turn the WiFi signal back on from the HVM200 meter, follow these steps: Connect HVM200 via USB cable to PC, launch G4 LD Util- Step 1 ity and connect meter, see “Connecting HVM200 to G4 LD...
-
Page 38: Upgrade Firmware And Options
To upgrade firmware and install optional firmware, follow these steps: Make sure the meter is powered on. Step 1 Launch G4 LD Utility and connect the HVM200 meter to Step 2 your PC. see “Connecting HVM200 to G4 LD Utility” on... - Page 39 FIGURE 4-11 Upgrade Firmware Open selected file. Step 7 Press button for Upload Firmware (or Upload Options). A Step 8 success message will appear, close out window. HVM200 Reference Manual Upgrade Firmware and Options...
-
Page 40: Appendix A Specifications
A.10.2 OBA General Specifications ..............A-30 A.10.3 1/1 OBA Filter Responses ..............A-30 A.11 Standards Met ....................A-38 Specifications are subject to change without notice. A.1 General Characteristics • Measurement modes: Hand-arm, Whole-body, Vibration • Metrics by mode: HVM200 Reference Manual General Characteristics... -
Page 41: General Characteristics
• Operating temperature: 14°F to 122°F (-10 °C to 50 °C) The RMS level of the HVM200 varies up to 1% when exposed to temperatures of - 10 °C to 50 °C • and relative humidity (RH) 20 to 90% (non-condensing). -
Page 42: Physical Characteristics
• Swapping limitation: Device must be off while replacing Micro SD card or battery. A.1.8 Transducer Electronic Data Sheets (TEDS) Support • Chips supported by HVM200: DS2430 and DS2431 • Versions supported: 0.9 (only DS2430 chip) and 1.0 • Templates supported: 0 (version 0.9), 25 (version 1.0) A.2 Physical Characteristics... -
Page 43: Operational Characteristics
Charged Power On is displayed both on start up and shut down. When turning on the HVM200, press the power button for about one second until the blue LED is displayed. When shutting down, press the power but- Power On ton until the blue LED is displayed and the Status LED is dark. -
Page 44: Electrical Characteristics
State The HVM200 is not running a measurement. Measurement Stopped The HVM200 is in the process of taking a measurement. Measurement Running The HVM200 is stabilizing for an impending measurement, which may last up to 60 seconds, or is awaiting a delayed start set from the Measurement scheduling tab. -
Page 45: Electrical Testing
• External Power: USB Type A to Micro-B USB cable, 3 ft (1 m) Larson Davis Power Supply PSA035 (universal 100-240 VAC to 5 V USB power adapter) A.4.3 Electrical Testing During electrical testing, the following circuit was used: Represents one input for each axis (x,y, z). -
Page 46: Reference Values
Hand Arm 500 rad/s (79.58 Hz) 10 m/s Whole Body 100 rad/s (15.915 Hz) 1.0 m/s 1.0 m/s 1.0 m/s 1.0 m/s 1.0 m/s 1.0 m/s 1.0 m/s Wf (Severity) 2.5 rad/s (0.3979 Hz) 0.1m/s HVM200 Reference Manual Reference Values... -
Page 47: Measurement Ranges
A.6 Measurement Ranges The following table shows the HVM200 dynamic and linearity ranges in root-mean square values. (Peak val- ues are 1.414 times higher.) Lower Limit Lower Limit Lin- Lower Limit Frequency Noise Floor Upper Limit (Under-range earity Range Linearity Range... - Page 48 HVM200 Reference Manual Frequency Weighting Curves...
- Page 49 HVM200 Reference Manual Frequency Weighting Curves A-10...
- Page 50 HVM200 Reference Manual Frequency Weighting Curves A-11...
- Page 51 HVM200 Reference Manual Frequency Weighting Curves A-12...
-
Page 52: Frequency Weighting Tables
A.8 Frequency Weighting Tables The following tables show frequency weighting values for the HVM200. HVM200 Reference Manual Frequency Weighting Tables A-13... - Page 53 +1/-1 39.81 -0.11 -0.12 +1/-1 50.12 -0.27 -0.27 +1/-1 63.10 -0.64 -0.65 +1/-1 79.43 -1.46 -1.44 +1/-1 100.0 -3.01 -2.99 +1/-1 125.9 -5.46 -5.47 +2/-2 -8.64 158.5 -8.65 +2/-2 - -12.27 199.5 -12.32 HVM200 Reference Manual Frequency Weighting Tables A-14...
- Page 54 Freq ( Hz) Fa Ideal (dB) Fa Typical (dB) Tolerance (dB) - 251.2 -16.11 -16.20 - 316.2 -20.04 -20.16 - 398.1 -24.02 -24.22 HVM200 Reference Manual Frequency Weighting Tables A-15...
- Page 55 31.62 0.00 -0.02 +1 / -1 39.81 0.00 -0.02 +1 / -1 50.12 0.00 -0.03 +1 / -1 63.10 0.00 -0.03 +1 / -1 79.43 0.00 0.00 100.0 0.00 -0.01 +1 / -1 HVM200 Reference Manual Frequency Weighting Tables A-16...
- Page 56 +2 / -2 1585 -5.46 -6.86 +2 / -2 1995 -8.64 -12.55 +2 / -2 2512 -12.27 -21.30 +2 / - 3162 -16.11 -39.09 +2 / - 3981 -20.04 -85.43 +2 / - HVM200 Reference Manual Frequency Weighting Tables A-17...
- Page 57 +1 / -1 316.2 -0.01 -0.05 -23.96 -26.06 +1 / -1 398.1 -0.02 -0.10 -25.98 -28.13 +1 / -1 501.2 -0.04 -0.15 -28.00 -30.21 +1 / -1 631.0 -0.11 -0.31 -30.07 -32.40 +1 / -1 HVM200 Reference Manual Frequency Weighting Tables A-18...
- Page 58 +2 / -2 1995 -5.46 -12.55 -45.42 -54.40 +2 / -2 2512 -8.64 -21.30 -50.60 -67.23 +2 / - 3162 -12.27 -39.09 -56.23 -92.87 +2 / - 3981 -16.11 -86.14 -62.07 -101.37 +2 / - HVM200 Reference Manual Frequency Weighting Tables A-19...
- Page 59 +1 / -1 50.12 -10.09 -19.26 -16.15 -16.20 -21.98 -28.28 +1 / -1 63.10 -12.43 -21.62 -18.55 -18.59 -24.01 -30.67 +1 / -1 79.43 -15.34 -24.40 -21.37 -21.39 -26.08 -33.45 +1 / -1 HVM200 Reference Manual Frequency Weighting Tables A-20...
- Page 60 +2 / - 251.2 -39.69 -49.17 -46.04 -46.21 -41.43 -58.25 +2 / - 316.2 -45.65 -55.16 -51.98 -52.19 -46.62 -64.23 +2 / - 398.1 -51.84 -61.23 -57.95 -58.29 -52.24 -70.30 +2 / - HVM200 Reference Manual Frequency Weighting Tables A-21...
- Page 61 +1 / -1 50.12 -32.11 -34.30 -0.08 -0.27 -10.01 -12.24 +1 / -1 63.10 -34.26 -36.68 -0.25 -0.65 -12.21 -14.66 +1 / -1 79.43 -36.64 -39.47 -0.63 -1.44 -14.62 -17.48 +1 / -1 HVM200 Reference Manual Frequency Weighting Tables A-22...
-
Page 62: Integration Weighting Limits
3.235 0.0080 695.458 0.0077 397.953 0.0083 698.669 0.0067 400.711 0.0049 698.620 0.0034 204.094 For the following charts, the valid measurement range for each weighting is shown between the noise floor and the maximum. HVM200 Reference Manual Integration Weighting Limits A-23... - Page 63 HVM200 Reference Manual Integration Weighting Limits A-24...
- Page 64 HVM200 Reference Manual Integration Weighting Limits A-25...
- Page 65 HVM200 Reference Manual Integration Weighting Limits A-26...
- Page 66 HVM200 Reference Manual Integration Weighting Limits A-27...
- Page 67 HVM200 Reference Manual Integration Weighting Limits A-28...
-
Page 68: 1/1 & 1/3 Octave Band Filters
A.10 1/1 & 1/3 Octave Band Filters Octave Band Analysis (OBA) is an optional feature for the HVM200. A.10.1 OBA Compliance • IEC 61260-1:2014 Class 1 • ANSI S1.11-2014 Part 1, Class 1 HVM200 Reference Manual 1/1 & 1/3 Octave Band Filters... -
Page 69: Oba General Specifications
0.0100 0.089 5.01 0.0097 0.112 5.01 0.0103 0.071 5.01 31.5 0.0114 0.100 5.01 0.0140 0.071 5.01 0.0157 0.056 5.01 0.0190 0.056 5.01 0.0245 0.079 5.01 1000 0.0343 0.100 5.01 2000 HVM200 Reference Manual 1/1 & 1/3 Octave Band Filters A-30... - Page 70 1/1 Octave Filter Response Summary Graph 1/1 OBA 8.0 Hz Filter Response HVM200 Reference Manual 1/1 & 1/3 Octave Band Filters A-31...
- Page 71 1/1 OBA 8.0 Hz Filter Response: Pass-band 1/1 OBA 16.0 Hz Filter Response HVM200 Reference Manual 1/1 & 1/3 Octave Band Filters A-32...
- Page 72 5.01 0.0053 0.089 5.01 12.5 0.0054 0.056 5.01 0.0053 0.056 5.01 0.0054 0.089 5.01 0.0055 0.071 5.01 31.5 0.0056 0.063 5.01 0.0057 0.089 5.01 0.0059 0.056 5.01 0.0062 0.056 5.01 HVM200 Reference Manual 1/1 & 1/3 Octave Band Filters A-33...
- Page 73 0.079 5.01 0.0126 0.056 5.01 1000 0.0139 0.056 5.01 1250 0.0153 0.063 5.01 1600 0.0171 0.056 5.01 2000 0.0191 0.056 5.01 2500 0.0219 0.063 5.01 1/3 Octave Filter Summary Graph HVM200 Reference Manual 1/1 & 1/3 Octave Band Filters A-34...
- Page 74 1/3 OBA 0.4 Hz Filter Response 1/3 OBA 0.4 Hz Filter Response: Pass-band HVM200 Reference Manual 1/1 & 1/3 Octave Band Filters A-35...
- Page 75 1/3 OBA 8.0 Hz Filter Response 1/3 OBA 8.0 Hz Filter Response: Pass-band HVM200 Reference Manual 1/1 & 1/3 Octave Band Filters A-36...
- Page 76 1/3 OBA 16.0 Hz Center Band Filter Response 1/3 OBA 16.0 Hz Filter Response: Pass-band HVM200 Reference Manual 1/1 & 1/3 Octave Band Filters A-37...
-
Page 77: Standards Met
A.11 Standards Met Type Precision The Larson Davis HVM200 Human Vibration Meter is a Type 1 instrument designed for use in assessing vibration as perceived by human beings. The instrument meets the requirements of ISO 8041:2005(E). Additionally, because the HVM200 meets the current ISO 8041:2005 standard, it is also compatible with the standards listed below. - Page 78 EN 1032:2003 Mechanical vibration -- Testing of mobile machinery in order to determine the vibra- tion emission value • ANSI S2.70 Guide for the Measurement and Evaluation of Human Exposure to Vibration Transmitted to the Hand HVM200 Reference Manual Standards Met A-39...
-
Page 79: Appendix B Adaptor Resonance & Frequency Response
Mounting Height of Vibration Sensor inches 0.32 (8.0) 0.18 (4.6) 0.32 (8.1) (distance between sensor and mounting (mm) surface) Adapter dimensions inches Shown Shown Shown (mm) Below Below Below B.1.1 ADP080A FIGURE B-1 (Hand Adapter with SEN04XF Accelerometer) HVM200 Reference Manual Mechanical... -
Page 80: Mechanical
A graphic is included to illustrate the test configuration. Triaxial Accelerometer The triaxial accelerometer used for these tests was a Larson Davis Model SEN041F having a sensitivity of 10 mV/g. HVM200 Reference Manual... -
Page 81: Adp080A + Sen041
B.1.5 ADP080A + SEN041 FIGURE B-4 ADP080A + SEN041 Frequency Response Function X, Y and Z HVM200 Reference Manual Mechanical... -
Page 82: Adp081A + Sen041
B.1.6 ADP081A + SEN041 Frequency Response Function X, Y and Z B.1.7 ADP082A + SEN041 Frequency Response Function X, Y and Z HVM200 Reference Manual Mechanical... -
Page 83: Appendix C Glossary Of Terms
Appendix C Glossary of Terms The following table contains definitions and calculations for terminology used in the HVM200 manual. Term Equation Description t t -- - a Acceleration T= Integration time in seconds. (t) = instantaneous acceleration. - Page 84 Term Equation Description The HVM200 measures the following quantities: A 8 t t ------------------- a 8Hours Energy A 4 t t ------------------- a Equivalent 4Hours Acceleration A 2 ...
- Page 85 (t); measured during one Averaging time period. Short Term Maximum The peak measurement period is controlled by the Averaging Peak time setting; a new Peak value is calculated and displayed at the end of each Averaging time period. HVM200 Reference Manual...
- Page 86 Summed = X, Y, and Z axis Sum Factors Instantaneous Acceleration The HVM200 uses the formula above to calculate the instanta- neous, summed acceleration, a (t). This value is then used to w calculate a sum quantity for the A Peak, VDV, and PE.
-
Page 87: Appendix D Regulatory Compliance Statement
• Reorient or relocate the receiving antenna. • Increase the separation between the equipment and receiver. • Connect the equipment into an outlet on a circuit different from that to which the receiver is con- nected. HVM200 Reference Manual... - Page 88 Vertrieb für Österreich : nbn Elektronik Handelsgesellschaft m. b. H. HVM200 Reference Manual www.nbn.at Riesstraße 146, 8010 Graz | Tel. +43 316 40 28 05 | Fax +43 316 40 25 06...
Need help?
Do you have a question about the HVM200 and is the answer not in the manual?
Questions and answers