Table of Contents
Advertisement
Quick Links
Advertisement
Chapters
Table of Contents

Related Manuals for Larson Davis HVM200


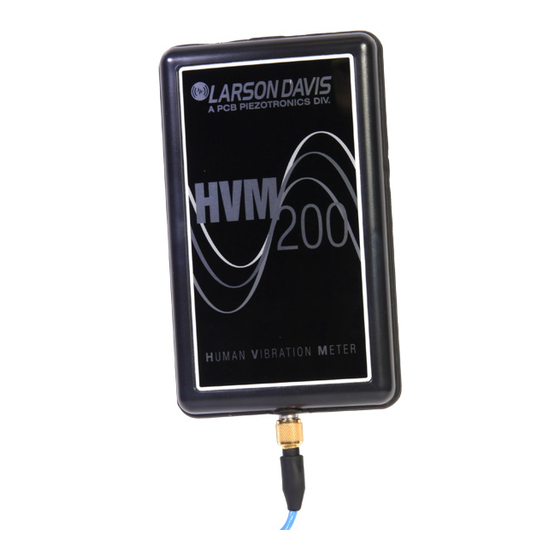
Summary of Contents for Larson Davis HVM200
- Page 1 Larson Davis HVM200 Reference Manual...
- Page 2 Changes and improvements to the information described in this manual may be made at any time. Safety If the equipment is used in a manner not specified by Larson Davis, the protection provided by the equipment may be impaired. HVM200 Purchase Information Record the serial number and date of purchase below.
- Page 3 Using A Digital Reference Manual Larson Davis is committed to the green practices of limited paper waste. In this effort, we only offer reference manuals in a digital PDF format. Digital notes and comments can be made in certain readers, and you are encouraged to print any procedures or sections for quick references that fit your needs.
-
Page 4: Table Of Contents
2.2 Power Button Operation .........................2-2 2.3 Installing the HVM200 Control App ....................2-3 2.4 Installing the G4 LD Utility .......................2-3 2.5 Connecting the HVM200 to a Mobile Device ...................2-4 2.6 Connecting HVM200 to G4 LD Utility ....................2-6 2.7 Connecting the Accelerometer .......................2-8... -
Page 5: Module 1 Introduction
Standard Contents ......................1-1 1.2.1 Optional Kits ......................1-2 1.2.2 Optional Accessories .................... 1-2 1.1 Features The Larson Davis HVM200 Human Vibration Meter is designed for use in assessing vibration as perceived by human beings. The HVM200 provides the following features for... - Page 6 Case, CCS048-L Hand/Arm Vibration Arm Band, SEN041F accel- erometer, ADP081A Hand Adapter, and SWW-G4-HVM software license 1.2.2 Optional Accessories SWW-G4-HVM License to enable HVM100 and HVM200 support in G4 LD Utility HVM200-OB3 1/1 and 1/3 Octave Band Analysis firmware HVM200-RAW Feature to record sampled raw data files...
-
Page 7: Standard Contents
Adapters for accelerometer placement information on HVM200 accessories, including CBL217-05, CBL216, and CBL217-01 sensors, “Adapter Resonance Cables for connection between accelerometers and HVM200 meter & Frequency Response” on page B-1. 394C06 Hand-held Shaker for vibrational measurement verification HVM200 Reference Manual... -
Page 8: Getting Started
HVM200 Control app and G4 LD Utility. 2.1 Charging the HVM200 To get an accurate reading, the HVM200 must be fully charged. When this is the case, the Power LED displays a solid green color. Time to fully charge is 3 to 6 hours. -
Page 9: Power Button Operation
FIGURE 2-1 Insert Battery Step 3. Slide the back battery cover onto the HVM200. Step 4. Insert one end of the supplied USB cable into the HVM200 Micro-B USB port and the other end to the PSA035 charger. TAKE NOTE Avoid leaving the battery drained for extended periods of time in order to maximize overall battery life. -
Page 10: Installing The Hvm200 Control App
Next, wait until both LEDs go dark, this indicates that the meter is now off. 2.3 Installing the HVM200 Control App Use your mobile device to find and download the HVM200 Control app ®2 from the Google Play®... -
Page 11: Connecting The Hvm200 To A Mobile Device
One HVM200 to Multiple Mobile Devices. FIGURE 2-4 Mobile Connection Use HVM200 Access Point to connect your meter to one or more mobile devices. See 2.5.2 "Connecting to a Mobile Device via Access Point." Multiple HVM200 to Multiple Mobile Devices... -
Page 12: Connecting Hvm200 To Wifi Network
FIGURE 2-6 HVM200 Access Point Tap here Step 3. Launch the HVM200 Control app to begin controlling the meter on your mobile device. Step 4. Connect the HVM200 by selecting the meter with the serial number displayed for your meter. -
Page 13: Connecting Hvm200 To G4 Ld Utility
FIGURE 2-8 Network Connection Details Step 7. If the HVM200 and your mobile device are both on the same local network, you will see the network on the connect screen of the HVM Control App. Tap the network name to connect. -
Page 14: Connecting The Hvm200 Meter To G4 Ld Utility Via Usb
Software Manual. In G4, go to Help > Manuals. Step 1. Connect the HVM200 to a PC with the provided USB to Micro-B cable (CBL218). Step 2. Launch G4 and click Step 3. Select HVM200 as the device. Step 4. Select connection type as USB. -
Page 15: Connecting The Accelerometer
Step 2. Insert the other end of the accelerometer cable into the 4-pin connector on the accelerometer and tighten the cable nut. Step 3. If the HVM200 is not already turned on, press the power button once. The Power LED should turn blue. -
Page 16: Transducer Electronic Data Sheet (Teds)
If TEDS is successfully found in the accelerometer, the T icon appears in the top display as shown below. FIGURE 2-1 TEDS Orange TEDS icon indicates that not all sensitivity values are discovered. Green TEDS icon indicates all sensitivity values are discovered and functioning. HVM200 Reference Manual Connecting the Accelerometer... -
Page 17: Making Measurements
• If needed, stop the measurement in progress. Step 1. Launch G4 or the HVM Control app on your mobile device. Step 2. Connect to your HVM200, then click the Live View. For help connecting, 2.6 Connecting HVM200 to G4 LD Utility. -
Page 18: Setting Up The Measurement
Step 8. To save the calibration check, close the Calibration Check dialog box. 3.1.2 Selecting a Setup File by Using Your Mobile Device The HVM200 includes 9 default measurement setups in the Settings list. You can also create your own custom setup file. This section describes this process. - Page 19 Step 1. Tap the menu icon on the HVM200 app, then tap Settings. Step 2. Tap and hold on a default Setup File in the Settings list. In the pop-up that appears, tap Save As and enter a name for the measurement setup.
- Page 20 Tap to jump to any of the settings options at anytime. Setting the Measurement Schedule If needed, complete this section to schedule the HVM200 to automatically take a measurement. Step 1. Tap the menu icon on the HVM200 app, then tap Settings.
- Page 21 Setting Misc Measurement Options Step 1. Tap the menu icon on the HVM200 app, then tap Settings. Step 2. Use the arrow in the bottom right to move to the Misc tab. Step 3. If you’ve purchased the Octave Band Analysis feature, select 1/1 Octave or 1/3 Octave.
-
Page 22: Making The Measurement
The end with the transparent cover should be the farthest from the hand. Step 2. Insert the HVM200 into the arm band so that the accelerometer connector is nearest the hand. Step 3. Connect the accelerometer to the HVM200. -
Page 23: Starting Or Stopping The Measurement
Viewing Live Data • Monitoring a Measurement Starting a Measurement Step 1. In the HVM200 Control app or G4, click or tap the Run button TRY THIS You can also start the measurement manually by pushing that appears when the meter is connected. - Page 24 MIN and MAX are the minimum and maximum general vibration values. represents the summation of vibration values taken from the X, Y, and Z axes. The Summation display provides a real-time graphical representation of the current summed values from all three axes. HVM200 Reference Manual Making the Measurement...
- Page 25 Red background shows the overload for each axis. Under-range Indicator An under-range condition occurs when the signal from the accelerometer is below the input range to the point it cannot be measured accurately. HVM200 Reference Manual Making the Measurement...
-
Page 26: Downloading Data
• Use a third-party tool that’s JSON compatible. HVM2 files are stored in JavaScript Object Notation (JSON) format. Copy the data file from the removable SD memory card and work with it in any JSON-compatible tool. HVM200 Reference Manual Downloading Data 3-10... -
Page 27: Working With Raw Data Files
For more information, see 3.3.2 Weighting Filters for Raw Data. Raw Data Script %% Example Matlab / GNU Octave code for parsing HVM200 raw data format close all; clear all; clc; %% Number of Samples to read Sample_Rate 7161.45833;% Hz (Hard wired sample rate) - Page 28 '-k'); hold off; legend('x','y','z'); title('HVM200 Data'); save(rawsavename,'x_axis','y_axis','z_axis','Sample_Rate','Sample_Time') %% Further processing through ISO 8041 Wk filter x_axis_filt = isofilwk(x_axis, Sample_Rate); y_axis_filt = isofilwk(y_axis, Sample_Rate); z_axis_filt = isofilwk(z_axis, Sample_Rate); figure(2); plot(x_axis_filt,'-b'); hold plot(y_axis_filt, '-r'); plot(z_axis_filt, '-k'); HVM200 Reference Manual Downloading Data 3-12...
- Page 29 Data with Wk filter'); legend('x','y','z'); save(filteredsavename,'x_axis_filt','y_axis_filt','z_axis_filt','Sample_ Rate','Sample_Time'); 3.3.2 Weighting Filters for Raw Data The "isofilwk()" function comes from sample code taken from the ISO 8041 standard. You can modify it for other weighting filters using the desired parameters from Table 3.1, “Parameters and transfer functions...
- Page 30 NOTE 2 For weighting Wh, Table A.1 of ISO 5349-1:2001 rounds the values of parameters f and f 5 significant figures and parameter Q to 2 decimal places. The parameters specified here are the exact values. HVM200 Reference Manual Downloading Data 3-14...
- Page 31 NOTE 2 For weighting Wh, Table A.1 of ISO 5349-1:2001 rounds the values of parameters f and f 5 significant figures and parameter Q to 2 decimal places. The parameters specified here are the exact values. HVM200 Reference Manual Downloading Data 3-15...
-
Page 32: Changing Features
HVM200. 4.1 Setting/Syncing Meter Time and Date The HVM200 has a time feature that allows the meter’s internal clock to be either manually set or synced with your PC or mobile device. 4.1.1 Setting/Syncing Time via G4 LD Utility Before you begin: •... -
Page 33: Turning Off/On Wifi Signal
4.2.2 Turning WiFi On • 4.2.1 Turning WiFi Off This section shows how to disable the WiFi signal on the HVM200 meter. Once complete, you can only re-enable WiFi from G4 with the meter connected via USB. HVM200 Reference Manual... - Page 34 Step 1. Launch the HVM200 Control app or the G4 LD Utility Live View. Step 2. Click the menu icon , and select Setup WiFi from the menu that appears. This opens the Network screen. Step 3. Click the power icon in the top left.
- Page 35 Step 4. Press Choose Firmware File (or Choose Options File). This opens the File Explorer. FIGURE 4-2 Upgrade Firmware Step 5. Open the available file. Step 6. Click Upload Firmware (or Upload Options). G4 displays a success message. Close the window to continue. HVM200 Reference Manual Upgrading Firmware or Options...
-
Page 36: Specifications
30 s; 1, 2, 5, 20, 30 min; 1 hr °C to 50 °C) • Stored values: RMS and Peak for x, y, and z • The RMS level of the HVM200 varies up to axes and for 1% when exposed to temperatures of - 10 Run Modes °C to 50 °C and relative humidity (RH) 20 to... -
Page 37: Physical Characteristics
Troubleshooting removable SD card into a PC and reformat or repair the file card: system; put the card back into the HVM200 while it Step 1 Delete all the files on the internal is off; restart the HVM200. - Page 38 If not charged, the HVM200 will shut down when the remaining battery Battery Low life approaches the threshold for safe shut down. If the HVM200 shuts down mid- measurement, the file is truncated and G4 LD Utility may not be able to display (Blinking) summary information for the file.
-
Page 39: Electrical Characteristics
The HVM200 is in the process of taking a measurement. Measurement Running The HVM200 is stabilizing for an impending measurement, which may last up to 60 seconds, or is awaiting a delayed start set from the scheduling tab. Measurement Run Pending... - Page 40 Refer to the “Pinout” diagram below for more information on the 1/4-28 input connection. ®1 Circuit to Inject Electrical Signal into HVM200 ICP • Measurement input voltage range: 1.8 to 16 Inputs • Measurement AC reference bias voltage: 9 Input •...
-
Page 41: Reference Values
1.0 m/s 1.0 m/s 0.1m/s Wf (Severity) 2.5 rad/s (0.3979 Hz) A.6 Measurement Ranges The following table shows the HVM200 dynamic and linearity ranges in root-mean square values. (Peak values are 1.414 times higher.) Lower Limit Lower Limit Lower Limit... -
Page 42: Frequency Weighting Curves
Upper Limit (Under-range Range Weighting (typical mV) Range (Overload V) (maximum (typical mV) 0.018 0.144 0.073 0.121 5.01 0.017 0.103 0.060 0.077 5.01 A.7 Frequency Weighting Curves The following graphs show frequency weighting curves for the HVM200. HVM200 Reference Manual... - Page 43 HVM200 Reference Manual...
- Page 44 HVM200 Reference Manual...
- Page 45 HVM200 Reference Manual A-10...
-
Page 46: Frequency Weighting Tables
A.8 Frequency Weighting Tables The following tables show frequency weighting values for the HVM200. Table A.2 Fa (Flat 0.4 Hz to 100 Hz) Freq (Hz) Fa Ideal (dB) Fa Typical (dB) Tolerance (dB) - 0.1000 -24.10 -25.19 - 0.1259 -20.12 -21.21... - Page 47 1.000 -0.11 -0.08 +1 / -1 1.259 -0.04 -0.05 +1 / -1 1.585 -0.02 -0.04 +1 / -1 1.995 -0.01 -0.04 +1 / -1 2.512 0.00 -0.04 +1 / -1 3.162 0.00 -0.07 +1 / -1 HVM200 Reference Manual A-12...
- Page 48 1259 -3.01 -3.35 +2 / -2 1585 -5.46 -6.86 +2 / - 1995 -8.64 -12.55 +2 / - 2512 -12.27 -21.30 +2 / - 3162 -16.11 -39.09 +2 / - 3981 -20.04 -85.43 +2 / - HVM200 Reference Manual A-13...
- Page 49 -30.21 +1 / -1 631.0 -0.27 -0.31 -32.23 -32.40 +1 / -1 794.3 -0.64 -0.63 -34.6 -34.70 +1 / -1 1000 -1.46 -1.47 -37.42 -37.41 +2 / -2 1259 -3.01 -3.35 -40.97 -40.97 +2 / -2 HVM200 Reference Manual A-14...
- Page 50 -2.25 -13.91 -13.95 +1 / -1 12.59 -7.71 -7.75 -3.84 -3.88 -15.93 -15.98 +1 / -1 15.85 -9.44 -9.44 -5.74 -5.74 -17.95 -17.95 +1 / -1 19.95 -11.25 -11.30 -7.75 -7.81 -19.97 -20.02 +1 / -1 HVM200 Reference Manual A-15...
- Page 51 -5.66 -1.86 -1.93 +1 / -1 3.981 -11.89 -11.95 -4.08 -4.11 -0.31 -0.38 +1 / -1 5.012 -13.93 -13.98 -1.99 -2.04 +0.33 0.28 +1 / -1 6.310 -15.95 -16.00 -0.47 -0.51 +0.46 0.42 +1 / -1 HVM200 Reference Manual A-16...
-
Page 52: Integration Weighting Limits
0.0068 563.341 0.0060 317.432 0.0163 1403.690 0.0143 801.367 0.0155 1415.048 0.0111 801.367 0.0108 1434.733 0.0102 804.139 0.0802 5740.123 0.1707 8823.712 0.0003 87.044 0.0002 3.235 0.0080 695.458 0.0077 397.953 0.0083 698.669 0.0067 400.711 0.0049 698.620 0.0034 204.094 HVM200 Reference Manual A-17... - Page 53 For the following charts, the valid measurement range for each weighting is shown between the noise floor and the maximum. HVM200 Reference Manual A-18...
- Page 54 HVM200 Reference Manual A-19...
- Page 55 HVM200 Reference Manual A-20...
- Page 56 HVM200 Reference Manual A-21...
- Page 57 HVM200 Reference Manual A-22...
- Page 58 HVM200 Reference Manual A-23...
-
Page 59: 1/1 & 1/3 Octave Band Filters
A.10 1/1 & 1/3 Octave Band Filters OBA General Specifications Octave Band Analysis (OBA) is an optional feature • 1/1 Octave Filters: 0.5 Hz to 2000 Hz for the HVM200. • 1/3 Octave Filters: 0.4 Hz to 2500 Hz OBA Compliance •... - Page 60 FIGURE A-5 1/1 OBA 8.0 Hz Filter Response FIGURE A-6 1/1 OBA 8.0 Hz Filter Response: Pass-band HVM200 Reference Manual A-25...
- Page 61 FIGURE A-7 1/1 OBA 16.0 Hz Filter Response FIGURE A-8 1/1 OBA 16.0 Hz Filter Response: Pass-band HVM200 Reference Manual A-26...
- Page 62 5.01 0.0205 0.07 5.01 0.0215 0.07 5.01 0.02258 0.07 5.01 0.02417 0.08 5.01 0.02574 0.08 5.01 1000 0.02753 0.08 5.01 1250 0.02973 0.08 5.01 1600 0.03231 0.08 5.01 2000 0.035 0.08 5.01 2500 0.0385 0.085 5.01 HVM200 Reference Manual A-27...
- Page 63 FIGURE A-9 1/3 Octave Filter Summary Graph FIGURE A-10 1/3 OBA 0.4 Hz Filter Response HVM200 Reference Manual A-28...
- Page 64 FIGURE A-11 1/3 OBA 0.4 Hz Filter Response: Pass-band FIGURE A-12 1/3 OBA 8.0 Hz Filter Response HVM200 Reference Manual A-29...
- Page 65 FIGURE A-13 1/3 OBA 8.0 Hz Filter Response: Pass-band FIGURE A-14 1/3 OBA 16.0 Hz Center Band Filter Response HVM200 Reference Manual A-30...
- Page 66 FIGURE A-15 1/3 OBA 16.0 Hz Filter Response: Pass-band FIGURE A-16 1/3 OBA 80.0 Hz Filter Response HVM200 Reference Manual A-31...
-
Page 67: Standards Met
A.11 Standards Met Type Precision • ISO 5349-1:2001 Mechanical vibration -- The Larson Davis HVM200 Human Vibration Meter Measurement and evaluation of human is a Type 1 instrument designed for use in exposure to hand-transmitted vibration -- assessing vibration as perceived by human beings. -
Page 68: Appendix B Adapter Resonance & Frequency Response
(distance between sensor and mounting surface) Adapter dimensions inches (mm) Shown Shown Shown Below Below Below B.1.1 Installing the ADP080A FIGURE B-1 (Hand Adapter with SEN04XF Accelerometer) B.1.2 Installing the ADP081A FIGURE B-2 (Handle Adapter with SEN04XF Accelerometer) HVM200 Reference Manual... - Page 69 The responses The triaxial accelerometer used for these tests was were measured in x, y and z directions using a a Larson Davis Model SEN041F having a sensitivity triaxial accelerometer connected to the test object of 10 mV/g.
- Page 70 FIGURE B-5 Frequency Response Function X, Y and Z B.1.6 ADP081A + SEN041 FIGURE B-6 Frequency Response Function X, Y and Z HVM200 Reference Manual...
- Page 71 B.1.7 ADP082A + SEN041 FIGURE B-7 Frequency Response Function X, Y and Z HVM200 Reference Manual...
-
Page 72: Appendix C Glossary Of Terms
Appendix Glossary of Terms The following table contains definitions and calculations for terminology used in the HVM200 manual. Term Equation Description -- - a t t RMS Acceleration T= Integration time in seconds. (t) = instantaneous acceleration. - Page 73 Term Equation Description The HVM200 measures the following quantities: ------------------ - a A 8 t t 8Hours ------------------ - a A 4 t t 4Hours Energy Equivalent RMS Acceleration ------------------ - a A 2 ...
- Page 74 (t) = X, Y, and Z axis instantaneous acceleration Instantaneous = X, Y, and Z axis Sum Factors Acceleration The HVM200 uses the formula above to calculate the instantaneous, summed acceleration, a (t). This value is then used to calculate a sum quantity for the w...
-
Page 75: Appendix D Regulatory Compliance Statement
Operation of this equipment in a residential area is likely to cause harmful interference in which case the user will be required to correct the interference at his own expense. HVM200 Reference Manual... -
Page 76: Appendix E Declaration Of Conformity
Appendix Declaration of Conformity HVM200 Reference Manual... - Page 77 Larson Davis - a PCB Piezotronics division LarsonDavis.com P/N IHVM200.01 Rev I ©2019 PCB Piezotronics, Inc. Worldwide Corporate Headquarters Toll-free (in the US): 888-258-3222 3425 Walden Avenue Phone: 716-926-8243 Depew, NY 14043-2495 USA USA fax: 716-926-8215 E-mail: sales@larsondavis.com HVM200 Reference Manual...
Need help?
Do you have a question about the HVM200 and is the answer not in the manual?
Questions and answers