Sony SA-VA100 Operating Instructions Manual
Home entertainment
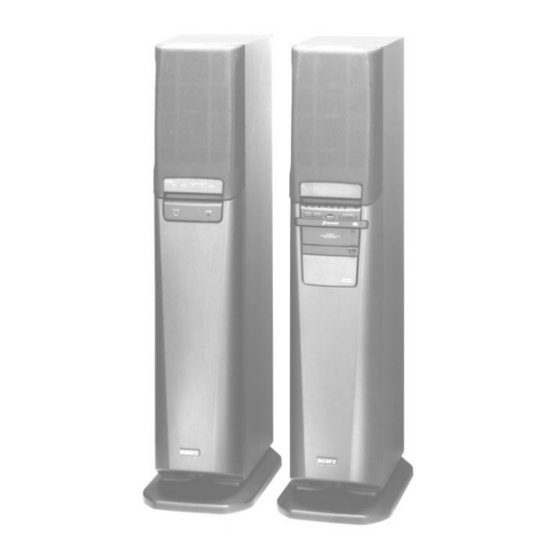
audio system
Hide thumbs
Also See for SA-VA100:
- Operating instructions manual (65 pages) ,
- Service manual (99 pages) ,
- Operating instructions (2 pages)

Related Manuals for Sony SA-VA100


Summary of Contents for Sony SA-VA100
-
Page 1: Audio System
3-856-758-11(1) Home Entertainment Audio System Operating Instructions SA-VA100 © 1996 by Sony Corporation... -
Page 2: About This Manual
This equipment has been tested and found to comply with the limits for a Class B digital device, pursuant to Part Thank you for purchasing a Sony Home 15 of the FCC Rules. To prevent fire or shock Entertainment Audio System. -
Page 3: Table Of Contents
Playing a CD (normal play) 16 Listening to the Radio 18 Playing a Tape 20 Selecting a Video Source 22 Operating Sony TVs and Video Components 23 Controlling the On-Screen Display (OSD) 25 Home Theater Operations Using OSD Enjoying Surround Sound 26... -
Page 4: Introduction
Introduction Four different types of surround sound The SA-VA100 is a complete home entertainment accommodate a variety of program sources audio system incorporating a unique interface, a seven- disc CD changer, FM/AM tuner, cassette deck, Dolby For details, see pages 14-15 and 26-30. - Page 5 Introduction Fully efficient and well equipped internal Built-in center speakers let you enjoy Dolby audio system Pro Logic Surround sound The use of a center speaker is a key factor in obtaining 7-CD changer a full surround effect when playing sources encoded Various play modes, like shuffle play and program with the Dolby Pro Logic Surround sound system.
- Page 6 Introduction Dynamic Bass Roar (DBR) super woofer system provides theater-like bass sound To provide a theater-like experience complete with dynamic bass sounds, this system incorporates the Super Acoustically-loaded Woofer (SAW) design (see below) in the left and right front speakers to form a DBR super woofer system.
-
Page 7: Getting Started
• If you don’t use the remote for an extended period of time, SAFEGUARDS” leaflet. remove the batteries to avoid possible damage from battery leakage and corrosion. If you have any question or problem concerning your speakers, please consult your nearest Sony dealer. -
Page 8: Installing The Speaker Stands
Getting Started Choosing the Best Location Installing the Speaker Stands Be sure to install the supplied speaker stands before To obtain high sound quality and a proper sound you use the speakers. image from the front speakers, place the speaker with the built CD player and cassette deck to the right of Notes your TV and the other to the left of your TV so that the... -
Page 9: Speaker And System Hookups
Getting Started Speaker and System Hookups This section describes how to connect the system. AM loop antenna Rear speaker Rear speaker FM lead antenna SS-SR151 SS-SR151 Right front speaker Left front speaker The arrow ç indicates signal flow. To disconnect, pull the connector out. Never Connect the supplied flat cord to the SYSTEM pull the cord itself. - Page 10 Wireless Speaker System. You can use the Wireless Speaker System in place of the supplied rear speakers. This jack is for use with the Sony Wireless Speaker System only. Connecting other equipment to this jack may damage this unit and the connected equipment.
-
Page 11: A/V Hookups
Getting Started A/V Hookups This section describes how to connect the system and how to connect your TV or VCR to the speakers. For the best possible sound and fully integrated on-screen operations, connect the system directly to your VCR. The following connections suppress noise from the TV and let you enjoy high quality sound. - Page 12 Getting Started 2 Connect an audio cord (not supplied) from the Make this connection if you want to record VIDEO 1 (AUDIO IN) jacks on the right front from the CD player, FM/AM tuner or tape speaker to the line out jacks on your TV. deck, or an additional video components.
- Page 13 Getting Started...
-
Page 14: Basic Operations
Basic Operations Basic Operations Enjoying Surround Sound You can take advantage of surround sound simply by selecting one of the pre-programed sound fields according to the type of program you want to play. To obtain the best possible sound we recommend equalizing the speaker levels of the DOLBY SUR and THEATER sound modes before you begin (see “Adjusting the Speaker Output Levels”... - Page 15 Basic Operations To listen without surround Press SURROUND repeatedly to select the sound field you effects desire. Press SURROUND repeatedly until SUR OFF is displayed. Program DOLBY SUR THEATER HALL SIMULATED OFF Recent movies Concerts Music Sports Old Movies Note Video games Some videos and laser discs may use Dolby Surround sound even if...
-
Page 16: Playing A Cd (Normal Play)
Basic Operations Playing a CD (normal play) You can play CDs in four modes: normal, shuffle, program and repeat. The mode decides which tracks (songs) you will listen to, which order you will listen in, and whether or not they will repeat. You can control the unit from the on screen display using the supplied remote. - Page 17 Basic Operations Press DISC 1 ~ 7 to choose the disc you want to play. The disc tray closes automatically and play starts. If you press · (or CD · on the remote), play starts from the beginning of the selected CD (the CD whose disc indicator is green). Press MASTER VOLUME + or –...
-
Page 18: Listening To The Radio
Basic Operations Listening to the Radio When you want to play a radio program, you can have the tuner automatically scan the radio frequencies and tune in the stations with clear signals. This feature saves you time in searching for stations with clear signals. However, stations with weak signals may be skipped by automatic tuning. - Page 19 Basic Operations Press TUNING + to scan for higher frequency stations. To scan for lower frequency stations, press TUNING –. The tuner starts scanning radio frequencies, and stops automatically when it finds a clear station. To improve AM broadcast reception “TUNED”...
-
Page 20: Playing A Tape
Basic Operations Playing a Tape You can use TYPE I (normal), TYPE II (CrO2) and TYPE IV (metal) tapes. When you insert a tape, the deck detects the tape type automatically. Right Speaker POWER TAPE » Æ ª · T A P E Æ... - Page 21 Basic Operations Press ( (to play the front side) or 9 (to play the reverse side). The tape starts playing. Press MASTER VOLUME + or – to adjust the volume. When listening to a tape Press (on remote) recorded with the Dolby* B or C type noise reduction Stop play p (p )
-
Page 22: Selecting A Video Source
Basic Operations Selecting a Video Source When you watch TV or video programs, we recommend you play audio portion through this system instead of the speaker on your TV. This lets you take advantage of the system’s surround sound effects, like Dolby Surround, and lets you use the system’s remote to control the audio. -
Page 23: Operating Sony Tvs And Video Components
Basic Operations Operating Sony TVs and Video Components You can use the shaded buttons shown below to Operate Sony TVs and video components. VISUAL POWER VIDEO 2 VIDEO 1 VIDEO 2 CONTROL VIDEO 1 TV CONTROL DISPLAY SWAP POSITION JUMP... - Page 24 If the factory settings of the VIDEO 1 and VIDEO 2 buttons don’t match your system components, you can change them. For example, if you connect a Sony Beta video deck to the VIDEO 2 jacks, you can assign the VIDEO 2 button to set the remote to control the Beta VCR.
-
Page 25: Controlling The On-Screen Display (Osd)
Basic Operations Controlling the On-Screen Display (OSD) The supplied remote also lets you perform almost all of the system operations using the on-screen display. Æ FUNCTION OSD ON/OFF RETURN EXIT Pointer OSD CONTROL – Blank ENTER area – LIST – BAND 87.50MHz STEREO... -
Page 26: Home Theater Operations Using Osd
Home Theater Operations Using OSD Click the sound mode you desire according to the Enjoying Surround Sound descriptions above. You can take advantage of surround sound simply by SOUND selecting one of the pre-programed sound fields DOLBY SUR SUR OFF according to the type of program you want to play. -
Page 27: Adjusting The Speaker Output Levels
Home Theater Operations Using OSD Then click LEVEL + or –. Adjusting the Speaker Output The level settings are stored separately for SUPER WOOFER 1 and SUPER WOOFER 2. Levels The test tone feature lets you set the volume of your SOUND speakers to the same level. -
Page 28: Customizing The Sound Fields
Home Theater Operations Using OSD To adjust the volume of all speakers at the same Customizing the Sound Fields time Press VOL + or – on the remote. Each sound field is composed of an tone (bass and treble) and surround sound parameters — variables of To reset the current sound field to the original factory settings sound, that create the sound image. - Page 29 Home Theater Operations Using OSD To adjust the speaker levels To start adjustment with a flat equalizer curve. Click the + or – icon located next to the speakers Click FLAT to adjust the speakers to the levels you prefer. To reset the tone parameter of the selected sound field to the original factory settings SUR EDIT...
-
Page 30: Using An External Center Speaker
Home Theater Operations Using OSD Click SUR. Using an External Center The SUR EDIT screen appears. Speaker Click C MODE repeatedly until the center mode you want is displayed. Since this system incorporates a center speaker (see page 5), you don't have to connect a center speaker. However, it is possible to connect a center speaker to SUR EDIT C MODE... -
Page 31: Operating The Cd Player Using Osd
Operating the CD Player Using OSD Operating the CD Player Using OSD If PROGRAM or SHUFFLE appear in the SUB Playing a CD (normal play) menu, click them repeatedly to select “CONTINUE”. You can play CDs in four modes: normal, shuffle, program and repeat. - Page 32 Operating the CD Player Using OSD To close the SUB menu Removing a CD using the buttons on the speaker Click EXIT or press EXIT on the remote control. Press DISC 1 ~ 7 for the disc you want to eject, then press §...
- Page 33 Operating the CD Player Using OSD Locating a track directly Locating a particular point in a track Click SUB You can locate a particular point in a track while monitoring the sound or quickly by observing the display. MEMO DISC Click and hold down TIME DISC–2 *...
-
Page 34: Playing A Cd In Random Order (Shuffle Play)
Operating the CD Player Using OSD C l i c k ( . Playing Tracks in Random Order (shuffle play) You can play all the tracks on one CD or all CDs in ALL DISCS SHUFFLE random order. EXIT Click SUB. DISC TIME DISC–2 *... -
Page 35: Playing A Tracks In A Desired Order (Program Play)
Operating the CD Player Using OSD Click MANUAL EDIT. Playing Tracks in a Desired Order (program play) PROGRAM EDIT You can program up to 32 program steps from all the MANUAL EDIT CDs in the order you want them to play. You can program one track or a whole CD in search Program RETURN EXIT... - Page 36 Operating the CD Player Using OSD To select a track number using the numeric keys on Programming from the remote without the remote using the on-screen display Press the numeric button corresponding to the track number you desire. Press p. To enter a track number greater than 10, press >10 first, If you switch to program mode during playback, then press the corresponding numeric buttons.
-
Page 37: Playing Tracks Repeatedly (Repeat Play)
Operating the CD Player Using OSD Assigning Names to CDs Playing Tracks Repeatedly (disc memo) (repeat play) You can choose between two different repeat modes. You can assign names to your CDs. The names may One repeats all the tracks in the current play mode, the consist of uppercase and lowercase letters, numbers other repeats a single track. - Page 38 Operating the CD Player Using OSD To enter a space Click a disc button to select the disc tray Click the space bar. containing the disc to be named. The number on (You cannot enter a space as the first character.) the button turns green if there is a disc in the tray.
- Page 39 Operating the CD Player Using OSD If a CD has not been assigned a name Click ERASE. “NO NAME” appears next to that disc number. “ERASE OK” appears and the memo is erased. If a CD is not loaded MEMO The disc number for the respective tray is white and no ERASE characters appear next to that button.
- Page 40 Operating the CD Player Using OSD Click YES to erase all the names currently stored in memory. MEMO ALL ERASE All discs memo will be erased! Is it all right? EXIT RETURN To go back to the previous menu Click RETURN or press RETURN on the remote control. To go back to the SUB menu Click SUB.
-
Page 41: Operating The Radio Using Osd
Operating the Radio Using OSD Operating the Radio Using OSD Click SUB Listening to the Radio LIST – BAND 87.50MHz STEREO When you want to play a radio program, you can have the tuner automatically scan the radio frequencies and tune in the stations with clear signals. -
Page 42: Presetting Radio Stations
Operating the Radio Using OSD When reception of an FM program is unclear Presetting Radio Stations You can switch to monaural reception. There will be no stereo effect but the reception will improve. Click STEREO/MONO repeatedly to select “MONO”. You can store up to 30 FM or AM stations, and recall “MONO”... -
Page 43: Tuning Preset Stations
Operating the Radio Using OSD Click the button where you want to store the Press OSD ON/OFF to turn off the on-screen station. display, then turn off your TV. The button lights up and the station is stored. “OSD OFF” appears momentarily in the display. Tune in a station you want to store in the preset FM 87.50MHz memory. -
Page 44: Naming Preset Stations
Operating the Radio Using OSD Tuning Preset Stations One by One Naming Preset Stations Click FUNCTION in the main menu. You can customize the tuner’s preset list by entering Click TUNER . names up to 10 characters long for each preset radio station. - Page 45 Operating the Radio Using OSD Click RETURN or press RETURN on the remote control. The name is stored automatically. To erase a preset name You can erase the station name by changing all the characters of that name to “spaces”. To go back to the previous menu Click RETURN or press RETURN on the remote control.
-
Page 46: Operating The Tape Deck Using Osd
Operating the Tape Deck Using OSD Click ( (to play the front side) or 9 (to play the Playing a Tape reverse side). The tape starts playing. You can use TYPE I (normal), TYPE II (CrO2) and TYPE IV (metal) tapes. When you insert a tape, the RESET DOLBY NR 0000... -
Page 47: Recording From Cd
Operating the Tape Deck Using OSD Click d repeatedly to select how to record the Recording from CD tape. You can record from a CD to a tape. Use TYPE I REC EDIT (normal) or TYPE II (CrO2) tapes. RESET DOLBY NR DOLBY 0000... - Page 48 Operating the Tape Deck Using OSD Click P PAUSE to release recording pause. Click FUNCTION in the main menu. Recording starts. After about 10 seconds, the CD starts to play. Click CD. Click SUB. REC EDIT RESET DOLBY NR Select the play mode you desire and, if necessary, 0000 DOLBY CD SYNC...
- Page 49 Operating the Tape Deck Using OSD Recording from CD manually using the Click P, in the REC EDIT control panel, to release recording pause. Recording starts. controls on the speaker You can also start recording by clicking ( or 9. REC EDIT RESET DOLBY NR...
-
Page 50: Recording From Cd: Selecting Tape Length Automatically (Tape Select Edit)
Operating the Tape Deck Using OSD Press REC. Recording from CD: Selecting The r (REC) and P (pause) indicators light up and the deck stands by for recording. Tape Length Automatically The direction indicators (9 or () light to (tape select edit) indicate which sides of the cassette you can use to record. - Page 51 Operating the Tape Deck Using OSD To view the order of the programed tracks Click d repeatedly to select how to record the Click > or .. tape. To record Click to display TAPE SELECT – 8 – 12 One side of the tape –...
-
Page 52: Recording From Cd: Specifying Track Order (Program Edit)
Operating the Tape Deck Using OSD Click d repeatedly to select how to record the Recording from CD: Specifying tape. Track Order (program edit) To record Click to display You can match the total recording time to the tape One side of the tape length while making a program. -
Page 53: Recording From The Radio
Operating the Tape Deck Using OSD To return to the previous menu Recording From the Radio Click RETURN or press RETURN on the remote control. You can record from the tuner onto a tape. Use TYPE I To exit to the main menu. (normal) or TYPE II (CrO2) tapes for recording. -
Page 54: Recording From Other Components
Operating the Tape Deck Using OSD Press DOLBY NR repeatedly to select DOLBY NR Recording From Other B or C when you want to reduce tape hiss in low- level, high- frequency signals. Components Press REC. You can record the audio signals from components The r (REC) and P (pause) indicators light up connected to the VIDEO 1 and VIDEO 2 IN jacks onto a and the deck stands by for recording. - Page 55 Operating the Tape Deck Using OSD Recording from other components using Click d repeatedly to select how to record the tape. the controls on the speaker REC EDIT RESET DOLBY NR DOLBY 0000 § § EXIT REC EDIT To record Click to display One side of the tape Both sides*...
-
Page 56: Inserting A Blank Space During Recording (Rec Mute)
Operating the Tape Deck Using OSD Press REC. Inserting a Blank Space During The r (REC) and P (pause) indicators light up and the deck stands by for recording. Recording (rec mute) The direction indicators (9 or () light to indicate which sides of the cassette you can use to You can insert a blank space of four seconds between each record. - Page 57 Operating the Tape Deck Using OSD Inserting a blank space during recording using the controls on the speaker While recording, press r REC at the position where you want to insert the blank space. The “r” indicator flashes and the tape runs without recording.
-
Page 58: Customizing The Function Menu
Additional Features Click the function button to be changed. Customizing the function menu INDEX SETTING You customize the function menu by specifying icons and names up to 9 characters long for each function VIDEO 1 VIDEO 2 button. TAPE Click FUNCTION in the main menu. TUNER Click INDEX. -
Page 59: Enjoying Two Sources At The Same Time
Additional Features To stop playing the SOUND source Enjoying Two Sources at the For TAPE or CD, Click p in the on screen control panel. For VIDEO 1 or 2, see the operating instructions supplied Same Time with the respective equipment for details. Use the procedure below to play two program sources To stop playing the VISUAL source at the same time (for example, to play a laser disc while... -
Page 60: Adjusting The Position Of The On-Screen Display
When you first turn on the system a demonstration START icon appears in the display. You can make fine adjustments to the overall position of the on-screen display control panel. Click FUNCTION in the main menu. SA-VA100 ON SCREEN Click SCREEN. START DEMONSTRATION... -
Page 61: Additional Information
Magnetic deposits have you have made the checks below, cord from the wall outlet, built-up on the record/ consult your nearest Sony dealer. then plug it back in. playback head.* Turn the power back on. *See “Maintenance.”... -
Page 62: Maintenance
Additional Information To save a tape permanently You connected an external The micro-computer is reset and the To prevent a tape from being center speaker, but the radio station presets and tuner index accidentally recorded over, break off Dolby Pro Logic Surround are restored to the factory settings. -
Page 63: Specifications
4-track 2-channel stereo Screw (12) Optical Pick-up Block with 7 mm Frequency response (DOLBY NR OFF) 40 – 13,000 Hz (±3 dB), using Sony aperture. Design and specifications are subject to TYPE I cassette Wavelength change without notice. -
Page 64: Glossary
Additional Information • 3 CH LOGIC mode Sound field Glossary Select 3 CH LOGIC mode if you have front Sound pattern produced by a sounding source or sources in a given environment due and center speakers but no rear speaker. The sound of the rear channel is output to direct and reflected sounds and the acoustics of the environment. -
Page 65: Index
54-56 Hookups from the radio 53-54 AC power cord 9, 10 Remote AM/FM antennas 9, 10 controlling Sony speakers 9 components 23-24 TV/VCRs 11-12 inserting batteries 7 operations without TV I, J, K 27, 32, 33, 34, 36, 37, 43,... - Page 66 Sony Corporation Printed in Malaysia...