Table of Contents
Advertisement
Advertisement
Table of Contents

Related Manuals for Tannoy QFLEX


Summary of Contents for Tannoy QFLEX
- Page 1 u s e r m a n u a l...
-
Page 2: Safety Warning
The feed for each QFlex must be protected by a fuse or circuit breaker rated at no more than 10A. It must be possible to isolate the feed to each QFlex by means of a double pole switch with a minimum of 3mm con... - Page 3 QFlex est conçu pour et est destiné à une utilisation excluant un usage domestique. L’alimentation secteur doit être assurée au moyen d’un câblage non volant. L’alimentation de chaque QFlex doit être protégée par un fusible ou coupe-circuit d’un calibre n’excédant pas 10A.
-
Page 4: Table Of Contents
Layout SOFTWARE INSTALLATION & SETUP Menus 3.1 BeamEngine Programme Toolbar 3.2 MatLab Runtime Library MCR Communications 3.3 QFlex BeamEngine Application Launching a Panel 3.4 Updates Controlling Devices – a quick overview 3.5 Uninstalling Parameter Synchronisation INSTALLING THE MATLAB RUNTIME LIBARARY... - Page 5 HARDWARE CONFIGURATION (GENERAL INFORMATION) ASSEMBLY INSTRUCTIONS 10.1 QFlex 8 & QFlex 16 Assembly 10.2 Wall Bracket Mounting Centres - QFlex 8 & QFlex 16 10.3 QFlex 24 & QFlex 32 Assembly 10.4 Wall Bracket Mounting Centres - QFlex 24 & QFlex 32 10.5 QFlex 40 Assembly...
-
Page 6: Introduction
Congratulations on the purchase of your new QFlex loudspeaker. QFlex is a range of self powered, digitally steerable loudspeaker arrays. With state of the art algorithms and dense physical spacing of transducers, QFlex is the first product of its kind to realize full range beam steering capabilities, producing class leading performance for both vocal and music applications. -
Page 7: Beamengine Programme
Restricted User Rights: If you operate your computer under restricted user rights then it is best to install the \MatLab Library first and then to install QFlex BeamEngine. If you currently work with administrator rights on your PC the order of installation does not matter. -
Page 8: Installing The Matlab Runtime Libarary
4 INSTALLING THE MATLAB RUNTIME LIBARARY Having downloaded the software, double click on the MCRInstaller_v77.exe The following window will appear – Click on “Run” to start the installer – Choose the setup language and click ‘Ok’ to start the InstallShield wizard The InstallShield window will appear –... - Page 9 Approve the suggested file location by clicking on ‘Next’ Click on ‘Install’ to begin the Installation The installation will begin. Due to the file size this may take some time Click ‘Finish’ to complete the installation. There is no need to start this programme as it resides behind the BeamEngine programme.
-
Page 10: Installing The Beamengine Application
Having downloaded the software, double click on the QFlex_vXXXX.exe The following window will appear. The QFlex Setup wizard will start; click ‘Next’ to continue Accept the terms of the licence agreement to continue with the installation. Click ‘Next’ to continue. - Page 11 Click on ‘Install’ to begin the Installation Check ‘Launch QFlex’ if you wish to begin using the software immediately. Click ‘Finish’ to complete the setup...
-
Page 12: Using Beamengine
6 USING BEAMENGINE Click on the QFlex icon which the installer left on your desktop. On the very first run of the program you will be prompted to select your preferred units of measurement. These settings can be modified at any time in the menu options. -
Page 13: Menu
Print a detailed project sheet. This includes Parameters, Project Notes & graphs. ‘Export’ generates a screenshot of your current project (.jpg) Edit From here you select your QFlex Model (Keyboard shortcut – F8) Add menu item Delete menu item Processing Optimize –... - Page 14 Which QFlex system you specify depends on a number of criteria:- Distance: Farther areas you wish to reach will require a larger QFlex column.Typically, as a rule of thumb a QFlex 16 will be used to distances of 20m(66ft), and a QFlex 48 in excess of 80m(260ft) Low Frequency Control: The larger the QFlex column, the more effective control at lower frequencies can be achieved.
-
Page 15: Laying Out Venue Planes
6.2 LAYING OUT VENUE PLANES 1. Click on ADD to create a new venue plane(s) 2. Choose SPL to target this particular area from the loudspeaker. NB. Other Options here are Silent – This is basically a probe to view the out of beam attenuation on the SPL map. Don’t Care - In the straight forward default case the steering algorithm will aim for silence in all unspecified directions, the user can specify areas where avoiding areas does not matter, for example, areas of high absorption. -
Page 16: Optimize Results
13. Optimize: Will generate the steering algorithm based on the supplied information. 6.3 OPTIMIZE RESULTS 1. Resultant Beam based on target data. From here you can save the steering file and upload to the QFlex hardware from the VNET software. -
Page 17: Adding Additional Venue Items
6.4 ADDING ADDITIONAL VENUE ITEMS 1. Here we have added a second venue plane, in this case a balcony. BeamEngine will automatically target the second venue plane (no need to specify opening angles or steering angles). Note that the intensity of the second beam has been manually increased to mach the SPL of the first venue plane. -
Page 18: Probes
When you are ready to save your steering file, click on the ‘Steering File’ tab. The name of the file automatically defaults to the QFlex model you are using. In this case ‘QFlex 32.bef’. A steering file is saved for each module in the array and given an individual number. -
Page 19: Balloon Data
EASE™ and CATT Acoustic™ Where more than one QFlex array is deployed in an installation it may be necessary or demanded to carry out a more resolute acoustical analysis of the room. To properly evaluate QFlex coverage in 3D you can export a configuration file from BeamEngine which can be used in Ease™... -
Page 20: Beamengine - Frequently Asked Questions
For effective vocal reinforcement in venues with very long reverberation times, do not be tempted to use too small an array. A QFlex 16 has effective steering control above 700Hz.The content of many vowel sounds occur below 700Hz. If the RT60 is particularly high, consider using a larger QFlex array. -
Page 21: Installing Vnet Software (Podware)
7 INSTALLING VNET SOFTWARE (PODWARE) The latest version of Podware can be found at www.tannoy.com. Any new updates will automatically overwrite any existing versions. 2. Select your destination Folder. Click <Next> 1. Having downloaded the software, double click on the ‘Setup.exe icon. The welcome screen will appear. -
Page 22: Using Vnet Software (Podware)
8 USING VNET SOFTWARE (PODWARE) Podware is a software package running under PC Windows for setting up and controlling any Tannoy VNET device. It is a clean Object Oriented package using the latest development technologies yielding intuitive ease of use and all the features you have come to expect and more. -
Page 23: Menus
8.3 MENUS The menu system is arranged like so: File Open - opens a file which contains parameters for the selected device Save - saves the current settings for the selected device in the current file name Save As - saves the current settings for the selected device under a new file name Load Factory Settings –... -
Page 24: Toolbar
We cannot guarantee that all adaptors will work correctly however. Please consult your dealer for recommended adaptors. It is strongly recommended that you use the dedicated Tannoy USB/232 interface (Tannoy part number 8001 4450). The user manual & drivers for this device can be found at www.tannoy.com. -
Page 25: Launching A Panel
If PodWare becomes unable to communicate with a device for some reason whilst on-line (such as a break in the network cable), the corresponding icon for it in the Devices node of the Tree will appear in red, indicating that control and monitoring on that device is invalid. -
Page 26: Controlling Devices - A Quick Overview
8.7 CONTROLLING DEVICES – A QUICK OVERVIEW When online the tree menus will show the connected VNET speakers on the network. Double clicking on the model on the tree view will open the control panel for each respective device. Each open panel will also appear on the tree view under panels . -
Page 27: Device Context Menu
8.12 DEVICE CONTEXT MENU By right-clicking on the node of a device in the Tree, a ‘context menu’ will appear, providing you with the following possible actions: Launch Panel – Launches the control panel for this device Rename Device – Allows the Device Name to be changed Update Firmware - Update firmware in this device (See Device Firmware) Locate Device –... - Page 28 The Logs area contains graphs of events against time, recording events over a period of up to three days. Since the loudspeaker cannot record any events whilst powered-off, breaks in a log due to power-downs are indicated by a discontinuity symbol ‘||’ in the log. The events recorded are: Thermal, which is the used thermal capacity, Amplifier Protect Gain, which is a measure of how much the loudspeaker is ‘dimming’...
-
Page 29: Loading Steering Data
8.14 LOADING STEERING DATA Steering Files are generated in the BeamEngine software package (See Using BeamEngine) The steering properties of the loudspeaker may be adjusted by loading a ‘Beam Engine File’ (*.bef) in the Setup tab in the main control panel. When the ‘Open File’ button is clicked, a dialogue will allow you to load a new .bef file. If there is more than one loudspeaker ‘box’... -
Page 30: Monicons
8.15 MONICONS Monicons are a condensed representation of a device, which show some monitoring status information, but few or no controls. Since these are quite small, they are a convenient way of arranging the devices on the main window in a manner meaningful to the application. -
Page 31: Filter Response Panels
Buttons Buttons generally have two states; depressed (active) and non-depressed (inactive). Generally, the button will apply the condition that is labelled when it is depressed. The space bar may be used to activate a button which is in focus. Radio buttons These are laid out in mutually exclusive groups to select one of a number of options. -
Page 32: Off-Line Operation
Tannoy. When you load factory settings into QFlex, the current user settings will be preserved since the factory settings will only overwrite the factory DSP settings rather than the User DSP settings. Depending on what type of file is supplied, the factory file may or may not include steering data. -
Page 33: Operating Mode
8.22 OPERATING MODE A control input on the back of the loudspeaker allows you to select between two different sets of DSP settings (1 and 2) – see system connectivity. The currently active Operating Mode is indicated by the ‘Active’ box in the OpMode group box in the PodWare panel. - Page 34 Input A muted.
-
Page 35: Device Properties
Device). These are as follows: Model Name: The Model Name/Number the type of device is usually known as (e.g. “QFlex 16 Master”) Device Name: The name given to this particular device by the user (e.g. “Left Proscenium”).This can usually be changed in a control panel, or in the Device Context Menu (seeDevice Context Menu) Settings Name: The name given to the current set of parameter settings (e.g. -
Page 36: Device Firmware
8.24 DEVICE FIRMWARE Firmware is the software which runs inside the device. Most products which are controllable from PodWare have firmware which can be updated by the user. Firmware is uniquely identified by two things: 1. The Firmware Model Number. This is not the model number of the product, but a number which uniquely describes the type of firmware used by the device. -
Page 37: Hardware Configuration (General Information)
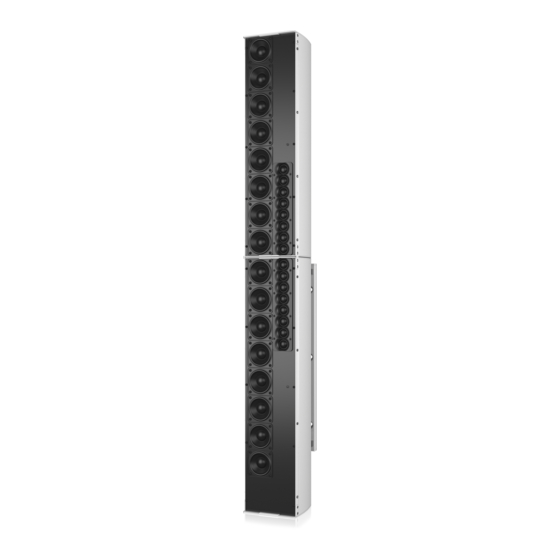
All of the required joining hardware and bracketry is included with each QFlex purchase. If you have purchased a QFlex 8 or a QFlex 16 there are no connecting plates or other joining hardware. Each QFlex carton is marked to show each modules position in the array. - Page 38 QFlex 48 8004 0150 A QFlex array will consist of either just a master unit (QFlex 8 or 16) or a master unit with up to three additional slave units (QFlex 48) The master unit will always be positioned at the bottom of any speaker column and will be slightly longer to accommodate the connectors and power indicator.
-
Page 39: Assembly Instructions
10.1 QFLEX 8 & QFLEX 16 ASSEMBLY With a QFlex 8 and QFlex 16 all you need to do is remove the loudspeaker from the box and fix the wall bracket as shown below. The wall bracket can be hinged on the left or right pivot points. 3mm Allen grub screws allow the QFlex to be locked at the desired horizontal angle. -
Page 40: Wall Bracket Mounting Centres - Qflex 8 & Qflex
10.2 WALL BRACKET MOUNTING CENTRES - QFLEX 8 & QFLEX 16 QFlex must be wall mounted with the separately ordered mounting kit. The Wall bracket should be fitted to the wall first. When you are satisfied with the mounting locations, fix the bracket to the wall using the instructions supplied with the bracket and ensuring that the installation complies with all local regulations. -
Page 41: Qflex 24 & Qflex 32 Assembly
QFlex to be locked at the desired horizontal angle. Having the hinge points on either side of the QFlex column allow the loudspeaker to be rotated at 90 degrees to the mounting structure allowing easy access to the input connector panel. -
Page 42: Wall Bracket Mounting Centres - Qflex 24 & Qflex
10.4 WALL BRACKET MOUNTING CENTRES - QFLEX 24 & QFLEX 32 QFlex must be wall mounted with the separately ordered mounting kit. The Wall bracket should be fitted to the wall first. When you are satisfied with the mounting locations, fix the bracket to the wall using the instructions supplied with the bracket and ensuring that the installation complies with all local regulations. -
Page 43: Qflex 40 Assembly
QFlex 40 to be locked at the desired horizontal angle. Having the hinge points on either side of the QFlex column allow the loudspeaker to be rotated at 90 degrees to the mounting structure allowing easy access to the input connector panel. -
Page 44: Wall Bracket Mounting Centres - Qflex
10.6 WALL BRACKET MOUNTING CENTRES - QFLEX 40 QFlex must be wall mounted with the separately ordered mounting kit. The Wall bracket should be fitted to the wall first. When you are satisfied with the mounting locations, fix the bracket to the wall using the instructions supplied with the bracket and ensuring that the installation complies with all local regulations. -
Page 45: Qflex 48 Assembly
The wall brackets can be hinged on the left or right pivot points. 3mm Allen grub screws allow the QFlex 40 to be locked at the desired horizontal angle. The installer must ensure that the mounting surface is capable of safely and securely... -
Page 46: Wall Bracket Mounting Centres - Qflex
10.8 WALL BRACKET MOUNTING CENTRES - QFLEX 48 QFlex must be wall mounted with the separately ordered mounting kit. The Wall bracket should be fitted to the wall first. When you are satisfied with the mounting locations, fix the bracket to the wall using the instructions supplied with the bracket and ensuring that the installation complies with all local regulations. -
Page 47: System Connectivity
The connectors will not be visible when installation is complete. Connections are accessed by the removal of the lower rear access plate on a QFlex master which will require the use of a Philips screwdriver. -
Page 48: Audio Connections
The USB to VNET (RS485) interface operates on a shared bus so that a single computer can control any QFlex loudspeaker on the bus, and the computer may gather status information from any device on the bus. Each module contains a unique address so that no user input will be required to configure network nodes. - Page 49 IMPORTANT: Always run a signal ground with RS-485 Connections from the USB to VNET device to the QFlex speaker is as follows:- From USB – VNET Device RJ45...
-
Page 50: Mains Power
QFlex is designed and intended for use in non-domestic situations. Mains power is to be supplied from a permanent hard wired feed. The feed for each QFlex must be protected by a fuse or circuit breaker rated at no more than 10A. It must be possible to isolate the feed to each QFlex by means of a double pole switch with a minimum of 3mm contact separation. -
Page 51: Control Inputs (System Integrity & Emergency Provision)
16 INDICATORS There is a dim green LED on the back of each QFlex master unit (master) that will illuminate if the PSU is running. All modules within a QFlex product have a blue ‘LOCATE’ LED visible from the front of the unit, operating as follows : a. -
Page 52: Service Parts
17 SERVICE PARTS Driver Kit - Type 0803 (3” driver) - 7900 1075 Driver Kit - Type 1004 (4” driver) - 7900 1076 Tweeter Array - 7900 1077 Amplifier Master 8 Way - 7900 1078 Amplifier Master 16 Way - 7900 1079 Amplifier Slave 8 Way - 7900 1080 Amplifier Slave 16 Way - 7900 1081 Grille 8 Way - 7900 1082... -
Page 53: Specifications
18 SPECIFICATIONS QFlex 8 QFlex 16 QFlex 24 Configuration 4” LF 3” LF 1” HF No. of Amp Channels 100W(RMS) @ 4 Ohms Vertical Dispersion Variable between 10 - 100 degrees (Asymmetric & multiple beams may also be generated) Frequency Range... - Page 54 18 SPECIFICATIONS (CONTINUED) QFlex 32 QFlex 40 QFlex 48 Configuration 4” LF 3” LF 1” HF No. of Amp Channels 100W(RMS) @ 4 Ohms Vertical Dispersion Variable between 10 - 100 degrees (Asymmetric & multiple beams may also be generated)
-
Page 55: Warranty
No maintenance of the QFlex loudspeakers is necessary. As part of the MUSIC Group, Tannoy is committed to providing the highest quality products, service and user experience for our customers. One element of this commitment is our after sales support which now incorporates our extended Limited Warranty. - Page 56 . c o m Tannoy operates a policy of continuous research and development. The introduction of new materials or manufacturing methods will always equal or exceed the published specifications. All specifications are subject to change without notice.
Need help?
Do you have a question about the QFLEX and is the answer not in the manual?
Questions and answers