
Related Manuals for Harris M5300


Summary of Contents for Harris M5300
-
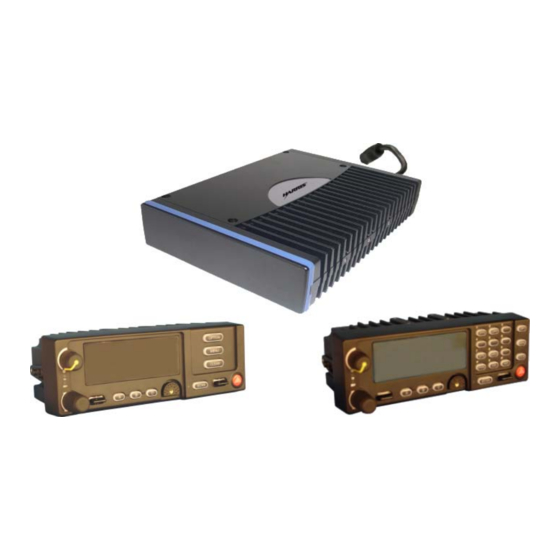
Page 1: Mobile Radios
Installation and Product Safety Manual MM-015371-001 Rev. C, Sep/09 M5300 and M7300 Mobile Radios with CH-721 Control Heads VHF and 800 MHz Motorcycle Applications... - Page 2 Harris Corporation at any time and without notice. Such changes will be incorporated into new editions of this manual. No part of this manual may be reproduced or transmitted in any form or by any means, electronic or mechanical, including photocopying and recording, for any purpose, without the express written permission of Harris Corporation.
-
Page 3: Table Of Contents
REGULATORY ..........................14 INTRODUCTION ............................15 GENERAL DESCRIPTION ....................... 15 3.1.1 VHF-Band M7300 Radio ..................... 15 3.1.2 800 MHz-Band M5300 Radio ....................15 3.1.3 Dual-Band 700 and 800 MHz M7300 Radio................ 15 3.1.4 General Information ......................16 RELATED PUBLICATIONS......................18 REPLACEMENT PARTS ........................ - Page 4 BOX)..............................56 11.3 HEADSET OPERATION ........................58 12 MICROPHONE ATTACHMENT ......................59 13 OPTIONAL CABLES ..........................60 13.1 M5300/M7300 OPTION CABLE CA-012349-001 ................60 13.2 HEADSET ADAPTER CABLE CA-012349-002................63 13.3 ACCESSORY CABLE 19B802554P24....................64 13.4 SERIAL PROGRAMMING CABLES CA-013671-010 AND -020 ...........65 13.5 CH-721 OPTION CABLE CA-011854-001..................66 13.6 CH-721 SERIAL PROGRAMMING CABLE CA-104861..............67...
- Page 5 Figure 5-3: M5300/M7300 Mobile Radio inside Weather-Resistant Motorcycle Radio Case......30 Figure 5-4: M5300/M7300 Mobile Radio — Front and Rear Views (Radio Removed from Case) ....31 Figure 6-1: Assembling, Mounting and Installing the Radio Case and Brackets ..........34 Figure 6-2: Alternate Mounting for Adapter Bracket..................
-
Page 6: Regulatory And Safety Information
Failure to comply with these precautions or with specific warnings elsewhere violates safety standards of design, manufacture, and intended use of the product. Harris Corporation assumes no liability for the customer's failure to comply with these standards. -
Page 7: Federal Communications Commission Regulations
COMPLIANCE WITH RF EXPOSURE STANDARDS The M5300 and M7300 two-way mobile radios are designed and tested to comply with a number of national and international standards and guidelines regarding human exposure to RF electromagnetic energy. The radios comply with the IEEE and ICNIRP exposure limits for occupational/controlled RF exposure environment at duty-cycle times of up to 50% (50% transmit, 50% receive), and they are authorized by the FCC for occupational use. -
Page 8: Mobile Antennas
4 in this manual (begins on page 20) and/or Harris’ Products and Services Catalog. 1.3.3 Contact Information For additional information on RF exposure and other information, contact Harris using one of the contact links listed in Section 3.4 on page 19. -
Page 9: Occupational Safety Guidelines And Safety Training Information
Always use Harris-authorized accessories (antennas, control heads, speakers/mics, etc.). Use of unauthorized accessories can cause the FCC RF exposure compliance requirements to be exceeded. The information listed above provides the user with information needed to make him or her aware of a RF exposure, and what to do to assure that this radio operates within the FCC exposure limits of this radio. -
Page 10: Safe Driving Recommendations
MM-015371-001, Rev. C within the interior of the vehicle, must conform to the National Fire Protection Association standard NFPA 58. This requires: The space containing the radio equipment must be isolated by a seal from the space containing the LP gas container and its fittings. ... -
Page 11: Operating Tips
MM-015371-001, Rev. C The FCC requires self-identification at certain specific times by means of call letters. Refer to the rules that apply to the particular type of operation for the proper procedure. No changes or adjustments shall be made to the equipment except by an authorized or certified electronics technician. -
Page 12: Specifications
MM-015371-001, Rev. C SPECIFICATIONS GENERAL 2.0 x 6.9 x 9.2 inches (5.1 x 17.5 x 23.4 centimeters) Dimensions, Remote-Mount Mobile Radio: (Height x Width x Depth) (Does not include space required for mounting bracket and cables at rear of radio) 2.4 x 6.9 x 3.9 inches (6 x 17.5 x 10 centimeters) Dimensions, Control Head: (Height x Width x Depth) - Page 13 800 MHz RF Channels: 5 to 35 watts (see WARNING below) Motorcycle applications of the M5300 and M7300 mobile radios are limited to 20 watts of maximum transmit RF output power. Refer to Section 1.2 (page 6), Section 5.4 (page 32), and Section 15 (page 69) for additional information.
-
Page 14: Regulatory
MM-015371-001, Rev. C OpenSky Compressed Voice 2400 bps Relative Data Rate: REGULATORY FCC Type Acceptance: VHF Radio: OWDTR-0055-E 700 & 800 MHz Radio OWDTR-0051-E Part 15 and Part 90 Applicable FCC Rules: Industry Canada Certification: VHF Radio: 3636B-0055 700 & 800 MHz Radio 3636B-0051 RSS-119 Applicable Industry Canada Rules:... -
Page 15: Introduction
TIA/EIA-603 conventional land-mobile radio standard. 800 MHz operating bands of the 800 MHz M5300 mobile radio include 806 to 824 MHz repeater input band (mobile transmit) and the 851 to 869 MHz band used for repeater output and talk-around communications. -
Page 16: General Information
The radio is shown in the case in Figure 5-3 on page 30. Control heads used with the M5300 and M7300 mobile radios include the CH-721 Scan and the CH-721 System model control heads. See Figure 8-1 through Figure 8-3 (pages 40 through 41). Both heads... - Page 17 Digital Voice Systems, Inc. When operating on an OpenSky radio network, AMBE gives an M5300/M7300 radio the ability to provide exceptional voice quality via the limited bandwidth of the radio frequency path, even when the received RF signal is weak (i.e., even in “fringe” areas). AMBE is...
-
Page 18: Related Publications
M7300 radio via an RF channel if it is equipped with the Over-the-Air Rekeying (OTAR) option. As of the publication of this manual, the OTAR option is not available for the M5300 radio. Harris recommends the buyer use only a Harris-authorized representative to install and service this product. -
Page 19: Replacement Parts
TECHNICAL ASSISTANCE Should the mobile radio or control head require repair, or if there are questions or concerns about the installation of this equipment, contact the Harris Technical Assistance Center (TAC) using the following telephone numbers or e-mail address: ... -
Page 20: Unpacking And Checking The Equipment
If any are noted, contact the Customer Resource Center immediately (see page 19 for contact information) to discuss and arrange the return of the equipment to Harris for replacement. Any unauthorized attempts to repair or modify this equipment will void CAUTION the warranty and could create a safety hazard. - Page 21 MM-015371-001, Rev. C CH-721 Scan Control Head, part number CU23218-0002 (M5300 catalog number MAHK-NCP9E) (M7300 catalog number MAMW-NCP9E) CH-721 System Control Head, part number CU23218-0004 (M5300 catalog number MAHK-NCP9F) (M7300 catalog number MAMW-NCP9F) Standard Microphone, part number MC-101616-041 (Included with catalog numbers MAHK- NMC7Z and MAMW-NMC7Z) ...
-
Page 22: Installation Kits
INSTALLATION KITS Four (4) Motorcycle Installation Kits are available for M5300 and M7300 motorcycle radio installations. Two (2) are for M5300 motorcycle radio installations, and two (2) are for M7300 motorcycle radio installations. The kits are listed in the following table:... - Page 23 MM-015371-001, Rev. C (Cont.) Table 4-2: Contents of M5300/M7300 Motorcycle Installation Kits ITEM QTY. PART NUMBER DESCRIPTION ILLUSTRATION 350A1396G2 Kit, Hardware, for Motorcycle Radio Case, Brackets, and Antenna. 350A1396G4 Kit, Hardware, Motorcycle Adapter Bracket Mounting (4 shock mounts). ...
- Page 24 M5300 radio and Motorcycle Installation Kit MAMW-NZN7X for the M7300 radio also include Accessory Cable 19B802554P24 (image shown below). When used with the M5300 and M7300 mobile radios, this cable provides connections for a headset and/or portable radio; see Section 11 for additional information. In other...
-
Page 25: Antennas
MM-015371-001, Rev. C ANTENNAS Table 4-3: Antennas for Motorcycle Applications of the M5300 and M7300 Mobile Radios PART NUMBER DESCRIPTION ILLUSTRATION LE-OM150K.125/TNC Antenna, 136 to 174 MHz High- Impedance Voltage/End-Fed; 2.5 dBd Gain LE-OM806HDBKTNCDS Antenna, 800 MHz High-Impedance Voltage/End-Fed OPTIONS AND ACCESSORIES... -
Page 26: Table 4-5: Options And Accessories For Ch-721 Control Heads
MM-015371-001, Rev. C Table 4-4: Additional Options and Accessories for M5300 and M7300 Mobile Radios PART NUMBER DESCRIPTION ILLUSTRATION CN-014756 Connector, RF; TNC Male Crimp- Type for RG58U, RG58A/U and RGU400 Coaxial Cable Table 4-5: Options and Accessories for CH-721 Control Heads... -
Page 27: Materials Not Supplied
MM-015371-001, Rev. C Table 4-6: Headset-Related Options for Use with M5300 and M7300 Mobile Radios CATALOG NUMBER DESCRIPTION SM-KA-13 Kit, Helmet Headset, External-Mount with One Speaker and Noise-Canceling Microphone SM-KA-23 Kit, Helmet Headset, External-Mount with Two Speakers and Noise-Canceling Microphone... -
Page 28: Planning The Installation
MM-015371-001, Rev. C PLANNING THE INSTALLATION GENERAL INFORMATION Figure 5-1 on page 29 illustrates a typical M5300/M7300 mobile radio motorcycle installation. Before starting, plan the installation carefully so it will: Be safe for the motorcycle operator; Allow convenient access by the operator, as applicable (i.e., the control head);... -
Page 29: Figure 5-1: Typical Motorcycle Installation (Full View From Rear)
MM-015371-001, Rev. C CH-721 Mobile Control Head Speaker Mobile Antenna Weather-Resistant Case with M7300 Microphone Mobile Radio Inside Figure 5-1: Typical Motorcycle Installation (Full View from Rear) Weather-Resistant Mobile Case with M7300 Antenna Mobile Radio Inside Case/Antenna Motorcycle’s Bracket Rear License Plate Adapter Bracket Motorcycle’s... -
Page 30: Figure 5-3: M5300/M7300 Mobile Radio Inside Weather-Resistant Motorcycle Radio Case
Weather-Resistant Case (Top; Shown Opened) M7300 Mobile Radio Square hole in bottom Weather-Resistant floor of case Case (Bottom) Mobile Antenna Case/Antenna Alternator Whine Bracket Reject Filter (Adapter Bracket Not Shown) Figure 5-3: M5300/M7300 Mobile Radio inside Weather-Resistant Motorcycle Radio Case... -
Page 31: Locating Components
(2 places) DC Power Cable (with 3-Pin Connector) Figure 5-4: M5300/M7300 Mobile Radio — Front and Rear Views (Radio Removed from Case) LOCATING COMPONENTS Plan the mounting locations of all components (radio, control head, antenna, and cables) and determine the routes for all wiring and cables. Particularly consider the connection of the radio for planning purposes. -
Page 32: Dc Power Considerations
DC power input lead and for its switched ignition sense power input. DC conditioning can be accomplished by a noise filter or DC CAUTION isolation equipment such as Harris part number FL-018314-001 or FL-018314-002, or similar units equal specifications. Contact TAC for additional information. -
Page 33: Radio Mechanical Installation
MM-015371-001, Rev. C RADIO MECHANICAL INSTALLATION Unless otherwise noted, all installation procedures in this manual should be performed in the order presented. INSTALLING THE ADAPTER BRACKET Install the Adapter Bracket by attaching it to the motorcycle’s radio bracket as follows: 1. -
Page 34: Figure 6-1: Assembling, Mounting And Installing The Radio Case And Brackets
MM-015371-001, Rev. C shaped holes in the corners of the Case/Antenna Bracket. The bracket’s triangle-shaped antenna mounting surface must face to the rear of the motorcycle. 4. Open-up the case to expose the interior floor in its bottom-half. 5. As illustrated in Figure 6-1, place the case over the Case/Antenna Bracket, and onto the -inch studs, passing the studs through the holes in the floor of the case. -
Page 35: Installing The Radio In The Case
MM-015371-001, Rev. C MOTORCYCLE’S RADIO BRACKET (NOT SUPPLIED) (Made From AA01-MAMW, Sh. 2, Rev. -) Figure 6-2: Alternate Mounting for Adapter Bracket INSTALLING THE RADIO IN THE CASE 6.3.1 Install the Radio’s Mounting Bracket Install the radio’s mounting bracket into the weather-resistant motorcycle radio using the following procedure. -
Page 36: Figure 6-3: Installing The Radio's Mounting Bracket And Filter Into The Motorcycle Radio Case
MM-015371-001, Rev. C DETAIL VIEWS (Made From AA01-MAMW, Sh. 1, Rev. –) Figure 6-3: Installing the Radio’s Mounting Bracket and Filter into the Motorcycle Radio Case... -
Page 37: Antenna Installation
7.1.1 Install the Mobile Antenna Table 4-4 (page 25) lists the mobile antenna available for M5300 and M7300 mobile radio motorcycle installations. This antenna is a voltage/end-fed high-impedance antenna that provides the proper VSWR and radiation pattern without the use of a ground plane. Typical antenna gain without a ground plane is 0 dBd. -
Page 38: Route Cable, Crimp-On Tnc Rf Connector And Connect It To The Radio
MM-015371-001, Rev. C 4. Pick a value of N then use the following formula to calculate an antenna cable length that will result in a cable length long enough for the installation: (N x ½ in inches + ¼ in inches) x 0.66 = required cable length in inches Example: Choose N = 7. - Page 39 MM-015371-001, Rev. C damage, dirt, and/or metal shavings which may be generated during the mechanical and electrical installation of the radio. Temporarily tying the connector and cable-end within a small plastic bag is recommended.
-
Page 40: Control Head Mechanical Installation
MM-015371-001, Rev. C CONTROL HEAD MECHANICAL INSTALLATION GENERAL INFORMATION The radio must be connected to a control head to provide the operator-to-radio interface. Two different control heads are available — the CH-721 Scan model and the CH-721 System model. See Figure 8-1 and Figure 8-2 respectively. -
Page 41: Mounting The Control Head
MM-015371-001, Rev. C the radio is receiving a call and one is the transmitter-enabled indicator that lights when the radio is transmitting. The front panel also has an ambient light sensor for automatic display dimming. Serial Port Connector (DB-9) CAN Port Connectors (2 places) Speaker Audio... -
Page 42: Figure 8-4: Typical Ch-721 Control Head Installation On A Motorcycle
MM-015371-001, Rev. C Have a relatively easy access for servicing. CH-721 Control Head Microphone Control Head Motorcycle’s Mounting Bracket Left Handlebar FM24841-0001 (Partial view) (Included with Mounting Bracket Kit KT-008608) Control Head Adapter Bracket (Not Supplied) Figure 8-4: Typical CH-721 Control Head Installation on a Motorcycle (Using the Standard U-Shaped Mounting Bracket) Pedestal shown For a “hanging”... -
Page 43: Control Head Adapter Bracket (Not Supplied)
MM-015371-001, Rev. C 8.2.2 Control Head Adapter Bracket (Not Supplied) In some cases, a control adapter bracket (not supplied) may be required to attach the supplied U-shaped control head mounting bracket (or the optional mounting pedestal) to the motorcycle. Control head adapter brackets for all makes and models are not available from the factory. - Page 44 MM-015371-001, Rev. C 6. Verify the mounting bracket is held firmly mounted. Firm mounting prevents unreasonable vibration, which could damage the control head and/or cause its cable connections to loosen. 7. Slide the control head into the bracket, placing the two pegs protruding from its left and right sides into the respective round holes in the bracket’s two side “ears.”...
-
Page 45: Speaker Installation
MM-015371-001, Rev. C SPEAKER INSTALLATION 9.1.1 Selecting a Mounting Location Typically, the radio’s speaker is mounted on the motorcycle’s steering handlebars. The selected mounting location: Must be in a location that is safe for the motorcycle operator (e.g., so it does not interfere with steering and other motorcycle controls);... -
Page 46: Cable Connections
MM-015371-001, Rev. C 10 CABLE CONNECTIONS 10.1 DC POWER CONNECTIONS 10.1.1 Overview of On/Off Power Wiring Configurations Radio on/off power control is accomplished by the control head. In a standard installation, when the control head is turned on, it “wakes-up” the radio via data activity on the CAN link. The following power wiring configurations are supported: ... -
Page 47: Dc Power Cable And Main Fuse Holder Installation
DC conditioning can be accomplished by a noise filter or DC CAUTION isolation equipment such as Harris part number FL-018314-001 or FL-018314-002, or similar units equal specifications. Fusing must be placed in-line before any noise filter. Contact TAC for additional information. - Page 48 MM-015371-001, Rev. C structural part of the motorcycle’s frame, which could weaken the frame and cause it to crack. If possible, use an existing hole to ground the black wire. If an existing hole cannot be located, locate a non-structural metal area of the motorcycle that has a solid and stable ground connection to the motorcycle’s frame.
-
Page 49: Control Head Power Cable Installation
MM-015371-001, Rev. C Before making connections to the battery’s positive post, carefully disconnect the battery’s negative (ground) cable(s). This will prevent tools or other metallic objects which come in contact with the battery’s positive terminal from shorting to vehicle ground, causing sparks or even a fire or an explosion! When disconnecting the negative cable(s), cover/insulate the positive post if it is not already so a tool cannot short between the posts. - Page 50 MM-015371-001, Rev. C 4. Route the cable (within the tubing/loom/wrap) to the frame of the motorcycle. If the control head is mounted on the motorcycle’s handlebars, leave sufficient slack to allow for full handlebar steering/travel without any stretching of the cable. This length of the cable must be in tubing/loom/wrap.
- Page 51 MM-015371-001, Rev. C 10.1.4.2.1 Control Head and Radio Turn on with Vehicle’s Ignition Switch/Key With this wiring configuration, the control head and radio automatically turn on and off with the vehicle’s ignition switch/key. The white wire of the control head’s DC Power Cable is sometimes referred to as the “white ignition switch wire”...
-
Page 52: Can Cable Connections
MM-015371-001, Rev. C 4. Using an appropriate electrical terminal, connect this short white wire to unswitched 12-volt DC power source at or near the vehicle’s fuse box. 5. Cut another section of white wire from the cable. This wire must be long enough to reach from this fuse holder to the location of the panel-mounted on/off switch. -
Page 53: Figure 10-1: Can Terminators And Control Head-To-Radio Can Cable Connection
MM-015371-001, Rev. C 3. Make a service loop in the cable near the back of the control head. 4. Route the cable from the rear of the control head to the weather-resistant motorcycle radio case. If the control head is mounted on the motorcycle’s handlebars, leave sufficient slack in the cable to allow for full handlebar steering/travel without any stretching of the cable. -
Page 54: Headset/Portable Radio Connections
11.1 CONNECTING A HEADSET TO THE RADIO (WITHOUT BELT BOX) To connect a headset to the M5300/M7300 mobile radio (without using a belt box), follow this procedure: 1. Open the motorcycle radio case. 2. As illustrated in Figure 11-1 on page 55, connect the male 44-pin D-subminiature (DB-44) connector of Headset Adapter Cable CA-012349-002 to the female DB-44 connector on the rear of the radio. -
Page 55: Figure 11-1: Headset-To-Mobile Radio Connection
PTT Only PTT + CG Disable Pushbutton Switch Rocker Switch MOTORCYCLE NOTE: Required DC power, antenna and CAN cable connections are not indicated. Male M5300/M7300 DB-44 Mobile Radio (P1) (Top View) Headset Adapter Cable Accessory Cable Female Male CA-012349-002 19B802554P24... -
Page 56: Connecting A Headset/Portable Radio To The Mobile Radio (With Belt Box)
Y-cable. 11.2 CONNECTING A HEADSET/PORTABLE RADIO TO THE MOBILE RADIO (WITH BELT BOX) To connect a headset to the M5300/M7300 mobile radio if a belt box is not required, follow this procedure. 1. Open the motorcycle radio case. -
Page 57: Figure 11-2: Headset/Portable Radio-To-Mobile Radio Connection
PTT Only PTT + CG Disable Pushbutton Switch Rocker Switch MOTORCYCLE NOTE: Required DC power, antenna and CAN cable connections are not indicated. Male M5300/M7300 DB-44 Mobile Radio (P1) (Top View) Headset Adapter Cable Accessory Cable Female Male CA-012349-002 19B802554P24... -
Page 58: Headset Operation
MM-015371-001, Rev. C 8. Continue installation of the PTT switch by routing its small plug to the location near the round 8-pin waterproof connector of Accessory Cable 19B802554P24. 9. Connect the Y-cable’s 8-pin connector to the 8-pin connector of Accessory Cable 19B802554P24. Refer to Figure 11-2 as necessary. -
Page 59: Microphone Attachment
MM-015371-001, Rev. C 12 MICROPHONE ATTACHMENT There are several versions of microphones available for use with the radio. Each has a 17-pin flush-mount type connector that mates with the mic connector on the front panel of the control head. The mic’s connector includes a captive thumbscrew that secures it to the mic connector on the front panel of the control head. -
Page 60: Optional Cables
M5300/M7300 mobile radio installation. P2 is not used in motorcycle installations, which employ a remote-mount M5300/M7300 mobile radio. In this case, the speaker connection is made at the rear of the CH-721 control head as the audio amplifier in the control head drives the external speaker. -
Page 61: Table 13-1: M5300/M7300 Option Cable Ca-012349-001 Interconnections
In standard mobile applications of the radio, this connector provides NMEA-formatted GPS serial data connections for the external computer processing the NMEA-formatted GPS data received by the radio’s internal GPS receiver. Table 13-1: M5300/M7300 Option Cable CA-012349-001 Interconnections 44-PIN I/O CABLE... - Page 62 MM-015371-001, Rev. C Table 13-1: M5300/M7300 Option Cable CA-012349-001 Interconnections 44-PIN I/O CABLE SIGNAL NAME TO/FROM DESCRIPTION CONNECTOR P1 PIN External Tone Encode Audio. This connection is not used in a XTONEENC P4 pin 15 motorcycle installation. External Tone Decode Audio. This connection is not used in...
-
Page 63: Headset Adapter Cable Ca-012349-002
As described in Section 11 of this manual, Headset Adapter Cable CA-012349-002 is required to connect a headset or a portable radio (via belt box) to the M5300/M7300 mobile radio. The cable’s assembly diagram is shown in Figure 13-2 below. -
Page 64: Accessory Cable 19B802554P24
DB-25 connector, identified P1, mates to the female DB-25 connector of Headset Adapter Cable CA-012349-002. The cable’s round 8-pin waterproof connector, identified P2, mates to the motorcycle harness Y-cable. In non-M5300/M7300 applications, Accessory Cable 19B802554P24 also supports connections to an external siren and light system via its connector J1. -
Page 65: Serial Programming Cables Ca-013671-010 And -020
Serial Programming Cable CA-013671-010 (10 feet long) and CA-013671-020 (20 feet long) can be used to program and configure the M5300/M7300 mobile radio via a Personal Computer (PC). This cable has a female DB-9 connector on one end for connection to the PC’s serial port and a male DB-9 connector on the other end for connection to the serial port on the rear of the radio. -
Page 66: Ch-721 Option Cable Ca-011854-001
MM-015371-001, Rev. C 13.5 CH-721 OPTION CABLE CA-011854-001 CH-721 Option Cable CA-011854-001 can be used to connect optional equipment to the 25-pin D-subminiature (DB-25) connector on the rear of the CH721. This cable expands the connections available at the 25-pin connector to three (3) separate connectors. The cable’s assembly and wiring diagrams are shown in Figure 13-5 below. -
Page 67: Ch-721 Serial Programming Cable Ca-104861
MM-015371-001, Rev. C 13.6 CH-721 SERIAL PROGRAMMING CABLE CA-104861 Serial Programming Cable CA-104861 (5 feet) can be used to program and configure the CH-721 control head via a Personal Computer (PC). This cable has a female DB-9 connector on one end for connection to the PC’s serial port and a male DB-9 connector on the other end for connection to the serial port on the rear of the head. -
Page 68: Initial Power-Up Test
MM-015371-001, Rev. C 14 INITIAL POWER-UP TEST 1. At the radio’s main waterproof (HFB-type) fuse holder installed near the vehicle battery, insert the 15-amp AGC-type fuse that was included with the radio’s DC Power Cable. 2. Tie and stow all fuse holders at this location to prevent excess vibration/movement. 3. -
Page 69: Setting Maximum Transmit Power Level And Antenna Performance Tests
MM-015371-001, Rev. C 15 SETTING MAXIMUM TRANSMIT POWER LEVEL AND ANTENNA PERFORMANCE TESTS This section includes procedures to set the radio’s maximum transmit output power level and to verify the performance of the installation’s mobile antenna system. The respective subsections include: ... -
Page 70: Changing From Conventional To Opensky
MM-015371-001, Rev. C 15.1.2 Changing from Conventional to OpenSky 1. If necessary, apply power to the radio and turn it on. 2. Use the control head’s / Ramp Control to scroll through the menu until an OpenSky system’s name is displayed. 3. -
Page 71: Transmit Power Level Adjustments
EDACS/ProVoice, conventional, and P25 modes, and 19 watts in OpenSky mode. To meet the minimum safe lateral distances listed in Table 1-1 (page 8), an M5300/M7300 mobile radio used in a motorcycle application must programmed for a transmit RF output power level that does not exceed 20 watts. -
Page 72: Adjusting Maximum Transmit Output Power For Opensky Mode (Optional)
MM-015371-001, Rev. C On a per-system basis, set the maximum transmit output power level (in Watts) via the respective Power Level text box. Figure 15-1: Setting Maximum RF Output Power Level via RPM’s System Setup Dialog Box 15.3.3 Adjusting Maximum Transmit Output Power for OpenSky Mode (Optional) If necessary, follow this procedure to adjust the radio’s OpenSky (OTP) mode maximum transmit RF output power level. -
Page 73: Transmitting Into A Dummy Load
MM-015371-001, Rev. C 6. Send the following command to the radio via the terminal application: at***** <maximum transmit power> where <maximum transmit power> equals the required maximum transmit RF output power level in dBm. A space is required after at*****. For example, to set the maximum power to 10 watts (40 dBm), send at***** 40 to the radio. -
Page 74: Figure 15-2: Wattmeter Connections For Antenna System Tests
If problems persist, contact the Technical Assistance Center (see page 19). In a motorcycle application, do not use an M5300/M7300 mobile radio with a transmit RF output power level exceeding 20 watts. Doing so violates the maximum regulatory RF power rating specified for this application. -
Page 75: Transmitting Into The Mobile Antenna
MM-015371-001, Rev. C 15.5 TRANSMITTING INTO THE MOBILE ANTENNA 1. Connect the antenna cable from the vehicle-mounted antenna to the wattmeter as shown in Figure 15-2. 2. If not already, turn the radio on and set it to the required operating mode (based upon available radio programming and test equipment). - Page 76 MM-015371-001, Rev. C 12. If the wattmeter reading is within the range, record the value in the appropriate space on the data collection form near the end of this manual. If the wattmeter reading is outside the range, make sure the antenna is consistent with the specified frequency range of the radio.
-
Page 77: Test Performance Data Form
Here Enter the information requested on this data collection form. Clip this form and file it as a permanent record of the tested performance of the M5300/M7300 mobile radio installation. Mobile Radio Serial Number Antenna Make and Model Numbers... -
Page 78: Complete The Installation
MM-015371-001, Rev. C 16 COMPLETE THE INSTALLATION Double-check the following items before considering the installation completed: Verify all newly installed mechanical hardware is mounted securely and all respective mounting hardware is tight. Verify all electrical interconnections are connected properly and the associated connector attachment hardware is tight. -
Page 79: Warranty
MM-015371-001, Rev. C 17 WARRANTY A. Harris Corporation, a Delaware Corporation, through its Public Safety and Professional Communications (PS&PC) Division (hereinafter "Seller") warrants to the original purchaser for use (hereinafter "Buyer") that Equipment manufactured by or for the Seller shall be free from defects in material and workmanship, and shall conform to its published specifications. - Page 80 Public Safety and Professional Communications | www.harrispublicsafety.com 221 Jefferson Ridge Parkway | Lynchburg, VA USA 24501 | 1-800-528-7711...
Need help?
Do you have a question about the M5300 and is the answer not in the manual?
Questions and answers