
Related Manuals for Allegion PegaSys


Summary of Contents for Allegion PegaSys
- Page 1 PegaSys Intelligent Access Control System Technical Manual Part 1 Assembly and Operating Instruction for all PegaSys Components...
- Page 3 "Old batteries for disposal" added to the shipment. Offline components Within the context of general information that applies to devices of the PegaSys Door Fittings, PegaSys Lock Cylinders or PegaSys Locker Locks series, the devices are generically called offline components.
-
Page 5: Table Of Contents
Contents Contents Electronic Door Fittings of the PegaSys Series Design of the electronic door fitting ..................5 1.1.1 Design of the Office series ..................6 Technical data ........................6 1.2.1 Technical data PegaSys 2.1 ..................6 1.2.2 Technical data of the Office series ................7 1.2.3... - Page 6 Switchover to daylight saving time, leap year ..............61 »Teach in« PIN Code operating mode ................61 »Teach in« (P 100) operating mode .................. 61 4.4.1 Configuring the PegaSys Offline component for "Teach in" ........62 4.4.2 Opening doors ....................... 64 4.4.3 Visual and audible signals ..................
- Page 7 Installation Instructions for PegaSys Electronic Door Fittings...
-
Page 9: Electronic Door Fittings Of The Pegasys Series
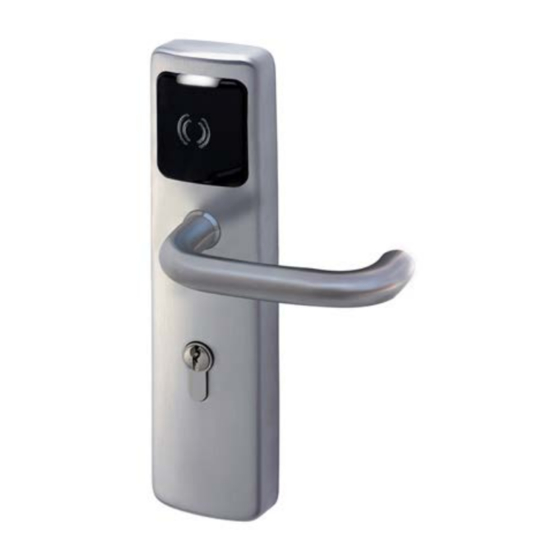
1 Electronic Door Fittings of the PegaSys Series Electronic door fittings of the PegaSys series are used to control the access at individual doors. A door secured with an electronic door fitting can only be opened after you have proven that you are authorized to enter, by means of a valid credential. -
Page 10: Design Of The Office Series
Square spindle for lever handle The PegaSys 2.1 fittings are supplied with door handles from the NT 181/EST 41, NT 191/EST 51, NT 291/EST 21, NT 1182/EST 1141, NT 1292/EST 1121 or 1171 series, or with pivoted support and additional square spindle set. -
Page 11: Technical Data Of The Office Series
Standards DIN 18273, EN 179 Power supply Battery PegaSys B 2.1: 3 x AA lithium batteries PegaSys S 2.1: 3 x AAA lithium batteries Battery life Up to 50,000 opening cycles, depending on the reading technology, the design, the installation conditions and the operating modes. -
Page 12: Dimensions: Pegasys Door Fitting
Electronic Door Fittings of the PegaSys Series Power supply Battery Depending on type, 3 AAA or AA batteries Battery life Up to 40,000 opening cycles, depending on the reading technology and the battery case used, as well as the various installation conditions and operating modes. -
Page 13: Dimensions: Interior Fittings
Electronic Door Fittings of the PegaSys Series 1.2.4 Dimensions: Interior fittings Interior fittings Version: 230 mm Version: 195 mm Interior fittings for doors with tubular frames Office interior fitting... -
Page 14: Dimensions: Door Handle Series
Electronic Door Fittings of the PegaSys Series 1.2.5 Dimensions: Door handle series Door handle series for wide door fittings 181 series 191 series 281 series 291 series Door handle series for doors with tubular frames 1171 series 1182 series 1282 series... -
Page 15: Applicable Reading Technologies
Electronic Door Fittings of the PegaSys Series 1.2.6 Applicable reading technologies: The PegaSys Offline components support the following reading technologies for the credentials: § MIFARE Classic § MIFARE DESFire § LEGIC Prime § LEGIC Advant § Hitag1 (availability depends on the type of PegaSys Offline component) 1.3 Assembly and installation... - Page 16 Electronic Door Fittings of the PegaSys Series Preparations for installation: Tools 1. Required tools Cordless screw driver / hand drill Flat-bladed screw driver Phillips screw driver Torx screw driver Drill, 7 mm Square hole (from left) 2. Optional tools Drilling template, long plate (Germany)
- Page 17 Electronic Door Fittings of the PegaSys Series Preparations for installation: Drilled hole in door Check the door hole with a caliper or gauge. Recommendation: The diameter should be min. 28 mm. A diameter of 28 mm is required for screw-on mounting on doors with tubular frames, as well as for exterior fittings without a key hole.
- Page 18 Electronic Door Fittings of the PegaSys Series PegaSys S 2.x PegaSys B 2.x PegaSys B 2.X PZ 92 mm Long plate: France ASSA 105 (Scandinavia) Office fitting...
- Page 19 Electronic Door Fittings of the PegaSys Series Using scribing templates or hole gages Marking the bore holes using the scribing template Method for installing a small number of PegaSys door fittings. Drilling bore holes using the hole gage This is the preferable method for installing a large number of fittings.
- Page 20 Electronic Door Fittings of the PegaSys Series Preparations for installation: Checking the cylinder length Check the cylinder length. For PegaSys 2.1 For Office Series § § The profile cylinder must jut out by at least 27 The maximum the cylinder may jut out is 23 mm on –...
-
Page 21: Installation Types
Check whether you can drill through the door leaf or whether you have to use the screw-on mounting method. If you can drill through the door leaf, the PegaSys door fitting on the outside is bolted to the rose fitting or bottom part of the plate on the inside. - Page 22 Electronic Door Fittings of the PegaSys Series Drilling door leaf for rose fitting (6 ×) Set the hole gage in acc. with the corresponding operating instructions. Insert the hole gage into the mortise lock. Align the hole gage by means of a water level and fasten it with a quick clamp.
- Page 23 Inserting the square spindle for the lever handle Insert the square spindle into the lock follower (pin of the spindle on the side with the PegaSys fitting, thin wall towards the latch bolt). Hang fitting onto the pin of the spindle and...
- Page 24 Electronic Door Fittings of the PegaSys Series Screwing on the interior fitting With the supplied screw set, loosely screw on the bottom parts of the rose or plate. With the mounting cylinder, align the door fitting. The mounting cylinder has to move easily.
- Page 25 Electronic Door Fittings of the PegaSys Series Installation of the Office series This installation type is suitable for standard doors made of wood, plastic and metal. This installation type has not been approved for fire protection doors. Observe the statutory stipulations.
- Page 26 This installation type has not been approved for fire protection doors. Observe the statutory stipulations. When using the screw-on mounting method, fasten the mounting plate for the PegaSys door fitting at the door leaf. Depending on the properties of the door, use appropriate fastening material.
- Page 27 Notes on Outdoor Installation For outdoor installation, use the included rubber seal to protect the PegaSys casing against water intrusion. Align the outer edge of the seal to the edge of the door and center the punch-outs.
- Page 28 Mounting "Back to Back" PegaSys "Back to Back" can only be installed indoors. For "Back to Back" mounting, two PegaSys door fittings are installed on one door. This makes electronic access control possible on both sides. PegaSys "Back to Back" with wide door fittings PegaSys "Back to Back"...
- Page 29 Insert the square spindle into the lock follower (pin of the spindle on the side with the PegaSys fitting, thin wall towards the latch bolt). Hang fitting onto the pin of the spindle and position it against the door leaf.
-
Page 30: Function Check - Mechanical Components
Electronic Door Fittings of the PegaSys Series Installing the lock cylinders Insert the round cylinder from the inside and fasten it. Screw tight the door handle on the inside and the fitting. 1.3.3 Function check - mechanical components Check whether the gap between front metal and striking plate is 2 to 5 mm. -
Page 31: Battery Change At Door Fitting
1.3.4 Battery change at door fitting When inserting the battery, observe the correct polarity. An incorrectly inserted battery can damage the device. Battery change on the wide PegaSys door fitting Insert the battery exchange tool and remove the battery case. - Page 32 If the battery is weak, the battery status is also written to credentials five times. If the PegaSys Offline component is connected to an access control system, this system can respond to these messages.
-
Page 33: Switchover To Daylight Saving Time, Leap Year
Electronic Door Fittings of the PegaSys Series 1.3.5 Switchover to daylight saving time, leap year The PegaSys Offline components automatically switch to daylight saving time and back. The switchover is performed in acc. with EU directive 2000/84/EC. The PegaSys Offline components also detect leap years automatically. - Page 35 Installation Instructions PegaSys Electronic Lock Cylinders...
-
Page 37: Electronic Lock Cylinders Of The Pegasys Series
Electronic identification media such as e.g. badges or easy-to-handle key tags are used as "keys". What else makes the lock cylinders of the PegaSys series so unique: They are compatible with many customary access control systems. Utilize available employee credentials and data stock from your access control system. -
Page 38: Scope Of Delivery
Electronic Lock Cylinders of the PegaSys Series Type 4 Type 5 The most important components: The most important components: § § Electronic knob side Cylinder body with permanently mounted mechanical knob. § Furniture lock adapter § Fixing screw The knob is permanently mounted on one cylinder side and cannot be transferred to the other cylinder side. - Page 39 Electronic Lock Cylinders of the PegaSys Series Electronic half cylinder, type 2 Electronic knob Half cylinder body Two batteries Electronic double knob cylinder, type 3, booking possible on both sides Electronic knob (2x) Cylinder body Four batteries Electronic lock cylinder, type 4, for furniture lock...
- Page 40 Electronic Lock Cylinders of the PegaSys Series Furniture lock adapter Two batteries Electronic double knob cylinder, type 5, booking possible on one side with anti-panic cylinder Mechanical knob with anti-panic cylinder Electronic knob Two batteries Cylinder adapters Cylinder Half cylinder...
- Page 41 Electronic Lock Cylinders of the PegaSys Series Anti-panic cylinder Cylinder, CH round Half cylinder, CH round...
-
Page 42: Technical Data
IP 66 (*), i.e. suitable for limited outdoor use (*) for version used in protected outdoor area See also Low-power adapter: Exchanging empty batteries ..............46 Applicable reading technologies: The PegaSys Offline components support the following reading technologies for the credentials: § MIFARE Classic § MIFARE DESFire §... -
Page 43: Installation/Dismantling
Electronic Lock Cylinders of the PegaSys Series 2.2 Installation/dismantling Preliminary notes: § The cylinders are supplied as assembly units. § On delivery, the electronic knob is in the factory state and must be programmed before initial operation/installation. § The battery contact has to be removed. -
Page 44: Installing The Cylinder Body
Electronic Lock Cylinders of the PegaSys Series 2.2.2 Installing the cylinder body Important: Before assembling the knob module, always check the freedom of movement of all components. Step 1: Remove the fixing screw and dismantle the existing cylinder body. Step 2: Insert the cylinder body and secure it with the fixing screw. -
Page 45: Installing The Electronic Knob For A Furniture Lock
Electronic Lock Cylinders of the PegaSys Series Dismantle the knob by turning it back and forth slightly while simultaneously pulling it gently. Type 2, type 3, type 4 For type 2, 3 and 4, the same workflows as for type 1 apply analogously. - Page 46 Electronic Lock Cylinders of the PegaSys Series Use the figure below to check which lock type is equipped and accordingly turn the spindle of the furniture lock adapter until it stops: Use the supplied screws to fasten the knob together with the furniture lock adapter.
-
Page 47: Dismantling The Electronic Knob For A Furniture Lock
Electronic Lock Cylinders of the PegaSys Series 2.2.6 Dismantling the electronic knob for a furniture lock Loosen and remove the screw(s) with which the exterior knob is secured. Pull off the exterior knob. If a sleeve equipped, remove it as well. -
Page 48: Permanently Open Mode
Electronic Lock Cylinders of the PegaSys Series 2.3.3 Permanently open mode Please note: For this function, a credential with the function "permanently open" is required. The door also has to be configured for allowing the permanently open status. Hold your credential in front of the electronic knob until a visual signal shows that the lock cylinder has been permanently released and can be actuated. -
Page 49: Batteries
If the battery is weak, the battery status is also written to credentials five times. If the PegaSys Offline component is connected to an access control system, this system can respond to these messages. -
Page 50: Low-Power Adapter: Exchanging Empty Batteries
Electronic Lock Cylinders of the PegaSys Series During operation in outdoor areas: Also change the two thin rubber seal rings on the upper and lower end of the knob. After battery exchange Simultaneously press in both locking pins and push the knob cover back in place. -
Page 51: Device Reset
Electronic Lock Cylinders of the PegaSys Series In doing so, ensure the correct alignment of the contact pins of the low-power adapter towards the emergency power contacts of the electronic knob: If the alignment is correct and the batteries are empty, an acoustic signal is heard. If the batteries still contain residual power then no acoustic signal is heard. - Page 53 Installation Instructions PegaSys Electronic Locker Locks...
-
Page 55: Pegasys Locker Locks
PegaSys Locker Locks 3 PegaSys Locker Locks With PegaSys locker locks, you can release and lock the doors of lockers, cabinets or mailboxes (locking lever [1]). As "key", RFID credentials (e.g. key tags or RFID credentials in the form of check cards) on which the required access authorizations can be saved are used. -
Page 56: Installation
PegaSys Locker Locks 3.3 Installation The locker lock can be installed on wooden or metal doors with up to 20 mm thickness, in four different installation positions: Fastening For fastening purposes, drill the holes shown on the right. Screw-mount the locker lock to the door, as shown on the left. -
Page 57: Removing The Battery Holder
For the programming, you need a facility or master card (depending on the mode of operation.) Depending on the respective case ("RFID" mode of operation), additional cards are required. See also PegaSys Operating Modes ..................... 61 3.4.2 Removing the battery holder Press the battery exchange tool into the intended hole. -
Page 58: Configuring The Locker Lock
The rest of the procedure depends on whether the locker lock is integrated into an access control system. For information on configuring the PegaSys Offline components in combination with an access control system, refer to the associated documentation of the access control systems. -
Page 59: Low Battery Warning Levels
If the battery is weak, the battery status is also written to credentials five times. If the PegaSys Offline component is connected to an access control system, this system can respond to these messages. -
Page 60: Replacement Parts And Accessories
PegaSys Locker Locks 3.9 Replacement parts and accessories Information on the following accessories and spares parts is listed below: § Locker lock PegaSys (Mifare) § Battery 3.6 V (lithium battery) § Locking lever, type 2, straight § Locking lever, type 3, 2.2 mm, angled §... - Page 61 PegaSys Locker Locks Locking lever, type 4, 6.5 mm, angled...
-
Page 62: Technical Data
PegaSys Locker Locks 3.10 Technical data Power supply Battery One lithium battery, type AA, 3.6 V. Battery life Up to 50,000 opening cycles, depending on the reading technology, the design, the installation conditions and the operating modes. Locker opening when battery is Possible by exchanging the battery. - Page 63 PegaSys "Teach In" or "NetworkOnCard" Operation Valid for all PegaSys offline components...
-
Page 65: Pegasys Operating Modes
You can find more details on PegaSys PIN-Code in a separate manual. 4.4 »Teach in« (P 100) operating mode In the case of PegaSys Offline components for the »Teach in« (P 100) operating mode, all settings are programmed by means of a master card. -
Page 66: Configuring The Pegasys Offline Component For "Teach In
Enrolling new credentials With this function, you can enroll new credentials. Hold the master card in the read area of the PegaSys Offline component (pictogram) until the LED starts to flash in green ( ...). The green status LED then flashes for 10 seconds and the enrollment mode starts. - Page 67 PegaSys Operating Modes Deleting all credentials Hold the master card in the read area of the PegaSys Offline component (pictogram) until the LED starts to flash in green ( ...). The green status LED then flashes for 10 seconds and the enrollment mode starts.
-
Page 68: Opening Doors
4.4.2 Opening doors Opening the door with a credential To open a door that is secured with a PegaSys Offline component, proceed as follows with the standard credential: Hold an enrolled credential in the read area of the PegaSys Offline component. -
Page 69: Networkoncard« (P 200 / P 300) Operating Mode With An Access Control System
If you want to give a credential authorization to open a certain door, use a single door authorization If you want to give a credential authorization for several doors, combine the PegaSys Offline components to a door group. Then you assign a group authorization to the credential for this door group. - Page 70 PegaSys Operating Modes Format 2.0 MIFARE and LEGIC Door groups Single doors Required Required Segment size bytes sectors 1024 1024 1024 1024 Format 2.1 or 3.1 MIFARE and LEGIC Door groups Single doors Required Required Segment size bytes sectors 216 ("256")
-
Page 71: Credentials And Booking Types
Blocking credentials If a credential is lost, the administrator marks it as blocked in the PegaSys 3000 software. With a blocking list card, a list of all cards to be blocked can be transferred from the computer on which the access control system is installed to the PegaSys Offline components. -
Page 72: Administration Of The Pegasys Offline Components
PegaSys Offline components. Use this card either immediately after its creation, if possible, or at the specified time and hold it to the reading unit of the PegaSys Offline component. If different time models are used for the PegaSys Offline components, use a new time model... -
Page 73: Opening Doors
PegaSys 3000 system. All blocked credentials are entered to a 'blocking list'. The blocking list card is used to download this list from the computer to the respective PegaSys Offline component. As the blocking list card does not contain any device-specific data, it can be used at all PegaSys Offline components. - Page 74 Remedy: Change the authorizations assigned to this credential, if necessary. Activating/deactivating the permanently open mode If you use a credential that is equipped with the permanently open function, you can switch the PegaSys Offline component to the permanently open mode, in which the door can be opened without requiring another booking.
-
Page 75: Visual And Audible Signals
PegaSys Operating Modes Overview: Connection between bookings/time models and the door status 4.5.6 Visual and audible signals PegaSys Offline components use visual and audible signals to provide important information (status of the PegaSys Offline component, result of the credential/card check). See also Low battery warning levels ..................... - Page 76 ), followed by another signal. Meaning: Data transmission. During the data exchange between a system card and another PegaSys Offline component, the LED flashes. Thereafter, the PegaSys Offline component signals whether or not the read/write procedure has been successfully completed.
- Page 77 Booking memory entry: No entry. 4 × RED Meaning: Invalid time. Remedy: Create a time initialization card and hold it in front of the PegaSys Offline component. 5 × RED Meaning: The PegaSys Offline component has not been initialized. Remedy: Create a door initialization card and hold it in front of the PegaSys Offline component.
-
Page 79: Glossary
Door leaf: open 5 Glossary Positions of the door leaf in which neither latch Authentication nor bolt can interlock with the assigned openings of the locking plate (or door Generally speaking, authentication is frame/non-active leaf). The passageway is free. verification of the genuineness of a certain The cover plate is, for example, only visible in property. - Page 80 Security function sector standalone terminals / electronic locks In a lock, the "security function" means that the (such as PegaSys, IF 131). For persons who latch bolt can be retracted from the outside of carry out their bookings at these the door by means of the "key".
-
Page 81: Index
- 43 door frame - 75, 76 door leaf - 75, 76 double knob cylinder - 34, 35 PegaSys locker lock - 51 permanent opening - 44, 64, 70 power supply - 45 emergency opening - 46 protection category - 6, 38, 58... - Page 82 screw - 15 scribing template - 13 seal - 45 short description - 51 short-time release - 43 signal - 44 signal transmitter - 44 signaling - 64 square spindle - 5, 75, 76 striking plate - 75, 76 technical data - 38, 58 temperature - 38, 58 template - 13 tubular frame door - 17, 22...
- Page 84 NORMBAU Beschläge und Ausstattungs GmbH Schwarzwaldstraße 15 77871 Renchen / Germany Phone +49 7843 704-0 Fax +49 7843 704-43 3050132 400 www.pegasys.allegion.com For more, visit www.allegion.com Briton NORMBAU...
Need help?
Do you have a question about the PegaSys and is the answer not in the manual?
Questions and answers