Table of Contents
Advertisement
*P519-087*
P519-087
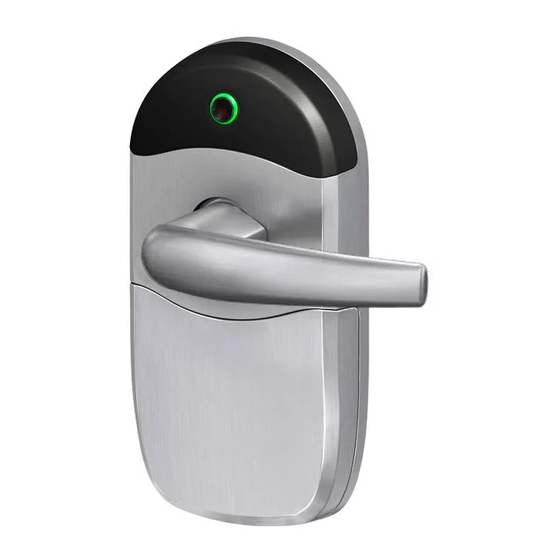
Key
Outside Lever*
Cylinder*
Latch*
Strike
Dust Box
Door Jamb
DPS
Strike Options
T-Strike
ANSI Strike
Installation Preparation
Tools Needed
• Phillips screwdriver
• Pin wrench
Optional
• T-15 Tamper Torx screwdriver
ENGAGE™ WEB & MOBILE APPLICATIONS
Search for "Allegion ENGAGE" in the Apple App Store or
Google Play store to download the app.
Navigate to portal.allegionengage.com to access your
account online.
NDEB Wireless Lock
Para Español, vaya a la página 9.
Pour le Français, voir la page 9.
Outside Assembly
Ribbon Cable
Chassis
Backplate
Door Edge
DPS
Door preparation:
See template in
package.
Contact Product Support
1-877-671-7011.
Spring Cage*
Inside
Assembly
Mounting
Screws*
Battery Strap
Battery Holder
Access online interactive instructions,
user guide, warranty, and reference
• Included strike and sensor must be installed for the door
position sensor to work properly.
The sensor is used to indicate door position.
• Install and test lock with door open to avoid being locked
out.
• Check door preparation with included template, and
prepare door before starting installation. If you have a lock
on your door already, remove completely before beginning.
• If you are updating from an NDE80 lock, remove
completely, and reinstall with supplied parts.
1-877-671-7011
Installation Instructions
Pin wrench
* Components shared with
ND-Series lock.
Escutcheon
Screws
Battery Cover
Battery Cover
information.
alle.co/nde
IMPORTANT NOTES
Customer Service
www.allegion.com/us
Cylinder Options
Full Size IC (FSIC)
Small Format (SFIC)
Standard Cylinder
Inside Lever*
Screw
Advertisement
Table of Contents

Related Manuals for Allegion SCHLAGE NDEB


Summary of Contents for Allegion SCHLAGE NDEB
- Page 1 ENGAGE™ WEB & MOBILE APPLICATIONS • If you are updating from an NDE80 lock, remove Search for “Allegion ENGAGE” in the Apple App Store or completely, and reinstall with supplied parts. Google Play store to download the app.
- Page 2 Door Thickness Adjustment Install latch. L For ” thick doors, NO ADJUSTMENT IS REQUIRED. The bevel must face toward the door stop. 1C\v Continue to step 1. For 1B\,” or 2” thick doors, complete the following door thickness adjustment steps. Remove chassis from outside assembly.
- Page 3 Reinstall adjustment plate. To change handing, pull lever post until it stops, then Tighten until door thickness insert enters notch in adjustment rotate 180 degrees. plate. Align lever catch pin and slide hole to latch side. Release lever post. Assembly will click into place. CAUTION Do not route ribbon cable before rotating chassis! Lever Catch Pin...
- Page 4 Align assembly and install on door. Install spring cage. Let the wire hang on the other side, through the hole. Align lever catch pin to door edge. Make sure the outside escutcheon is square before tightening the bolts. WARNING Do not pinch ribbon cable! WARNING Ensure that the lever catch pin is aligned with latch side before continuing!
- Page 5 Install inside escutcheon. Connect DPS wire (1), route wire behind tabs (2), and tuck excess wire back into the hole in door (3). Connect the cable from the outside escutcheon to the connector on the inside escutcheon. Route wire from door position sensor (DPS) through hole in inside escutcheon.
- Page 6 Cylinder and Lever Installation Lever With Interchangeable Core Cylinder Lever Removal Install cylinder tailpiece. Rotate cam in lever post until the cam stops. To remove a lever with a To remove a lever without cylinder, insert key first, a cylinder, press pin and turn it 90 degrees wrench into hole in lever, toward door edge.
-
Page 7: Install Batteries
Install battery cover screw. Install Batteries Choose either standard Phillips screw or Torx screw. Install batteries into battery holder. Push the tab on the right of the battery securing strap, and pull out to release battery holder. Install four high-quality alkaline batteries into battery holder. -
Page 8: Fcc Statement
• The model NDEB has been tested to the following UL294 7th edition performance levels: Standby Power Level I, Endurance Level IV, Line Security Level I, and Destructive Attack Level I • Tested to compliance with CSA-C22.2-M1983. Customer Service 1-877-671-7011 www.allegion.com/us © Allegion 2020 Printed in U.S.A. P519-087 Rev. 01/20-b... - Page 9 Cerradura inalámbrica NDEB Serrure sans fil NDEB Instrucciones de instalación Instructions d’installation Opciones de cilindros Llave para clavija Options de cylindre Clef à ergots Núcleo grande Unidad externa intercambiable (FSIC) * Componentes Assemblage extérieur Cœur interchangeable compartidos con la de pleine dimension cerradura Serie ND.
-
Page 10: Notas Importantes
APPLICATIONS WEB ET MOBILES DE LA MÓVILES ENGAGE(TM) TECHNOLOGIE ENGAGE(MC) Busque “Allegion ENGAGE” en el App Store (iOS) o Cherchez « Allegion ENGAGE » sur l’App Store (iOS) Google Play Store (Android) para descargar. ou sur le Google Play Store (Android) pour télécharger l’application. - Page 11 Ajuste del espesor de la puerta Instale el pestillo. Ajustement selon l’épaisseur de la porte Installez le loquet. El bisel debe apuntar hacia el tope de la puerta. L Para puertas de 1 ” de espesor, NO SE REQUIERE Le biseau doit être dirigé vers la butée de porte. NINGÚN AJUSTE.
- Page 12 Retire la placa de ajuste al girarla en sentido contrario Vuelva a instalar la placa de ajuste. a las agujas del reloj. Retire el inserto de espesor de la Remettez la plaque d’ajustement. puerta mediante el uso de una llave para clavija. Ajuste hasta que el inserto de espesor de la puerta ingrese Retirez la plaque d’ajustement en la faisant pivoter en la muesca en la placa de ajuste.
- Page 13 Conecte el cable del chasis. Tienda los cables. Para retirar el chasis, tire del eje de la manija hacia atrás y Raccordez le câble du châssis. Acheminez les câbles. gire 10 grados en sentido contrario a las agujas del reloj tal ¡El cable debe colocarse sobre el chasis! Conecte el cable como se muestra a continuación hasta que las pestañas de la desde la unidad externa al conector en el chasis.
- Page 14 La parte posterior del pestillo debe insertarse dentro de la canaleta y la parte delantera del pestillo debe insertarse en el chasis. Si la parte posterior del pestillo no se encuentra en la profundidad correcta, debe ajustarse el anillo de espesor de Clavija de sujeción de la manija la puerta.
- Page 15 Coloque el escudo interno en la placa posterior (1) y Instale el escudo interno. deslice para enganchar en la placa posterior (2). Sujete con los tornillos (3). Asegúrese de que el escudo y la Installez l’écusson intérieur. jaula de resorte estén correctamente alineados antes de Conecte el cable desde el escudo externo al conector ajustar los tornillos que se encuentra en el escudo interno.
- Page 16 Instalación del cilindro y la manija Manija con cilindro de núcleo intercambiable Installation du levier et du cylindre Levier avec cœur de cylindre interchangeable Instale la parte posterior del Manija con cilindro estándar cilindro. Installez la pièce de Levier avec cylindre standard raccordement du cylindre.
- Page 17 Conecte el cable del soporte de la batería con el Extracción de la manija conector en el tablero de circuito. Retrait du levier Raccordez le câble du porte-piles au connecteur de la carte du circuit. Para retirar una manija con un cilindro, primero inserte la llave y luego gire 90 grados hacia el borde de la puerta.
- Page 18 Coloque la correa de sujeción de la batería en su lugar y ¡No aplaste los cables de la pila al colocar la cubierta! luego deslice la correa hasta que quede ajustada. Ne coincez pas les fils du bloc-piles en installant le Installez la sangle de fixation des piles, puis faites-la couvercle! glisser vers le bas jusqu’à...
-
Page 19: Manuel De L'utilisateur
Vuelva a colocar la cubierta de la pila, luego use la Guía del usuario aplicación para capturar su cerradura. Manuel de l’utilisateur Réinstallez le couvercle des piles, puis utilisez l’application pour prendre une photo de votre serrure. Gire la manija interna. El NDE se comunicará en el BLE buscando su aplicación ENGAGE durante dos minutos al cabo de cada giro de la manija en el modo FDR. -
Page 20: Declaración De La Comisión Federal De Comunicaciones (Fcc)
1-877-671-7011 www.allegion.com/us suivantes : (1) l’appareil ne doit pas produire de brouillage, et (2) l’appareil doit accepter tout brouillage radioélectrique subi, même si le brouillage est susceptible d’en compromettre le fonctionnement. © Allegion 2020 Printed in U.S.A. P519-087 Rev. 01/20-b... - Page 21 3. tolerance ± .13 10/10/2019 4. printed in country may vary P519-087 5. drawings not to scale Created By 6. 20 page saddle-stitched booklet Activity R. Byun 3899 Hancock Expwy Software: Security, CO 80911 InDesign CC 2020 © Allegion 2020...
Need help?
Do you have a question about the SCHLAGE NDEB and is the answer not in the manual?
Questions and answers