Table of Contents
Advertisement
Quick Links
Advertisement
Table of Contents

Related Manuals for Siruba HSM-2517


Summary of Contents for Siruba HSM-2517
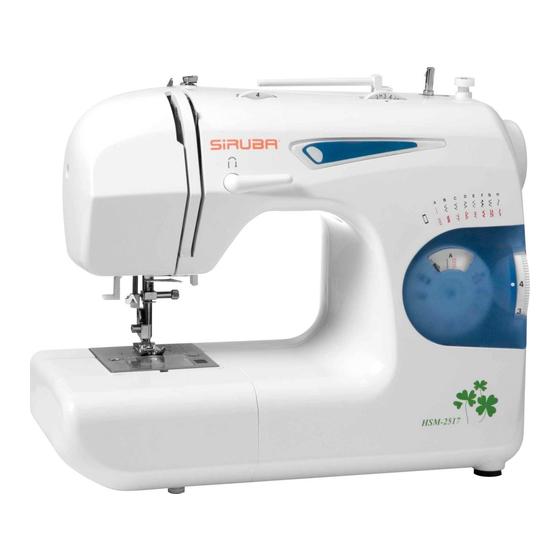
- Page 4 11.Spool pin 12.Hand wheel 13.Stitch selector 14.Power/light switch 15.Plug socket 16.Presser foot lever 17.Thread cutter 18.Automatic needle threader 19.Needle 20.Presser foot screw 21.Thread guide 22.Needle clamp screw 23.Foot release lever 24.Presser foot 25.Feed dogs 26.Foot control 27.Drop feed lever...
-
Page 5: Opening The Accessory Case
ACCESSORIES Some accessories are provided in the accessory case. 1.Needle set 2.Bobbins 3.Spool pin cap (large) 4.Spool pin cap (small) 5.Screwdriver (small) 6.Screwdriver (large) 7.Buttonhole opener with brush 8.Oiler 9.Buttonhole Foot 10.Overcasting Foot 11.Zipper Foot 12.Straight stitch foot OPENING THE ACCESSORY CASE To open the accessory case, lift up on the top left side of the table and pull toward you. -
Page 6: A.removing The Extension Table
a.REMOVING THE EXTENSION TABLE Hook your finger to the bottom of extension table and slid to the left. To attach, insert to the right. b.OPENING THE ACCESSORY CASE Hook your finger to the left side of accessory case and pull toward you. DUST COVER (OPTIONAL) Cover the machine with dust cover when it is not in use. -
Page 7: Changing The Presser Foot
CHANGING THE PRESSER FOOT The presser foot must be changed according to the stitch you sew, or work you do. CAUTION:To prevent accidents. Turn off the power switch before you change the presser foot. 1.Turn the hand wheel toward you until the needle is at its highest point. -
Page 8: Setting Up Your Machine
SETTING UP YOUR MACHINE Be sure to wipe off any surplus oil from needle plate area before using your machine the first time. Power/light switch Foot control FOOT CONTROL Connect the plug of the foot control into the machine socket your wall outlet as illustrated. -
Page 9: Machine Setting Chart
MACHINE SETTING CHART 1.INDICATOR 2.LENGTH CONTROL 4.PRESSER FOOT 3.STITCH WIDTH CONTROL Overcasting Zigzag foot Straight stitch foot foot Buttonhole foot Zipper foot STITCH STITCH PRESSER INDICATOR STITCH LENGTH WIDTH FOOT CONTROL CONTROL STRAIGHT ZIGZAG 0.5-4 BLIND SHELL MULTI-STITCH ZIGZAG DOUBLE ACTION FAGGOTING TRIPLE STRAIGHT RICK-RACK... -
Page 10: Straight Stitches
STRAIGHT STITCHES Stitch Selector Stitch Width Stitch Length Straight stitch most frequently used for every aspect of sewing.Learn the correct method of your machine following the steps below. 2.Pull both threads under the 1.SETTINGS Stitch indicator - A presser foot toward the back Stitch length - 2 - 3 of the machine. -
Page 11: Presser Foot Lever
1.ADJUSTING TOP THREAD TENSION Decrease or increase the tension of the top thread by using this control. The higher the number,the tighter the tension. 2.PRESSER FOOT LEVER There are three positions for your presser foot. 1.Lower the presser foot to sew. 2.Raise the lever to the middle position to insert or remoye fabric. -
Page 12: Removing The Bobbin
BOBBIN WINDING REMOVING THE BOBBIN 1.Remove the bobbin cover by sliding the release lever to right and push down the left corner of bobbin cover at the same time. 2.Remove the bobbin from the machine. WINDING THE BOBBIN 1.Raise presser foot lever. Pivot spool pin into highest position. -
Page 13: Inserting The Bobbin
INSERTING THE BOBBIN 1. Place bobbin into bobbin holder with the thread unwinding counter clockwise. 2. Draw thread into notch (A). 3. Pull thread toward the left and along the inside of spring (B) until it slips into notch (C) being sure that thread does not slip out of notch (A). -
Page 14: Threading The Top Thread
THREADING THE TOP THREAD 1.Raise the presser foot lever. 2.Raise the needil to its highest position by rotating the hand wheel towards you. 3.Thread the machine in the order as illustrated. USING AUTOMATIC NEEDLE THREADER Raise the needle to its highest position by rotating the hand wheel towards you. -
Page 15: Picking Up Bobbin Thread
PICKING UP BOBBIN THREAD 1.Raise the presser foor lever. Holding needle thread loosely with your left hand, turn hand wheel towards you one revolution with your right hand untial the needle comes to its highest position. 2.Lightly pull up on the needle thread. This will pull a loop of bobbin thread through the needle plate slot. -
Page 16: Adjusting The Thread Tensions
ADJUSTING THE THREAD TENSIONS The thread tension must be properly balanced. If adjustment is required, it can be made by changing the upper thread tension. A. Correct Thread Tension Upper and bobbin threads should lock approximately in the middle of fabric. B.When bobbin thread appears on top side of fabric. -
Page 17: Zigzag Stitching
ZIGZAG STITCHING SATIN STITCH Stitch Selector B This is a closely spaced attractive stitch used for Stitch Width 1-5 applique,bar-tacking,etc. Slightly loosen top thread Stitch Length 1-4 tension for satin stitching. Use a backing stabilizer interfacing for the sheer Stitch indicator materials to avoid puckering. -
Page 18: Multi-Stitch Zigzag
ZIGZAG STITCHING Stitch Selector D Stitch Width 1-5 Stitch Length 1-4 Shell stitch is for seaming and overcasting sheer, soft fabrics in one operation. It also produces a delicate shell hem on lingerie and other fine garments. SEAM AND OVERCAST IN ONE Place the right sides of the fabric together and position under the presser foot so that the zig-zag part of the stitch sews just over the raw edge. - Page 19 DOUBLE-ACTION STITCH Stitch Selector G Stitch Width 1-5 Stitch Length 1-4 Double-action stitch is ideal for producing flat overlapped seams on almost any type of fabric A bolder effect will result from sewing with contrasting thread. BRIDGINE STITCH Stitch Selector H Stitch Width 1-5 Stitch Length 1-4 This is a popular decorative stitch (used in sleeves or fronts of...
-
Page 20: Triple Straight Stitch
TRIPLE STRAIGHT STITCH TRIPLE STRAIGHT HONEYCOMB RICK-RACK ELASTIC OVERLOCK STRETCH OVERLOCK DOUBLE OVERLOCK OVERLOCK FEATHER STRETCH STITCHES Stitch Selector A Stretch stitches are mainly for use on knit, or stretch fabrics, Stitch Width but can also be sewn on woven fabrics. Stitch Length -S+ Rick-rack Stitch Triple straight stitch is far stronger than... -
Page 21: Feather Stitch
FEATHER STITCH Stitch Selector E Stitch Width 1-5 Stitch Length -S+ The pleasing appearance of this stitch enables it to be used for top stitching, or attaching lace or inset panels when making lingerie or girdles. It is also ideal for quilting application and faggoting. -
Page 22: Corded Buttonholes
BUTTONHOLES Carefully mark the buttonhole length on your garment. Place the fabric with the buttonhole marked under the buttonhole foot. Slide the foot forward so that the needle pierces the Spur fabric at the beginning of the buttonhole. CORDED BUTTONHOLES Hook filler cord (crochet thread or buttonhole twist) to the spur Spur and pull both ends of the cord forward under the foot. -
Page 23: Caring For Your Machine
CARING FOR YOUR MACHINE To ensure the best possible operation of your machine, it is necessary to keep the essential parts clean at all times. Always disconnect the machine from power supply by removing the plug from the socket- outlet. Cleaning the feed dogs and hook area 1.Raise the needle to its highest position.
Need help?
Do you have a question about the HSM-2517 and is the answer not in the manual?
Questions and answers