Table of Contents
Advertisement
Quick Links
Advertisement
Table of Contents

Related Manuals for Decagon Devices WP4C


Summary of Contents for Decagon Devices WP4C
- Page 1 Dewpoint PotentiaMeter Operator’ s Manual Version 1...
- Page 2 Decagon Devices, Inc. 2365 NE Hopkins Court Pullman WA 99163 tel: (509) 332-2756 fax: (509) 332-5158 www.decagon.com support@decagon.com Trademarks “WP4C PotentiaMeter” is a registered trademark of Decagon Devices, Inc. ©2010 Decagon Devices, Inc., All rights reserved.
-
Page 3: Table Of Contents
WP4C and Water Potential ....5 How the WP4C works ......5 WP4C and Temperature . - Page 4 7. Taking a Reading ... . 30 How WP4C takes Readings ....31 Cautions .
- Page 5 PotentiaMeter Table of Contents 11. Repair Instructions ... .45 Shipping Directions ......45 Repair Costs .
- Page 6 PotentiaMeter Table of Contents...
-
Page 7: Introduction
Whether you are a scientist or a student, WP4C will suit your needs. It is easy to use and provides fast, accurate results. We hope you find this manual informative and helpful in understanding how to maximize the capabilities of your WP4C. -
Page 8: Warranty
E-mail: If you need technical support or have questions about your application with WP4C, you can send us messages via e-mail at support@decagon.com. Again, please include as part of your message your WP4C’s serial number, your name, address, phone, fax number, and return e-mail address. -
Page 9: Seller's Liability
PotentiaMeter 1. Introduction made to ensure that the content of this manual is correct and scientifically sound. Seller’s Liability Seller warrants new equipment of its own manufacture against defective workmanship and materials for a period of one year from date of receipt of equipment (the results of ordinary wear and tear, neglect, misuse, accident and excessive deterioration due to corrosion from any cause are not to be considered a defect);... -
Page 10: About The Wp4C
ASCII code, 9600 baud, no parity, 1 stop bit Power: 110VAC to 220 VAC, 50/60 Hz Interface Cable: Standard RS232 serial cable (included) Compatible Standards: ASTM D6836-07 Warranty: 1 year parts and labor * Note that the WP4C (and all vapor pressure instruments) are... -
Page 11: Wp4C And Water Potential
-0.1MPa has an accuracy of ±50% of the read- ing, and -1 MPa has an accuracy of ±5% of the reading. Function- ally this means that the WP4C will not measure water potential accurately near field capacity. -
Page 12: Wp4C And Temperature
The final water potential and tempera- ture of the sample is displayed. In addition to the technique described above, WP4C uses an internal fan that circulates the air within the sample chamber to reduce time to equilibrium. Since both dewpoint and sample surface temperatures are simultaneously measured, the need for complete thermal equilibrium is eliminated. -
Page 13: Getting Started
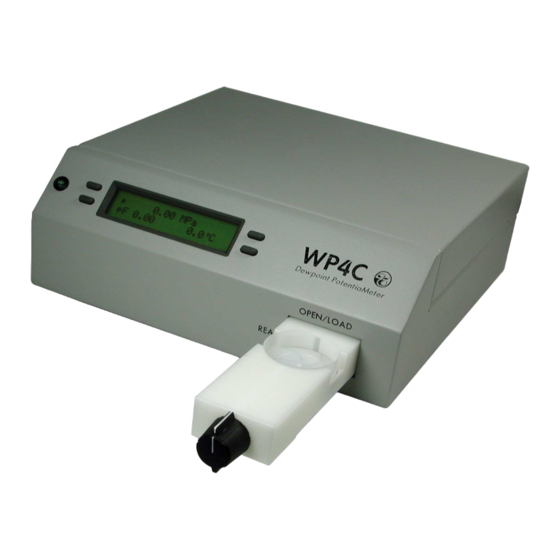
PotentiaMeter 3. Getting Started 3. Getting Started Components of your WP4C Your WP4C should have been shipped with the following items: • WP4C main unit • Quickstart guide • Certificate of Calibration • Power cord • RS-232 interface cable •... -
Page 14: Choosing A Location
PotentiaMeter 3. Getting Started Choosing a Location To ensure that your WP4C operates correctly and consis- tently, place it on a level surface. This reduces the chance that sample material will spill and contaminate the inside of the instrument. To protect the internal electrical com-... -
Page 15: Preparing The Wp4C For Operation
Back view of WP4C Preparing the WP4C for Operation After finding a good location for your WP4C, plug the power cord to the back of the unit. Before turning it on, pull open the sample drawer (turn the knob to the “OPEN/LOAD”... -
Page 16: Portability
1. Purchase a portable power inverter that plugs into the 12V output (cigarette lighter) of your vehicle. The inverter should have a continuous output of at least 140 Watts. 2. Place the WP4C on a level surface. Care should be... - Page 17 3. Plug the 12-volt inverter to the 12-volt output of the vehicle, or directly to the battery itself. 4. Plug the WP4C to the inverter, and turn it on. When the instrument is on, it draws up to 1 amp. Check the...
-
Page 18: The Menus
0.00 MPa 0.0°C pF 0.00 Every time you turn on your WP4C, it will come to this screen. If this screen doesn’t appear, refer to Chapter 12 for troubleshooting instructions. As mentioned earlier, the water potential and sample temperature are displayed on the screen. -
Page 19: Changing Languages
Select the desired language, then press the lower left button to exit. Reading Modes Precise Mode The first time you turn on the WP4C, it will be in precise mode. In this mode, measurements on a sample are... - Page 20 (0.03MPa for Ψ>-40MPa; otherwise 0.3MPa) . The WP4C always starts in precise mode. To toggle between the precise, continuous and fast modes, press the top left button. The display will show a small p, c or f to the left of the water potential readings: “c”...
-
Page 21: System Configuration
> -0.5MPa. In this mode the WP4C will measure the sample, stop to dis- play the water potential and sample temperature, then begin another read cycle. Between samples, it will signal you with the green LED flash, accompanied by the beeper, if it is enabled. - Page 22 LED, located on the left front corner of the WP4C’s case. In fast and precise reading modes, the LED will flash once when a...
- Page 23 PotentiaMeter 4. The Menus continuously until the knob is moved to the OPEN/ LOAD position (if not operating in continuous mode). You cannot turn off or change the LED flashing functions. There are three beeper options, represented by three icons: No beeping.
-
Page 24: Setting The Temperature
PotentiaMeter 4. The Menus Setting the Temperature The WP4C gives you the ability to manually set your instrument’s sample chamber temperature. This is done by set T pressing the lower right button next to the “ ” in the system configuration menu. The following screen will... - Page 25 When the temperature control is disabled the diplay will show ‘off ’ in place of the temperature set- ting Important tips with the WP4C • Before reading, wait for approximately 30 minutes to let the chamber’s temperature stabilize after turning it on.
-
Page 26: Sample Equilibration Screen
Sample Equilibration Screen To see the temperature difference between your sample and the WP4C, press the lower right button at the main menu. This screen can only be accessed when the drawer knob is in the OPEN/LOAD position. The following... -
Page 27: Calibration And Verification
5. Calibration and Verification 5. Calibration and Verification Verification WP4C uses the chilled mirror dewpoint technique for mea- suring water potential. This is a primary method but cleanli- ness of the instrument can affect the calibration. The calibration slope is fixed during factory calibration. The user just adjusts the zero offset. -
Page 28: When To Verify Calibration
PotentiaMeter 5. Calibration and Verification When to Verify Calibration The calibration of your WP4C should be checked with the KCl standard before each use. It can also be checked by measuring distilled water, but this is often not a good choice for checking calibration. - Page 29 5. Calibration and Verification 2. Empty the whole vial of KCl solution into a sample cup and place it in the WP4C’s sample drawer. Make sure you calibrate using the same type of sample cup (plastic of stainless steel) that you will make subse- quent measurements with.
- Page 30 PotentiaMeter 5. Calibration and Verification 5. If your WP4C is reading within 0.05 MPa of the KCl solution, press -Exit- and proceed with reading. If it is not, a change in calibration may have occurred, or the sensor chamber may be contaminated. For cleaning instructions, see Chapter 10.
-
Page 31: Sample Preparation
Choosing a Sample Cup The WP4C comes with two types of samples cups: dispos- able plastic cups and stainless steel cups. The disposable plastic cups are adequate for most samples, but are not good for samples in the wet end. -
Page 32: Preparing The Sample
1. Place the sample in a disposable sample cup, com- pletely covering the bottom of the cup, if possible. WP4C may not be able to accurately measure a sample that does not (or cannot) cover the bottom of the cup. -
Page 33: Dry Samples
However, samples with such dry water potential values are rare. When a sample’s water potential value is drier than about -300 MPa, WP4C will display an error message indi- cating the lowest reading it could make on that particular sample. For example, if you were measuring a dry sample and the following screen appeared: <... - Page 34 For samples that are more than 1°C below chamber temperature, the WP4C waits until their temperature increases to 1 °C below chamber temperature to start a...
-
Page 35: Measuring Plant Samples
Readings are therefore speeded up if sample temperature is just a little below chamber temperature. Measuring Plant Samples The WP4C can be used to measure the water potential of leaves and plant material. Please refer to the application note: Measurement of Leaf Water Potential Using the... -
Page 36: Taking A Reading
PotentiaMeter 7. Taking a Reading 7. Taking a Reading Once you have prepared your sample, you are ready to take readings. 1. Turn the sample drawer knob to the OPEN/LOAD position and pull the drawer open. 2. Place your prepared sample in the drawer. Check the top lip of the cup to make sure it is free from sample residue (remember, an over-filled sample cup will con- taminate the chamber’s sensors). -
Page 37: How Wp4C Takes Readings
LED flash and beeper (if you have the beeper enabled). Cautions • Never leave a sample in your WP4C after a reading has finished. The sample may spill and contaminate the instrument’s chamber if the instrument is accidentally moved or jolted. - Page 38 7. Taking a Reading • The physical temperature of the instrument should be between 5°C—43°C. Between these temperatures, WP4C will measure samples of similar temperature quickly and accurately. • If you are reading and a triangular warning symbol appears in the top right corner of the display, this indi- cates that the mirror has become too dirty to give accurate measurements.
-
Page 39: Computer Interface
PotentiaMeter 8. Computer Interface 8. Computer Interface Your WP4C was shipped to you with a standard RS-232A interface cable. Using this, you can use your computer’s terminal program to send water potential data to your computer for further analysis and storage. Set up your ter- minal program as follows: 1. - Page 40 PotentiaMeter 8. Computer Interface in the terminal session, or cut and paste it to a spread- sheet or text editor. A good, free terminal program can be found at http://ttssh2.sourceforge.jp.
-
Page 41: Theory: Water Potential
Pressure potential depends on the hydrostatic or pneu- matic pressure on the water. The WP4C measures the sum of the osmotic and matric potentials in a sample. Often one or the other of these potentials will be the dominant factor in determining the total potential. - Page 42 In the WP4C, a sample is placed in a sample cup, which is sealed against a sensor block.
-
Page 43: Effect Of Temperature On Water Potential
0.05 MPa, temperature difference measurements need to be accurate to 0.006°C. WP4C’s infrared thermometer measures the difference in temperature between the sample and the block. It is care- fully calibrated to minimize temperature errors, but achieving 0.006°C accuracy is difficult when temperature... -
Page 44: Estimating Osmotic Potential
Estimating Osmotic Potential The WP4C measures the sum of osmotic and matric potential. An approximate value for the osmotic potential can be found by measuring the electrical conductivity (EC) of the saturation extract of the soil. The osmotic potential of the saturation extract is computed from: Ψ... -
Page 45: Cleaning And Maintenance
They also don’t have any other compounds in the tissue that may contaminate the sensors in the WP4C’s block. Never use cotton swabs to clean the block sensors. Most cotton swabs con- tain adhesives and other compounds that are released and transferred to the mirror and other surfaces, contaminating them. - Page 46 PotentiaMeter 10. Cleaning and Maintenance upward and then sliding the lid back (away from the front of the case) and off. 3. Unscrew the two thumbscrews that secure the sensor block. 4. Unplug the cable with the 20-pin socket that attaches the block to the main circuit board by releasing the two locking levers that are on either side of the socket.
-
Page 47: Cleaning Procedure
PotentiaMeter 10. Cleaning and Maintenance Cleaning Procedure: Cleaning your WPC4 is a multi-step procedure which involves washing, rinsing, and drying for each specific area as outlined below: 1. Cleaning the Inside Chamber Note: Be extremely careful not to damage the fan blades in the cham- ber. - Page 48 PotentiaMeter 10. Cleaning and Maintenance f. Visually inspect the sample chamber for cleanliness. Re-clean if necessary. Note: Do not reuse Kimwipes. 2. Cleaning the Mirror NOTE: Wash hands with soap and water (to prevent oils from con- taminating the Kimwipe tissue and being transferred to the mirror). a.
- Page 49 PotentiaMeter 10. Cleaning and Maintenance 4. Cleaning the Thermopile a. Wrap a new Kimwipe around the end of the thin plas- tic rod (spatula) and moisten it with isopropyl alcohol or Decagon Cleaning Solution. b. WASH--Swipe the moistened Kimwipe across ther- mopile.
-
Page 50: Checking Calibration
6. Connect the WP4C’s power cord. Checking Calibration After you have cleaned the chamber and other parts of your WP4C, it is important to check the instrument’s per- formance in order to correct for any calibration change that may have occurred during cleaning procedures. -
Page 51: Repair Instructions
PotentiaMeter 11. Repair Instructions 11. Repair Instructions If your WP4C ever needs to be sent in for service or repair*, call Decagon at (509) 332-2756 or 1-800-755- 2751, or fax us at (509) 332-5158. We will ask you for your address, phone number, and serial number. For non-... - Page 52 2. Put your instrument in a plastic bag to avoid disfigur- ing marks from the packaging. 3. Don’t ship your WP4C to us with the power cord; we have plenty here to use with your instrument, and it may damage the instrument in shipment.
-
Page 53: Repair Costs
We have loaner instruments that can be provided while your instrument is being serviced. There is, however, a limited number of loaner instruments. They are granted on a “first-come-first-served” basis. This service is in place to help you if your WP4C needs service during criti- cal operations. -
Page 54: Troubleshooting
PotentiaMeter 12. Troubleshooting 12. Troubleshooting WP4C is a high performance instrument, designed to have low maintenance and few problems if used with care. Unfortunately, sometimes even the best operators using the best instruments encounter technical difficulties. Here is a list of some problems that may occur. If you have encountered a problem that isn’t addressed here, or if... - Page 55 • Block memory compo- turning on WP4C nent has failed 7. 7. 7. 7. “set T” option no Temperature control mod- longer appears on sy s- ule in WP4C is broken tem config screen or not functioning...
- Page 56 PotentiaMeter 12. Troubleshooting 1. PROBLEM: WP4C won’t turn on. SOLUTION: • Check to make sure your power cord is securely attached the back of the instrument, and into the power outlet. • A power surge may have caused a fuse to blow. To change the fuses, follow these instructions: 1.
- Page 57 PotentiaMeter 12. Troubleshooting on. If the fuse blows again, a failed component may be causing the problem. Contact Decagon to make arrangements for repairs. 2. PROBLEM: Readings are slow or inconsistent. SOLUTION: • The sample chamber may be dirty. Refer to Chap- ter 10 of the manual for directions on cleaning the sample chamber.
- Page 58 PotentiaMeter 12. Troubleshooting SOLUTION: • The thermopile in your chamber, which measures sample temperature, may have become contami- nated. Refer to Chapter 10 for directions on cleaning. • If you weren’t using Decagon’s KCl verification standards, high readings may indicate that the salt solution you are using is not in equilibrium.
- Page 59 The mirror needs to be cleaned, along with the rest of the sample chamber, until it disappears. This triangle is a mirror performance indicator. When the WP4C senses that the mirror performance has dropped to unacceptable levels, it will display the triangular warning sign after the sample has been measured.
-
Page 60: Sensor Performance Screen
If, after cleaning your instrument and reading the other troubleshooting hints, you have reason to believe that one of the components of your WP4C may be causing mea- surement error, you can access a screen that will display values for component performance. This is done by hold- ing down the lower right button while turning on the instrument. - Page 61 PotentiaMeter 12. Troubleshooting ence in temperature between the block and the mirror. If this is zero, there is something wrong with the thermocou- ple. The top right value is the value read by the thermo- pile, which is the temperature difference between the block and what it “sees”...
-
Page 62: Further Reading
PotentiaMeter 13. Further Reading 13. Further Reading References: Brye, K.R. (2003) Long-term effects of cultivation on par- ticle size and water-retention characteristics deter- mined using wetting curves. Soil Science Society of America 168:7 459-468. Campbell, E.C., G.S. Campbell, and W.K. Barlow. (1973) A dewpoint hygrometer for water potential measure- ment. -
Page 63: Application Notes
PotentiaMeter 13. Further Reading Application Notes The following WP4C application notes are available from Decagon by request and via our website under the educa- tion tab, choose WP4C. • Generating a Soil Moisture Characteristic with the WP4C. • Measuring Leaf Water Potential using the WP4C. -
Page 64: Preparing Salt Solutions
PotentiaMeter Appendix A Appendix A Preparing Salt Solutions Following is a table showing the water potential at given concentrations of NaCl and KCl at 20°C. Table 2: Water Potential of NaCl and KCl in Megapascals (MPa) Concentration NaCl (Moles/kg) 0.05 -0.232 -0.232 0.10... - Page 65 PotentiaMeter Appendix A...
- Page 66 PotentiaMeter Appendix A...
-
Page 67: Index
Index Accessories 7 Application notes 57 Beeper 16 changing Block sensors 39 Block failure 49,53 Buttons for menu selection 12 c for continuous mode 14 Calibration changes in 21 menu 17 steps 22–24 when to check 22 Calibration drift 21 Cautions 31 Checking calibration 44 Chilled-mirror technique 5... - Page 68 Cotton swabs not used for cleaning 39 Customer service 1 Czech 13 Danish 13 Dirty mirror indicator 32 Distilled water 22 Dry samples 52 Dry water potential 27 E-mail address 2 Error messages 48,52 Exit 17 inside sample chamber 6 Fast mode 15 Fax number 2 Features 8...
- Page 69 Instrument 4 Italian 13 KCl standards 21 Languages changing 13 Leaf measuring water potential in continuous mode 15 LED 16 Linear offset how to adjust for 22 Loaners 47 Location for reading 8 Main menu 10, 12 Maintenance 39 Manual 1 Matric potential 35 Menus main menu 12...
- Page 70 27 long read time 49, 51 Reading modes 13 Continuous 14 Fast 15 Precise 13 Readings cautions 31 how WP4C takes 31 taking readings 30 References 56 Repair costs 47 instructions for 45 shipping 45 Salt standards. See verification standards...
- Page 71 dry water potential 27 not at room temperature 27 preparation 25 slow water-emitting 51 too dry 52 too hot 31 Sample cups cleaning 26 filling level 26 sealing 26 Sample equilibration screen 6, 20 Saturated salts 58 Seller’s liability 3 Sensor performance screen 54 Shipping for repair 45 Spanish 13...
- Page 72 35 Water potential 58 definition 5, 35 displayed 10 equation 36 measuring 35 theory 35 WP4C and temperature 6 Chilled mirror dewpoint technique 5 important tips 19 measuring water potential 36 preparing for operation 9 theory 35...
Need help?
Do you have a question about the WP4C and is the answer not in the manual?
Questions and answers