
Related Manuals for Hach 2100P


Summary of Contents for Hach 2100P
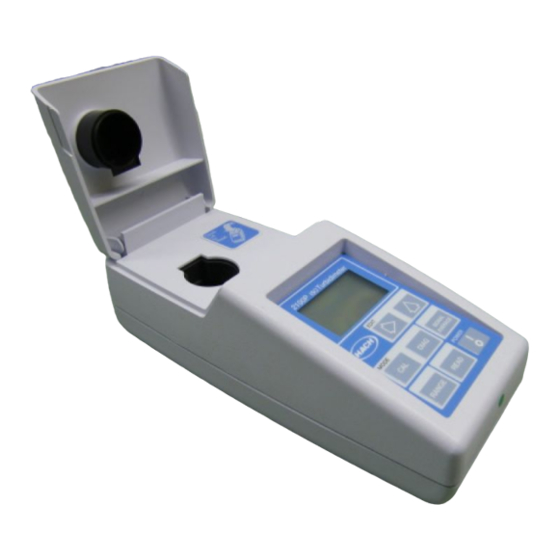
- Page 1 CAT. NO. 46500-88 PORTABLE TURBIDIMETER Model 2100P Instrument and Procedure Manual © Hach Company, 1991-2004. te/dk 3/04 8ed All rights reserved. Printed in the U.S.A.
-
Page 3: Table Of Contents
TABLE OF CONTENTS TABLE OF CONTENTS ..............3 CERTIFICATION ................5 SAFETY PRECAUTIONS ............. 7 SPECIFICATIONS ................9 OPERATION ..................11 SECTION 1 DESCRIPTION ............13 1.1 General Description............... 13 1.2 Accessories ..................14 1.3 Principle of Operation ..............14 1.4 Preparation for Use................ 15 1.4.1 Unpacking ................ - Page 4 TABLE OF CONTENTS, continued SECTION 3 OPERATION ............33 3.1 Operational Controls and Indicators ..........33 3.2 Using the Read Key ..............35 3.2.1 Continuous Reading ............35 3.3 Using the Signal Averaging Key........... 35 3.4 Using the Range Selection Key ............ 36 3.5 Restoring the Default Calibration ..........
-
Page 5: Certification
Hach Company certifies this instrument was tested thoroughly, inspected and found to meet its published specifications when it was shipped from the factory. The Model 2100P Portable Turbidimeter has been tested and is certified as indicated to the following instrumentation standards: Product Safety Battery/Eliminator Power Supply Only: 120 Vac, 60 Hz, UL Listed &... - Page 6 The following techniques of reducing interference problems are applied easily: 1. Disconnect the battery eliminator from it’s power source and from the 2100P Portable Turbidimeter to verify if it is the source of the interference 2. If the battery eliminator for the 2100P Portable Turbidimeter is plugged into the same outlet as the device with which it is interfering, try another outlet.
-
Page 7: Safety Precautions
SAFETY PRECAUTIONS Please read this entire manual before unpacking, setting up, or operating this instrument. Pay particular attention to all danger and caution statements. Failure to do so could result in serious injury to the operator or damage to the equipment. To ensure the protection provided by this equipment is not impaired, do not use or install this equipment in any manner other than that which is specified in this manual. -
Page 9: Specifications
SPECIFICATIONS Specifications subject to change without notice. Operating specifications applicable at 25 °C unless noted. Program software copyrighted by Hach Company, 1991. Measurement Method: Ratio Nephelometric signal (90°) scatter light ratio to transmitted light Range: 0-1000 NTU with automatic decimal point placement or manual range selection of 0-9.99, 0-99.9 and 0-1000 NTU... - Page 10 SPECIFICATIONS, continued Operating Temperature: 0 to 50 °C (32 to 122 °F) (instrument only) Operating Humidity Range: 0 to 90% RH noncondensing at 30 °C; 0 to 80% RH noncondensing at 40 °C; 0 to 70% RH noncondensing at 50 °C Power Requirements: Four AA Alkaline cells or optional battery eliminator Battery Life: Typically 300 tests with signal average mode off;...
-
Page 11: Operation
OPERATION DANGER Handling chemical samples, standards, and reagents can be dangerous. Review the necessary Material Safety Data Sheets and become familiar with all safety procedures before handling any chemicals. DANGER La manipulation des échantillons chimiques, étalons et réactifs peut être dangereuse. -
Page 13: Section 1 Description
5.5 minutes if no keystrokes occur (does not influence operation). If this occurs, simply turn the instrument on – the 2100P will resume operation as if the power had not been interrupted. The instrument, all standard accessories, and the optional battery eliminator may be conveniently stored in the carrying case. -
Page 14: Accessories
1.3 Principle of Operation The Model 2100P Portable Turbidimeter operates on the nephelometric principle of turbidity measurement. This instrument meets the design criteria specified by the United States Environmental Protection Agency, Method 180.1. -
Page 15: Preparation For Use
Service Department, Hach Company, Loveland, Colorado. The toll-free number in the United States is 800-227-4224. International customers should contact the Hach office or authorized distributor serving your area. Refer to REPAIR SERVICE on page 77. Please do not return the instrument without prior authorization from Hach. -
Page 16: Using The Battery Eliminator And Rechargeable Batteries
Batteries are not necessary for battery eliminator operation. 1.4.4 Calibration The 2100P Portable Turbidimeter is calibrated with Formazin Primary Standard at the factory and does not require recalibration before use. Hach recommends recalibration with formazin once every three months, or more often as experience dictates. - Page 17 SECTION 1, continued for application, but must be assigned values before use from formazin calibration. See Section 3.6 on page 37 for calibration instructions.
-
Page 19: Section 2 Turbidity Measurement
SECTION 2 TURBIDITY MEASUREMENT 2.1 Operating Controls and Indicators Figure 4 shows the 2100P controls and indicators. Refer to SECTION 3 for a detailed description of each control and indicator. Figure 4 Keyboard and Display with Descriptions Displayed when instrument... -
Page 20: Turbidity Measurement Procedure
SECTION 2, continued intermediate results. The initial value is displayed after about 11 seconds and the display is updated every 1.2 seconds until all ten measurements are taken (about 20 seconds). After this, the lamp turns off, but the final measured turbidity value continues to be displayed until another key is pressed. - Page 21 SECTION 2, continued Press: Insert the sample cell Select manual in the instrument cell or automatic range The instrument will turn compartment so the selection by pressing the on. Place the instrument diamond or orientation key. The display RANGE on a flat, sturdy surface. mark aligns with the will show AUTO RNG Do not hold the...
-
Page 22: Measurement Notes
SECTION 2, continued 2.2.2 Measurement Notes • Always cap the sample cell to prevent spillage of sample into the instrument. • When taking a reading, place the instrument on a level, stationary surface. It should not be held in the hand during measurement. •... -
Page 23: Cleaning Sample Cells
Applying a thin coat of silicone oil will mask minor imperfections and scratches which may contribute to turbidity or stray light. Use silicone oil equivalent to Hach Cat. No. 1269-36. This silicone oil has the same refractive index as glass. When applied in a thin, uniform coat, the oil fills in and masks minor scratches and other imperfections in the glass. -
Page 24: Orienting Sample Cells
SECTION 2, continued Note: Soft, lint-free cloth (velvet) works well for oiling. Store the oiling cloth with the sample cells and keep it free of dirt. After a few applications of oil, the cloth will contain enough residual oil that simply wiping the cell with the oiled cloth will provide a sufficient oil coat on the sample cell. - Page 25 SECTION 2, continued Fill the clean sample Press: to turn the Insert the sample cell to the line with instrument on. cell into the sample high quality water compartment. Close (< 0.5 NTU). Cap and the cover. wipe with lint-free cloth. Apply silicone oil.
-
Page 26: Matching Multiple Sample Cells
SECTION 2, continued 2.3.4 Matching multiple sample cells Precise measurements of very low turbidity samples require the cells be optically matched or a single cell be used for all measurements. If more than one cell is used, follow this procedure to match (index) the cells: Clean and oil Fill the clean sample Press:... - Page 27 SECTION 2, continued READ Press: Remove the cell, Repeat step 8 until READ rotate it slightly and the value displayed for Record the cell’s position reinsert into the cell the second cell is within in the cell compartment compartment. Close the 0.01 NTU (or 1%) of the and the displayed cover, then press...
-
Page 28: Removing Bubbles (Degassing)
SECTION 2, continued 2.3.5 Removing Bubbles (Degassing) Before measurement, removing air and other trapped gasses from the sample is strongly recommended, even if bubbles are not visible. Four degassing methods are commonly used: 1. applying a partial vacuum 2. adding a surfactant 3. - Page 29 Surfactants change the surface tension of the water, which releases trapped gases. Hach recommends a surfactant such as Triton X-100 or the equivalent, Hach Cat No. 14096-37. Put one drop of Triton X-100 in the sample cell before adding sample.
- Page 30 SECTION 2, continued 2.3.5.3 Using an ultrasonic bath Note: The time necessary to expel bubbles may vary from a few seconds to a minute or more. To avoid excessive application of ultrasound, a simple procedure can be followed. First, apply ultrasound until all visible bubbles are absent.
-
Page 31: Measuring Overrange Samples
This results in a negative interference – the measured turbidity is lower than the actual turbidity. This condition is called “going blind”. A multidetector ratioing instrument, such as the Hach 2100P Turbidimeter, minimizes this effect and extends the instrument range. -
Page 32: Representative Sampling
SECTION 2, continued Use secondary standards for periodic calibration checks. Please note ® that Gelex standards must be assigned values after StablCal Stabilized Formazin calibration or formazin calibration and before use as secondary standards. Gelex standards must be recalibrated (values assigned) each time the instrument is calibrated with StablCal Stabilized Formazin or formazin. -
Page 33: Section 3 Operation
Signal Averaging mode. After the initial delay, the reading is updated every 1.2 seconds. Used to perform a calibration or review calibration data. Also terminates a calibration or calibration review and returns to the 2100P measurement mode. - Page 34 SECTION 3, continued Description Edits a flashing digit in the calibration mode or sequences through the calibration standards (S0,S1, S2, S3) or diagnostic menu. Used to move the editing cursor to the digits being edited in the calibration mode or initiate editing of a standard value. Turns the signal averaging function on or off.
-
Page 35: Using The Read Key
SECTION 3, continued Display Icon Description SIGNAL Indicates the signal averaging mode is on. The icon turns off if AVERAGE signal averaging is not selected. AUTO RNG Indicates instrument is in automatic range mode. The icon turns off when manual range mode is selected. 8888 The 4-digit display is active when the instrument is on (measurements are displayed to three digits). -
Page 36: Using The Range Selection Key
(For models with serial number less than 920300000800, disappears). This clears 2100 any user-entered calibration from memory; the 2100P will use the default calibration for measurement. will appear and continue to CAL? flash until a user-entered calibration is successfully completed. -
Page 37: Calibration
Section 3.6.1.3 for information on preparing the standards for use. Note: Hach StablCal Stabilized Formazin in 20-, 100-, and 800-NTU values is packaged in convenient sets for calibration of the 2100P Turbidimeter. The set may be ordered in 500-mL size bottles by specifying Cat. No. 26594-00, in 100-mL size bottles by specifying Cat. - Page 38 SECTION 3, continued • Do not transfer the standard to another container for storage. • Do not return standard from the sample cell back into the its original container. Standard contamination will result. • Store standards between 0 and 25 °C. •...
- Page 39 SECTION 3, continued 5. Rinse the sample cell at least one time with the standard and discard the rinse. 6. Immediately fill the sample cell with the standard. Cap the sample cell and let it stand for one minute. The standard is now ready for use in the calibration procedure, Section 3.6.3.
-
Page 40: Formazin Primary Standards
Preparing Formazin Stock Solution Dilute formazin standard solutions from a 4000 NTU stock solution equivalent to Hach Cat. No. 2461-49. The prepared stock solution is stable for up to one year when properly prepared. An alternative to purchasing the 4000 NTU stock solution is preparing a stock solution as follows: 1. - Page 41 Note: Use the same dilution water for all dilutions and the sample blank. Collect at least 1000 mL of high quality dilution water (distilled or deionized water). The 2100P Turbidimeter, as received from the factory, is precalibrated and may be used to check the dilution water turbidity. If the turbidity is greater than 0.5 NTU, filter the water with the Sample...
- Page 42 (Cat. No. 23238-10). 3.6.2.4 Preparing Formazin Dilutions (Factory recommended) Hach Company recommends using 20, 100, and 800 NTU formazin standards for calibrating the 2100P Turbidimeter. Dilutions with other NTU values can be prepared and used (see Section 3.6.3.1 on page 48).
- Page 43 SECTION 3, continued Preparing the 20, 100 and 800 NTU standards Table 1 Formazin Standard Preparation Step 1 Step 2 Step 3 Standards 20 NTU Add 100 mL of With a TenSette* Dilute to the mark dilution water to a pipet, add 1.00 mL with dilution water.
-
Page 44: Calibrating The Turbidimeter
AVERAGE functional in calibration mode. ® Hach Company only recommends the use of StablCal Stabilized Formazin or formazin standards for the calibration of Hach turbidimeters. Hach Company cannot guarantee the performance of the turbidimeter if calibrated with co-polymer styrene divinylbenzene beads or other suspensions. - Page 45 SECTION 3, continued READ READ Press: READ Press: The display will READ show the S1 (with the The instrument will The instrument will 1 flashing) and 20 NTU count from 60 to 0, (67 to count from 60 to 0 or the value of the S1 0 if signal average is on), (67 to 0 if signal average...
- Page 46 SECTION 3, continued READ The display will Press: The display will READ show the S2 (with the show the S3 (with the The instrument will 2 flashing) and 100 NTU 3 flashing) and 800 NTU count from 60 to 0 or the value of the S2 or the value of the S3 (67 to 0 if signal average...
- Page 47 SECTION 3, continued READ Press: Press: READ accept the calibration. The instrument will The instrument will count from 60 to 0 return to measurement (67 to 0 if signal average mode automatically. is on), measure the turbidity and store the Note: Pressing completes the calculation value.
- Page 48 3.6.3.1 Preparing User-selected Formazin Dilutions The formazin solutions should span the entire range of the instrument. Hach recommends preparing three standards: 1. 10 to 30 NTU 2. 90 to 110 NTU 3. 700 to 900 NTU The standards must have a difference of at least 60 NTU.
- Page 49 SECTION 3, continued 3.6.3.2 Calibrating with User-selected Standards Note: For best accuracy use the same sample cell or four matched sample cells for all measurements during calibration. Always insert the sample cell with the same orientation. Fill a clean sample Insert the sample Press: cell to the line (about...
- Page 50 SECTION 3, continued READ Press: Thoroughly mix the The display will READ 10 to 30 NTU range show the S1 icon (with The instrument will standard, then fill a clean the 1 flashing) and count from 60 to 0 sample cell to the line 20 NTU or the value of (67 to 0 if signal average with the standard.
- Page 51 SECTION 3, continued READ Edit the standard When all the digits Thoroughly mix the concentration by show the appropriate 90 to 110 NTU standard, pressing →. The 1 will value, press then fill a clean sample READ stop flashing and the left The instrument will cell to the line with the digit in the display will...
- Page 52 SECTION 3, continued READ The display will Edit the standard When all the digits show the S2 icon (with concentration by show the appropriate pressing →. The 2 will the 2 flashing) and value, press READ 100 NTU or the value stop flashing and the left The instrument will of the S2 standard for the...
- Page 53 SECTION 3, continued READ When all the digits Press: show the appropriate The instrument will store value, press READ the new calibration data The instrument will and return the instrument count from 60 to 0 to the measurement (67 to 0 if signal average mode.
-
Page 54: Using Gelex ® Secondary Turbidity Standards
SECTION 3, continued NOTES • If the key is pressed during calibration, the new calibration data is lost and the old calibration will be used for measurements. Once ↑, and → keys function. in calibration mode, only the READ, I/O, Signal averaging and range mode must be selected before entering the calibration mode. - Page 55 SECTION 3, continued 3.6.4.1 Assigning Values to Gelex Standards Calibrate 2100P with formazin Calibrate the Select automatic Thoroughly clean the instrument with range mode using the outside of the Gelex vials formazin. key. and apply a thin coating RANGE of silicone oil.
- Page 56 3.6.4.2 Routine Calibration Check With Gelex Standards The 2100P Turbidimeter does not require standardization before every measurement as some turbidimeters do. Periodically, as experience dictates, check the instrument calibration using the appropriate Gelex Secondary Standard. Be sure the Gelex standards are aligned correctly when inserting them (diamond aligns with orientation mark).
-
Page 57: Maintenance
MAINTENANCE Some of the following manual sections contain information in the form of warnings, cautions and notes that require special attention. Read and follow these instructions carefully to avoid personal injury and damage to the instrument. Only personnel qualified to do so, should conduct the maintenance tasks described in this portion of the manual. -
Page 59: Section 4 Maintenance
If, after changing batteries, the instrument will not turn off or on and the batteries are good, remove the batteries and reinstall them. If the instrument still won't function, contact Hach Service or the nearest authorized dealer. 4.3 Lamp Replacement The procedure below explains lamp installation and electrical connections. - Page 60 SECTION 4, continued 1. Orient the instrument so it is upside down and the top faces away from you. Remove the battery cover and at least one battery. 2. Remove the lamp assembly by grasping the tab on the left side of the assembly.
- Page 61 SECTION 4, continued 3. Rotate the tab towards the nearest outside edge. The assembly should release and slip out easily. 4. Back the terminal block screws partially out (1 to 2 turns) and remove the old lamp leads.
- Page 62 SECTION 4, continued 5. Gently bend the wires of the new lamp assembly into an “L” shape so they fit easily into the housing. Insert the leads into the terminal screws and tighten with clockwise turns. Gently tug on the wires to make sure they are connected to the terminal block.
- Page 63 SECTION 4, continued 7. Snap the U-shaped bottom of the tab into the slot on the left side of the black plastic that holds the lamp assembly. 8. With your thumb, firmly slide the assembly forward until it stops. Again, push firmly against the tab to make sure the lamp is seated correctly.
- Page 64 SECTION 4, continued 9. Replace the battery(s) and battery cover. 10. Insert the 800 NTU formazin standard into the sample cell. Press and hold . Then press . Release the key after the READ READ software version number disappears from the display (for models with serial numbers less than 920300000800, disappears).
- Page 65 SECTION 4, continued 11. Adjust the scattered light amplifier output by inserting a small flat-bladed screwdriver into the trimpot hole (located on bottom). Adjust the display to read 2.5 ± 0.3 volts (2.0 volts for models that display when turned on). 2100 12.
-
Page 67: Section 5 Troubleshooting
SECTION 5 TROUBLESHOOTING 5.1 Using the Diagnostic Functions Key Enter the diagnostic mode by pressing the key. Exit this mode at DIAG any time by pressing the key again. The diagnostic mode allows access to information about instrument function which may be useful for servicing and troubleshooting. -
Page 68: The Diagnostic Procedure
SECTION 5, continued 5.2 The Diagnostic Procedure DIAG DIAG Fill a clean sample Press: To continuously DIAG cell to the line with clear display the lamp-on The DIAG icon will voltage, press →. The water, cap the cell and turn on and will be place it in the cell lamp icon will flash. - Page 69 SECTION 5, continued Press the ↑ key to scroll through the other diagnostics. Each press of the key increments the digit in the small numerical display below the DIAG icon and the result of the diagnostic measurement is then displayed. Each press of key updates READ the value.
-
Page 70: Other Instrument Diagnostics
SECTION 5, continued 5.3 Other Instrument Diagnostics 5.3.1 Display Test Pressing and holding the key turns on all the display icons and elements so you can determine if all the elements and icons are functioning. The display test sequence will cycle as long as the key is held down. - Page 71 Re-read measurement. Check lamp** Check for obstructed light path. Dilution may be necessary. EEPROM malfunction. Check sum failed. Press I/O. If E 4 reappears, call Hach service. If CAL? appears, recalibrate. A/D overrange. Check for obstructed light path. Call Hach Service.
-
Page 73: General Information
GENERAL INFORMATION At Hach Company, customer service is an important part of every product we make. With that in mind, we have compiled the following information for your convenience. -
Page 74: Replacement Parts & Accessories
Replacement Parts & Accessories REPLACEMENT PARTS Description Cat. No. StablCal Calibration Set for 2100P, Sealed Vials: <0.1 NTU, 20 NTU, 100 NTU, and 800 NTU ...... 26594-05 AA Batteries, 4/pkg ..............19380-04 Battery Door ................46005-00 Carrying Case ................46506-00 ®... - Page 75 Triton-X Solution, 118 mL (4 oz) ..........14096-32 Volumetric Flask, 100 mL ............14574-42 Volumetric Flask, 200 mL ............14574-45 * TenSette™ is a Hach Company trademark. ® ** <0.1 NTU StablCal Standard is used in place of dilution water standard when performing a calibration.
-
Page 76: How To Order
Call 1-800-227-4224 or E-mail techhelp@hach.com. International Customers Hach maintains a worldwide network of dealers and distributors. To locate the representative nearest you, send E-mail to intl@hach. com or contact: In Canada, Latin America, Africa, Asia, Pacific Rim: Telephone: (970) 669-3050;... -
Page 77: Repair Service
REPAIR SERVICE Authorization must be obtained from Hach Company before sending any items for repair. Please contact the HACH Service Center serving your location. In the United States: Hach Company 100 Dayton Avenue Ames, Iowa 50010 (800) 227-4224 (U.S.A. only) -
Page 78: Warranty
LIABLE FOR ANY INCIDENTAL OR CONSEQUENTIAL DAMAGES OF ANY KIND FOR BREACH OF ANY WARRANTY, NEGLIGENCE, ON THE BASIS OF STRICT LIABILITY, OR OTHERWISE. This warranty applies only to Hach products purchased and delivered in the United States. Catalog descriptions, pictures and specification, although accurate to the best of our knowledge, are not a guarantee or warranty.
Need help?
Do you have a question about the 2100P and is the answer not in the manual?
Questions and answers