Table of Contents
Advertisement
Quick Links
Advertisement
Table of Contents

Related Manuals for Roche ACCU-CHECK


Summary of Contents for Roche ACCU-CHECK
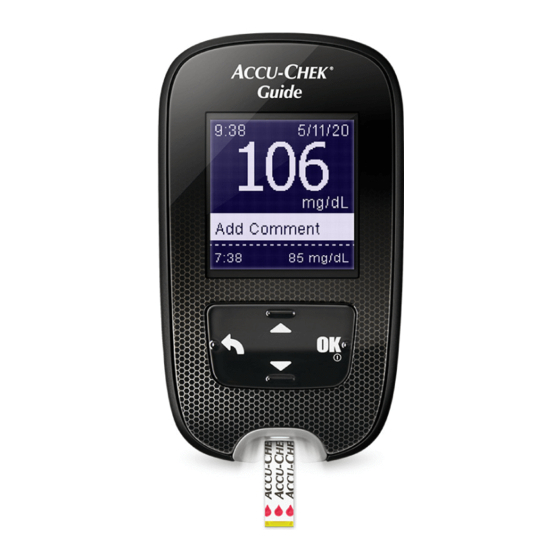
- Page 1 User’s Manual Blood Glucose Meter...
-
Page 3: Table Of Contents
Contents Introduction ..........................3 Chapter 1: Your New System ....................5 Chapter 2: Blood Glucose Tests .....................13 Chapter 3: Control Tests ......................25 Chapter 4: Meter Settings .....................31 Chapter 5: Review Your Data....................53 Chapter 6: Wireless Communication and Meter Pairing ............71 Chapter 7: Meter Maintenance and Troubleshooting .............85 Chapter 8: Technical Information ..................97 Chapter 9: Guarantee ......................103 Index ..........................105... -
Page 5: Introduction
Introduction The Accu-Chek Guide System The Accu-Chek Guide test strips with the Accu-Chek Guide meter are intended to quantitatively measure glucose in fresh capillary whole blood from the finger, palm, forearm, and upper arm as an aid in monitoring the e ectiveness of glucose control. The Accu-Chek Guide test strips with the Accu-Chek Guide meter are intended for in vitro diagnostic self-testing by people with diabetes. - Page 6 Introduction Why Regular Blood Glucose Testing Is Important Testing your blood glucose regularly can make a big di erence in how you manage your diabetes every day. We have made it as simple as possible. Important Information About Your New Meter •...
-
Page 7: Chapter 1: Your New System
Your New System The Accu-Chek Guide Meter Front View Back View Side View 1. Display 6. Battery Door Shows results, messages, and test Flip open to replace batteries. results stored in memory. 7. Micro USB Port 2. Back Button Transfers data from the meter to a computer Returns to a previous display or field. - Page 8 Your New System (for example) Test Strip 9. Test Strip Container* 12. Control Solution Bottle* 10. Metallic End 13. Batteries Insert this end into meter. 14. USB Cable* 11. Yellow Edge Connects the meter to a PC. Touch blood drop or control solution here. * Some items may not be included in the kit.
- Page 9 Your New System Button Functions Here are the functions of the back, arrow, and Power/Set/OK buttons on the meter. These functions are used throughout this manual. See the chapter Meter Settings for specific instructions on setting up the meter. Button Function Return to the previous display.
- Page 10 Your New System Meter Menus Title of display or menu Menu options Scroll down Scroll up Display Description There are more menu options listed beneath the last option. Press on the meter to view the options. There are more menu options listed above the first option. Press on the meter to view the options.
- Page 11 Your New System Display Description Highlighted option (Test) Press to enter the Test menu. Highlighted field (Hour) Press to increase or decrease the hour. Press to set the hour and move to the minutes field.
- Page 12 Your New System Symbols Here is a list of the symbols on the meter display. Symbols Description Above target range After meal Bedtime Before meal Below target range Blood glucose test Checkmark / Control test OK / Selected option or setting Control bottle Control test not OK Edit...
- Page 13 Your New System Symbols Description Flight mode Help Low battery My data No comment Other Overall Settings Test reminder Warning Within target range...
- Page 14 Time Format appears. Main Menu. Press to highlight 12 hour (am/pm) or 24 hour. Press to set the option and return to Main Menu. NOTE If you select the wrong language and cannot correct it, contact Roche.
-
Page 15: Chapter 2: Blood Glucose Tests
Blood glucose results can be displayed in either mg/dL or mmol/L. The back label of the meter shows the unit of measurement. If the meter shows the wrong unit, contact Roche. If you do not know which unit of measurement is correct for you, contact your healthcare professional. Using the wrong unit of measurement may cause misinterpretation of your actual blood glucose level and may lead to improper therapy. -
Page 16: Performing A Blood Glucose Test With Blood From Your Fingertip
Blood Glucose Tests Using the Accu-Chek Guide System • Use only Accu-Chek Guide test strips. • Use the test strip immediately after removing it from the test strip container. • Do not apply blood or control solution to the test strip before inserting it into the meter. •... - Page 17 Blood Glucose Tests Wash your hands with warm Check the use by date on the Remove a test strip from the soapy water and dry thoroughly. test strip container. test strip container. Prepare the lancing device. Do not use test strips past the Close the cap tightly.
- Page 18 Blood Glucose Tests Gently squeeze your finger to Touch the yellow edge of the Analyzing appears when there assist the blood flow. This helps test strip to the blood drop. Do is enough blood in the test you get a blood drop. not put blood on top of the test strip.
- Page 19 Blood Glucose Tests Add Comment appears. Press to highlight a The final result appears. Press to set the comment. Press to set the comment for the comment and return to Main Menu. Or to change test result. See the Adding Comments to Blood the comment, press to select the comment.
- Page 20 Blood Glucose Tests Blood Glucose Warnings If your blood glucose result is outside the measurement range of the meter, a warning is displayed. Press to acknowledge the LO or HI warning, OR the meter automatically moves to the LO or HI result display. Blood glucose may be lower than the measurement range of the system.
- Page 21 Blood Glucose Tests Adding Comments to Blood Glucose Results NOTE Analyzing your blood glucose results stored in the meter is an e ective way for you and your healthcare professional to determine how well you are controlling your diabetes. This analysis is a valuable tool for making improvements to your diabetes management.
- Page 22 Blood Glucose Tests Here is a list of comment symbols that can be added to a blood glucose result. Symbols Name Description Before meal If Patterns is On, select Before breakfast, lunch, dinner, or snack (see the following page for adding comments with Patterns On). After meal If Patterns is On, select After breakfast, lunch, dinner, or snack (see the following page for adding comments with Patterns On).
- Page 23 Blood Glucose Tests After performing a blood glucose test, the test The Add Comment menu appears. Press result is displayed on the screen with Add highlight the desired comment (the example here Comment highlighted. Press is Before meal). Press to add a to select the comment.
- Page 24 Do not use alternative site testing to calibrate a continuous glucose monitoring system or to make insulin dosing calculations. If you are interested in AST, talk to your healthcare professional first. To obtain an AST cap and detailed AST instructions, contact Roche.
-
Page 25: Unusual Blood Glucose Results
See the chapter Blood Glucose Tests and repeat Did you follow the directions? the blood glucose test. Contact Roche if you still have problems. Are the meter and test strips working properly? Perform a control test. See the chapter Control Tests for instructions. -
Page 26: Symptoms Of Low Or High Blood Glucose
Blood Glucose Tests Symptoms of Low or High Blood Glucose Being aware of the symptoms of low or high blood glucose can help you understand your test results and decide what to do if they seem unusual. Low blood glucose (hypoglycemia): Symptoms of hypoglycemia may include, but are not limited to, anxiety, shakiness, sweating, headache, increased hunger, dizziness, pale skin color, sudden change in mood or irritability, fatigue, di culty concentrating, clumsiness, palpitations, and/or confusion. -
Page 27: Chapter 3: Control Tests
Control Tests When to Perform a Control Test Performing a control test lets you know the meter and test strips are working properly. You should perform a control test when: • you open a new test strip box. • you left the test strip container open. •... -
Page 28: Performing A Control Test
Control Tests Performing a Control Test You need the meter, a test strip, and control solution Level 1 or Level 2. Check the use by date on the test strip container. Remove a test strip from the test strip container. Do not use test strips past the use by date. - Page 29 Control Tests Select the control solution to test. You will enter Remove the bottle cap. Wipe the tip of the bottle the level later in the test. with a tissue. Squeeze the bottle until a tiny drop forms at the tip. Touch the drop to the yellow Analyzing appears when there edge of the test strip.
- Page 30 Control Tests Control Result and the control bottle symbol appear. Press to select the control level you tested. If you do not select a level, the control result is saved without a control level. Press Within range and appear if the control result Out of range and appear if the control result is within range.
- Page 31 Control Tests Wipe the tip of the bottle with a tissue. Cap the bottle tightly. Remove and discard the used test strip. NOTE The meter turns o 90 seconds after a successful test or 15 seconds after the test strip is removed, provided no other action is taken.
- Page 32 If you chose the wrong control solution level, you can either 1 or 2, when you performed the control test? still compare the control result to the range printed on the test strip container. Are you still unsure of the problem? Contact Roche.
-
Page 33: Chapter 4: Meter Settings
Meter Settings Overview You can adjust the following settings in the meter for your personal preferences. Refer to the sections later in this chapter for details and how to set the options. Setting Options Function Time/Date Time / Date Set the time and date. Beeper On / O Select On or O . -
Page 34: Meter Settings
Meter Settings Setting Options Function Target Ranges O / Single Range / 2 Ranges Select the blood glucose target range appropriate for you. NOTE Consult your healthcare professional for the appropriate target range for you. O – no target range arrow symbols appear with blood glucose result. - Page 35 Meter Settings Setting Options Function Post Meal On / O / Edit time On – reminds you to perform an after meal blood glucose test. Last Result On / O Select whether the previous blood glucose result (within the past 24 hours) appears with the current blood glucose result.
- Page 36 Meter Settings Time/Date Time/Date Turn the meter on by briefly Time/Date is highlighted. Press to adjust each pressing . From Main Menu, Press field. Press to set and move press to highlight Settings. to the next field. Set am or pm Press if necessary.
- Page 37 Meter Settings Beeper Beeper The beeper prompts you: • when a test strip is inserted. • to apply blood or control solution to the test strip. • when enough blood or control solution is drawn into the test strip. • when the blood glucose or control test is complete. •...
- Page 38 Meter Settings Target Ranges Target Ranges Your healthcare professional can tell you what blood glucose range is appropriate for you. It is very important to stay within your target range. Target Ranges can be set from a lower limit of 50–100 mg/dL (2.8–5.5 mmol/L) to an upper limit of 101–200 mg/dL (5.6–11.1 mmol/L).
- Page 39 Meter Settings Target Ranges w WARNING This function is no substitute for hypoglycemia training by your healthcare professional. Turn the meter on by briefly Press to highlight More Target Ranges is highlighted. pressing . From Main Menu, Options. Press Press press to highlight Settings.
- Page 40 Meter Settings Target Ranges Press to highlight Off, Press to adjust the lower limit of the Before Meal target Single Range, or 2 Ranges. range. Press to set and move to the next field. Press to select an option (the Continue to set the upper limit for the Before Meal range and the example here is 2 Ranges).
- Page 41 Meter Settings Patterns NOTE Analyzing your blood glucose results stored in the meter is an e ective way for you and your healthcare professional to determine how well you are controlling your diabetes. This analysis is a valuable tool for making improvements to your diabetes management. Use care when adding comments to blood glucose results.
- Page 42 Meter Settings Patterns Turn the meter on by briefly Press to highlight More Press to highlight Patterns. pressing . From Main Menu, Options. Press Press to highlight Settings. press Press...
- Page 43 Meter Settings Patterns Press to highlight On. Press This message appears if Target Ranges appears on the to move to the option. Target Ranges is O : display (see the Target Ranges Press Press to highlight Yes. Press section of this chapter for details on setting target ranges).
- Page 44 Meter Settings Patterns If Patterns is On and a new pattern is detected with a blood glucose result, a message appears on the display. Press to select Details to Press to highlight View view the blood glucose results Later. that make up that pattern. Press to return to the previous screen.
- Page 45 Meter Settings Reminders Reminders You can set up to 4 general test Reminders per day to remind you to test. A series of beeps sound is displayed for Reminders set in the meter. Reminders: • turn o by inserting a test strip or pressing any button. •...
- Page 46 Meter Settings Reminders Turn the meter on by briefly pressing . From Press to highlight More Options. Press Main Menu, press to highlight Settings. Press Pre-set reminder times appear on the display. Press to highlight Reminders. Press Press to highlight a Reminder time. Press...
- Page 47 Meter Settings Reminders The pre-set reminder time To change the Reminder time Press to adjust each appears. Press shown: field. Press to move to the select On or Off. Press next field. Press to return to Press to highlight Edit time. move to the option.
- Page 48 Meter Settings Post Meal Reminders Post Meal Reminders Post Meal reminders can be set to remind you to test again later when you add a Before Meal comment to a blood glucose result. When a reminder occurs, a series of beeps sound and is displayed.
- Page 49 Meter Settings Post Meal Reminders Turn the meter on by briefly Press to highlight More Press to highlight Post pressing . From Main Menu, Options. Press Meal. Press press to highlight Settings. Press...
- Page 50 Meter Settings Post Meal Reminders Press to highlight On. Press to highlight Edit time. Press to highlight Press to move to the Press 1 hour, 1.5 hours, or 2 hours after a meal for Post Meal option. reminders to occur. Press to move to the...
- Page 51 Meter Settings Last Result Last Result Select whether the previous blood glucose result appears with the current blood glucose result. Test results older than 24 hours do not appear. Turn the meter on by briefly O – only the current blood glucose result appears.
- Page 52 Meter Settings Last Result Press to highlight More Press to highlight Last Press to highlight On Options. Press Result. Press or Off. Press to move the option. Press to set the option and return to the previous menu.
- Page 53 Meter Settings Language Language Choose the language that appears on the meter. Turn the meter on by briefly Press to highlight More Press to highlight . From Main Menu, Options. Press Language. Press pressing press to highlight Settings. Press Press to highlight the desired language.
-
Page 54: Time Format
Meter Settings Time Format Time Format Choose the time format (12-hour or 24-hour clock) that appears on the meter. Turn the meter on by briefly Press to highlight More Press to highlight Time pressing . From Main Menu, Options. Press Format. -
Page 55: Chapter 5: Review Your Data
Review Your Data Overview • Blood glucose results are stored from the newest to the oldest. • The meter automatically stores up to 720 blood glucose results in memory with the time and date of the test and any test result comments. •... - Page 56 Review Your Data Logbook Logbook Logbook is highlighted. Turn the meter on by briefly pressing . From Main Menu, Press press to highlight My Data. Press to scroll through Logbook. Press The most recent test result The 2nd most recent test result...
- Page 57 Review Your Data Logbook To view details about a test result, press to highlight the test result. Press . Test result details shown below only appear if Target Ranges is On or comments were added to a test result. The 2nd most recent test result. The most recent test result.
- Page 58 Review Your Data Averages Averages to highlight Averages. Turn the meter on by briefly Press Press to highlight a category pressing . From Main Menu, Press (the example here is Overall). press to highlight My Data. Press Press Press to highlight a time Press to return to the previous menu if you want to review a period (the example here is...
- Page 59 Review Your Data Target Percent (%) Target Percent (%) Target Percent (%) allows you to view the percentage of your Overall, Before meal, After meal, Fasting, and Bedtime blood glucose results that are above, within, or below your target ranges. •...
- Page 60 Review Your Data Target Percent (%) Press to highlight a time The Target % appears (for the period (the example here is Before meal example). The 90 days). Press number of total tests included in the Target % appears at the bottom of the display.
- Page 61 Review Your Data Low/High Data NOTE Analyzing your blood glucose results stored in the meter is an e ective way for you and your healthcare professional to determine how well you are controlling your diabetes. This analysis is a valuable tool for making improvements to your diabetes management. Use care when adding comments to blood glucose results.
- Page 62 Review Your Data Low/High Data You can select Low BG and High BG results for Overall, Before meal, After meal, Fasting, or Bedtime blood glucose results. Symbol Name Description Overall Includes low and high blood glucose results based on Target Ranges set in the meter. Before meal You may view low or high test results marked with a Before Meal comment for Overall, Before breakfast, Before lunch,...
- Page 63 Review Your Data Low/High Data Turn the meter on by briefly pressing . From Press to highlight Low/High Data. Press Main Menu, press to highlight My Data. Press If Target Ranges is set to On: If target ranges have NOT been On within the last 30 days: Press to select Low or High BG Data (the...
- Page 64 Review Your Data Low/High Data Press to highlight a category (the example If results with detailed meal comments are here is Before meal). Press saved in the Logbook: The meter may prompt you to select detailed categories to view. Press to highlight a category (the example here is Before breakfast).
- Page 65 Review Your Data Patterns NOTE Analyzing your blood glucose results stored in the meter is an e ective way for you and your healthcare professional to determine how well you are controlling your diabetes. This analysis is a valuable tool for making improvements to your diabetes management. Use care when adding comments to blood glucose results.
- Page 66 Review Your Data Patterns Patterns detected by the meter may be displayed on the Main Menu as: Patterns High and low patterns have been detected Patterns may include the following blood glucose High Pattern(s) One or more high patterns have been detected results marked with comments: Low Pattern(s)
- Page 67 Review Your Data Patterns Press to highlight a category Turn the meter on by briefly Press to highlight Low to review (the example here is pressing . From Main Menu, Patterns or High Patterns (the Before breakfast). Press press to highlight the example here is Low Patterns).
- Page 68 Review Your Data Data Transfer Using Wireless Data Transfer Using Wireless This feature allows you to transfer data wirelessly from your meter to another device. to highlight Data to select Wireless. Turn the meter on by briefly Press Press pressing .
- Page 69 Review Your Data Data Transfer Using Wireless If a device has not been paired with your If the meter has already been paired with at meter: least one device: The meter prompts you to pair a device to the Press to choose a wireless device for meter (see the First-Time Pairing section in the data transfer.
- Page 70 Review Your Data Data Transfer Using USB Cable Data Transfer Using USB Cable This feature allows you to transfer data from your meter to special software for diabetes management on a PC using a USB cable. Start the software for data analysis and initiate a data transfer.
- Page 71 Review Your Data Data Transfer Using USB Cable The meter transfers the data to the software.
- Page 72 Review Your Data...
-
Page 73: Chapter 6: Wireless Communication And Meter Pairing
Wireless Communication and Meter Pairing Overview You can wirelessly and automatically synchronize your diabetes information with a mobile device. The process of creating a connection between the meter and the other device is called pairing. You need an application on your mobile device that can accept the meter’s data. Setting Options Function... - Page 74 Wireless Communication and Meter Pairing Setting Options Function Sync Time On / O Select whether to synchronize the time and date to the default paired device. On – the time and date on the meter synchronize to the time and date on the default paired device. O –...
- Page 75 Wireless Communication and Meter Pairing First Time Pairing First-Time Pairing The steps below are for first-time pairing. Up to 5 devices can be paired with the meter at any time. Each device must be paired with the meter one at a time. The meter and the device to be paired should be within 1 meter of each other.
- Page 76 Wireless Communication and Meter Pairing First-Time Pairing Pair Device appears. To pair a device, press The meter displays its code. to highlight Yes. Press The mobile device displays a list of found devices, including the meter. Select the meter from the list.
- Page 77 Wireless Communication and Meter Pairing Flight Mode Flight Mode Select whether wireless communication is available or not. When Flight Mode is on, appears in the title bar and wireless communication is not available. Turn the meter on by briefly Press to highlight Wireless.
- Page 78 Wireless Communication and Meter Pairing Default Device Default Device If more than 1 device is paired, select the default paired device for the Auto-Send and Sync Time features. to highlight Wireless. Press Turn the meter on by briefly pressing . From Press Main Menu, press to highlight Settings.
- Page 79 Wireless Communication and Meter Pairing Auto-Send Auto-Send Select whether data is automatically sent to the default paired device after each test. to highlight Wireless. Press Turn the meter on by briefly pressing . From Press Main Menu, press to highlight Settings. Press Press to highlight...
- Page 80 Wireless Communication and Meter Pairing Sync Time Sync Time Select whether to synchronize the time and date to the default paired device. Turn the meter on by briefly pressing . From Press to highlight Wireless. Press Main Menu, press to highlight Settings. Press Press to highlight Sync...
- Page 81 Wireless Communication and Meter Pairing Pairing Additional Devices Pairing Additional Devices This procedure is to add another paired device (assumes there is already 1 paired device). You can pair 5 devices. If you have 5 paired devices, you must delete a pairing before you can add another device. The device you choose remains the default until you change it.
- Page 82 Wireless Communication and Meter Pairing Pairing Additional Devices Press to highlight Pair If there are already 5 paired Press to highlight the Device. Press devices: device to delete. Press Proceed to Step 5. Maximum paired devices If there are less than 5 paired appears.
- Page 83 Wireless Communication and Meter Pairing Pairing Additional Devices If there is more than 1 paired device, the meter asks if you want When pairing is complete, the new device to be the default device. Press to highlight and the name of the paired No or Yes.
- Page 84 Wireless Communication and Meter Pairing Delete Pairing Delete Pairing This procedure is to delete a paired device (assumes there is at least 1 paired device). You can pair 5 devices. If you have 5 paired devices, you must delete a pairing before you pair to another device.
- Page 85 Wireless Communication and Meter Pairing Delete Pairing Press to highlight Press to highlight the Delete Pairing. Press device to delete. Press to set the option.
- Page 86 Wireless Communication and Meter Pairing Delete Pairing If the selected device is not If the selected device is the Highlight the new default the default device: default device: device and press . The name of the deleted device and The pairing is deleted. The The meter prompts you to appear, along with the new name of the deleted device and...
-
Page 87: Chapter 7: Meter Maintenance And Troubleshooting
The meter automatically tests its own systems every time you turn it on and lets you know if something is wrong. See the Error Messages section of this chapter. If you drop the meter or think the results are not accurate, contact Roche. Changing the Batteries... -
Page 88: Cleaning The Meter
Meter Maintenance and Troubleshooting Cleaning the Meter Keep the meter free of dust. If you need to clean or disinfect it, follow these guidelines carefully to help you get the best performance possible. w WARNING • Do not allow liquid to enter any openings in the meter. •... -
Page 89: Error Messages
WARNING • Never make therapy decisions based on an error message. • If you have any concerns or see any other error message, contact Roche. The meter will not turn on or The meter is connected to a PC The connection between the the display is blank. - Page 90 Meter Maintenance and Troubleshooting There is no connection Blood glucose results were not Data could not be transferred between the meter and PC. transferred to a paired device. from the meter to the PC. Connect the USB cable and Make sure the paired device is Check the PC or USB cable.
- Page 91 Meter Maintenance and Troubleshooting One or more blood glucose The date entered is not valid. A meter setting was changed results are excluded from the while in Flight Mode. Enter the correct date. selected low/high data because The setting change will not the test results are invalid.
- Page 92 Meter Maintenance and Troubleshooting The test strip may be damaged, A meter or test strip error has occurred. not properly inserted, or was Repeat the blood glucose test. previously used. If a second E-3 code appears, perform a control test with the control solution and a new test strip.
- Page 93 Meter Maintenance and Troubleshooting Not enough blood or control Blood or control solution was An electronic error occurred. solution was drawn into the applied to the test strip before Remove the batteries, press Apply drop appeared. test strip for measurement or and hold the Power/Set/OK was applied after the test had Discard the test strip and...
- Page 94 Fluid or foreign material may An electronic error has occurred. be present in the test strip slot. Contact Roche. Remove and reinsert the test strip or repeat the blood glucose or control test with a new test strip. If the problem persists, contact Roche.
- Page 95 Meter Maintenance and Troubleshooting The meter time and date have There are no results in the been changed to match the Logbook. paired device. There is an invalid result in the Logbook. There are no test results in range for the selected data.
- Page 96 Meter Maintenance and Troubleshooting Target Ranges is O and there Target Ranges is O and there are no results for the Target % are no results for the low/high data stored in the meter. data stored in the meter. There are no results stored in the meter for the selected data.
- Page 97 Meter Maintenance and Troubleshooting Patterns is On but there are no Patterns is O . active patterns stored in the meter. Blood glucose may be higher Blood glucose may be lower than the measurement range of than the measurement range of the system.
- Page 98 Meter Maintenance and Troubleshooting...
-
Page 99: Chapter 8: Technical Information
Technical Information Product Limitations See the literature packaged with the test strips and control solutions for the latest information on product specifications and limitations. Specifications Blood volume Refer to the test strip package insert. Sample type Measuring time Measurement range Test strip storage conditions System operating conditions Meter storage conditions... -
Page 100: Technical Information
Performance Analysis – Refer to the test strip package insert. Test Principle – Refer to the test strip package insert. Declaration of Conformity – Roche hereby declares that the Accu-Chek Guide blood glucose meter conforms with the basic requirements and other relevant regulations of the European Directive;... -
Page 101: Product Safety Information
Technical Information Product Safety Information w WARNING • Strong electromagnetic fields may interfere with the proper operation of the meter. Do not use the meter close to sources of strong electromagnetic radiation. • To avoid electrostatic discharge, do not use the meter in a very dry environment, especially one in which synthetic materials are present. -
Page 102: Explanation Of Symbols
Technical Information Explanation of Symbols These symbols may appear on the packaging, on the type plate, and in the instructions for the Accu-Chek Guide meter. Consult instructions for use Biological risks – used meters carry a risk of infection. Caution, refer to safety-related notes in the instructions for use accompanying this product. -
Page 103: Information For Healthcare Professionals
Technical Information Information for Healthcare Professionals w WARNING Healthcare Professionals: Follow the infection control procedures appropriate for your facility. Refer to the test strip package insert for additional healthcare professional information. Sample Handling Always wear gloves when handling blood-contaminated items. Always adhere to the recognized procedures for handling objects that are potentially contaminated with human material. - Page 104 Technical Information...
-
Page 105: Chapter 9: Guarantee
Guarantee Guarantee The statutory provisions on rights in consumer goods sales in the country of purchase shall apply. - Page 106 Guarantee...
-
Page 107: Index
Index alternative site testing 22, 101 settings, meter 31 averages 56 beeper 35 language 51 last result 49 battery, changing 85 patterns 39 battery type 97 post meal 46 blood glucose results, unusual 23 reminders 43 blood glucose test, performing 14 target ranges 36 blood glucose, warning 18 time/date 34... - Page 108 Notes...
- Page 109 Notes...
- Page 110 Notes...
- Page 111 LAST UPDATE: 2015-10...
- Page 112 Bluetooth SIG, Inc. and ® any use of such marks by Roche is under license. All other product names and trademarks are the property of their respective owners. © 2015 Roche Diabetes Care...
Need help?
Do you have a question about the ACCU-CHECK and is the answer not in the manual?
Questions and answers