Siemens OpenStage 60 User Manual
Hipath 8000 series
Hide thumbs
Also See for OpenStage 60:
- User manual (212 pages) ,
- Quick reference manual (10 pages) ,
- Administration manual (378 pages)
Table of Contents
Advertisement
Quick Links
Advertisement
Table of Contents

Subscribe to Our Youtube Channel
Related Manuals for Siemens OpenStage 60


Summary of Contents for Siemens OpenStage 60
- Page 1 HiPath 8000 OpenStage 60/80 SIP User Manual...
-
Page 2: Important Information
Never open the telephone or a key module. Should you en- counter any problems, contact the responsible service per- sonnel. Use only original Siemens accessories. The use of other accessories may be hazardous and will render the warran- ty, extended manufacturer’s liability and the CE marking in- valid. -
Page 3: Location Of The Telephone
Important information Location of the telephone • The telephone should be operated in a controlled environment with an ambient temperature between 5°C and 40°C. • To ensure good speakerphone quality, the area in front of the micro- phone (front right) should be kept clear. The optimum speakerphone distance is 50 cm. -
Page 4: Table Of Contents
Contents Contents Important information ......2 Trademarks ..........2 Location of the telephone . - Page 5 Contents Basic phone functions ......36 Incoming calls ..........36 Answering a call via the handset .
- Page 6 Contents During a call ..........69 Conference .
- Page 7 Contents Privacy/security ......90 Deactivating the ring tone ........90 Do not disturb .
- Page 8 Contents Individual phone configuration ....109 Language settings ........109 Selecting the language for graphic display user prompts .
-
Page 9: General Information
• Your communications platform does not feature this function. Please contact your Siemens sales partner for information on how to upgrade. This user guide is intended to help you familiarize yourself with OpenStage and all of its functions. It contains important information on the safe and proper operation of your OpenStage phone. -
Page 10: Intended Use
Single-line telephone / multi-line telephone Your OpenStage 60/80 is a multi-line telephone. This means that multiple lines can be configured on your Openstage 60/80, which is not the case with single-line phones. Each line is assigned an individual phone number which you can use to make and receive calls. -
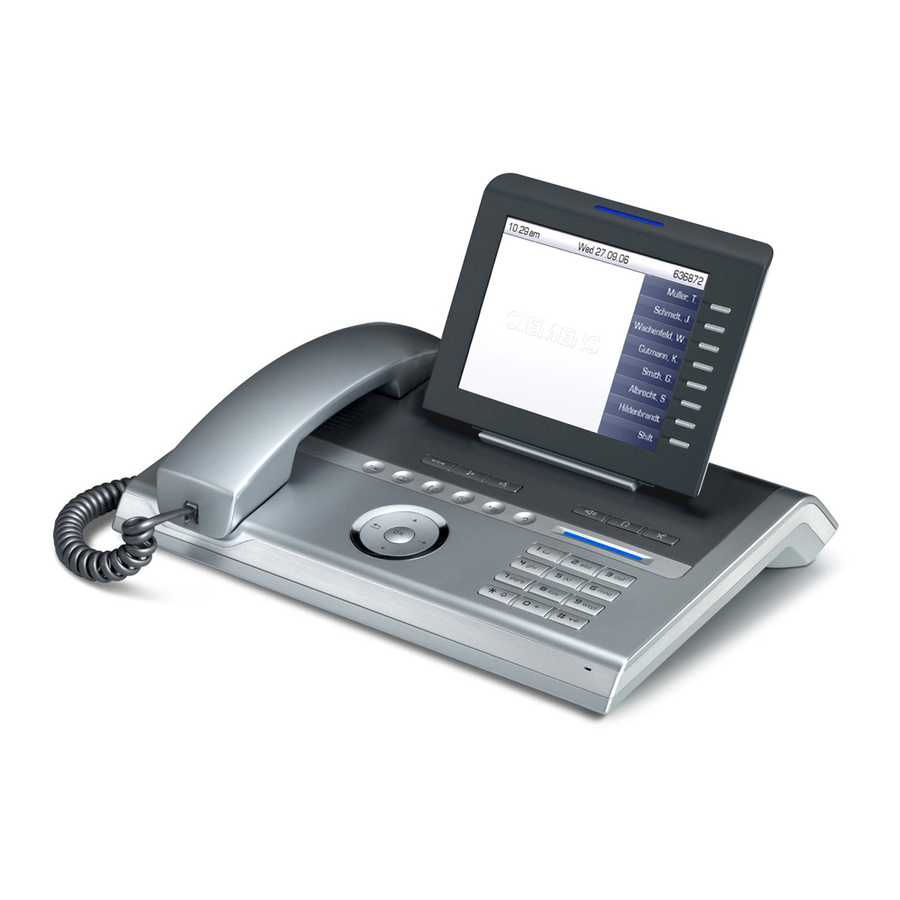
Page 11: Getting To Know Your Openstage Phone
Getting to know your OpenStage phone Getting to know your OpenStage phone The following sections describe the most frequently used operating ele- ments and the displays on your OpenStage phone. OpenStage 80 user interface OpenStage 60 user interface... - Page 12 Getting to know your OpenStage phone You can make and receive calls as normal using the handset. The large graphic display permits intuitive operation of the phone page 19. The mode keys allow easy operation of the applications featured on your telephone. To select a tab within a function press the rele- vant key repeatedly until the required tab is displayed page 14.
-
Page 13: Keys And Controls
Getting to know your OpenStage phone Keys and controls Function keys Function when key is pressed End (disconnect) call Activate/deactivate forwarding Start voice recognition Audio controls Audio keys Function when key is pressed Activate/deactivate loudspeaker for speakerphone mode and open listening Activate/deactivate headset Activate/deactivate microphone (also for speakerphone mode) TouchSlider... -
Page 14: Mode Keys
Getting to know your OpenStage phone Mode keys These sensor keys allow you to switch to the required application with the simple stroke of a key. Function when key is LED display pressed Display telephony interface Blue: Application is active page 25 Flashing blue: Open another applica- tion during a call... -
Page 15: Touchguide
Getting to know your OpenStage phone TouchGuide With the TouchGuide, you can administer most of the functions featured on your OpenStage phone as well as the displays. Operation Functions when key is pressed • Call up the context menu Press •... -
Page 16: Programmable Sensor Keys
Getting to know your OpenStage phone Programmable sensor keys Your OpenStage 80 telephone features more than 9 (OpenStage 60: 8) lit sensor keys that are programmable. To open the programming menu, press and hold down the relevant sensor page 53. - Page 17 Getting to know your OpenStage phone Secondary line The secondary line on your phone is used as a primary line by another sub- scriber in the LAN. Your primary line, which is configured on another tele- phone in the LAN, simultaneously functions as the secondary line on that telephone.
-
Page 18: Keypad
Getting to know your OpenStage phone Keypad In cases where text input is possible, you can use the keypad to input text, punctuation and special characters in addition to the digits 0 to 9 and the hash and asterisk symbols. To do this, press the numerical keys repeated- Example: To enter the letter "h", press the number key on the keypad twice. -
Page 19: Graphic Display
Getting to know your OpenStage phone Graphic display In addition to the status bar and the programmable sensor key list, the graphic display offers a wide range of context-dependent displays. Status bar Programmable sensor key list page 16 Context-dependent displays page 20 Status bar The time, weekday, date, and your phone number are displayed in the sta-... -
Page 20: Context-Dependent Displays
Getting to know your OpenStage phone Context-dependent displays Depending on the situation at hand, the graphic display on your OpenStage phone displays different content, to which you can respond intuitively. Telephony dialogs The dialogs in the lower area of the display prompt you to input data or pro- vide you with information about the call states. -
Page 21: Application Tab
Getting to know your OpenStage phone Context menus The context menu can be called up by pressing on the TouchGuide and offers a range of functions corresponding to the situation at hand. Consultation First entry (selected when the menu is called Hold Call park Selected entry... - Page 22 Getting to know your OpenStage phone Text input via the display keyboard Depending on the context, the display keyboard is displayed with different elements. Element in focus Letters, digits, punctuation or special characters Function bar Use the TouchGuide to operate the display keyboard page 15.
-
Page 23: Ports On The Underside Of The Phone
Getting to know your OpenStage phone Ports on the underside of the phone Keyboard Power supply unit port Network switch Headset Key module Hands... -
Page 24: Applications Available On Your Openstage Phone
Applications available on your OpenStage phone Applications available on your OpenStage phone The following descriptions provide an overview of the various applications available on your OpenStage phone. Application navigation Activating an application You can switch to the relevant application using the mode keys page 14. -
Page 25: Telephony Interface
Applications available on your OpenStage phone Telephony interface Single line view Additional information is displayed in the telephony interface when your phone rings, when you dial a number or during a call, for instance. The same information is available on multi-line telephones for the selected line in the "Line overview". -
Page 26: Multi-Line View
Applications available on your OpenStage phone Multi-line view Two tabs are displayed on the telephony interface: • "My phone" tab - represents the primary line or the line view of a se- lected line page 25 • "Overview" tab - configurable overview of the secondary lines page 17 Press to open this interface. -
Page 27: Phonebooks
Applications available on your OpenStage phone Phonebooks In addition to the local phone book, this application contains entries from other directory services, such as an LDAP corporate directory. If several directories are available, each one is displayed individually on a separate tab. - Page 28 Applications available on your OpenStage phone Local phonebook The "Personal" tab contains your local phonebook. You can store up to 1000 personal contacts in this phonebook. The entries are sorted in alphabetical order and displayed with the icon for the specified default phone number. You can create new contacts or transfer entries from another application to your local phonebook: •...
-
Page 29: Ldap Directory
Applications available on your OpenStage phone Using contacts The following functions are available via the context menu of a selected contact: • Establish a call to a preferred number page 65 • View details page 80 • Delete contact • Create new contact page 80 LDAP directory... -
Page 30: Call Lists
Applications available on your OpenStage phone Call lists All calls and numbers dialed on your phone are logged in chronological or- der in call lists. Callers with suppressed numbers cannot be saved in the call lists. The following call lists are displayed individually on separate tabs: •... -
Page 31: Entry Details
Applications available on your OpenStage phone Entry details Up to ten call attempts can be stored for each entry in the details list. The following information is available via the "Details" context menu: • Name (if available or conveyed as an ID) •... -
Page 32: Voicemail
Applications available on your OpenStage phone Voicemail Depending on the type and configuration of your communication platform (contact the relevant service personnel), messages from services such as HiPath Xpressions are displayed in this application in addition to received callbacks. The following messages are displayed individually on separate tabs: •... -
Page 33: Service/Applications Menu
Applications available on your OpenStage phone Service/Applications menu In addition to the local settings menu, you can access various applications as well as the password-protected administration area with this applica- tion. To call up the Service or Applications menu, press repeatedly until the required tab is displayed. -
Page 34: Network Information
Applications available on your OpenStage phone Network information This overview in the user area of the Service menu provides you with in- formation about the IP address of the phone and the HTML address of the Web interface. It also provides real-time data about the network activity of the phone. -
Page 35: Help Function
Applications available on your OpenStage phone Further details about the network information values listed here can be obtained from the responsible service personnel. Alternatively you can refer to the OpenStage Administration Manual. Administration You can access the administration area via the "Admin" function and by en- tering the administration password. -
Page 36: Basic Phone Functions
Basic phone functions Step by Step Basic phone functions Please read carefully the introductory chapters "Getting to know your OpenStage phone" page 11 and "Applications available on your OpenStage phone" page 24 before perform- ing any of the steps described here on your phone. -
Page 37: Answering A Call Via The Headset
Basic phone functions Step by Step Suggestions for using speakerphone mode: • Tell the other party that speakerphone mode is ac- tive. • Adjust the call volume while speakerphone mode is active. • The ideal distance between the user and the phone in speakerphone mode is about 50 cm. -
Page 38: Open Listening
Basic phone functions Step by Step Open listening You can let other people in the room join in on the call. Let the other party know that you have turned on the loudspeaker. Prerequisite: You are conducting a call via the handset. Activating Press the key shown. -
Page 39: Making Calls
Basic phone functions Step by Step Making calls If you are using a dial plan and "Immediate dialling" is set page 67, dialing is automatically performed as soon as the character string entered matches an entry in the dial plan. If you selected the option "Busy When Dialling"... -
Page 40: On-Hook Dialing
Basic phone functions Step by Step On-hook dialing Press the key shown. Enter the phone number. or In the pop-up menu: Select and confirm the option shown. Redialing S. Hawking The connection is set up as soon as your input in com- plete. -
Page 41: Activating/Deactivating The Microphone
Basic phone functions Step by Step Activating/deactivating the micro- phone You can temporarily deactivate the microphone on your handset to prevent the other party from overhearing a conversation, for instance, with a colleague in the same room. Prerequisite: You are conducting a call. Deactivating the microphone Press the key shown. -
Page 42: Consulting A Second Party
Basic phone functions Step by Step Consulting a second party You can call a second party while a call is in progress. The connection to the first party is placed on hold. Prerequisite: You are conducting a call. Select and confirm the option shown in the connec- Consultation tions’s context menu. -
Page 43: Switching To The Held Party (Alternating)
Basic phone functions Step by Step Switching to the held party (alternating) Prerequisite: You are conducting a consultation call page 42. Alternating Select and confirm the option shown in the connec- tion’s context menu. It does not matter which context menu is open when alternating. -
Page 44: Call Forwarding
Basic phone functions Step by Step Call forwarding HiPath 8000 also supports system-based call for- warding. These functions are described from page 94 onwards. You should never combine phone-based call forwarding with system-based call forwarding in HiPath 8000. You can forward calls for your phone to another phone. On multi-line telephones page 10, you can only configure call forwarding for the primary... -
Page 45: Programming Call Forwarding
Basic phone functions Step by Step Programming call forwarding Saving destination phone numbers for call forwarding You can save up to five destination phone numbers for call forwarding. These destination phone numbers can then be assigned different forwarding conditions. Press the key shown. The pop-up menu opens: Select and confirm the option shown. - Page 46 Basic phone functions Step by Step Defining the ring duration before call forwarding on no reply You can define how often the phone should ring until "No reply" call forwarding activates. Prerequisite: The phone is idle. Press the key shown. The pop-up menu opens: Select and confirm the option shown.
-
Page 47: Activating/Deactivating Call Forwarding
Basic phone functions Step by Step Activating/deactivating call forwarding Prerequisite: At least one destination phone number is programmed page 45. Press the key shown. The pop-up menu opens: Select and confirm the option shown. Edit call forwarding An overview of call forwarding settings appears. Select and confirm the option shown. -
Page 48: Activating Call Forwarding For All Calls
Basic phone functions Step by Step Activating call forwarding for all calls Use the function key to activate or deactivate call forwarding directly for all calls. Prerequisite: At least one destination phone number is programmed page 45. Press the key shown. The pop-up menu opens: The pop-up menu disappears after around five seconds and the... -
Page 49: Callback
Basic phone functions Step by Step Callback You can request a callback if the station called is busy or if nobody answers. You receive a callback when the other party’s line be- comes free. This option must be activated by your service personnel. -
Page 50: Permitting A Callback
Basic phone functions Step by Step Permitting a callback Permitting callback on busy Press the key shown until the application’s "Settings" tab is active. poss. Enter and confirm the user password. User Select and confirm the option shown. Select and confirm the option shown. Configuration Outgoing calls Select and confirm the option shown. -
Page 51: Calling Back Missed Calls
Basic phone functions Step by Step Calling back missed calls Calls received while you are absent are indicated by a message on the idle display page 20. In addition, the mode key lights up white. Missed calls are logged in the missed calls list. This list provides information on the missed call and lets you call back the number directly. -
Page 52: Programmable Sensor Keys
The phone features a range of functions that can, if re- quired, be programmed on programmable sensor keys. The phone comes with nine (OpenStage 80) or eight (OpenStage 60) programmable sensor keys, all of which can be programmed on two separate levels. The programmable sensor key "Shift key", which allows you to switch between the two programmable sensor key levels, is preassigned. -
Page 53: Programming Programmable Sensor Keys
Basic phone functions Step by Step Programming programmable sensor keys Press the sensor key you want to program until the field opens. The programmable sensor key lights up. Programming the first level Select and confirm the option shown. Function Select "Level 2" to program the second level. Do not disturb Select and confirm the function you want in the context menu ("Do Not Disturb", for instance). -
Page 54: Using Programmable Sensor Keys
Basic phone functions Step by Step Using programmable sensor keys The use of programmed functions depends on the phone’s status. The relevant display appears once you have pressed a programmable sensor key. Example 1: Accessing a stored contact or phone number Prerequisite: The idle menu is displayed on the graphic display. -
Page 55: Enhanced Phone Functions
Enhanced phone functions Step by Step Enhanced phone functions Incoming calls Rejecting a call You can reject an incoming call. In the pop-up menu: Reject Select and confirm the option shown. The caller hears a busy signal. If the rejected caller’s phone number is transmit- ted, it is saved in the call list. - Page 56 Enhanced phone functions Step by Step Permitting call deflection Press the key shown until the application’s "Settings" tab is active. poss. Enter and confirm the user password. Select and confirm the option shown. User Select and confirm the option shown. Configuration Incoming calls Select and confirm the option shown.
-
Page 57: Placing A Call On Hold
Enhanced phone functions Step by Step Placing a call on hold You can use this function to place an ongoing call on hold, for instance, to prevent the other party overhear- ing a conversation with a colleague in the same room. The "Hold"... - Page 58 Enhanced phone functions Step by Step Held call wait status After placing a call on hold, you can replace the handset and then decide if the call should be retrieved or discon- nected. Prerequisite: You placed a call on hold and replaced the handset.
- Page 59 Enhanced phone functions Step by Step Setting the hold reminder time Use the "Hold reminder" function to set the time after which you want to receive an automatic reminder about a held call. The minimum value is 3, that is, the reminder is output after three minutes.
-
Page 60: Call Waiting (Second Call)
Enhanced phone functions Step by Step Call waiting (second call) You can accept a second incoming call in the course of an ongoing call. The caller hears the on-hook signal while you hear a call-waiting signal tone. You can reject or accept the second call. Before you ac- cept the second call, you can end the first call or place it on hold for subsequent retrieval. - Page 61 Enhanced phone functions Step by Step Deflecting a second call Prerequisite: You are conducting a call and call waiting is allowed page 61. In the pop-up menu: Select and confirm the option shown. Call deflect Enter and confirm the phone number. The second call is deflected to the destination speci- fied.
-
Page 62: Transferring A Call
Enhanced phone functions Step by Step Transferring a call You can transfer your current call to another party with or without consultation. Blind transfer Prerequisite: You are conducting a call. The options "Al- low Call Transfer" and "Transfer on Ring" were selected page 63. - Page 63 Enhanced phone functions Step by Step If the party answers: Announce the call you want to transfer. Select and confirm the option shown in the connections’s Complete transfer context menu. If the party does not answer: You do not have to wait for the second party to answer before you can transfer the call.
- Page 64 Enhanced phone functions Step by Step Allowing "Transfer on Ring" If this option is allowed, you can activate call transfer by replacing the handset even before the called party an- swers. Press the key shown until the application’s "Settings" tab is active. poss.
-
Page 65: Making Calls
Enhanced phone functions Step by Step Making calls Dialing with the DDS key You can program frequently used phone numbers on programmable keys page 52. If you press a direct destination selection key for around three seconds, the associated contact or phone number appears and dial- ing is initiated. -
Page 66: Dialing A Phone Number From A List
Enhanced phone functions Step by Step Dialing a phone number from a list Press the key until the application table for the relevant call list is active. Select and confirm the entry you want. Niels, Bohr 18.10. 07:06am. Dial Select and confirm the option shown in the context menu. -
Page 67: Using Autodial Delay
Enhanced phone functions Step by Step Using autodial delay A number is automatically dialed after a set delay start- ing from the entry of the number’s last digit. The auto- dial delay can be used: • when dialing in idle mode •... - Page 68 Enhanced phone functions Step by Step Press the key shown until the application’s "Settings" tab is active. poss. Enter and confirm the user password. Select and confirm the option shown. User Configuration Select and confirm the option shown. Select and confirm the option shown. Outgoing calls Autodial delay Select and confirm the option shown.
-
Page 69: During A Call
Enhanced phone functions Step by Step During a call Conference Prerequisite: You are conducting a consultation call page 42 and the "Conference" function is allowed page 70. Establishing a conference When establishing a conference it is not impor- tant which context menu is open. Both menus (active and held calls) feature the "Conference"... - Page 70 Enhanced phone functions Step by Step Allowing a conference This option allows or blocks the "Local conference" func- tion. Press the key shown until the application’s "Settings" tab is active. poss. Enter and confirm the user password. Select and confirm the option shown. User Configuration Select and confirm the option shown.
-
Page 71: Making And Receiving Calls
Step by Step Making and receiving calls using multi-line phones You can use your OpenStage 60/80 as a multi-line phone. If you have any questions regarding how to con- figure your OpenStage phone as a multi-line phone, please contact your service personnel. -
Page 72: Incoming Calls
Making and receiving calls using multi-line phones Step by Step Incoming calls Depending on your individual settings, you will be noti- fied of incoming calls page 118. Accepting calls for the primary line In this case, the telephone behaves in the same way as a single-line telephone page 36 and page 55. -
Page 73: Making Calls
Making and receiving calls using multi-line phones Step by Step Making calls You must seize a line before you can make calls on a multi-line telephone. Trunk seizure can be configured on an individual basis. Your service personnel can determine if the lines on your telephone can be automatically seized and with which priority. -
Page 74: Automatic Trunk Seizure
Making and receiving calls using multi-line phones Step by Step Automatic trunk seizure Prerequisite: Your service personnel has configured automatic trunk seizure. Lift the handset or press the speakerphone mode or headset key. The line defined during configuration is seized. Enter the phone number. -
Page 75: During Calls
Making and receiving calls using multi-line phones Step by Step During calls Making and receiving calls on a single line If you only use one line on your multi-line telephone to make calls, and you receive calls on the same line, the phone operates in the same way as a single-line tele- phone: •... - Page 76 Making and receiving calls using multi-line phones Step by Step Accepting a waiting call Depending on the settings for "Rollover", you will be notified of incoming calls page 79. Prerequisite: You are conducting a call. At the same time, a call is incoming on another line. Call on line 1.
-
Page 77: Settings For Multi-Line Phones (Keyset)
Making and receiving calls using multi-line phones Step by Step Settings for multi-line phones (keyset) Displaying the line in the overview Specify here if the selected line should be displayed in the line overview. Press the key shown until the application’s "Settings" tab is active. -
Page 78: Configuring The Line Overview Display
Making and receiving calls using multi-line phones Step by Step Configuring the line overview display Specify here the sequence in which the individual lines in the line overview should appear on the display. Press the key shown until the application’s "Settings" tab is active. -
Page 79: Activating "Rollover" For A Line
Making and receiving calls using multi-line phones Step by Step Activating "Rollover" for a line "Rollover" is the term used to describe the signaling of a call on another line while you are conducting a call. Press the key shown until the application’s "Settings" tab is active. -
Page 80: Phone Number Directories And Lists
Phone number directories and lists Step by Step Phone number directories and lists Local phonebook Creating a new contact Press the key shown. Select and confirm the option shown. Options New contact Select and confirm the option shown in the context menu. -
Page 81: Selecting A Preferred Phone Number
Phone number directories and lists Step by Step Select and confirm the option shown in the context Groups menu for the setting you want. Save & exit Select and confirm the option shown. Selecting a preferred phone number If multiple phone numbers were assigned to a contact, you can select the preferred phone number here that you want to use for calls via the phonebook. -
Page 82: Managing Contact Groups
Phone number directories and lists Step by Step Managing contact groups Creating a new group Press the key shown. Select and confirm the option shown. Options Select and confirm the option shown in the context Groups menu. Options Select and confirm the option shown. Select and confirm the option shown in the context New group menu. -
Page 83: Deleting A Group
Phone number directories and lists Step by Step Adding a contact to a group Press the key shown. Select and confirm a phonebook entry. t and confirm a phonebook Details Select and confirm the option shown in the context menu. Select and confirm the option shown. -
Page 84: Saving A Picture For A Contact
Phone number directories and lists Step by Step Saving a picture for a contact Press the key shown. Select and confirm the option shown. Options Select and confirm the option shown in the context Groups menu. @Home Select and confirm a group. Select and confirm the option shown in the context View menu. -
Page 85: Finding Contacts In The Phonebook
Phone number directories and lists Step by Step Finding contacts in the phonebook The search mask for the phonebook search is very sim- ilar to the form for entering contact data. It lets you en- ter a range of search criteria to narrow down your searches. -
Page 86: Quick Search In The Phonebook
Phone number directories and lists Step by Step Quick search in the phonebook You can use the quick search to search the phonebook for the initial letters of a specific last name. Press the key shown. Enter the initial letters. The quick search input mask opens automatically. -
Page 87: Ldap Database
Phone number directories and lists Step by Step LDAP database You can search an LDAP database (corporate phone- book) for contact entries if you can reach this database over your network and your access was correctly con- figured by your service personnel. You can perform searches using the name (simple search) or different information on an entry (advanced search), for example, job title or department name. -
Page 88: Importing An Ldap Entry Into The Phonebook
Phone number directories and lists Step by Step Importing an LDAP entry into the phonebook Prerequisite: You found and selected an LDAP entry page 87. Save Select and confirm the option shown in the context menu for the entry. The view changes from the "Company" ("LDAP") tab to the "Personal"... -
Page 89: Call Lists
Phone number directories and lists Step by Step Call lists For a detailed description of the different call lists page 30. View details Prerequisite: You selected an entry. Details Select and confirm the option shown in the context menu. For display and information shown page 31. -
Page 90: Privacy/Security
Privacy/security Step by Step Privacy/security Deactivating the ring tone You can deactivate your ring tone if you do not want to be disturbed by your phone ringing. Deactivating the ring tone using the keypad Hold down the key until the "Ringer off" icon appears in the status bar on the display page 19. -
Page 91: Do Not Disturb
Privacy/security Step by Step Do not disturb If "Do not disturb" is activated, your telephone will not ring. The caller hears the busy signal. On multi-line telephones page 10 you can only activate the "Do not disturb" function for your pri- mary line. -
Page 92: User Password
Privacy/security Step by Step Select and confirm the option shown. Select and confirm the option shown. Save & exit User password Your user password protects your individual configura- tions, including your language settings. You can also use the user password to lock your telephone. Press the key shown until the application’s "Settings"... -
Page 93: Locking The Phone
Privacy/security Step by Step Locking the phone You can lock your phone to prevent an unauthorized par- ty from using it to make calls or change your user set- tings. Emergency numbers and predefined numbers from the dial plan can still be dialed when the phone is locked. For more information, contact your administrator. -
Page 94: Hipath 8000 Functions
HiPath 8000 functions Step by Step HiPath 8000 functions The System supports a number of functions that you can activate and deactivate from your phone. On multi-line telephones, the full scope of HiPath 8000 functions is only available for the pri- mary line. -
Page 95: Using System Call Forwarding
HiPath 8000 functions Step by Step Using system call forwarding This section describes the system call forwarding func- tions in System. These functions are activated with fea- ture codes. You can also program a frequently used function on a programmable sensor key. All call forwarding types described in this section refer to system call forwarding which is con- trolled by HiPath 8000. -
Page 96: Call Forwarding Don't Answer
HiPath 8000 functions Step by Step Call forwarding don’t answer With Call forwarding don’t answer (CFDA), you can use a feature code to activate call forwarding to another number if the handset is not picked up after a certain number of rings (2 to 7). You can use the feature code to activate/deactivate this function and define a forwarding destination. -
Page 97: Call Forwarding Unconditional
HiPath 8000 functions Step by Step Call forwarding unconditional With Call forwarding unconditional, all incoming calls are forwarded to a different destination. You can use the feature code to activate/deactivate this function and define a forwarding destination. Activating Lift the handset. Enter the code, for example *72 (contact your service personnel). -
Page 98: Call Forwarding Selective
HiPath 8000 functions Step by Step Call forwarding selective With Call forwarding selective, you can create a list of phone numbers (selection list) that should be automat- ically forwarded. If a caller’s phone number matches an entry in this list, the call is transferred to the forwarding number. -
Page 99: Making Anonymous Calls
HiPath 8000 functions Step by Step Making anonymous calls Your service personnel decides whether or not your call- er ID (name and phone number) is displayed on a called party’s station. Anonymous calling is when your data is not transmitted. The settings configured can be deacti- vated, however, for specific calls. -
Page 100: Temporarily Activating Anonymous Calling For The Next Call
HiPath 8000 functions Step by Step Temporarily activating anonymous calling for the next call If your service personnel activated caller ID transmis- sion for your phone, you can deactivate this setting for the next call as follows: Lift the handset. Enter the code, for example *68 (contact your service personnel). -
Page 101: Creating A List For Selective Calls
HiPath 8000 functions Step by Step Creating a list for selective calls For call acceptance You can create a list of the phone numbers from which you are willing to accept calls (also known as a selection list). Your service personnel know how long this list may be in the System used on site in your facility. -
Page 102: For Call Rejection
HiPath 8000 functions Step by Step For call rejection As for selective call acceptance, you can create a selec- tion list with the phone numbers of parties from whom you are not willing to accept calls. Your service person- nel know how long this list may be in the System used on site in your facility. -
Page 103: Anonymous Calls
HiPath 8000 functions Step by Step Anonymous calls Rejecting You can reject all calls from parties that activated a data protection feature (for example, caller ID suppression) to prevent their phone number from being transmitted. In this case, you are not informed that a call was reject- Lift the handset. -
Page 104: Using Abbreviated Dialing
HiPath 8000 functions Step by Step Using abbreviated dialing Abbreviated dialing gives you access to a central list of frequently dialed phone numbers. Single-key abbreviated dialing This function lets you dial frequently dialed numbers faster by simply pressing a numerical key. You can enter eight phone numbers in this list. -
Page 105: Using Last Number Dialed
HiPath 8000 functions Step by Step Using last number dialed With this function, you can set up a connection within your area to the last peer dialed. Use the "Redial" function to dial additional exter- nal destinations. Lift the handset. Enter the code (ask your service personnel). -
Page 106: Group Functions
HiPath 8000 functions Step by Step Group functions To ensure optimum handling of specific calls, your tele- phone can be assigned to a pickup group and/or a hunt group. Call pickup groups Your service personnel can incorporate multiple tele- phones in a call pickup group. If your telephone is as- signed to a pickup group, you can also accept calls in- tended for other members of the group. -
Page 107: Hunt Group Functions
HiPath 8000 functions Step by Step Hunt group functions Your service personnel can incorporate multiple tele- phones in a hunt group. If your telephone is assigned to a hunt group, HiPath 8000 forwards calls for the mem- bers of your group in accordance with specific rules de- fined by your service personnel. - Page 108 HiPath 8000 functions Step by Step Marking the last line in the hunt group chain Sets the "stop hunt" line in the hunt group chain. The system will stop looking for a free line in the hunt group chain after it reaches this line. Activating Lift the handset.
-
Page 109: Individual Phone Configuration
Individual phone configuration Step by Step Individual phone configuration Language settings Selecting the language for graphic display user prompts Press the key shown until the application’s "Settings" tab is active. poss. Enter and confirm the user password. Select and confirm the option shown. User Locality Select and confirm the option shown. -
Page 110: Setting The Country
Individual phone configuration Step by Step Setting the country Adapt your phone settings to suit the country-specific conditions (for example, transmission parameters). The graphic display’s default appearance de- pends on the language package installed. Press the key shown until the application’s "Settings" tab is active. -
Page 111: Graphic Display Settings
Individual phone configuration Step by Step Graphic display settings Contrast On OpenStage 80, you can adjust the graphic display contrast to your lighting conditions using the sensor ring. Press the key shown until the application’s "Settings" tab is active. Select and confirm the option shown. User Select and confirm the option shown. -
Page 112: Timeout
Individual phone configuration Step by Step Setting the fade time for the screensaver Set the intervals at which the screensaver images change here. The following fade times are possible: • 5 seconds • 10 seconds • 20 seconds • 30 seconds •... -
Page 113: Display Design
Individual phone configuration Step by Step Select and confirm the option shown. Display Select and confirm the option shown. Inactivity delay (mins) 1 min. Select and confirm the value you want in the context menu. Select and confirm the option shown. Save &... -
Page 114: Date And Time
Individual phone configuration Step by Step Date and time You can choose the date and time display here. You must set the date and time manually if your phone is not connected to an (S)NTP server. Setting the time Press the key shown until the application’s "Settings" tab is active. -
Page 115: Time Display Format
Individual phone configuration Step by Step Time display format Press the key shown until the application’s "Settings" tab is active. poss. Enter and confirm the user password. Select and confirm the option shown. User Select and confirm the option shown. Locality Time format Select and confirm the option shown. -
Page 116: Setting Daylight Saving Time
Individual phone configuration Step by Step Setting daylight saving time Press the key shown until the application’s "Settings" tab is active. poss. Enter and confirm the user password. Select and confirm the option shown. User Select and confirm the option shown. Date and time Daylight saving Select and confirm the option shown. -
Page 117: Audio Settings
Individual phone configuration Step by Step Audio settings Setting the volume Set the volume here, for instance, for the loudspeaker, handset or headset. You can also use the TouchSlider to adjust the volume of the current tone (ring, handset or loud- speaker tone) page 13. -
Page 118: Setting The Ring Tone
Individual phone configuration Step by Step Setting the ring tone Press the key shown until the application’s "Settings" tab is active. poss. Enter and confirm the user password. Select and confirm the option shown. User Select and confirm the option shown. Audio Settings Select and confirm the option shown. -
Page 119: Adjusting Room Acoustics
Individual phone configuration Step by Step Adjusting room acoustics To ensure that the other party can hear you properly in speakerphone mode, you can adjust the phone to the room acoustics by choosing one of the following room character conditions: "Normal", "Live", "Dead". Press the key shown until the application’s "Settings"... -
Page 120: Bluetooth
10 meters. With your OpenStage 60/80, you can receive data such as vCards via Bluetooth. This option must be activated by your service... -
Page 121: Transferring Contacts
Bluetooth Step by Step Transferring contacts The Bluetooth function on your OpenStage allows you to transfer contacts in vCARD format (file extension: .vcf) from other Bluetooth devices to your OpenStage and administer them in the phonebook. Transferring vCARDs Prerequisite: The Bluetooth function on your Open- Stage is activated page 122. -
Page 122: Configuring Bluetooth
Bluetooth Step by Step Configuring Bluetooth Activating and deactivating Bluetooth Press the key shown until the application’s "Settings" tab is active. poss. Enter and confirm the user password. Select and confirm the option shown. User Select and confirm the option shown. Bluetooth Active Select and confirm the option shown. -
Page 123: Bluetooth Name For Your Openstage
Bluetooth Step by Step For security reasons, it is recommended that you only activate the "Discoverable" function for Blue- tooth when new Bluetooth devices are to be connected. A connection is established for devic- es that are already connected even if the "Discov- erable"... -
Page 124: Web Interface
Web interface Step by Step Web interface General The telephone features a HTTP Web server (Web-based Management tool) which allows the phone to map its contents to a Web browser on a PC integrated in the LAN. The Web interface allows you to set up your OpenStage using the PC. -
Page 125: Preparatory Steps
Web interface Preparatory steps Calling up the Web interface For further details on the IP address, Web interface address and ad- ditional information on how to connect the telephone to the net- work, refer to the chapter entitled "Applications available on your OpenStage phone"... -
Page 126: Fixing Problems
Fixing problems Fixing problems Protection of the telephone • Never allow the telephone to come into contact with coloring, oily or aggressive agents. • Always use a damp or antistatic cloth to clean the telephone. Never use a dry cloth. •... -
Page 127: Index
Index Contact Index display format ......... 86 Context menus ........... 20 Accepting calls multi-line ..........72 Date ............114 Administration ..........35 Daylight saving ......... 116 Alternating ........... 43 Direct destination selection (DDS) key ... 65 Application tab ..........19 Display design .......... - Page 128 Index Help function Making calls ..........35 HiPath 8000 multi-line ..........94 ..........73 abbreviated dialing Microphone ..........41 single-key abbreviated dialing Mode keys ..104 ..........14 two-key abbreviated dialing Multi-line .... 104 accepting anonymous calls accepting calls ....103 ........
- Page 129 ............113 Time ............114 Time display format ......... 115 TouchGuide ..........15 TouchSlider ..........13 Troubleshooting ........126 Trunk keys ........... 16 User interface OpenStage 60 ......... 11 OpenStage 80 ......... 11 User support ..........9 Web interface ........... 124...
- Page 130 Subject to availability. Right of modification reserved. All trademarks are the property of Siemens Enterprise Printed in the Federal Republic of Germany. Communications GmbH & Co. KG or their respective owners.
Need help?
Do you have a question about the OpenStage 60 and is the answer not in the manual?
Questions and answers