Table of Contents
Advertisement
Quick Links
Download this manual
See also:
Service & Parts Manual
Advertisement
Chapters
Table of Contents

Subscribe to Our Youtube Channel
Related Manuals for Snorkel UL40


Summary of Contents for Snorkel UL40
- Page 1 PARTS & SERVICES Serial Number UL25-01-060166 and after MANUAL Serial Number UL25-01-060167 and after Serial Number UL32-01-060036 and after Serial Number UL32-01-060037 and after Part Number 515066-200 Serial Number UL40-01-060200 and after July 2017 Serial Number UL40-01-060201 and after...
- Page 3 UL25, UL32 & UL40 ENGLISH When contacting Snorkel for service or parts information, be sure to include the model and serial numbers from the equipment name plate. Should the name plate be missing, the serial number is also stamped on top of the chassis above the front axle pivot...
- Page 4 UL25, UL32 & UL40 SERVICE AND PARTS MANUAL FOREWORD This manual is divided into six sections namely; SECTION 1: INTRODUCTION General description and machine specifications. SECTION 2: OPERATION AND SPECIFICATION Information on how to operate the work platform and how to prepare it for operation.
- Page 5 Please understand that these warnings cannot cover all conceivable ways in which service, whether or not recommended by Snorkel, might be carried out, or of the possible hazardous consequences of each conceivable way, nor could snorkel investigate all such ways.
- Page 7 INTRODUCTION PURPOSE The purpose of this service and parts manual is to provide instructions and illustrations for the operation and maintenance of this work platform manufactured by Snorkel. SCOPE The manual includes procedures for proper operation, maintenance, adjustment and repair of this product as well as recommended maintenance schedules and troubleshooting.
- Page 8 D A N G E R The elevating function shall ONLY be used when the work platform is level and on a firm surface. Page 1 - 2 UL25/UL32/UL40...
- Page 9 OPERATION AND SPECIFICATION UL25/UL32/UL40 Page 2 - 1...
- Page 10 SAFETY RULES WARNING All personnel shall carefully read, understand and follow all safety rules and operating instructions before operating or performing maintenance on any SNORKEL aerial work platform. ELECTROCUTION TIP OVER COLLISION FALL TRAPPING/CRUSHING STABILITY PUSH HAZARD HAZARD HAZARD HAZARD...
- Page 11 Harness attachment points are provided in the platform and the manufacturer recommends the usage of a fall restraint harness, especially where required by national safety regulations. All harness attachment points on SNORKEL vehicles have been tested with a force of 3,650 lbs (16.3 KN) per person.
- Page 12 4. It is important to ensure that the machine meets the requirements of stability during use, trans- portation, assembly, dismantling when out of service, testing or foreseeable breakdowns. 5. Never use a machine that is damaged or not functioning properly. Verify that all labels are in place and legible before using. Page 2 - 4 UL25/UL32/UL40...
- Page 13 UL25/UL32/UL40 Page 2 - 5...
-
Page 14: Table Of Contents
LOWERING 2-19 RAISING 2-19 MAINTENANCE 2-21 BATTERY MAINTENANCE 2-21 BATTERY CHARGER 2-21 HYDRAULIC FLUID 2-22 HYDRAULIC FLUID CHECK 2-22 INSPECTION AND MAINTENANCE 2-23 DAILY PREVENTATIVE MAINTENANCE SCHEDULE 2-24 SPECIFICATIONS 2-25 WASTE REMOVAL AND DISPOSAL 2-26 Page 2 - 6 UL25/UL32/UL40... -
Page 15: General Description
INTRODUCTION INTRODUCTION This manual covers the operation of the UL25, UL32 and UL40 work platforms. This manual must be stored on the machine at all times. Read, understand and follow all safety rules and operating instructions before attempting to operate the machine. -
Page 16: Special Limitations
The platform lift function is interlocked through a level sensor system. If the chassis is tilted more than 1.5 degrees in either direction, an alarm will sound when the power is turned on and the lift function will not operate. When the alarm sounds, only the platform lower function will operate. Page 2 - 8 UL25/UL32/UL40... -
Page 17: Controls/Pre-Operation
CHASSIS CONTROLS AND INDICATORS DC MODELS 1. Emergency stop button 2. Diagnostics port 3. Enable button 4. Platform raise button 5. Platform lower button 6. Power indicator 7. Control selector switch 514441-001 Figure 2-3: Chassis controls and indicator locations UL25/UL32/UL40 Page 2 - 9... -
Page 18: Platform Controls And Indicators Ac
CHASSIS CONTROLS AND INDICATORS AC MODELS 1. Emergency stop button 2. Diagnostic port 3. Circuit breaker (MCB) 4. Enable button 5. Platform raise button 6. Platform lower button 7. Control selector switch 514442-001 Figure 2-5: Chassis controls and indicator locations Page 2 - 10 UL25/UL32/UL40... -
Page 19: Pre-Operation Safety Inspection
9. Check that all guardrails are in place and all fasteners are properly tightened. 10. Inspect the machine thoroughly for cracked welds and structural damage, loose or missing hardware, hydraulic leaks, damaged control cable and loose wire connections. UL25/UL32/UL40 Page 2 - 11... -
Page 20: Outrigger Interlock Test
2. Adjust the outriggers so that the platform is tilted by more than 1.5 degrees. 3. Verify that the tilt alarm sounds and using the ground control panel, the platform should not elevate. 4. Repeat steps 1 to 3 using the platform controls. Page 2 - 12 UL25/UL32/UL40... -
Page 21: System Function Inspection
9. Repeat tests 4 & 5 from the platform controls. 10. Push the platform emergency stop switch to verify proper operation. All machine functions should be disabled. Pull out the platform emergency stop switch to resume. UL25/UL32/UL40 Page 2 - 13... -
Page 22: Operation
20% to 10% Steady on less than Table 2-1: Battery condition indicators. NOTE: To maximise battery life, always re-charge the battery after use and never store the machine for extended periods without first fully re-charging the battery. Page 2 - 14 UL25/UL32/UL40... -
Page 23: Emergency Procedure
NOTE: This procedure should only be used in the event of an emergency. UL25/UL32/UL40 Page 2 - 15... -
Page 24: Transportation
For DC models, prior to transportation, disconnect the plug from the battery box and remove the battery box from the rear of the machine. C A U T I O N The battery box is heavy (23.6kg/52 lbs). Lift properly to avoid back injury. Page 2 - 16 UL25/UL32/UL40... - Page 25 TRANSPORTATION Loader channel Gravity hook Loader support bracket Loader Retaining pin Figure 2-11: Loader in load position. Retaining pin Handle Handle bar Figure 2-12: handle positioning. UL25/UL32/UL40 Page 2 - 17...
-
Page 26: Loading
Gradually counterbalance the unit’s weight by applying an upward force on the T-handle. This allows the unit to settle gently on the wheels avoiding undue impact on the unit. 5. Return the T-handle to the stored position making sure that the locking pin engages the T-han- dle. Page 2 - 18 UL25/UL32/UL40... -
Page 27: Lowering
5. While holding the tilt back frame, remove the retaining pin and raise the tilt back assembly to the stowed position. 6. Secure with the retaining pin, making sure that the retaining pin is fully inserted and that the hair pin retainer is installed. UL25/UL32/UL40 Page 2 - 19... - Page 28 TRANSPORTATION Retaining pin Hair pin retainer Cylinder assembly Figure 2-13: Cylinder secured with retaining pin. Tilt back handle Retaining pin Figure 2-14: Lowering and raising with the tilt back handle. Page 2 - 20 UL25/UL32/UL40...
-
Page 29: Maintenance
Battery fluid is highly corrosive. Thoroughly rinse away any spilled fluid with clean water. Always replace the batteries with Snorkel batteries or manufacturer approved replacements weigh- ing 22 kg (48 lbs.) each. Use the following procedure to ensure battery maintenance. -
Page 30: Hydraulic Fluid
3. Check the fluid level using the gauge on the dipstick. 4. To add hydraulic fluid, remove the filler cap. 5. Add the appropriate hydraulic fluid to raise the level to the end of the dipstick. Page 2 - 22 UL25/UL32/UL40... -
Page 31: Inspection And Maintenance
The daily preventative maintenance checklist has been designed for machine service and mainte- nance. Photocopy the checklist page and use the checklist when inspecting the machine. UL25/UL32/UL40 Page 2 - 23... -
Page 32: Daily Preventative Maintenance Schedule
Check the structure and welds for dam- age, deformation, corrosion and cracks Check condition of deck (no damage, deformation, corrosion or cracks Check entry gate closure functions correcly Table 2-2: Daily preventative maintenance checklist Page 2 - 24 UL25/UL32/UL40... -
Page 33: Specifications
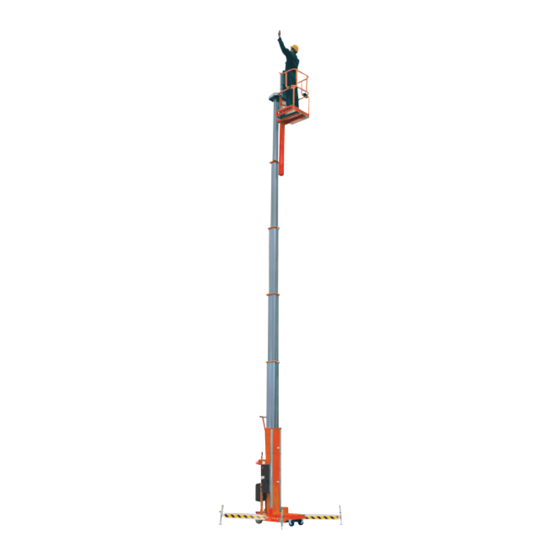
SPECIFICATIONS ITEM UL25 UL32 UL40 Platform capacity 159 kg (350 lbs.) 136 kg (300 lbs.) 136 kg (300 lbs.) Occupants 1 PERSON 1 PERSON 1 PERSON Height Working height 9.62 m (31.6 ft.) 11.75 m (38.5 ft.) 14.19 m (46.6 ft.) Maximum platform height 7.62 m (25 ft.) -
Page 34: Waste Removal And Disposal
WASTE DISPOSAL AND REMOVAL Page 2 - 26 UL25/UL32/UL40... - Page 35 PLATFORM ASSEMBLY 3-12 PLATFORM SUPPORT ASSEMBLY 3-13 SEQUENCING STRAP INSTALLATION 3-13 CYLINDER ASSEMBLY 3-13 SEAL REPLACEMENT 3-13 ORIFICE VALVE CLEANING 3-15 CYLINDER REMOVAL 3-17 CYLINDER INSTALLATION 3-17 TORQUE SPECIFICATIONS 3-18 HYDRAULIC COMPONENTS 3-18 FASTENERS 3-19 UL25/UL32/UL40 Page 3 - 1...
-
Page 36: Introduction
Snorkel work platform and help in diagnosing and repair of the machine. The preventative maintenance table should be used at intervals specified by Snorkel or that of Lo- cal/National regulations to ensure the aerial platform is in good condition for use. -
Page 37: Preventative Maintenance Table
Check for leaks at mating surfaces Table 3-2: Preventative maintenance checklist Check mounting bolts for proper torque A thorough investigation should be carried out every 6 months. NOTE: Frequency and extent of periodic examinations may depend on national regulations. UL25/UL32/UL40 Page 3 - 3... -
Page 38: Lubrication
Contact local oil recyclers for more information. NOTE: Ensure the o-ring is in place on the pump when installing the hydraulic reservoir. 3. Reinstall hydraulic reservoir to pump assembly with grip plates and screws. Page 3 - 4 UL25/UL32/UL40... -
Page 39: Battery Inspection And Cleaning
Permanent damage to the battery will result if not immediately recharged after discharging. NEVER leave the charger operating unattended for more than two days. NEVER disconnect cables from the battery when the charger is operating. Keep the charger dry. UL25/UL32/UL40 Page 3 - 5... -
Page 40: Battery Cell Equalization
1 to 2 hours to adequately mix the water with the electrolyte. Battery Charger Figure 3-3: Battery Charger. SETTING SYSTEM RELIEF VALVE Check the hydraulic system pressure whenever the pump or relief valve has been serviced or re- placed. Page 3 - 6 UL25/UL32/UL40... -
Page 41: Mast Assembly/Disassembly
1. Extend elevating assembly far enough to expose the eight screws attaching the cage support assembly to stage 6 by opening the emergency lowering valve and pulling on the cage guardrail. 2. Remove cover from the front of the platform assembly. UL25/UL32/UL40 Page 3 - 7... - Page 42 #4 MAST 1. Remove sequence strap retainer on the top of #2 mast. 2. Remove the Allen head screws holding the top mast bearings between the #3 and #4 mast. Re- move the top mast bearings. Page 3 - 8 UL25/UL32/UL40...
- Page 43 2. Slide the #2 mast out of the #1 mast. As mast is removed, the bottom four mast bearings will fall out. Its important to note their orientation for re-assembly. UL25/UL32/UL40 Page 3 - 9...
- Page 44 SERVICE AND REPAIR Figure 3-6: Mast Assembly, Strap and Chain Detail. Page 3 - 10 UL25/UL32/UL40...
- Page 45 SERVICE AND REPAIR Figure 3-7: Mast Assembly, Bearing Detail. UL25/UL32/UL40 Page 3 - 11...
-
Page 46: Platform Assembly
6. Install the top bearings and secure with retaining screws using loctite 242 or equivalent on the threads. 7. Install the #6 chain around the #5 sheave and through the casting secured to the #4 casting with Page 3 - 12 UL25/UL32/UL40... -
Page 47: Platform Support Assembly
Re-installing the nuts with the proper tension will speed up adjustment later. 3. Remove the cylinder mounting plate. Be careful not to allow the tie rods to suck back inside the UL25/UL32/UL40 Page 3 - 13... - Page 48 Slide the seal retainer into place and tighten using the spanner wrench. Seal Kit Rod end cap Static seal #1 Seal retainer Rod wiper Cylinder rod Pressure seal Seal Profiles Cylinder body Static seal #2 Figure 3-8: Lift Cylinder. Page 3 - 14 UL25/UL32/UL40...
-
Page 49: Orifice Valve Cleaning
Replace the nuts on the tie rod ends temporarily to prevent this. 4. Remove the hydraulic line from the cylinder fitting and cap the cylinder fitting to prevent contami- nants from entering the cylinder. UL25/UL32/UL40 Page 3 - 15... - Page 50 W A R N I N G Keep hands clear of the mast assembly when the pinch shield is removed for inspection purposes; pinching injury to hands may result. Never operate a machine with the pinch shield removed except for inspection. Page 3 - 16 UL25/UL32/UL40...
-
Page 51: Cylinder Removal
7. Feed the #4 strap between the #3 and the #2 mast with a fish tape. 8. Slide the #4 strap through the #2 casting. 9. Feed the #3 strap between the #2 and the #1 mast with a fish tape. UL25/UL32/UL40 Page 3 - 17... -
Page 52: Torque Specifications
Never operate a machine with the pinch shield removed except for inspection. TORQUE SPECIFICATIONS HYDRAULIC COMPONENTS Use the following values to torque the hydraulic components used on Snorkel work platforms. NOTE: Always lubricate threads with clean hydraulic oil prior to installation. Coil nuts: 3 Nm (30 In/lbs) - Page 53 SERVICE AND REPAIR FASTENERS Use the following values to torque fasteners used on Snorkel work platforms unless a specific torque value is called out for the part being installed. Thread size (American National Width across flats Torque value Standard-UNF (fine))
- Page 54 Page 3 - 20 UL25/UL32/UL40...
- Page 55 TROUBLESHOOTING CONTENTS INTRODUCTION GENERAL PROCEDURE TILT SENSOR TILT SENSOR SWITCH SETTING THE TILT SENSOR TO ZERO DIAGNOSTICS USING EZCAL CALIBERATOR REPLACING THE EZ120 CONTROL MODULE UL25/UL32/UL40 Page 4 - 1...
-
Page 56: General Procedure
TROUBLESHOOTING INTRODUCTION Table 4-1 provides a logical sequence of tests that are designed to isolate problems with the Snorkel lift. This table includes a list of probable causes and remedies. W A R N I N G When troubleshooting, ensure that the work platform is resting on a firm, level surface. - Page 57 3. Mechanical interference Inspect mast assembly, correct interference. Platform continues to lower 1. Down valve (V1) stuck open. Clean or replace down valve. when controls are released. Table 4-1: Troubleshooting table. UL25/UL32/UL40 Page 4 - 3...
-
Page 58: Tilt Sensor
12. Scroll to tilt and both readings should be below 0.2°. If not, repeat from #3. Display Change Entry Esc to leave Up / Down Sub-Menu without saving. Enter to Save ENTER Entry Scroll Left/Right Figure 4-1: EZcal calibrator. Page 4 - 4 UL25/UL32/UL40... -
Page 59: Diagnostics Using Ezcal Caliberator
Output to power on lamp (DC only) P2-5 Output to platform raise valve. P2-6 Output to platform lower valve. P2-7 Output to line contactor. P2-8 Spare. P2-9 Output to outrigger switches & alarm supply. Table 4-2: EZlift 120 I/O allocations. UL25/UL32/UL40 Page 4 - 5... -
Page 60: Replacing The Ez120 Control Module
To confirm the calibration has worked, switch the machine off and then back on again. 12. Scroll to diagnostics and hit “Enter”. 13. Search for system and hit “Enter”. 14. Scroll to tilt and both readings should be below 0.2°. If not, repeat from #5. Page 4 - 6 UL25/UL32/UL40... - Page 61 The diagrams are to be used in conjunction with the information in section 4. The schematics pro- vide an understanding to the makeup and functions of the systems for checking, tracing and fault- finding during troubleshooting analysis. CONTENTS INTRODUCTION ELECTRICAL SCHEMATIC A.C. - 514446-000 ELECTRICAL SCHEMATIC D.C. - 514445-000 HYDRAULIC SCHEMATIC UL25/UL32/UL40 Page 5 - 1...
- Page 62 SCHEMATICS ELECTRICAL SCHEMATIC A.C. - 514446-000 Page 5 - 2 UL25/UL32/UL40...
- Page 63 SCHEMATICS ELECTRICAL SCHEMATIC D.C. - 514445-000 UL25/UL32/UL40 Page 5 - 3...
- Page 64 Lower power module Valve, 2-way norm. Stops flow when energized. Valve block assembly Open Valve, 2-way norm. Allows flow when energized. Lift cylinder assembly. Closed Table 5-1: Hydraulic schematic legend. Figure 5-1: Hydraulic schematic. Page 5 - 4 UL25/UL32/UL40...
- Page 65 D.C. PLATFORM CONTROL BOX 6-33 TILT BACK ASSY 6-34 LOADER STOP BRACKET ASSY 6-38 LOADER BAR ASSY 6-39 OUTRIGGER ASSY UL25/32 6-40 OUTRIGGER ASSY UL40 6-41 UL DC BATTERY BOX 6-43 DECAL KIT UL25 6-44 DECAL KIT UL32 6-46 DECAL KIT UL40 6-48...
- Page 66 508783-001 UL32 DC 514859-800 Operator’s manual 515066-000 Parts & services manual 515066-200 Power option AC 068008-011 Decal kit 508783-003 UL40 AC 514860-800 Operator’s manual 515066-000 Parts & services manual 515066-200 Power option DC 068009-011 Decal kit 508783-001 UL40 DC 514861-800 Operator’s manual...
- Page 67 ILLUSTRATED PARTS LIST GENERAL ASSEMBLY BREAKDOWN UL25 - 514856-800 (AC) 514857-800 (DC) UL32 - 514858-800 (AC) 514860-800 (DC) UL40 - 514860-800 (AC) 514861-800 (DC) ITEM PART NUMBER DESCRIPTION UL25 UL32 UL40 512805-100 Lift cylinder assembly 512789-100 Lift cylinder assembly 512806-100...
- Page 68 ILLUSTRATED PARTS LIST ITEM PART NUMBER DESCRIPTION UL25 UL32 UL40 068141-000 Pin chain 510146-001 Cable connector gland 510147-001 Cable connector nut 056065-045 Bolt hexhd .500-13 1.75 GR5 056069-012 Washer, SteelFlatWasher M12 984519 Nut hex LKG .500-13 063926-007 Plug 011735-020 Roll pin...
- Page 69 Screw, #6 self tapping 014066-004 Screw HWH SLFTP 1/4 x 1/2 514457-000 Wire harness 514454-000 Retractile Cord 514455-000 Retractile Cord 514456-000 Retractile Cord 515182-000 Fork Pocket Table 6-2: UL25/32/40 general assembly components and part numbers. UL25/UL32/UL40 Page 6 - 5...
- Page 70 ILLUSTRATED PARTS LIST GENERAL ASSEMBLY BREAKDOWN Figure 6-1: General assembly illustration, DWG 1. Page 6 - 6 UL25/UL32/UL40...
- Page 71 ILLUSTRATED PARTS LIST GENERAL ASSEMBLY BREAKDOWN Figure 6-2: General assembly illustration, DWG 2. UL25/UL32/UL40 Page 6 - 7...
- Page 72 056069-008 Washer 8mm flat 011240-004 Washer 1/4 flat 011252-004 Screw HHC 1/4 - 20 (1/2) 056064-008 8 mm nut 013540-001 Wire nut 12-10 011868-019 Connection cable Table 6-3: AC power option components and part numbers. Page 6 - 8 UL25/UL32/UL40...
- Page 73 ILLUSTRATED PARTS LIST AC POWER OPTION - 068008-011 Figure 6-3: AC power option illustration. UL25/UL32/UL40 Page 6 - 9...
- Page 74 Control box w/electric down 011240-004 Washer 1/4 flat 011252-004 Screw HHC 1/4 - 20 x 1/2 010154-000 Terminal cover 514459-000 D.C. power harness Table 6-4: DC power option components and part numbers. DC power unit identification Page 6 - 10 UL25/UL32/UL40...
- Page 75 ILLUSTRATED PARTS LIST DC POWER OPTION - 068009-011 Figure 6-4: DC power option illustration. UL25/UL32/UL40 Page 6 - 11...
- Page 76 8 A Diode 514642-000 Socket 4-way panel mount 512366-000 4-way panel plug 509755-000 Mate - n - lock SCKT contact 510145-000 Mate - n - lock pin contact Table 6-5: AC Lower control box components. Page 6 - 12 UL25/UL32/UL40...
- Page 77 ILLUSTRATED PARTS LIST AC LOWER CONTROL BOX - 514444-000 Figure 6-5: AC Lower control box illustration. UL25/UL32/UL40 Page 6 - 13...
- Page 78 509740-005 Blade fuse 7.5 A 514642-000 Socket 4-way panel mount 512935-000 LED green 12 V 510145-000 Mate - n - lock pin contact 512366-000 4 way panel plug Table 6-6: DC Lower control box components. Page 6 - 14 UL25/UL32/UL40...
- Page 79 ILLUSTRATED PARTS LIST DC LOWER CONTROL BOX - 514443-000 Figure 6-6: DC Lower control box illustration. UL25/UL32/UL40 Page 6 - 15...
- Page 80 ILLUSTRATED PARTS LIST LIFT CYLINDER UL25 - 068074-020 UL32 - 068074-021 UL40 - 068074-022 ITEM PART NUMBER DESCRIPTION UL25 UL32 UL40 068129-000 stage bottom casting 068128-000 stage bottom casting 068113-006 Lift cylinder 068113-007 Lift cylinder 068113-008 Lift cylinder 068113-010 Seal kit...
- Page 81 ILLUSTRATED PARTS LIST LIFT CYLINDER UL25 - 068074-020 UL32 - 068074-021 UL40 - 068074-022 Figure 6-7: Lift cylinder illustration. UL25/UL32/UL40 Page 6 - 17...
- Page 82 PART NUMBER DESCRIPTION 068055-001 Stage mast assy UL25 068055-002 Stage mast assy UL32 068055-003 Stage mast assy UL40 068053-000 #2 Section slide 011703-016 Screw socket hex set 1/4 - 20 UNC x 1 Table 6-8: 2 stage mast assembly components.
- Page 83 UL25 - 068056-001 UL32 - 068056-002 UL40 - 068056-003 ITEM PART NUMBER DESCRIPTION 068060-001 stage mast assy UL25 068060-002 stage mast assy UL32 068060-003 stage mast assy UL40 068139-000 Shaft 011735-012 062753-000 Strap assy 068137-000 Sheave 062642-010 Bearing 011786-005 MAC. Bushing Table 6-9: 3 stage mast assembly components.
- Page 84 STAGE MAST ASSEMBLY UL25 - 068061-001 UL32 - 068061-002 UL40 - 068061-003 ITEM PART NUMBER DESCRIPTION 068064-001 stage mast assy UL25 068064-002 stage mast assy UL32 068064-003 stage mast assy UL40 062168-111 Chain 062168-137 Chain 062168-163 Chain 068138-000 Shaft 011753-020 Shaft 068146-000...
- Page 85 ILLUSTRATED PARTS LIST STAGE MAST ASSEMBLY UL25 - 068061-001 UL32 - 068061-002 UL40 - 068061-003 Figure 6-10: 4 stage mast assembly illustration. UL25/UL32/UL40 Page 6 - 21...
- Page 86 UL25 - 068066-001 UL32 - 068066-002 UL40 - 068066-003 ITEM PART NUMBER DESCRIPTION 068069-001 stage mast assy UL25 068069-002 stage mast assy UL32 068069-003 stage mast assy UL40 062167-141 Chain 062167-173 Chain 062167-205 Chain 068138-001 Shaft 068135-000 Sheave, 5 stage top...
- Page 87 ILLUSTRATED PARTS LIST STAGE MAST ASSEMBLY UL25 - 068066-001 UL32 - 068066-002 UL40 - 068066-003 Figure 6-11: 5 stage mast assembly illustration. UL25/UL32/UL40 Page 6 - 23...
- Page 88 ILLUSTRATED PARTS LIST STAGE MAST ASSEMBLY UL25 - 514600-001 UL32 - 514600-002 UL40 - 514600-003 ITEM PART NUMBER DESCRIPTION 514601-001 stage weldment UL25 514601-002 stage weldment UL32 514601-003 stage weldment UL40 062166-139 Chain 062166-171 Chain 062166-203 Chain 062753-000 Strap assy...
- Page 89 ILLUSTRATED PARTS LIST STAGE MAST ASSEMBLY UL25 - 514600-001 UL32 - 514600-002 UL40 - 514600-003 Figure 6-12: 6 stage mast assembly illustration. UL25/UL32/UL40 Page 6 - 25...
- Page 90 ILLUSTRATED PARTS LIST PLATFORM SUPPORT ASSEMBLY UL25 - 514599-000 UL32 - 514599-010 UL40 - 514599-011 ITEM PART NUMBER DESCRIPTION UL25 UL32 UL40 514599-001 Platform support weldment 514599-002 Platform support weldment 514599-003 Platform support weldment 062165-133 Chain 062165-169 Chain 062165-201 Chain...
- Page 91 ILLUSTRATED PARTS LIST PLATFORM SUPPORT ASSEMBLY UL25 - 514599-000 UL32 - 514599-010 UL40 - 514599-011 Figure 6-13: Platform support assembly illustration. UL25/UL32/UL40 Page 6 - 27...
- Page 92 Backing plate 514697-000 Backing plate 058508-030 Bolt - M10 x 30 056064-010 Nyloc nut - M10 505087-010 Flatwasher - M10 970129 Screw HHC 1/4 - 20 UNC x 3 Table 6-14: Platform assembly components UL25. Page 6 - 28 UL25/UL32/UL40...
- Page 93 ILLUSTRATED PARTS LIST PLATFORM ASSEMBLY UL25 068179-003 Figure 6-14: Platform assembly illustration UL25. UL25/UL32/UL40 Page 6 - 29...
- Page 94 Backing plate 514697-000 Backing plate 058508-030 Bolt - M10 x 30 056064-010 Nyloc nut - M10 505087-010 Flat washer - M10 970129 Screw HHC 1/4 - 20 UNC x 3 Table 6-15: Platform assembly components UL32/UL40. Page 6 - 30 UL25/UL32/UL40...
- Page 95 ILLUSTRATED PARTS LIST PLATFORM ASSEMBLY UL32/UL40 068179-004 Figure 6-15: Platform assembly illustration UL32/UL40. UL25/UL32/UL40 Page 6 - 31...
- Page 96 SW twist release E/stop 0120803 Raise push button 510542-000 Pushbutton 0120804 Lower push button 514822-000 Switch 2-way spring to off 505082-010 514825-000 Overlay Table 6-16: A.C. platform control box components. Figure 6-16: A.C. platform control box illustration. Page 6 - 32 UL25/UL32/UL40...
- Page 97 SW twist release E/stop 0120803 Raise push button 510542-000 Pushbutton 0120804 Lower push button 505082-010 514826-000 Overlay 512934-000 LED red 12V Table 6-17: D.C. platform control box components. Figure 6-17: D.C. platform control box illustration. UL25/UL32/UL40 Page 6 - 33...
- Page 98 ILLUSTRATED PARTS LIST TILT BACK ASSEMBLY UL32 - 068200-000 UL40 - 068200-001 ITEM PART NUMBER DESCRIPTION 068180-000 Loader bar assembly 068190-000 Loader stop bracket assembly 068201-000 Tilt back weldment 32-40 062844-000 Tiltbar weldment 062846-001 Tube cylinder mount 068196-000 Inner tube 32...
- Page 99 ILLUSTRATED PARTS LIST TILT BACK ASSEMBLY - UL32 - 068200-000 UL40 - 068200-001 060545-022 Figure 6-18a: UL32/40 tilt back assembly illustration. UL25/UL32/UL40 Page 6 - 35 ULII Series Parts Manual Page 33...
- Page 100 LANYARD ASSEMBLY 5592006 EXTERNAL CIRCLIP - 19mm 068190-000 LOADER STOP BRACKET ASSY 062891-001 LANYARD ASSEMBLY 011248-008 Nut HEX ESNA 1/2-13 UNC 011256-022 SCREW HHC 1/2 - 13 2(3/4) Table 6-18b: UL25 tilt back assembly components. Page 6 - 36 UL25/UL32/UL40...
- Page 101 TILT BACK ASSEMBLY - UL25 - 068200-003 Table 6-18b: UL25 tilt back assembly components. UL25/UL32/UL40 Page 6 - 37...
- Page 102 Loader stop bracket weldment 068193-000 Slide pad - loader stop 03570-000 Retaining pin assy 014066-006 Screw 1/4 self tapping x 3/4 Table 6-19: UL25/32/40 loader stop bracket assembly components Figure 6-19: UL25/32/40 loader stop bracket assembly illustration. Page 6 - 38 UL25/UL32/UL40...
- Page 103 Bolt shoulder 3/8 x 1/2 011248-005 Nut hex ESNA 5/16 - 18 UNC 014066-006 Screw HWH SLFTP 1/4 - AB x 3/4 Table 6-20: UL25/32/40 loader bar assembly components Figure 6-20: UL25/32/40 loader bar assembly illustration. UL25/UL32/UL40 Page 6 - 39...
- Page 104 Screw casting 508247-008 Washer, pennywasher, DIN9021, M8 056060-075 Bolt, hexbolt Din931 M10 x 75mm 970369 Bolt hexhead .313-18 1.00 GR5-5/1 056066-010 Nut, nylocknut Din985 M10 8.0 5569922 M8 spring washer Table 6-21: UL25/32 outrigger assembly components Page 6 - 40 UL25/UL32/UL40...
- Page 105 Bolt, hexbolt Din931 M10 x 75mm 970369 Bolt hexhead .313-18 1.00 GR5-5/1 056066-010 Nut, nylocknut Din985 M10 8.0 5569922 M8 spring washer 011741-004 Screw flat HD SOC 3/8 - 16 UNC 1 Table 6-22: UL40 outrigger assembly components UL25/UL32/UL40 Page 6 - 41...
- Page 106 ILLUSTRATED PARTS LIST OUTRIGGER ASSEMBLY UL25/UL32 - 068157-001 UL40 - 030838-007 16 18 9 Figure 6-21: UL25/32/40 outrigger assembly illustration. Page 6 - 42 UL25/UL32/UL40...
- Page 107 ITEM PART NUMBER DESCRIPTION 068214-002 Battery box 068214-003 Battery box cover 011703-016 Socket HD cap 1/4” UNC x1” 514015-020 Battery charger mount Table 6-23: UL DC battery box components Figure 6-22: UL25/32/40 outrigger assembly illustration. UL25/UL32/UL40 Page 6 - 43...
- Page 108 Label, warning centre bubble 069338-900 Label, control switch 064936-009 Tape reflective FT 12 062840-900 Label, controls 066550-215 Label, warning before using 066550-315 Label, Warning before using 062466-902 Label, Tiltback warning Table 6-24: UL25 decal kit breakdown Page 6 - 44 UL25/UL32/UL40...
- Page 109 ILLUSTRATED PARTS LIST DECAL KIT - UL25 AC - 068013-012 DC - 068013-013 Figure 6-23: UL25 decal kit illustration. UL25/UL32/UL40 Page 6 - 45...
- Page 110 Label, warning centre bubble 069338-900 Label, control switch 064936-009 Tape reflective FT 22 062840-900 Label, controls 066550-215 Label, warning before using 066550-315 Label, Warning before using 062466-902 Label, Tiltback warning Table 6-25: UL32 decal kit breakdown Page 6 - 46 UL25/UL32/UL40...
- Page 111 ILLUSTRATED PARTS LIST DECAL KIT - UL32 AC - 068014-012 DC - 068014-013 Figure 6-24: UL32 decal kit illustration. UL25/UL32/UL40 Page 6 - 47...
- Page 112 Label, warning centre bubble 069338-900 Label, control switch 064936-009 Tape reflective FT 28.7 062840-900 Label, controls 066550-215 Label, warning before using 066550-315 Label, Warning before using 062466-902 Label, Tiltback warning Table 6-26: UL40 decal kit breakdown Page 6 - 48 UL25/UL32/UL40...
- Page 113 ILLUSTRATED PARTS LIST DECAL KIT - UL40 AC - 068015-012 DC - 068015-013 Figure 6-25: UL40 decal kit illustration. UL25/UL32/UL40 Page 6 - 49...
- Page 115 Local Distributor / Lokaler Vertiebshändler / Distributeur local El Distribuidor local / ll Distributore locale EUROPE, MIDDLE EAST AFRICA & ASIA PHONE: +44 (0) 845 1550 057 FAX: +44 (0) 845 1557 756 NORTH & SOUTH AMERICA PHONE: +1 785 989 3000 TOLL FREE: +1 800 225 0317 FAX: +1 785 989 3070 AUSTRALIA...
Need help?
Do you have a question about the UL40 and is the answer not in the manual?
Questions and answers