Sartorius MA50 Operating Instructions Manual
Electronic moisture analyzer
Hide thumbs
Also See for MA50:
- Operating instructions manual (89 pages) ,
- Operating instructions manual (89 pages)

Related Manuals for Sartorius MA50


Summary of Contents for Sartorius MA50
- Page 1 Operating Instructions Sartorius Moisture Analyzer Models MA100 | MA50 Electronic Moisture Analyzer 98648-008-50...
-
Page 2: Intended Use
Intended Use The moisture analyzer is ideal as a The MA100 | MA50 Moisture Analyzer Symbols can be used for quick and reliable measuring and test instrument for The following symbols are used in determination of the moisture content incoming inspection, in-process... -
Page 3: Table Of Contents
Contents Intended Use “isoTEST” Calibration | Adjustment Functions Contents Heater Adjustment Weighing System Settings Warning and Safety Information Hardware Tests Adjusting the Heater Getting Started Heating Unit Adjustment Storage and Shipping Conditions Data Output Unpacking Output to the Moisture Analyzer Instructions for Recycling Interface Description Equipment Supplied... -
Page 4: Warning And Safety Information
Improper use or handling, however, Fire Explosion can result in damage and/or injury. – Connect only Sartorius accessories and options, as these are optimally designed – Flammable or explosive substances Read these operating instructions for use with your moisture analyzer thoroughly before using your moisture –... -
Page 5: Getting Started
Getting Started The moisture analyzer consists of a Equipment Supplied – Set up the moisture analyzer on a heating unit, a weighing system, a The equipment supplied includes the stable, even surface that is not exposed display and control unit and an optional components listed below: to vibrations printer. -
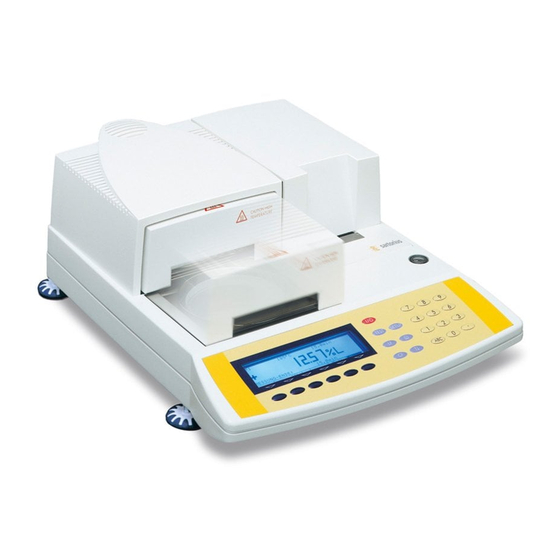
Page 6: General View Of The Moisture Analyzer
General View of the Moisture Analyzer Designation Order no. Designation Order no. for replacement for replacement Internal printer (option) YDS01MA “isoTEST” key (calibration/ Leveling foot 69MA0091 adjustment functions) Level indicator On/off key Brief instructions “Setup” key Fuse Print key Power socket Keypad Interface port Display... -
Page 7: Connecting The Moisture Analyzer
(see the bottom of the analyzer), for example: – 230 volts: MA50C-...230.. – 115 volts: MA50C-...115.. If they do not match: To have the voltage setting changed, contact your local Sartorius office or dealer, and do not operate your moisture analyzer in the meantime! Use only –... -
Page 8: Leveling The Moisture Analyzer
Leveling the Moisture Analyzer Purpose: – To compensate for unevenness at the place of installation – To achieve perfectly horizontal positioning of the moisture analyzer for consistent repeatability – This is necessary especially for testing liquid samples that need to be at a uniform level in the disposable sample pan Always level the moisture analyzer again any time it is moved to a different location. -
Page 9: Operating Design
Operating Design Operation of the moisture analyzer follows a standardized “philosophy” which is described below. Keys The moisture analyzer is operated either Info Prog. Stat. Mode Tara using the keys on the display and control unit or via a connected PC. Operation using the keys is described in the following. -
Page 10: Operation: Analysis And Test Functions
Function Keys (Soft Keys) Operation Plus/Minus Sign: The current function of a soft key is A plus or minus sign (F or H) is shown indicated in the bottom line of the display Analysis and Test Functions here for a weight value (e.g., a calculated (footer). -
Page 11: Menu Operation And Drying Results
– internal printer (option) levels. Input and Output Window – interface port for: Example of the Setup Menu: – Sartorius printer Soft Key Labels To select a parameter: (such as the YOP03-01) Press the s key Line for Operating State: –... -
Page 12: Error Codes
Interface Port Error Codes Saving Data You may choose to connect a different If you press a key that has no function, Storing Parameter Settings peripheral device, such as one of the or which is blocked at a certain point The parameter settings in the Setup following, to the interface port instead in an application program, this error is... -
Page 13: Configuring The Moisture Analyzer
Configuring the Moisture Analyzer Purpose Setting the Language You can configure your moisture You can choose from 5 languages for analyzer to meet individual require- the information display: ments by entering user data and setting selected menu parameters in the –... -
Page 14: Setting The Device Parameters
Setting the Device Parameters Weighing parameters Factory Settings (DEVICE) – Adjustment to the ambient conditions Parameters: The factory-set configu- rations are identified by an “o” in the Purpose – Weight set number for list starting on page 18. Device configuration, i.e., to meet calibration/adjustment: individual requirements by selecting W ID (weight ID;... -
Page 15: Entering Or Changing The Password
Entering or Changing the Password Extra Functions § New password: Enter the numbers § Exit the Setup menu: – Password for access to the following and/or letter of the new password functions, entered with 8 characters Press the oo soft key (8 characters max.) max.: >... - Page 16 Example 1: Adapt filter to the ambient condition: “Strong vibration” Step Key (or Instruction) Display/Printout 1. Select Setup menu 2. Select and confirm q soft key, then the “Device parameters” O soft key q soft key twice, 3. Select and confirm then the O soft key “Weigh.
- Page 17 Example 2: Set time and date Step Key (or Instruction) Display/Printout s, then 1. Select Setup menu; select “Device parameters” q and O soft keys 2. Set clock q and O soft keys repeatedly 1 1 . 1 2 3. Enter the time .
-
Page 18: Device Parameters (Overview)
Device Parameters (Overview) ο factory setting √ user-defined setting Setup – Password empty Enter 8 Device characters max. parameters User ID empty Enter 20 characters max. ο Normal vibration Weighing Adapt filter parameters Strong vibration Calibration/ Weight set number None Enter 14 adjustment (weight ID) - Page 19 ο Off Setup – Internal printer Device (option) parameters Keys CF function Delete entire for input input ο Delete last character ο All keys unblocked Block key functions All keys blocked except for s, e Alphanumeric keys blocked ο White Display Background Black...
-
Page 20: Configuring The Printout
Configuring the Printout Extra Functions Output of All Printout Settings: § Exit “Printout configuration”: (CONFIG) – When the select bar is on printout overview (SETUP CONFIG.): Press the oo soft key Press p Purpose You can configure individual printout > Restart the application formats for each application. - Page 21 13:06 Time with seconds Time 13:06:45 User ID (from Setup: Device) User ID WORKSTAT 234 Identification code 1 SARTORIUS Identification code 2 GOETTINGEN Identification code 3 WEENDER LANDSTRASSE LOT 15 Identification code 4 Name in program memory Program name Prg 1...
- Page 22 Parameter Display text Print- Inter- Print- Statistics Info Printout (Example) mediate header result footer Text line “Statistics” Statistics ID STATISTICS Number of analyses Number of analys. Mean value Mean value Avg. 4.84 %L Standard deviation Std. deviation 0.05 %L Minimum Minimum 4.80 %L Maximum...
- Page 23 Example: Adding the Item “Phase Results” to Configure the Printout Footer Step Key (or Instruction) Display/Printout s, then Select Setup menu; Select “Printout q soft key twice, configuration” then O soft key Select printout footer q soft key twice, then O soft key Use the select bar to define q soft key repeatedly the position for printout items...
-
Page 24: Device Information
Device Information § Printout information: Press p Purpose Display of device information > Printout (example) Display Device Information -------------------- § Select Setup menu: 13.07.1999 13:02 Press the s soft key Mod. MA100C Ser. no. 90805355 > “SETUP” is displayed: Ver. no. 01-38-07 (Operating program version) BECKER123... -
Page 25: Operating The Moisture Analyzer
A physical property, which is related to Purpose content. In fact, the moisture of a the moisture in the substance, is measured The MA100/MA50 moisture analyzer material includes of all the volatile (e.g., absorption of electromagnetic rays). can be used for quick and reliable... - Page 26 The Sartorius Moisture Analyzer Applications Guide will provide you with important information on the use of your moisture analyzer.
-
Page 27: Preparation
Preparation Adjustment to an Existing Measuring System Before drying a sample, you must carry A moisture analysis method often replaces another drying method (e.g., the oven drying out the following preparations: method), because it is simple to use and requires shorter analysis time. In this case, you should adapt this method to that of the moisture analyzer in order to obtain values –... -
Page 28: Preparing A Sample
$ Use an appropriately designed tool for shredding a sample. Using Disposable Sample Pans Use only Sartorius disposable sample pans (inner diameter = 92 mm). Reusing sample pans leads to poor reproducibility of results: – after cleaning, sample residues can still remain on the pan –... - Page 29 Applying a Sample to the Sample Pan Apply the sample to the sample pan in a thin, even layer (height: 2 to 5 mm, weight: 5 to 15 g); otherwise: – a sample applied unevenly will result in a nonuniform distribution of heat –...
-
Page 30: Setting The Drying Parameters
Minimum and Max. init.wt.: MA100: 1 mg to 90% of max. capacity maximum initial weight MA50: 10 mg to 90% of max. capacity Min. init.wt.: MA100: 1 mg to 90% of max. capacity MA50: 10 mg to 90% of max. capacity... - Page 31 ο 1 mg Program Weight memory resolution 0.1 mg* (Prog.) for analysis* ο Moisture (%L) Display mode Number of decimal 1 decimal place ο places 2 decimal places 3 decimal places * Conversion factor* 1.0000 factor 0.5000 to 2.0000 Dry weight (%R) Number of decimal 1 decimal place ο...
- Page 32 Start the final temperature and time required – MA100: 30 programs to achieve the final temperature. soft key (time delay: – MA50: 5 programs MA100: selectable, MA50: 2 seconds only) T [°C] Individual names with a maximum of 15 characters as user identification in –...
- Page 33 SPRM Weight Resolution for Analysis 4 Identification Codes (IDs) (Swift Parameter Adjustment to a You can select the number of decimal Identification codes can be entered Given Reference Method): parameter places to be displayed for the weight for each drying program (such as Dairy determination for semi-automatic mode resolution (MA100 only): Farm, Berlin, powdered milk, Lot 1):...
- Page 34 -------------------- Printout of the Analysis Parameters Function Keys (Soft Keys) Info 13.07.1999 13:06 – When the desired program is displayed: Intermediate results for Press the p key MA100C phase drying Ser. no. 90706913 Prog. Ver. no. 01-38-07 > Printout (see example on the right) Parameter setting for drying Texts with more than 20 characters are programs...
-
Page 35: Displaying Analysis Data
Displaying Analysis Data Overview Info Moisture Display intermediate and final results analyzer is (Analysis information) for phase drying Prog. (e key) see page 30, (Drying programs) “Setting the Drying Parameters” Stat. Display statistics (MA100 only: statistics) ID1 20 characters (Identification codes; ID2 20 characters IDs) ID3 20 characters... - Page 36 Mode Example for Mode: Temporarily Changing the Unit for the Display Mode Parameters listed in the overview (see You can temporarily change the unit for the display mode. Mode previous page) under the item can MODE Mode be temporarily changed. Each time the Select : Press the soft key...
- Page 37 End of analysis: automatic (different from the factory settings) Step Key (or instruction) Display/Printout e key Turn on the moisture analyzer Sartorius logo is displayed Self-test runs Prog. Enter the parameters for soft key drying program Select program “1” O soft key Select “Program name”...
- Page 38 Step Keys (or instruction) Display/Printout Select “Standard O soft key drying” program 130 soft keys Enter new final temperature (in this case: 130°C) 10. Confirm the temperature l soft key o soft key and exit the input mode oo soft key twice 11.
- Page 39 Step Key (or instruction) Display/Printout The header for the moisture 130 C Auto. analysis is printed 2036g ANALYS.BEGIN: Start Prog. Stat. Mode Cancel -------------------- 14.07.1999 13:10 Mod. MA100C Ser. no. 90805355 Ver. no. 01-38-07 -------------------- Prg 1 CORN STARCH Heating STANDARD Fin.
- Page 40 Step Key (or instruction) Display/Printout 21. Exit the parameter display oo soft key 130 C Auto. The residual dry weight 9734%R is displayed as a percentage of the initial weight ANALYSIS: 54 C 1.7min 756mg/24s Start Prog. Stat. Mode Cancel Fully automatic shutoff of the drying 130 C Auto.
- Page 41 Result displayed: dry weight (%R) Step Key (or instruction) Display/Printout e key Turn on the moisture analyzer Sartorius logo is displayed Self-test runs The above mentioned parameters Enter the parameters: 130 C Auto. for drying program 2 see Example 1 0007g “fine ceramic material”...
- Page 42 Step Key (or instruction) Display/Printout k key Open the sample chamber 200 C Auto. 0000g Position a new sample pan WEIGH-IN: Load sample pan Tare Start Prog. Stat. Mode Tara Tare the sample pan soft key 200 C Auto. Distribute approx. 2.5 g of 2584g fine ceramic material uniformly on the sample pan...
- Page 43 End of analysis: SPRM: parameter determination for semi-automatic mode Step Key (or instruction) Display/Printout e key Turn on the moisture analyzer Sartorius logo is displayed Self-test runs The above mentioned parameters Enter the parameters: 200 C Auto. for drying program 3...
- Page 44 Step Key (or instruction) Display/Printout Tare Tare the sample pan soft key 100 C SPRM 0000g WEIGH-IN: Load sample pan Start Prog. Stat. Mode Tara Spread an even layer 100 C SPRM approx. 4.5 g of powdered 4492g skim milk on the sample pan k key Close the sample chamber WEIGH-IN: Start analysis...
- Page 45 Phase results (for input sequence see the chapter entitled “Configuring the Moisture Analyzer”) Step Key (or instruction) Display/Printout e key Turn on the moisture analyzer Sartorius logo is displayed Self-test runs The above mentioned parameters Enter the parameters: 100 C 4mg/30s...
- Page 46 Step Key (or instruction) Display/Printout Prepare the sample see the section on “Preparing a Sample” k key Open the sample chamber 50/105/200 C Time 0000g Position a new sample pan WEIGH-IN: Load sample pan Tare Tare the sample pan soft key Info Prog.
- Page 47 Step Key (or instruction) Display/Printout The sample is preheated to 50°C. After 4 minutes, the sample is heated to 105°C. Info 11. Display the analysis information soft key INFO 4.0min Res1 2.00 %L (The moisture loss during phase 1 6.0min is displayed;...
- Page 48 Phase results (see also the chapter entitled “Configuring the Moisture Analyzer”) Step Key (or instruction) Display/Printout e key Turn on the moisture analyzer Sartorius logo is displayed Self-test runs The above-mentioned parameters Enter the parameters: 50/105/200 C Time for drying program 4...
- Page 49 Step Key (or instruction) Display/Printout Prepare the sample: not necessary for dispersion adhesive k key Open the sample chamber Position a new sample pan 140/140/140 C Auto. Tare Tare the sample pan soft key 0000g WEIGH-IN: Load sample pan Info Prog.
- Page 50 Step Key (or instruction) Display/Printout The sample is heated to 140/140/140 C Auto. 140°C and dried for at least 2574%L 5 minutes (phase 1). ANALYSIS: 140 C 5.0min 436mg/24s Info Prog. Stat. Mode Cancel If a constant weight has not been 140/140/140 C Auto.
- Page 51 “isoTEST” Calibration/ Weighing System Settings Selecting the Calibration/ Adjustment Functions Adjustment Mode Calibration, Adjustment After pressing the T key and The following functions are available: Purpose selecting the menu item Weighing System T key Calibration is the determination of the Settings difference between the weight readout –...
- Page 52 External Calibration/Adjustment with a Factory-Defined Weight Externally calibrate weighing system and adjust using factory-defined (standard) weight Step Key (or instruction) Display/Printout T key isoTEST Select function Select “Weighing system settings” soft key Select external calibration/adjustment soft key with factory-defined weight 0000g (tare the weighing system, if necessary) WGH.SYS: Ext.
- Page 53 Step Key (or instruction) Display/Printout Start Otherwise, adjust the weighing system soft key This is displayed after adjustment: 50000g WGH.SYS: Ext. cal. factory-def. wt Start Tare -------------------- 07.09.1999 13:04 Mod. MA100C Ser. no. 90805355 Ver. no. 01-38-07 -------------------- External calibration W-ID Nom.
- Page 54 Internal Calibration/Adjustment (MA100 only) Inside the moisture analyzer is a built-in motorized calibration weight. Step Key (or instruction) Display/Printout T key isoTEST Select function Select “Weighing system settings” soft key function q soft key twice Select “Internal calibration/ adjustment” soft key 0001g WGH.SYS: Internal calibration Start...
- Page 55 Repeatability Test “reproTEST” Definition (MA100 only) Repeatability is the ability of the weighing system in the moisture analyzer to display Purpose identical readouts when it is loaded several The “reproTEST” function automatically times with the same weight under constant determines the repeatability of results ambient conditions.
- Page 56 Hardware Tests The following device elements can be tested: – SBI communication Purpose – Internal printer (optional) Hardware tests are performed to check – Digital I/O communications port whether the system communication – Heater test with internal and external devices –...
- Page 57 Testing the Internal Printer (Option) Step Key (or instruction) Display/Printout Select “Hardware tests” see above Select “Test interfaces” soft key function and confirm Select “Internal printer test” q soft key HARDWARE Interface INT.PRINTER function and confirm soft key Result: If the test is passed: All printable characters will be output on the internal printer At the end of the test, the following...
- Page 58 Testing the Heater Step Key (or instruction) Display/Printout Select “Hardware tests” see the previous page Select “Heater test” q soft key and confirm soft key Start Start the heater test soft key After initialization, the current temperature (in this case: 138°C) and test time (in this case: 1.5 min) are displayed If the sample chamber is opened,...
- Page 59 Data Output There are three options for data output: – Output to the moisture analyzer – Output to an internal printer (option) – Output to a peripheral device (e.g., computer, external printer, PLC) via the interface port Output to the Moisture Analyzer (Weights and Calculated Values) Info drying program/Test function The display is divided into 9 sections.
- Page 60 Line for Moisture Analysis Values This line shows: 37482 – the current weight unit – calculated values (e.g., % moisture) – user-defined entries (e.g., preset tare) Weight Unit Display This section shows: – the current weight unit (e.g., g) – the drying temperature unit –...
- Page 61 RS-232 cables purchased from other ) Network address is only valid in the XBPI and Sartonet modes manufacturers often have incorrect pin assignments for use with Sartorius weighing systems! Be sure to check the Parameter Factory Settings for the Interface Port:...
-
Page 62: 11 Mode
Data Output Format Output Format with 20 Characters + CR LF You can output the values, displayed 9 10 11 12 13 14 15 16 17 18 19 20 21 22 in the corresponding line for moisture D D D D D D U U U CR LF analysis values, and the weight unit –... - Page 63 Data Input Format Format 1 You can connect a computer to your weighing system to send commands via the weighing Meaning system interface port to control functions and applications of the weighing system and Weighing mode 1 the drying unit. SBI functions for remote control are only useful, if the current device/appli- Weighing mode 2 cation mode can be read out any time.
- Page 64 During data communication between the The moisture analyzer SBI interface Once XOFF has been received, it prevents moisture analyzer and an on-line device (Sartorius Balance Interface) has further transmission of characters. (computer), messages consisting of ASCII transmit and receive buffers. You can When XON in received, it re-enables the characters are transmitted via the interface.
- Page 65 Digital Input/Output Ports Functions for Remote Control Remote control via the universal remote (see also “Data Input Format” and control switch input (pin 15): Monitoring, Remote Control “Data Output Format”): Set the universal remote control switch function to “Function key F1” (“Setup: You can monitor and remote-control Read out the moisture analyzer status: Device: Extra functions: Ext.
- Page 66 Pin Assignment Chart Pin Assignment Chart: Female Interface Connector: Pin 1: Signal Ground 25-position D-Submini, DB25S, with screw lock hardware for cable gland Pin 2: Data Output(T+D) Pin 3: Data Input(R+D) Male Connector Used: (please use connectors with the same specifications): Pin 4: Signal Return(T+D/R+D) 25-pin D-Submini, DB25S, with integrated shielded cable clamp assembly (Amp type...
- Page 67 Cabling Diagram – Diagram for interfacing a computer or different peripheral device to the moisture analyzer using the RS-232/V24 standard and cables up to 15 m (50 ft.) long Weighing System Peripheral Device 25-pin 9-pin – – Type of cable: AWG 24 specification...
- Page 68 (Tare value exceeds the Unload the moisture analyzer weighing range) and tare Err 30 Interface port for printer output Contact your local Sartorius Service Print fct. blocked is blocked Center to have the port configured for printer output Err 31...
- Page 69 – Increase the sample quantity Insufficient heat output – Clean the protective glass or temperature sensor Place of installation exposed to – Change the place interfering factors (vibration, etc.) of installation If any other errors occur, please contact your local Sartorius Service Center.
- Page 70 Care and Maintenance Service Cleaning the Heating Unit and Regular servicing by a Sartorius Temperature Sensor technician will extend the service life of !Danger: The terminals of the your moisture analyzer and ensure its continued weighing accuracy. Sartorius heating unit are under live current can offer you service contracts, with §...
- Page 71 Sartorius and who: The following replacement work – have access to the required may only be performed by Sartorius maintenance manuals service technicians (temperature adjust- ment required): – have attended the relevant service traning courses –...
- Page 72 Overview Specifications for Models without EC type-approval certificate Model MA100Q MA100C, MA100H MA50Q MA50C, MA50H Dryer functions: Heating element Coiled quartz Ceramic IR heater, Coiled quartz Ceramic IR heater, heating element round halogen lamp heating element round halogen lamp Temperature range 30 –...
- Page 73 Specifications for Models with EC type-approval certificate Model MA100Q-0CE230V1 MA100C-0CE230V1, MA100H-0CE230V1 Dryer functions: Heating element Coiled quartz heating element Ceramic IR heater, round halogen lamp Temperature range 30 – 230°C 30 – 180°C Temperature increments adjustable in 1°C increments Temperature adjustment with YTM03MA temperature adjustment set Weighing functions: Accuray class...
- Page 74 Heating unit (can be exchanged by Sartorius service technicians only): Ceramic IR heating element, 230 volts 69MA0095 Ceramic IR heating element, 115 volts 69MA0096 Round halogen lamp, 230 volts 69MA0097 Round halogen lamp, 115 volts 69MA0098 Other spare parts can be ordered directly through your local Sartorius Service.
- Page 75 SARTORIUS for use as legal Member States of the European Union measuring instruments and that have an and the Signatories of the European Eco- EC Type-Approval Certificate, see the page nomic Area.
-
Page 80: Examples
Index Page Page Accessories Identification codes (ID) 31, 33, 35 Acoustic signal Information on using the moisture analyzer Adjustment to the available measuring system Installation instructions Adjustment Intended use Analysis number 31, 33 Interface 18, 61 Analysis with former sample 31, 33 Intermediate results printout Analysis, starting an... - Page 81 Page Shutoff mode 30, 32 Shutoff parameters 30, 32 Soft keys 10, 34 Software handshake 18, 64 Specifications SPRM mode 27, 30, 33 Standard drying Standby temperature 30, 32 Statistics 35, 36 Storage and shipping conditions Synchronization Test, heater Test, interfaces 56, 57 Testing the heater Text input...
- Page 82 Entering the General Password Enter/Change Password § Select password setting: Press the q or Q soft keys repeatedly § Select the Setup menu: and O, until Press the s soft key > Password is displayed, together with the > SETUP is displayed current password setting §...
- Page 83 Sartorius AG Weender Landstrasse 94–108 37075 Goettingen, Germany Phone +49.551.308.0 Fax +49.551.308.3289 www.sartorius-mechatronics.com Copyright by Sartorius AG, Goettingen, Germany. All rights reserved. No part of this publication may be reprinted or translated in any form or by any means without the prior written permission of Sartorius AG.
Need help?
Do you have a question about the MA50 and is the answer not in the manual?
Questions and answers