Table of Contents
Advertisement
Quick Links
Download this manual
See also:
User Manual
Advertisement
Table of Contents

Related Manuals for Teledyne Falcon4 57M


Summary of Contents for Teledyne Falcon4 57M
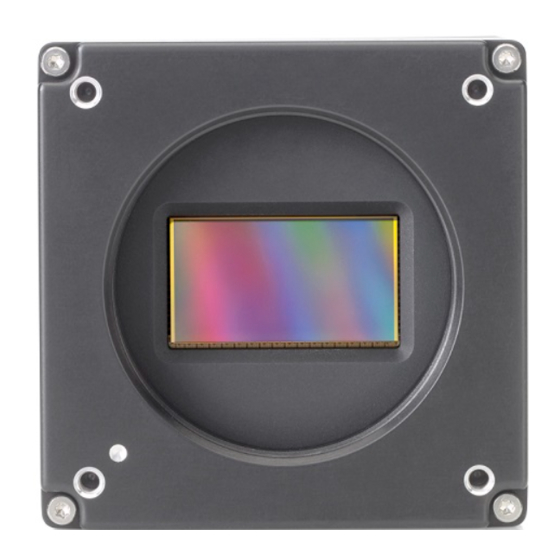
- Page 1 Falcon4™ 57M Camera User’s Manual FA-S0-57M16-00-R sensors | cameras | frame grabbers | processors | software | vision solutions 03-032-20220-00 www.teledynedalsa.com...
- Page 2 All information provided in this manual is believed to be accurate and reliable. No responsibility is assumed by Teledyne DALSA for its use. Teledyne DALSA reserves the right to make changes to this information without notice. Reproduction of this manual in whole or in part, by any means, is prohibited without prior permission having been obtained from Teledyne DALSA.
-
Page 3: Table Of Contents
Contents THE FALCON4 CAMERA OVERVIEW ..............3 ..................3 AMERA IGHLIGHTS Key Features ..................3 Programmability ..................3 Applications ................... 3 Models ....................4 Camera Performance Specifications ............4 & C ................5 ERTIFICATIONS OMPLIANCE ..................5 HOCK AND IBRATION .............. - Page 4 I/O Block Diagram ................33 Opto-Coupled Inputs ................33 Opto-Coupled Outputs ................34 ......35 IELD ORRECTION AND EFECTIVE IXEL ETECTION VERVIEW Correction Function Block Diagram ............35 Flat Field Correction Algorithm Description ..........36 An important note on window blemishes ..........37 How to do an FFC Setup in the Camera ...........
-
Page 5: The Falcon4 Camera Overview
Camera Highlights Teledyne DALSA’s new generation of monochrome area scan cameras—the Falcon4 57M—incorporate very large resolutions and faster frame rates, enabling high speed image capture with superb spatial resolution and improved image quality. Global shuttering and correlated double sampling ensure smear free and low noise images. These features make the Falcon4 camera the best choice for applications where throughput, resolution and high pixel capacity matter most. -
Page 6: Models
Models The camera is available in the following configurations. Table 1: Camera Models Overview Model Number Description FA-S0-57M16-00-R 57M pixel monochrome, Camera Link HS. Table 2: Software Software Product Number / Version Number Camera firmware Embedded within camera GenICam™ support (XML camera description file) Embedded within camera Recommended: Sapera LT, including CamExpert GUI application and Version 7.50 or later... -
Page 7: Certifications & Compliance
Mono Operating Ranges Units Notes Antiblooming >600 x Saturation DN rms Typical, FFC enabled PRNU DN rms Typical, FFC enabled Integral non-linearity From 10-90% of camera saturation *DN = digital number Test Conditions: • Table 4: Frame Rates, Aspect Ratio, and Resolution Comparison Resolution Aspect Maximum... -
Page 8: Upported Ndustry Tandards
Supported Industry Standards GenICam™ The camera is GenICam compliant and implements a superset of the GenICam Standard Features Naming Convention specification V1.5. This description takes the form of an XML device description file using the syntax defined by the GenApi module of the GenICam specification. The camera uses the GenICam Generic Control Protocol (GenCP V1.0) to communicate over the Camera Link HS command lane. -
Page 9: Camera Link Hs Transmission Characteristics
Camera Frame Grabber (C2,7M1) (C2,7M1) Command Video Link Channel Channel Data Lane 0 Data Lane 6 Figure 1. Single CLHS Connector Configuration The command channel is used by the frame grabber to send command, configuration, and programming data to the camera and to receive command responses, status, and image data from the camera. -
Page 10: Responsivity
Responsivity The responsivity graph describes the camera’s response to different wavelengths of light (excluding lens and light source characteristics). Figure 2: Falcon4 Monochrome 57M Spectral Responsivity 8 • Falcon 4 Camera User's Manual The Falcon4 Camera Overview... - Page 11 Figure 3: Falcon4 Monochrome 57M Effective QE Falcon 4 Camera User's Manual • 9 The Falcon4 Camera Overview...
-
Page 12: Sensor Cosmetic Specifications
Sensor Cosmetic Specifications The following table lists the current cosmetic specifications for the Teledyne DALSA sensor used in the Falcon4 series. Feature / Unit Notes Specification Dark Pixel Definition - > 500 4 frame average absolute output level Dark Pixel Count Light Pixel Definition - ±... -
Page 13: Sensor Block Diagram And Pixel Readout
Figure 4: Pixel Readout of the Falcon 4 camera. Notes: As viewed looking at the front of the camera without a lens. (The Teledyne DALSA logo on • the side of the case will be right-side up.) Falcon 4 Camera User's Manual •... -
Page 14: Camera Setup
Camera Setup System Precautions and Cleaning Precautions Read these precautions and this manual before using the camera. Do not open the housing of the camera. The warranty is voided if the housing is opened. • Confirm that the camera’s packaging is undamaged before opening it. If the packaging is damaged please contact the related logistics personnel. -
Page 15: Software And Hardware Setup
Installing Sapera LT gives you access to the CamExpert GUI, a GenICam™ compliant application. Sapera LT is available free of charge for download from the Teledyne Dalsa website. Step 2: Connect Camera Link and Power Cables The camera uses a Camera Link HS SFF-8470 (CX4) cable and a Hirose connector for power and IO connections. -
Page 16: Power Connector
Figure 5: Input and Output, trigger, and Power Connectors WARNING! Grounding Instructions Static electricity can damage electronic components. It’s critical that you discharge any static electrical charge by touching a grounded surface, such as the metal computer chassis, before performing handling the camera hardware. Power Connector WARNING: It is extremely important that you apply the appropriate voltages to your camera. -
Page 17: Camera Link Data Connector
11 12 Figure 6: 12-pin Hirose Circular Male Power Plug—Power Connector Table 6. Power Plug Pinout Description Description OUT2+ +12 V to +24 V DC OUT2- OUT1- OUT1+ IN1-/Trigger IN2+/Trigger IN1+/Trigger IN2-/Trigger WARNING: When setting up the camera’s power supplies follow these guidelines: Apply the appropriate voltages. -
Page 18: Led Indicators
LED Indicators The camera is equipped with 2 LEDs on the back to display the operational status of the camera. The tables below summarizes the operating states of the camera and the corresponding LED states. When more than one condition is active, the LED indicates the condition with the highest priority. Color of Camera Meaning Status LED... - Page 19 Falcon 4 Camera User's Manual • 17 Software and Hardware Setup...
-
Page 20: Step 3: Establish Communication With The Camera
Step 3: Establish Communication with the Camera To establish communication with the camera: 1. Power on the camera 2. Connect to the frame grabber 3. Connect to the camera Power on the camera Turn on the camera’s power supply. You may have to wait up to 60 seconds for the camera to warm up and prepare itself for operation. - Page 21 Falcon 4 Camera User's Manual • 19 Software and Hardware Setup...
- Page 22 Figure 7: Two CamExpert windows shown: one connected to the frame grabber and one connected to the camera At this point you are ready to start operating the camera in order to acquire images, set camera functions, and save settings. 20 •...
-
Page 23: Using Camexpert
Using CamExpert The Sapera CamExpert tool is the interfacing tool for GenCP compliant Camera Link cameras, and is supported by the Sapera library and hardware. When used with a CLHS camera, CamExpert allows a user to test most of the operating modes. Additionally CamExpert saves the camera user settings configuration to the camera or saves multiple configurations as individual camera parameter files on the host system (*.ccf). - Page 24 Device Selector pane: View and select from any installed Sapera acquisition device. After a • device is selected, CamExpert will only present parameters applicable to that device. Optionally select a camera file included with the Sapera installation or saved by the user. Parameters pane: Allows viewing or changing all acquisition parameters supported by the •...
-
Page 25: Creating A Camera Configuration File In The Host
Visibility level from the View ∙ Parameters Options menu. Creating a Camera Configuration File in the Host When using the Teledyne DALSA Sapera SDK – the CCF is created automatically via a save. • party SDK application, if that SDK supports GenAPI 2.4, then the process is When using a 3 •... -
Page 26: Camera Operation
Camera Operation Factory Settings The camera ships and powers up for the first time with the following factory settings: Flat field coefficients enabled (calibrated in internal exposure mode, non-concurrent readout • and integration). • Internal exposure mode (internal frame rate and exposure time). Maximum frame rate and exposure time. -
Page 27: Saving And Restoring Camera Settings
Saving and Restoring Camera Settings The Power-up Configuration parameter opens a dialog allowing you to specify the camera configuration to use on power up and to save current parameter settings. When the user changes a camera parameter, the settings are stored in the camera’s volatile memory and will be lost if the camera resets or is powered down. -
Page 28: Acquisition And Transfer Control Features
Figure 8: Relationship between the Camera Settings NOTE: If a test pattern is active when you save the User set, the camera will turn off all digital processing upon restart. For example: • Set the test image selector to FPN Diagonal Pattern. Do FPN Calibration and save the coefficient set. - Page 29 Test Patterns When setting test patterns, the camera set the digital gains to 1x, the digital offsets to 0, and deactivates the flat field correction. This ensures that the test patterns appear as they should. At the same time, the camera saves the last set of values that were used for video processing and restores them when video output is restored.
- Page 30 Gray Diagonal Ramp This test pattern is the sum of the horizontal and vertical test patterns. FPN Diagonal Ramp This is the sum of a horizontal test pattern that repeats every 64 pixels and a vertical test pattern that repeats every 62 lines. This test pattern can be used to test FPN correction.
-
Page 31: Gain And Black Level Control Details
Gain and Black Level Control Details Gain and black level adjustments are available in the Falcon4 series of cameras. Depending on the model of camera, adjustments are available at the sensor as an analog variable and / or in the digital domain. -
Page 32: Exposure Controls
Exposure Controls Exposure Control modes define the method and timing of how to control the sensor integration period. The integration period is the amount of time the sensor is exposed to incoming light before the video frame data is transmitted to the controlling computer. Exposure control is defined as the start of exposure and exposure duration. -
Page 33: Camera Features
Internally-generated Exsync Exposure Time Exposure Time Programmable Programmable Readout Time Readout Time Programmable Programmable Frame Time Frame Time FVAL Figure 10: Internally Programmable Frame Rate and Internally Programmable Exposure Time (Default) External Frame Rate and External Exposure Time (Trigger Width) In this mode, EXSYNC sets both the frame period and the exposure time. -
Page 34: Exposure Time
External Frame Rate, Programmable Exposure Time In this mode, the frame rate is set externally with the falling edge of EXSYNC generating the rising edge of a programmable exposure time. Camera Features: TriggerMode = On • ExposureMode = Timed • ExposureTime = 10000 (for example) •... -
Page 35: Internal Frame Rate
GPIO [2 : 1]. General purpose inputs are isolated by an opto-coupler input with a time programmable debounce circuit. Software trigger: An exposure trigger is sent as a control command via the command • channel. Software triggers cannot be considered time accurate due to communications latency and sequential command jitter. -
Page 36: Opto-Coupled Outputs
Refer to Figure 6: 12-pin Hirose Circular Male Power Plug—Power Connector for the connector pin out and electrical information. The cable shell and shield should electrically connect the camera chassis to the computer chassis for maximum EMI protection. Figure 14 Opto-coupled input Each input incorporates a signal debounce circuit (following the opto-coupler) to eliminate short noise transitions that could incorrectly be interpreted as a valid pulse. -
Page 37: Flat Field Correction And Defective Pixel Detection Overview
Flat Field Correction and Defective Pixel Detection Overview The Flat Field correction function consists of using two coefficients per pixel which correct the gain and offset of the corresponding pixel. These corrections compensate for the Photo-response Non- uniformity (PRNU) and Fixed Pattern noise (FPN) attributes unique to each camera sensor. In addition, the camera supports replacement of defective pixels (hot, dead, blinking) with a value based on neighborhood pixels. -
Page 38: Flat Field Correction Algorithm Description
Flat Field Correction Algorithm Description Flat Field Correction Algorithm–Method1 (feature: flatfieldCorrectionAlgorithm) applies the following FFC formula for correcting pixel values: newPixelValue – FFCOffsetBase FFCOffsetDelta = (sensorPixelValue x,y – normalized * FFCGain Where: x & y are the Flat Field Correction Pixel coordinates. (See the •... -
Page 39: An Important Note On Window Blemishes
An important note on window blemishes When flat field correction is performed, window cleanliness is paramount. The figure below shows an example of what can happen if a blemish is present on the sensor window when flat field correction is performed. The blemish will cast a shadow on the wafer. FFC will compensate for this shadow by increasing the gain. - Page 40 If the calibration finds any defective pixels, where its FPN base value is greater than Pixel Replacement Offset Threshold, or its PRNU value is greater than Pxiel Replacement Gain Threshold, the pixel can be replaced if Pixel Replacement Mode is Active. The gain (PRNU) calibration is performed next to determine the multiplication factors required to bring each pixel to the required value (target) for flat, white output.
-
Page 41: Matching Gain And Offset Values On Multiple Cameras
Matching gain and offset values on multiple cameras One way is of course to use flat field correction. All cameras would be set up under the same conditions, including lighting, and then calibrated with FPN and PRNU. This process can be time- consuming and complicated (especially the white target). -
Page 42: File Access Via The Camexpert Tool
File Access via the CamExpert Tool 1. Click on the “Setting…” button to show the file selection menu. Figure 18 Initial File Access Control Dialog 2. From the Type drop menu, select the file type that will be uploaded to the camera. 3. -
Page 43: Technical Specifications
Technical Specifications Mechanicals Falcon 4 Camera User's Manual • 41 Technical Specifications... -
Page 44: Appendix E: Emc Declaration Of Conformity Tbd
Appendix E: EMC Declaration of Conformity 42 • Falcon 4 Camera User's Manual Technical Specifications... -
Page 45: Appendix A: Genicam Commands
Parameters in black are user set in CamExpert or programmable via an imaging application. Features listed in the description table but tagged as Invisible are typically reserved for Teledyne DALSA Support or third party software usage, and not typically required by end user applications. - Page 46 Software Default SoftwareDefault No default set is loaded. The camera uses model default values and no factory calibrated values. Factory Factory Load factory calibrated defaults. UserSet1 UserSet1 Select the user defined configuration (UserSet1 to UserSet8) as the Power-up Configuration. UserSet 4 UserSet4 User Set Selector UserSetSelector...
-
Page 47: Acquisition And Transfer Control Category
Acquisition and Transfer Control Category The acquisition and transfer control category, as shown by CamExpert, group acquisition and transfer specific parameters. Acquisition and Transfer Control Feature Descriptions The following table describes these parameters along with their view attribute. Display Name Feature &... - Page 48 Timed Timed The exposure duration time is set using the Exposure Time feature and the exposure starts with a LineStart event. Trigger Width TriggerWidth Uses the width of the trigger signal pulse to control the exposure duration. Use the Trigger Activation feature to set the polarity of the trigger.
-
Page 49: I / O Control Category
I / O Control Category The camera’s I / O controls, as shown by CamExpert, group features used to configure external inputs and acquisition actions based on those inputs, plus camera output signals to other devices. I/O Controls Feature Descriptions The following table describes these parameters along with their view attribute. - Page 50 H1_Pin7_Pin8 H1_Pin7_Pin8 General Purpose Output 2: Hirose Pin 7, Pin 8. Line Debouncing Period lineDebouncingPeriod Specifies the minimum length of an input line voltage DFNC transition before recognizing a signal transition. Available Beginner when the Line Selector is set to an input. Each input line stores its own debouncing period.
- Page 51 Inactive Inactive Inactive - Sets the Output circuit to open. Line Detection Level lineDetectionLevel The voltage at which the signal is treated as a logical DFNC high. Available when the Line selector is set to a general Beginner purpose input (GPI). Note: This value is for both general purpose inputs (i.e.
-
Page 52: Advanced Processing Control Category
Advanced Processing Control Category The camera’s Advanced Processing controls, as shown in CamExpert, group parameters used to configure Defective Pixel Detection, Flat Field calibration. Advanced Processing Control Feature Descriptions The following table describes these parameters along with their view attribute. Display Name Feature &... - Page 53 Pixel Y Coordinate flatfieldCorrectionPixelYCoordinate Specifies the Y coordinate of the flat field pixel DFNC coefficient to access. To configure, set Beginner Correction Mode to Calibration. Pixel Gain(PRNU) flatfieldCorrectionGain Sets the gain to apply to the currently selected pixel. Range is from 1 to 4, as float. To configure, set Correction Mode to Calibration.
- Page 54 Copy Coefficient to flatfieldCoefficientsCopyInCurrent Copies the currently selected flat field DFNC Active coefficients in the Active Set. Read-Write when Expert in Calibration Mode Pixel Replacement defectivePixelReplacementMode Enable or disable pixel replacement. DFNC Mode Expert If Active: If FPNx,y > defectivePixelReplacementOffsetThreshold OR PRNUx,y >...
- Page 55 DFNC FPN Delta Defect flatfieldCalibrationFPNDeltaDefectCount Reports the number of defect pixels detected in Guru Count FPN delta calibration. DFNC PRNU Defect Count flatfieldCalibrationPRNUDefectCount Reports the number of defect pixels detected in Guru PRNU delta calibration. DFNC LUT Mode lutMode Enables or disables the linearization look up Expert table correction.
-
Page 56: Image Format Controls Category
Parameters in black are user set in CamExpert or programmable via an imaging application. Features listed in the description table but tagged as Invisible are usually for Teledyne DALSA Support or third party software usage—not typically required by end user applications. - Page 57 Grey Diagonal GreyDiagonalRamp Image is filled horizontally and vertically with an Ramp image that goes from the darkest possible value to the brightest by 1 Dn increment per pixel. Static Value Static Value User-specified static value. The value is set using the testImageStaticValue feature.
-
Page 58: Camera Link Transport Layer Feature Description
Parameters in black are user set in CamExpert or programmable via an imaging application. Features listed in the description table but tagged as Invisible are usually for Teledyne DALSA Support or third party software usage—and are not typically required by end user applications. -
Page 59: File Access Control Category
DFNC Activate Hot Plug ActivateHotPlug Performs a Hot Plug event. This event will cause the Beginner camera to: • disconnect from the frame grabber • load the configuration specified by NextDeviceConfig if it has changed since the last connection • reconnect to the frame grabber. DFNC 8b/10b ErrorCount LinkErrorCount... - Page 60 Rolling Shutter,Tap LutLuminance2Tap2 Luminance LUT for Rolling Shutter Tap 2, Pixels 2,Column 1,Odd Rows 0 - 1791, Odd Rows Rolling Shutter,Tap LutLuminance2Tap3 Luminance LUT for Rolling Shutter Tap 3, Pixels 3,Column 2, Even Rows 1792 - 3583, Even Rows Rolling Shutter,Tap LutLuminance2Tap4 Luminance LUT for Rolling Shutter Tap 4, Pixels 4,Column 2,Odd Rows...
-
Page 61: Appendix B: Camera, Frame Grabber Communication
Teledyne DALSA Camera Link cameras support the GenCP Camera Link HS standards. To configure Teledyne DALSA GenCP Camera Link HS Cameras: 1. Install the Teledyne DALSA frame grabber in the host computer; refer to the hardware installation manual 2. Install Sapera LT and the Teledyne DALSA frame grabber driver. -
Page 62: Appendix C: Cleaning The Sensor Window
Appendix C: Cleaning the Sensor Window Recommended Equipment Glass cleaning station with microscope within clean room. • 3M ionized air gun 980 • (http://solutions.3mcanada.ca/wps/portal/3M/en_CA/WW2/Country/) Ionized air flood system, foot operated. • Swab (HUBY-340CA-003) • (http://www.cleancross.net/modules/xfsection/article.php?articleid=24) • Single drop bottle (FD-2-ESD) E2 (Eclipse optic cleaning system (www.photosol.com) •... -
Page 63: Appendix D: Internal Flat Field Calibration Algorithms
Appendix D: Internal Flat Field Calibration Algorithms The Falcon4 camera provides the user with the ability to perform a custom flat field calibration. This appendix gives details of the calibration algorithms. All calibration is performed on averaged image data to reduce noise. Offset (FPN) Calibration Offset calibration is performed when the sensor is not exposed to light. - Page 64 If the calculated gain is less than 1 then the number of clipped gain. A large number of clipped pixels may indicate a poorly chosen target or exposure setting. • If the calculated pixel gain is not correctable (i.e. greater than 4), it will be clipped at 4. •...
-
Page 65: Appendix E: File Format
Appendix E: FILE FORMAT LUT file is downloaded/uploaded as shown in the following figure. LUT file format Byte Offset Name Value Signature “SAPERA_LUT “ Version Header size Format For mono12, the value is 0x01000C00 For mono16, the value is 0x00000001 Only has 1 type MONO16, the value is 0x00000001 Type Falcon 4 Camera User's Manual •... -
Page 66: Ffc File Format
Entries 2048 36 ~ 36 + Entries * 2 FFC file format FFC file is downloaded/uploaded as shown in the following figure. Byte Offset Name Value/Note "SAPERA_FFC " Signature Version Header size Base OffsetBits Number of bits of FPN base component: 9 Number of bits of PRNU gain PRNU Gain Bits Aoi width... - Page 67 The file downloaded to PC is a raw image file, which combines each FPN base, FPN delta, and PRNU into a double word. Teledyne Dalsa provides a standalone command line application (FFC_Codec.exe) to decode this raw image into 3 readable tif files.
-
Page 68: Contact Information
Sales Information Visit our web site: www.teledynedalsa.com/mv Email: mailto:info@teledynedalsa.com Canadian Sales Teledyne DALSA — Head office Teledyne DALSA — Montreal office 605 McMurray Road 880 Rue McCaffrey Waterloo, Ontario, Canada, N2V 2E9 Saint-Laurent, Quebec, Canada, H4T 2C7 Tel: 519 886 6000...
Need help?
Do you have a question about the Falcon4 57M and is the answer not in the manual?
Questions and answers