Tornado 99125B Operation & Maintenance Manual
20” & 24” floorkeeper “ez” for commercial use only
Hide thumbs
Also See for 99125B:
- Operation & maintenance manual (18 pages) ,
- Owner's operation and maintenance manual (37 pages)
Advertisement
TORNADO INDUSTRIES, LLC
3101 WICHITA COURT
FORT WORTH, TX 76140
(800)-822-8867 FAX (817)-551-6507
WWW.TORNADOVAC.COM
Operations & Maintenance Manual
For Commercial Use Only
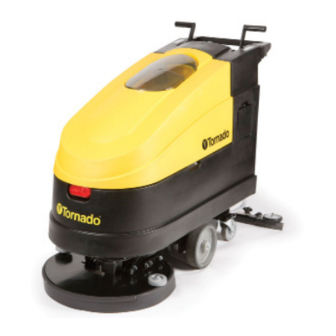
20" & 24" Floorkeeper "EZ"
MODEL NOS: 99125A,99125B & 99130
Form No. L2552PA 02/14 ©Tornado Industries, LLC. All rights reserved
Advertisement
Table of Contents

Subscribe to Our Youtube Channel
Related Manuals for Tornado 99125B


Summary of Contents for Tornado 99125B
- Page 1 TORNADO INDUSTRIES, LLC 3101 WICHITA COURT FORT WORTH, TX 76140 (800)-822-8867 FAX (817)-551-6507 WWW.TORNADOVAC.COM Operations & Maintenance Manual For Commercial Use Only 20” & 24” Floorkeeper “EZ” MODEL NOS: 99125A,99125B & 99130 Form No. L2552PA 02/14 ©Tornado Industries, LLC. All rights reserved...
- Page 2 Write your machine serial number here:_______________________ This illustrated instruction book covers: Model 20” 20” 24” Cat. No. 99125A** 99125B** 99130** Volts Series All specifications are subject to change without notice. TABLE OF CONTENTS Warranty Statement…………………… .3 Safety Instructions……………………… 5 Safety Information……………………….7 Machine Set –Up………………………...
- Page 3 2. All non-wear item parts purchased after warranty expiration are warranted for 90 days. 3. Warranty starts from the date of sale to the consumer or, at Tornado’s discretion, 6 months after the dealer purchased the unit from Tornado, whichever comes first.
- Page 4 Do not use with damaged cord or plug. If charger is not working as it should, has been dropped, damaged, left outdoors, or dropped into water, return it to a Tornado Service Center. Do not pull or carry by cord, use cord as a handle, close a door on cord, or pull cord around sharp edges or corners.
- Page 6 How To Install Batteries CAUTION: Batteries are heavy. Use 2 people and lift them to avoid injury. Install (2) 12-volt or (4) 6-volt batteries. New bat- teries should be given a full charge before first use. Limit use of new batteries during first 5 cycles. Place batteries alongside machine.
- Page 7 NOTE: Give all new batteries a full charge before they CAUTION: BEFORE charging batteries, put are used. machine in a ventilated area and always leave machine top open. NOTE: Limit extended use of new batteries during the first 5 operating cycles. CAUTION: Only use a battery charger designed for the machine.
-
Page 8: Dip Switch Setting
IPSWITCH SETTING CBHD3 24V 25A TACONY DIPSWITCH: SW1 CHARGING CURVE IUIa-ACD for Lead-acid (Wet) batteries IU0U-AGM FULLRIVER IUIUa-AGM DISCOVER IUIa-Gel for TROJAN Gel batteries Dipswitches are located behind the white label on the top side of the charger and next to the green led you will find 2 sets of dipswitches (SW1 and SW2). RED LED YELLOW LED GREEN LED... -
Page 9: Visual Signals
99822 Battery Charger Operating Instructions Warnings: • The battery charger must not be used by persons with reduced physical, sensory and mental capabilities or with lack of experience and/or knowledge, unless they are properly supervised and instructed by a person responsible for their safety. •... - Page 10 How To Install The Pad Holder and Brush The EZ uses 1 pad holder or 1 of 2 types of brushes. CAUTION: Always use Tornado® plastic clutch plate in the center of the pad holder. Aluminum clutch plates are not recommended for use with the EZ machines.
-
Page 11: How To Operate The Machine
How To Fill the Solution Tank CAUTION: DO NOT overfill. To prevent overfilling refer the clear tube located at the back of the machine. Never fill above the red line. Fill with water to the BLUE and GREEN line and then add your cleaning solution. - Page 12 How to Lower/Raise the Brush/Pad Hold the drive handle with both hands. To raise the brush/pad, step down on the round foot pedal until you feel it lock. To lower the brush/pad, step down completely on BOTH the round foot pedal and the square pedal next to it. When fully depressed, slide your foot to the inside to release the square pedal and SLOWLY let the round pedal raise to the UP position. With the brush head lowered, slide the splash guard down around the entire brush housing. It should be slightly above the floor. How to Engage the Brush Drive (20” & 24” EZ Traction Drive) Hold the drive handle with both hands. Turn the knob on the control panel clockwise (forward) or counter-clockwise (reverse). How to Lower/Raise the Squeegee Pull the handle towards you to lower the squeegee.
- Page 13 What To Do When You’re Operating Machine (20” & 24” EZ Traction Drive) 1 Stand behind the machine. 2 Make sure the brush drive motor switch is ON. 3 Lower the brush deck as described. 4 Pull up on the Control bar under the drive handle. The machine will start to move forward in a straight line. To go backward turn the speed knob on the control panel counter-clockwise. How To Steer the Machine The machine is very easy to steer. Just point the machine in the direction you want to go. At the end of a long hallway or aisle, go slow and stand a bit to the side of machine as you turn it around. NEVER let go of the machine. Vacuuming Up Solution Make sure the squeegee is in the down position. As the machine moves forward and the solution is dispensed, the squeegee will vacuum it up into the recovery tank. If necessary, adjust squeegee pressure by turning knob. If solution is missed, reduce the amount of solution flow and move the machine back over the missed area. You can go forward or backward and pick up solution. How To Control Excess Foam in Recovery Tank Watch the liquid as it accumulates in the recovery tank. If you notice excess foaming, stop the machine. Add a small...
-
Page 14: Maintenance
How To Empty the Recovery Tank The machine will automatically shut the vacuum motor OFF when the recovery tank is full of dirty water. A red light comes on at the control panel. Stop the machine by releasing the Control Bar and raising the brush drive housing. Stop the solution flow. Turn OFF all 3 power switches (brush motor, vacuum motor, main power) Move the machine to an area that will allow you to empty the recovery tank into a floor drain or basin. Lower the brush deck. Remove the recovery tank drain hose from the front of the machine. Raise the hose above the solution tank and remove the plug. Put the hose over a drain or in a basin and remove the plug. Empty the tank. Replace the plug and tighten it. Replace the hose and secure it with the clips. Remember to fill the solution tank with fresh water before operating the machine. Maintenance Preventative Maintenance Schedule Daily- Empty the tank and rinse the recovery tank with clean water. Leave the tank cover open on top... - Page 15 Weekly- CAUTION: Never test the strength of the battery unless it is fully charged and cool. Check the battery cells with a hydrometer. Monthly- Lubricate brush and squeegee lift mechanisms with light oil. Check for wear or damage of clutch plate, brushes, pads, or squeegee blades. Clean all battery terminals. Check all electrical connections and tighten if any are loose. Clean entire machine with all purpose cleaner. Vacuum motor is not running Vacuum filter is clogged Recovery tank is full Squeegee or vacuum hose is clogged, broken or disconnected Problem: Solution is not being picked up Bad seal at tank cover, vacuum motor or...
- Page 16 This page intentionally left blank...
-
Page 17: Warranty Registration Form
Return to: may or may not apply based on your specific machine. If any defect occurs, the warranty is voided if TORNADO INDUSTRIES, LLC service is attempted by non-Authorized Tornado Service Centers. 3101 WICHITA COURT FORT WORTH, TX 76140 PHONE: ©2012 Tornado Industries.
Need help?
Do you have a question about the 99125B and is the answer not in the manual?
Questions and answers