Table of Contents

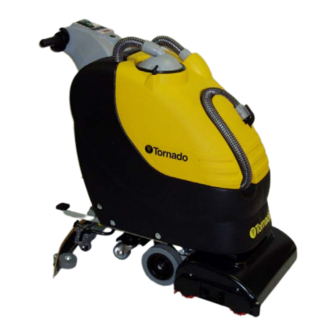
Summary of Contents for Tornado 99685 BR 18/11
- Page 1 TORNADO INDUSTRIES 7401 W. LAWRENCE AVENUE CHICAGO, IL 60706 (708) 867-5100 FAX (708) 867-6968 www.tornadovac.com £ £ £ £ Tornado Operations & Maintenance Manual MODEL NO. 99685 BR 18/11 L9717 ¤2007 Tornado Industries All rights reserved.
-
Page 2: Table Of Contents
TABLE OF CONTENTS TECHNICAL DESCRIPTION……….……………………………………..1 STOP OF THE MACHINE AFTER CLEANING OPERATION……….9 WARRANTY ……………………………………………………………….2 DAILY MAINTENANCE…………………………………………… 9-10 SAFETY INSTRUCTIONS………………………………………………..3 Recovery tank cleaning……………………………………… FEATURES INSTRUMENT BOARD AND CONTROLS………………...4 Float cleaning……………………………………………….. FEATURES OF MACHINE………..……………………………………….4 Brush cleaning………………………………………………. INTRODUCTORY COMMENT……………………………………………4 Brush disassembly……………………………………………. 9 SYMBOLS…..………………………………………………………. Squeegee cleaning…………………………………………….. -
Page 4: Safety Instructions
- Avoid working with the - Do not remove covers on GENERAL SAFETY brush when the machine areas that require the use of RULES stands still in order to tools. prevent floor damages. - Do not wash the machine The rules below have to be - Do not use the machine on with direct water jets or followed carefully in order... -
Page 5: Features Instrument Board And Controls
LEGEND INSTRUMENT BOARD AND CONTROLS BRUSH MOTOR SWITCH CHARGE LEVEL DISPLAY: BATTERIES/HOUR BRUSH ACTIVATION LEVERS METER SOLUTION VALVE LEVER VISUALIZATION PUSH BUTTON: HOUR/METER SQUEEGEE LIFTING LEVER SUCTION MOTOR SWITCH BRUSH HEAD LIFTING PEDAL SOLUTION VALVE OPEN SIGNAL LAMP LEGEND MACHINE 10. -
Page 6: Symbols
SYMBOLS ,QGLFDWHV WKH H[KDXVW KRVH RI WKH UHFRYHU\ WDQN 6\PERO GHQRWLQJ WKH VROXWLRQ YDOYH ,QGLFDWHV WKH VROXWLRQ YDOYH OHYHU ,QGLFDWHV WKH VLJQDO ODPS RI WKH RSHQ VROXWLRQ YDOYH 6\PERO GHQRWLQJ WKH EUXVK ,QGLFDWHV WKH VZLWFK RI WKH EUXVK PRWRU ,QGLFDWLRQ RI WKH PD[LPXP WHPSHUDWXUH RI WKH VROXWLRQ GHWHUJHQW ,W LV SODFHG QHDU WKH FKDUJLQJ KROH RI WKH VROXWLRQ WDQN... -
Page 7: Battery Installation And Setting The Battery Type
Please contact an authorized minutes after battery Battery installation and technical assistant. discharge signal starts setting the battery type blinking. This machine is equipped with two NOTE: Never leave battery batteries at 12V in series completely discharged even connection, placed in its if the machine is not used. -
Page 8: Battery Charge Level Indicator
On the display (1) the following Insert the squeegee hose (3) into Adjustment of the indication of the battery charge its coupling, respecting its position squeegee inclination level is digital and indicates the as indicated in the figure. percentage of the battery charge. To increase the rubber bending in 90 is the maximum charge, down the central part, it is necessary to... -
Page 9: Recovery Tank
ATTENTION: Recovery tank Use always-low foam Check that the cover of the suction detergent. To avoid foam float filter (1) is correctly secured presence, before starting after rotating the levers and working operation, introduce whether the suction motor hose (2) into the recovery tank a is correctly connected. -
Page 10: Emptying Detergent Solution
ATTENTION: 4. Take off the filter and filter Brush cleaning This operation must be protection. Disassemble the brush and clean carried out using gloves for 5. Rinse the tank with a water jet. them with a water jet (for protection against dangerous disassembly, see as follows under solutions. -
Page 11: Squeegee Cleaning
ATTENTION: 2. Release the hook (4) of the 5. Rinse the solution tank filter The execution of brush rubber holder blade and take the placed inside the exhaust plug, disassembly operations with rubber off. under the machine. electric supply on may cause 3. -
Page 12: Troubleshooting Guide
2. The brush bristles are worn out. TROUBLESHOOTING Check the brush wear condition GUIDE and eventually replace them. To replace the brush, see Signals on the display instructions at paragraph “BRUSH DISASSEMBLY” and “BRUSH A001: Indication of the version of ASSEMBLY”. -
Page 13: Programmed Maintenance
PROGRAMMED MAINTENANCE TWO- INTERVENTION DAILY WEEKLY SIX-MONTH MONTH • RECOVERY TANK CLEANING • SUCTION FILTER CLEANING • SOLUTION TANK FILTER CLEANING • BRUSH CLEANING • BRUSH DISASSEMBLY • SQUEEGEE CLEANING • FRONT SQUEEGEE RUBBER REPLACEMENT • REAR SQUEEGEE RUBBER REPLACEMENT •...


Need help?
Do you have a question about the 99685 BR 18/11 and is the answer not in the manual?
Questions and answers