Table of Contents

Related Manuals for AAON SS1079


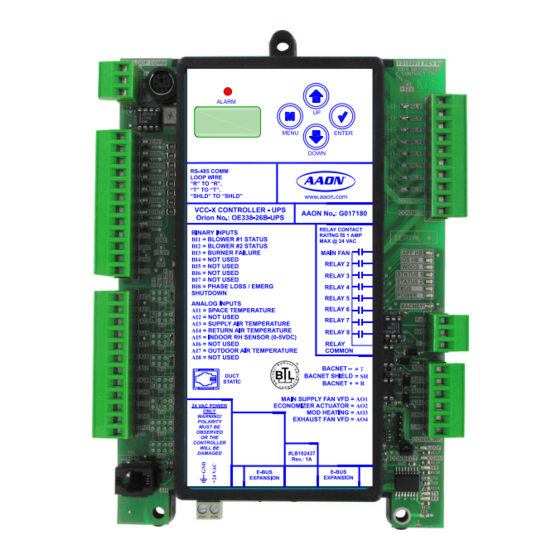
Summary of Contents for AAON SS1079
- Page 1 VCC-X Controller Operator Interface SD Technical Guide VCC-X Controller Code: SS1079 Version 1.0 & up VAV/Zone Controller Code: SS1001, SS1005, SS1025 Requires Service Tool SD Code: SS1063 Requires System Manager SD Code: SS1068 Version 1.11...
- Page 2 AAON Part Number: V57150 8500 NW River Park Drive · Parkville, MO 64152 ® AAON is a registered trademark of AAON, Inc., Tulsa, OK. Toll Free Phone: 866-918-1100 ® Neither WattMaster Controls, Inc. nor AAON PH: (816) 505-1100 · FAX: (816) 505-1101 assumes any responsibility for errors or omissions in this E-mail: mail@wattmaster.com...
-
Page 3: Table Of Contents
TABLE OF CONTENTS OVERVIEW & SYSTEM CONNECTION ................4 Modular Service Tool ..........................4 Modular System Manager SD ......................... 6 MODULAR SERVICE TOOL SD ..................10 Display Screens and Data Entry Keys ....................10 Initialization & Setting the Time & Date ....................11 Setting the Operating Mode &... -
Page 4: Overview & System Connection
Zone SYSTEM CONNECTION Zone Modular Service Tool SD Modular Service Tool SD The OE391-12 Modular Service Tool is a system operator interface that provides a direct link to enable the system operator to view the status, confi gure, and adjust the setpoints of the VCC-X, VBC-X, VCM, VCM-X, VCM-X E-BUS, RNE, SA E-BUS, VAV/CAV, MUA II, or VAV/Zone Controller on the control system communications loop. - Page 5 SYSTEM CONNECTION Modular Service Tool Modular Service Tool Be sure that the Modular Service Tool has fresh batteries installed or that it is connected to a power source using the supplied power pack Whether you have a Stand Alone, Interconnected, or Networked before attempting any programming of the controller.
-
Page 6: Modular System Manager Sd
Zone SYSTEM CONNECTION Zone Modular System Manager SD Modular System Manager SD The OE392-12 Modular System Manager SD provides a direct link to enable you to view the status and adjust the setpoints of the VCC-X, VCB-X, VCM-X, VCM-X E-BUS, RNE, SA E-BUS, VCM, 9.00"... - Page 7 SYSTEM CONNECTION Modular System Manager SD Network Connection Network Connection When the System Manager is to be connected to a Stand Alone system, a 12-foot cable with modular connectors on one end and stripped wire ends on the other end is provided for this purpose. This As previously described, when you are connecting the Modular is used to facilitate connecting communications and power wiring System Manager to a Networked System, the Modular System...
- Page 8 Zone SYSTEM CONNECTION Zone Power/Comm Board Wiring A Power/Comm Cable Can Be Used To WARNING! Connect With The MiniLink PD Instead Using 2 Conductor Twisted Pair With Shield DO NOT GROUND THE 24V TRANSFORMER Cable . You Can Also Use A Power/Comm THAT IS TO BE USED WITH THE POWER/COMM Cable To Connect With...
- Page 9 SYSTEM CONNECTION Stand Alone Connection Controller Board NOTE: You Can Use The Three Conductor Communications Terminal Block or a Modular Connection to Connect to the Controller Board. One or the Other Option Can Be Used, SHLD Not Both. Alternatively, for Network Connections, A Power Comm Board Can Be Used.
-
Page 10: Modular Service Tool Sd
MODULAR SERVICE TOOL SD Modular Service Tool Keys Operator Interfaces Mode Selection Buttons In order to confi gure and program the VCC-X Controller, you must The Modular Service Tool is provided with “Mode Selection But- have an Operator’s Interface or a personal computer with the Prism tons.”... -
Page 11: Initialization & Setting The Time & Date
MODULAR SERVICE TOOL SD Initialization & Setting the Time & Date Modular Service Tool Initialization Although the times are displayed on the Main Screen in a standard 12-hour format, you must program them using the 24-hour military format. If you confi gured the VCC-X Controller to use its own Modular Service Tool Initialization Screen and Internal Schedules, the Occupied/Unoccupied modes are calculated Setup Screens... -
Page 12: Setting The Operating Mode & Energy Timer
MODULAR SERVICE TOOL SD Setting the Operating Mode and Energy Saving Timer Setting the Operating Mode Setting the Energy Saving Timer The Operating Mode is displayed on the last line of the Main Screen The Modular Service Tool has a built-in timer that can be pro- as shown below. -
Page 13: Alarm Search & Override Search
MODULAR SERVICE TOOL SD Alarm and Override Search Modular Service Tool Alarm Search Modular Service Tool Override Search When a space sensor with override option is used with any VAV/ NOTE: When you <ALARMS> button on the Modu- press Zone or Unit Controller, the Modular Service Tool can determine lar Service Tool, it will search only the unit ID that and report any controllers that are currently operating in an override you have entered;... -
Page 14: Schedules & Holidays
MODULAR SERVICE TOOL SD Schedules and Holidays Scheduling The screens will step through the Start Time and then the Stop Time for each day of the week. You can quit at any point in the process by You can access the Unit Controller Scheduling Screens by pressing <ESC>... -
Page 15: Schedule Override
MODULAR SERVICE TOOL SD Holiday Scheduling and Schedule Override Holiday Start/Stop Times Schedule Override VCC-X Schd ID # VCC-X Ovrd ID # Holiday Schedule Schedule Override Start Event #1: XXXX Enter Override: X Stop Event #1: XXXX [0=Auto 1=ON 2=OFF] If you want to force the unit to operate in a continuous Occupied or Unoccupied mode, select this menu item to activate the desired VCC-X Schd... -
Page 16: System Manager Sd
Zone MODULAR SYSTEM MANAGER SD Zone System Manager SD Keys and Buttons Operator Interfaces Mode Selection Buttons In order to confi gure and program the Orion System controllers, The Modular System Manager is provided with “Mode Selection you must have an Operator’s Interface or a personal computer with Buttons.”... -
Page 17: Initialization & Setting The Time & Date
MODULAR SYSTEM MANAGER SD Initialization & Setting the Time & Date System Manager SD Initialization Programming the Time <1> From the Setup Screen shown below, press on your keypad to System Manager SD Initialization Screen and access the Set Time & Date Screens. Setup Screens After connecting the System Manager to the controller with the 1) Set Time &... -
Page 18: Setting The Operating Mode
Zone MODULAR SYSTEM MANAGER SD Zone Setting the Operating Mode Setting the Operating Mode Passcode Clearance Screen will appear as shown below. The Operating Mode is displayed on the last line of the Main Screen THIS ACTION REQUIRES as shown below. The factory default setting for the System Manager A SPECIAL HIGH LEVEL is LS (Low Speed) Stand Alone Mode. -
Page 19: Changing Passcodes
MODULAR SYSTEM MANAGER SD Changing Passcodes System Manager Passcodes Passcodes can only be changed by a Level 2 user. Enter the passcode <ENTER> and press . The following screen will appear: Changing the mode of operation, updating software, changing schedules, and changing setpoints and confi gurations require pass- Enter New Passcode code clearance. -
Page 20: Loop Search And System Alarm Search
Zone MODULAR SYSTEM MANAGER SD Zone Loop Search and System Alarm Search Network Mode & Multiple Managers System Alarm Search Loop Search The System Manager can be used to search for all active alarms on the system. You must confi gure the MiniLink PD to allow for When the System Manager is confi... -
Page 21: Unit Alarm Search & Override Search
MODULAR SYSTEM MANAGER SD Unit Alarm Search and Override Search System Manager Override Search Alarm Screen NO ALARMS DETECTED NOTE: In order for the Override Search to work, a Loop Search must be performed fi rst. See page 20 for de- tails. -
Page 22: Schedules & Holidays
Zone MODULAR SYSTEM MANAGER SD Zone Schedules and Holidays Scheduling Week Schedules You can access the Controller Scheduling Screens by pressing From the Unit Schedule Menu, select Week Schedules. The following <SCHEDULES> . The screen below will appear because Scheduling two screens will appear in order: requires passcode clearance. -
Page 23: Schedule Override
MODULAR SYSTEM MANAGER SD Holiday Scheduling and Schedule Override Holiday Start/Stop Day Selection Schedule Override From the Unit Schedule Menu, select Holiday Schedules. The fol- From the Unit Schedule Menu, select Schedule Override. The fol- lowing four screens will appear in order: lowing screen will appear: Hldy Ovrd... -
Page 24: Programming
Zone VCC-X CONFIGURATION Zone VCC-X Confi guration Screen Index VCC-X Confi guration Screen Index Screen #35 Sensor Installed Screen #36 Building Pressure Sensor Installed The available Confi guration Screens for the VCC-X Controller are Screen #37 Building Pressure Control listed on the next few pages by sequential screen number. When each Screen #38 Building Pressure Control Rate VCC-X Controller is confi... -
Page 25: Vcc-X Confi Guration
VCC-X CONFIGURATION VCC-X Confi guration Screens Confi guration Screens NOTE: If “No Communication” remains, it indicates a communication failure to the controller. In order to correctly set up the VCC-X Controller, you must fi rst confi gure several parameters in regard to the type of HVAC unit The following screen will be displayed: and system you have installed. - Page 26 Zone VCC-X CONFIGURATION Zone VCC-X Confi guration Screens Confi guration Screen #3 - RSM #3 & #4 Confi guration Screen #7 - 12 Relay E-BUS Modules Installed Expansion Module Installed VCC-X Cnfg ID # VCC-X Cnfg ID # RSM#3 Installed: NO 12RLY Installed: NO RSM#4 Installed: NO USE <...
- Page 27 VCC-X CONFIGURATION VCC-X Confi guration Screens Space Temperature —Typical recirculating unit using Return Air Temperature —The SAT Setpoints will be a Space Temperature Sensor to determine the Heating, adjusted based on the Return Air Temperature. Cooling, and Vent Modes of operation. ...
- Page 28 Zone VCC-X CONFIGURATION Zone VCC-X Confi guration Screens Confi guration Screen #15 - Outdoor Sensor Type This value determines the time interval between changes to the Sup- ply Fan Speed or the Bypass Damper Position during Duct Static Pressure Control. It also determines the time interval between VCC-X Cnfg ID #...
- Page 29 —Only fully modulating forms of Heat is lost. Default is NO. which would be Modulating Hot Water or Steam Heat or Modulating SCR Electric Heat. Does not include Modulating Gas using the AAON MODGAS-X Controller. ® Confi guration Screen #23 - Fan Starting Delay ...
- Page 30 Zone VCC-X CONFIGURATION Zone VCC-X Confi guration Screens YES for the Economizer to operate in the Unoccupied Cooling Select Confi guration Screen #28 - Mechanical Heat/ Mode. Default is NO. Cool Alarm Delay —You want the Economizer to always remain fully Closed in the Unoccupied mode.
- Page 31 VCC-X CONFIGURATION VCC-X Confi guration Screens period. By the time the difference is 1˚, the signal change will be Confi guration Screen #37 - Building Pressure 2% per time period. With a Proportional Window of 2˚, if you are 2˚ Control or more from setpoint, the amount of signal change will be 10% per time period, and at 1˚...
- Page 32 Zone VCC-X CONFIGURATION Zone VCC-X Confi guration Screens Confi guration Screen #40 - Exhaust Fan Confi guration Screen #42 - WSHP Glycol % Output VCCX Cnfg ID 101 VCC-X Cnfg ID # WSHP Glycol Exh Fan Volts Percentage: 0% Min Volts: 0.0VDC Use <...
- Page 33 VCC-X CONFIGURATION VCC-X Confi guration Screens Confi guration Screen #47 - Type of Airfl ow All Modes Occupied —This is Occupied Mode Station Dehumidifi cation Priority. The unit can enter Dehumidifi cation during Cooling, Heating, or Vent Modes, but only while in Occupied operation. VCC-X Cnfg ID #...
- Page 34 Zone VCC-X CONFIGURATION Zone VCC-X Confi guration Screens measuring the Return Air duct damper area, be sure to measure the Confi guration Screen #51 - Monitor Supply Air inside dimensions of the damper. The duct size needs to be accurate Airfl...
- Page 35 VCC-X CONFIGURATION VCC-X Confi guration Screens Bcast Fixed to Boxes —The VCC-X Controller is Confi guration Screen #60 - Trend Log Rate communicating to Orion VAV Boxes and will broadcast a command to the boxes to go to a Fixed Percentage Position or Airfl...
- Page 36 Zone VCC-X CONFIGURATION Zone VCC-X Confi guration Screens Confi guration Screen #64 - Broadcast OA RH Confi guration Screen #68 - Broadcast Building Pressure VCC-X Cnfg ID # Broadcast OA RH VCC-X Cnfg ID # Broadcast Build. Pr. USE < or > TO CHANGE USE <...
- Page 37 VCC-X CONFIGURATION VCC-X Confi guration Screens See the for information on how VCC-X Controller Technical Guide Confi guration Screen #76 - Return Air Bypass these Delays and Run Times are used. Control Description Minimum Default Maximum VCC-X Cnfg ID # Cooling Stage Up 3 Min 3 Min...
- Page 38 Zone VCC-X CONFIGURATION Zone VCC-X Confi guration Screens • • Confi guration Screens #78-84 - VCC-X Relay ReHeat PreHeat Confi guration Screens • • Low Ambient Exhaust Fan • • VCC-X Cnfg ID # Economizer Heat Wheel On-Board Relay (2-8) •...
- Page 39 VCC-X CONFIGURATION VCC-X Confi guration Screens No. Relay Description Details Cooling Stage Confi gured for each fi xed stage of cooling (except heat pump compressor). Heating Stage Confi gured for each fi xed stage of heating. Aux Heat Confi gured for a fi xed stage of Aux Heat in a heat pump unit. Emergency Heat Confi...
-
Page 40: Vcc-X Setpoint Screen Index
Zone VCC-X CONFIGURATION Zone VCC-X Setpoint Screens Setpoint Screen Index Screen #25 Head Pressure Setpoints - Cooling and Reheat Screen #26 WSHP Head Pressure Setpoints - Cooling and The available Setpoint Screens for the VCC-X Controller are listed Reheat on the next few pages by sequential screen number. When each Screen #27 Condenser Fan Cycle - Enable &... -
Page 41: Vcc-X Setpoint Confi Guration
VCC-X SETPOINTS VCC-X Setpoint Screens Setpoints - General Procedures The following screen will be displayed: Change Setpoints Modular Service Tool Instructions Configure Unit <SETPOINTS> From any menu screen, press . The Unit Selection Save/Copy/Restore will appear requesting that you enter the unit Screen, shown below, ID number. - Page 42 VCC-X SETPOINTS VCC-X Setpoint Screens Space Temperature Control of High Percentage Outside Air Description Minimum Default Maximum Units—This option allows for Space Temperature control of 100% Unoccupied Offsets 0ºF 30ºF 30ºF Outside Air MUA Units or units with a high percentage of Outdoor º...
- Page 43 VCC-X SETPOINTS VCC-X Setpoint Screens If using a Digital Space Sensor, pushing the Override Button mo- Setpoint Screens #6, #7 & #8 - Flush Mount mentarily will initiate the Override Mode. Space Sensor Calibrate Slide Adjust Description Minimum Default Maximum VCCX Spts ID 101 Space Sensor 0.0 Hr...
- Page 44 VCC-X SETPOINTS VCC-X Setpoint Screens Setpoint Screen #12 - Outdoor Dewpoint Description Minimum Default Maximum Setpoint Indoor RH Setpoint 100% Disable/Low Reset Source VCC-X Spts ID:# Indoor RH Setpoint 100% Outdoor Dewpoint Enable/High Reset Setpoint: 55.0ºF Source Setpoint Screen #14 - Coil (Saturation) On MUA confi...
- Page 45 VCC-X SETPOINTS VCC-X Setpoint Screens Setpoint Screen #16 - VFD Speed Minimums Setpoint Screen #18 - Supply Air Cooling Cool/Vent Modes Setpoint and High Reset Limit VCC-X Spts ID:# VCC-X Spts ID:# Supply Air Cooling VFD Speed Limits Setpoint..: 55.0ºF Min Cool: 30% Hi Rst Limit: 55.0ºF Min Vent: 20%...
- Page 46 VCC-X SETPOINTS VCC-X Setpoint Screens Setpoint. So, if the Space Temperature is at or below the Low Reset Setpoint Screen #21 - Heat Reset Source Source value on this screen, the VFD Fan Speed will set at the Min Setpoints - High Reset/Low Reset Cool VFD Speed set in Setpoint Screen #16.
- Page 47 VCC-X SETPOINTS VCC-X Setpoint Screens Setpoint Screen #22 - Stage Off Window - Setpoint Screen #24 - Mod Cool Proportional Cooling/Heating Window and Time Period VCC-X Spts ID:# VCC-X Spts ID:# Mod Cool Stage Off Window Prop Window: 10.0ºF Cooling: 5.0ºF Time Period: Heating: 5.0ºF The Modulating Cooling Proportional Window is the control range...
- Page 48 VCC-X SETPOINTS VCC-X Setpoint Screens Setpoint Screen #26 - WSHP Head Pressure Setpoint Screen #29 - Economizer Enable Setpoints - Cooling and Reheat Setpoint VCC-X Spts ID:# VCC-X Spts ID:# WSHP Head Pres Spts Economizer Enable Cooling: 235psi Setpoint: 55.0ºF Reheat: 350psi If a WSHP-X2 Module is connected to the RSM Module you can...
- Page 49 VCC-X SETPOINTS VCC-X Setpoint Screens Setpoint Screen #32 - Minimum Outdoor Setpoint Screen #34 - CO Setpoints Min/Max Airfl ow Setpoint & Deadband VCC-X Spts ID:# CO2 Setpoints VCC-X Spts ID:# Min CO2: 900ppm Min. Outdoor Airflow Max CO2: 1000ppm Setpoint.: 2.00kCFM Deadband.: 200CFM The Min CO...
- Page 50 VCC-X SETPOINTS VCC-X Setpoint Screens • Supply Fan VFD – Contact WattMaster regarding this Setpoint Screen #36 - Building Pressure Reverse Acting Building Pressure Control option. It Setpoint & Deadband should not be used in most applications. If this option is selected, the user-adjustable Supply Fan VFD Output VCC-X Spts ID:# (AOUT1 on the VCC-X) will be used to control the...
- Page 51 VCC-X SETPOINTS VCC-X Setpoint Screens Setpoint Screen #39 - Supply Air Cutoffs - Setpoint Screen #41 - Preheat Relay Setpoint Cooling/Heating VCC-X Spts ID:# VCC-X Spts ID:# Preheat Relay Supply Air Cutoffs Setpoint: 30.0ºF Cooling: 40.0ºF Heating: 150.0ºF For cold climates where freezing temperatures may be experienced, a Pre-Heater relay output can be activated to control a preheat coil The VCC-X controller will temporarily disable Heating or Cooling based on the Outdoor Air Temperature to prevent freezing of Water...
- Page 52 VCC-X SETPOINTS VCC-X Setpoint Screens Heat Pump Defrost Interval is the length of time that must be met Air Temperature to determine if the unit should initiate Morning between Defrost Modes. The length of this Defrost Interval can be Warm-up Mode. If the Return Air Temperature is below the Morning automatically adjusted by the Adaptive Defrost Interval Adjustment Warm-up Target Temperature and the Max Length is greater than described in Setpoint Screen #44.
- Page 53 VCC-X SETPOINTS VCC-X Setpoint Screens Setpoint Screen #49 - Warm-Up Supply Air Setpoint Screen #52 - PREHEAT-X Vent Mode Temperature Setpoint Setpoint VCC-X Spts ID:# VCC-X Spts ID:# Warmup Supply Air Preheat-X Spts Setpoint: 100.0ºF Vent Mode: 50.0ºF Heating will be controlled to this Supply Air Setpoint during Morn- If using the Preheat-X Controller with the VCC-X, this screen al- ing Warm-Up.
- Page 54 Zone VCC-X SETPOINTS Zone VCC-X Setpoint Screens Setpoint Screen #55 - Return Air Temperature Setpoint Screen #57 - OAT Sensor Calibration Sensor Calibration - Current and Offset - Current and Offset VCC-X Spts ID:# VCC-X Spts ID:# OAT Sensor Cal Return Sensor Cal Current: 0.0ºF...
-
Page 55: Vcc-X Status Screen Index
VCC-X STATUS VCC-X Status Screens VCC-X Status Screen Index Screen #16 Current Outdoor Air Drybulb and Current Outdoor Air Relative Humidity The available Status Screens for the VCC-X Controller are listed on Screen #17 Current Wetbulb Temperature and Current the next few pages by sequential screen number. The following is a Calculated Outdoor Air Dewpoint Temperature list of all the VCC-X Status Screens in numerical order with a brief Screen #18... -
Page 56: Vcc-X Status Screens
Zone VCC-X STATUS Zone VCC-X Status Screens Status Screens - General Procedures Status Screen #2 - Application Type, Schedule Mode & HVAC Mode <STATUS> From any menu screen, press . The Unit Selection Screen, shown below, will appear requesting that you enter the unit ID number. VCC-X v1.02 ID #... - Page 57 VCC-X STATUS VCC-X Status Screens Status Screen #4 - Space and Return Status Screen #6 - Cooling Enabled Temperature & Slide Adjust VCC-X v1.02 ID # VCC-X v1.02 ID # Cooling Enabled Space Temp: 0.0ºF YES/NO Return Temp: 0.0ºF Slide Adj: 0.0ºF Line 3 Cooling Enabled YES/NO...
- Page 58 Zone VCC-X STATUS Zone VCC-X Status Screens Line 3 Current Return Air Relative Humidity Percentage Status Screen #9 - Heating Outputs - Active Stages and Mod Heat Position If an E-BUS Return Air Temperature/Humidity Sensor has been installed and confi gured on the unit, the current Return Air Relative Humidity Percentage will appear on VCC-X v1.02...
- Page 59 VCC-X STATUS VCC-X Status Screens Status Screen #14 - PREHEAT-X Controller Status Screen #16 - OA Drybulb and Humidity Current Leaving Air and Entering Air Temperature VCC-X v1.02 ID # Outdoor Conditions VCC-X v1.02 ID # Drybulb: 0.0ºF Preheat-X Temps Humidity: XXX% Leaving Air: 0.0ºF Entring Air: 0.0ºF...
- Page 60 Zone VCC-X STATUS Zone VCC-X Status Screens Line 4 Economizer Minimum Percentage Status Screen #18 - Economizer Enabled and Economizer Position This shows the current Economizer (OA) Minimum Damper Position. If the unit is not in IAQ Mode, this will be the regular confi gured Minimum Damper VCC-X v1.02 ID #...
- Page 61 VCC-X STATUS VCC-X Status Screens Status Screen #23 - Return Air CFM & Exhaust Status Screen #25 - Building Pressure & Set- Air CFM point VCC-X v1.02 ID # VCC-X v1.02 ID # Building Pressure Return kCFM: XXX.XX Pressure: XXX” Exhaust kCFM: XXX.XX Setpoint: X.XX”...
- Page 62 Zone VCC-X STATUS Zone VCC-X Status Screens Status Screen #27 - Return Air Damper Signal Status Screens #29-#36 - VCC-X Relays & Return Air Bypass Damper Signal VCC-X v1.02 ID # On Board Rly 1-8 VCC-X v2.00 ID 101 Return Dmper: XXX% ON/OFF Bypass Dmper:...
- Page 63 VCC-X STATUS VCC-X Status Screens Status Screens #37-#41 - EM1 Relays Status Screens #42-#53 - 12 Relay Expansion Module Relays VCC-X v1.02 ID # Main Exp Rly 1-5 VCC-X v1.02 ID # Relay Name 12 Rly Bd Rly 1-12 ON/OFF Relay Name ON/OFF Line 2...
- Page 64 Zone VCC-X STATUS Zone VCC-X Status Screens Status Screens #54-## - Alarm Status No Economizer Feedback Title 24 Economizer Air Temperature Sensor Failure Title 24 Economizer Damper Failure Title 24 Economizer Excess Outdoor Air VCC-X v1.02 ID # Title 24 Economizer Not Economizing When It Should Title 24 Economizer Economizing, But It Shouldn’t NO ALARMS PRESENT High Supply Air Temperature Cutoff...
-
Page 65: Rsm Confi Guration Screen Instructions
RSM CONFIGURATION RSM Confi guration Screens Modular Service Tool Instructions System Manager SD Instructions From any Main screen, <SETPOINTS> . The screen below press No matter what screen or menu you’re in, <CONFIGURA- press will appear because this option requires passcode clearance. Only TION>... -
Page 66: Rsmv Confi Guration Screens
RSM CONFIGURATION RSMV Confi guration Screens RSM Confi guration Screens RSMV #1-#4 Confi guration Screen #3 - Expansion Valve The available screens for the RSM(s) are listed on this page by se- quential screen number. When each RSM is confi gured for the fi rst RSM#1-4 CONFIGURATION time, it is best to start with screen #1 and proceed to each screen in Evap Coil Exv... -
Page 67: Rsmd Confi Guration Screens
RSM CONFIGURATION RSMD Confi guration Screens RSMD Main Confi guration Screen #1 - RSMD #1-#4 Confi guration Screen #5 - Compressor Minimum Position Compressor #2 Type RSMD CONFIGURATION RSM#1-4 Configuration Digital Compressor Compressor #2 Type Min Position: 11% MODULATING USE < or > TO CHANGE Options are Modulating or Fixed. -
Page 68: Rsmv & Rsmv-Hp Status Screens
RSM STATUS RSM-VFD & HP Status Screens RSM-VFD & HP #1-#4 Status Screen RSM #1 Index RSM #2 RSM #3 The available Status Screens for the RSM-VFD & HP Modules are Select & Press Enter listed by sequential screen number. The following is a list of all the RSM Status Screens in numerical order with a brief listing of the Status features available on each screen. - Page 69 RSM STATUS RSM-VFD & HP Status Screens RSM Status Screen #3 - Coil (Suction Line) RSM HP Status Screen #6 - Coil (Suction Line) Temperature 1, Superheat 1, and Expansion Temperature 3, Superheat 3, and Expansion Valve 1 Position Valve 3 Position RSM HP #1-4 Status RSM #1-4 Status Coil Tmp 3: 0.0ºF...
-
Page 70: Rsmd Status Screens
RSM STATUS RSM-DIGITAL Status Screens RSMD #1-#4 Status Screen Index RSM #4 The available Status Screens for the RSMD Modules are listed by sequential screen number. The following is a list of all the RSMD Status Screens in numerical order with a brief listing of the Status Select &... - Page 71 RSM STATUS RSM-DIGITAL Status Screens RSMD Status Screen #3 - Coil (Saturation) RSMD Status Screen #5 - Alarms Temp & Setpoint & Suction Pressure RSM #1-4 Alarms Active Alarms: No RSMD #1-4 Status See Active Alarms Coil Temp: 0.0ºF on the RSM LCD Coil Setpt: 0.0ºF Suction Pr: XXX PSI Line 2...
-
Page 72: Vav/Zone Confi Guration Screens
VAV/ZONE CONFIGURATION VAV/Zone Confi guration Screens VAV/Zone Confi guration The following screen will be displayed: In order to correctly set up the VAV/Zone Controller, you must fi rst Change Setpoints confi gure several parameters in regard to the type of system and Configure Unit operating parameters for the VAV/Zone Controller you have installed. - Page 73 VAV/ZONE CONFIGURATION VAV/Zone Confi guration Screens Confi guration Screen #3 - Voting Zone Confi guration Screen #6 - Proportional Heating Signal XX Box Cnfg IDXXXX Is This Box a XX Box Cnfg IDXXXX Voting Zone..: YES Proportional Heating Use < Or > To Change Signal..: 0 - 10 VDC Use <...
- Page 74 VAV/ZONE CONFIGURATION VAV/Zone Confi guration Screens Confi guration Screen #9 - Push-Button Confi guration Screen #10 - Dump Zone Override XX Box Cnfg IDXXXX XX Box Cnfg IDXXXX Is This A Dump Zone Push-Button Override (No Actuator): Group ID #: 1 Use <...
-
Page 75: Vav/Zone Setpoint Screens
VAV/ZONE CONFIGURATION VAV/Zone Setpoint Screens VAV/Zone Controller Setpoints The following screen will be displayed: Modular Service Tool Instructions Change Setpoints Configure Unit <SETPOINTS> From any menu screen, press . The Unit Selection Save/Copy/Restore will appear requesting that you enter the unit Screen, shown below, ID number. - Page 76 VAV/ZONE CONFIGURATION VAV/Zone Setpoint Screens mum CFM before the 4°F error is achieved, bringing the zone under Setpoint Screen #3 - AHU Heat Call Space Temp control faster than it normally would. Start with a small (5 or 10) value, if you use this, and monitor the effect it has. If you enter too XX Box Spts IDXXXX large a value, you can create “hunting”...
- Page 77 VAV/ZONE CONFIGURATION VAV/Zone Setpoint Screens Setpoint Screen #8 - Damper Airfl ow Night Min Description Minimum Default Maximum and Fan On Min Fixed Pos 0% or 0% or 100% or 0 CFM 0 CFM 9999 CFM XX Box Spts IDXXXX Damper/Airflow Spt Setpoint Screen #11 - SAT HVAC Mode Night Min.:...
- Page 78 VAV/ZONE CONFIGURATION VAV/Zone Setpoint Screens Setpoint Screen #13 - Zone Alarm Delay Setpoint Screen #16 - Push-Button Override Duration XX Box Spts IDXXXX XX Box Spts IDXXXX Zone Alarm Delay Push-Button Override Must Be Out Of Duration : X.X Hr Limits For.: XXX Min As mentioned above, if you confi...
-
Page 79: Vav/Zone Status Screens
VAV/ZONE STATUS VAV/Zone Status Screens VAV/Zone Status Status Screen #3 - Slide Offset & H/C Demand Status Screen #1 - Mode of Operation XX Box v4.01 IDXXXX Slide Offset: XXºF XX Box v4.01 IDXXXX H/C Demand.: XX.XºF Occupied Mode Vent Mode Belongs to Group # 1 Line 2 If the optional Setpoint Slide Adjust is installed... - Page 80 VAV/ZONE STATUS VAV/Zone Status Screens Line 4 If your VAV/Zone Controller has been confi gured Status Screen #5 - Zone Damper Position, to control reheat stages, this line refl ects the On/Off Airfl ow, and Desired CFM Status of the second stage of Reheat. If you have 3 stages of reheat as explained on line 2, this line will XX Box v4.01 IDXXXX be blank.
-
Page 81: Vav/Zone Damper Force Modes
VAV/ZONE DAMPER FORCE VAV/Zone Damper Force Modes Damper Force Modes Set the appropriate Damper Force Mode by entering numbers 0 through 5. Following is a list of the force modes and their meaning: Damper Force Modes are available for testing or balancing the sys- tem. -
Page 82: Minilink Pd Confi Guration Screens
MINILINK PD CONFIGURATION MiniLink PD Confi guration Screens MiniLink PD Confi guration NOTE: If “No Communication” remains, it indicates a communication failure to the controller. NOTE: If this is not a voting system, the only screens you need to confi gure are Screens 6 through 65 if alarm The following screen will be displayed: polling pertains to your system. -
Page 83: Minilink Pd Status Screens
MINILINK PD CONFIGURATION MiniLink PD Confi guration and Status Screens MiniLink PD Status Confi guration Screen #4 - Optimal Start Target Zone Status Screen #1 - Schedule Mode, System Status, and Minutes Left Polling Unit Config Optimal Start Polling Device Target Zone..: XXX System Occupied [Enter Target Zone]... -
Page 84: Troubleshooting Vcc-X Outputs Force
Zone TROUBLESHOOTING Zone VCC-X Outputs Force Outputs Force The next screen displays the Relay Overrides for Relay 2. After <ENTER> < > pressing to save any changes, press to have the Outputs Force settings are available for testing or troubleshooting the next relay displayed. - Page 85 TROUBLESHOOTING VCC-X Outputs Force Analog Output 4 Screen Analog Output 6 Screen Exhaust Fan Signal Mod Condenser Override Volts: -1.0 Override Volts: -1.0 [-1.0 Auto] [-1.0 Auto] The default setting for normal operation is -1.0 volts. Voltages The default setting for normal operation is -1.0 volts. Voltages between 0 to 10.0 are valid entries.
-
Page 86: Appendix A - Saving, Loading, And Copying Setpoints
APPENDIX A - SAVE, LOAD, COPY SETPOINTS Saving & Copying Setpoints Modular Service Tool Instructions The following screen will be displayed: <BALANCE-TEST> From any menu screen, . The press Unit Selec- will appear requesting that you enter the unit ID number. tion Screen Change Setpoints Configure Unit... - Page 87 APPENDIX A - SAVE, LOAD, COPY SETPOINTS Copying & Restoring Previously Saved Setpoints Copy Setpoints - Network Mode Restore Setpoints - Network or Stand-Alone Mode To copy a saved setpoints fi le to other controllers on the network do the following: The Restore Setpoints feature is used to reload a saved setpoints fi...
-
Page 88: Appendix B - Updating Your Sd Memory Card
APPENDIX B - UPDATING THE SD CARD SD Memory Card Update Updating Your SD Memory Card Once you unzip the fi le, you will see a window similar to the one below. You may need to update your SD memory card from time to time, either for a new release or to add data for another Controller. -
Page 89: Appendix C - Updating Controllers & E-Bus Module Software
APPENDIX C - UPDATING CONTROLLERS & MODULES Updating Controller & E-BUS Module Software Updating Controller & E-BUS Module WattMaster Controllers Software Using the Modular Service <1> Press to update a WattMaster Controller. Tool SD The following screen will appear: To update the software for various WattMaster controllers and E- Enter Board Address BUS modules, follow these simple steps. - Page 90 APPENDIX C - UPDATING CONTROLLERS & MODULES Updating Controller & E-BUS Module Software E-BUS Modules The screen will display the following messages: “Resetting Unit” “Load Sys Info” <2> Press to update an E-BUS Module. The following screen will appear: If communications are successful, the screen will display, the name of the HEX fi...
-
Page 91: Index
INDEX 12 Relay E-BUS Expansion Module Building Pressure Control Cooldown SAT Setpoint..53 Installed..26 OA Damper..31 Cool/Heat Stage Delays..36 12 Relay E-BUS Relay Supply Fan..31 Cooling Active Stages Status..57 Confi guration Screens..38 Building Pressure Control Screen..31 Cooling Enabled Status..57 12 Relay E-BUS Expansion Module Building Pressure Deadband Setpoint..50 Cooling Min Off Time..37 Relays..63... - Page 92 INDEX Head Pressure Setpoints - Cooling and Reheat..47 Economizer %..60 Heat/Cool Changeover Delay..37 Keys Economizer Active Relay, Description..39 Heating Described..10,16 Min Off Time..37 Economizer Control Loop Rate..30 Function..10,16 Economizer Control Type..30 Min Run Time..37 Setpoints..79 Economizer Enabled..60 Economizer Enable Setpoint..48 Stage Down..37 Stage Up..37 Economizer Enable Source Screen..30...
- Page 93 INDEX Minus Key Defi ned..10,16 Morning Warm Up..34 Outdoor Air Relative Humidity Minutes Left Max Length..52 Status..59 MiniLink PD Status..83 Target Temp..52 Outdoor Air Temperature Sensor..54 Morning Warm-Up Relay Outdoor Dewpoint Setpoint..43 Cooling Override..85 Confi guration..39 Outdoor Sensor Type..28 Heating Override..84 Morning Warm Up Setpoint..52 Outputs Force Screen..84 Mod Cool Enable Relay...
- Page 94 INDEX Economizer Control Type..30 Economizer Enable Setpoint..48 Real Time Clock..11,17 SAT Reset Source Screen..27 Economizer Enable Source..30 Refrigeration Module Cooling..29 SAT Sensor Calibration - Current and Economizer in Unoccupied Mode..30 Reheat Stages..80 Offset..54 Reheat Minimum Damper Airfl ow..77 Schedule Economizer Maximum Position if High Level..49 Reheat Offset Enable..48 Button..10,16...
- Page 95 INDEX Mod Heat Proportional Window and Supply Air Airfl ow Monitoring..34 Economizer Maximum Position in Time Period..47 Supply Air Cooling Setpoint and High High CO Level..49 Modulating Heat Output Signal..29 Reset Limit..45 Economizer Minimum Damper Monitor Outdoor Air Airfl ow..33 Supply Air Cutoffs - Cooling/ Position..48 Morning Cool-Down Type..37...
- Page 96 INDEX Damper Airfl ow SETPOINTS, continued Supply Air CFM..60 Cool/Heat Minimum..76 Supply Air Heating..46 Supply Air Cooling Setpoint and High Reset Integral..76 SZ VAV Integral Constant..52 Limit..45 Maximum..76 Unoccupied Offsets - Cooling & Supply Air Cutoffs - Cooling/Heating..51 Vent Minimum..76 Heating..42 Supply Airfl...
- Page 97 INDEX Unoccupied Setbacks..75 Zone Alarm Delay..78 Zone Alarm Offsets..77 Warmup SAT Setpoint..53 VAV/Zone Status Week Schedules Airfl ow..80 VCC-X Controller..14,22 Alarm Status..80 Wetbulb..30 Box Air Temperature..79 Wetbulb Temperature..59 Cooling Setpoints..79 Wiring Desired CFM..80 Power/Comm Board..8 Fan Status..80 WSHP Fail to Cool..32 Heating/Cooling Demand..79 WSHP Fail to Heat..32 Heating Setpoints..79...
- Page 98 2425 So. Yukon Ave • Tulsa, OK 74107-2728 www.aaon.com Ph: (918) 583-2266 • Fax: (918) 583-6094 AAON Manual Part No: V57150 ® WattMaster Manual Form No: AA-VCCXOISD-TGD-01E...
Need help?
Do you have a question about the SS1079 and is the answer not in the manual?
Questions and answers