Advertisement
Advertisement
Table of Contents

Related Manuals for DeVilbiss AGGS-522


Summary of Contents for DeVilbiss AGGS-522
- Page 1 SB-E-2-702 ISS.01 Operation Manual AGGS-522 –Automatic Spray Gun P 1 – 12...
-
Page 2: Ec Declaration Of Conformity
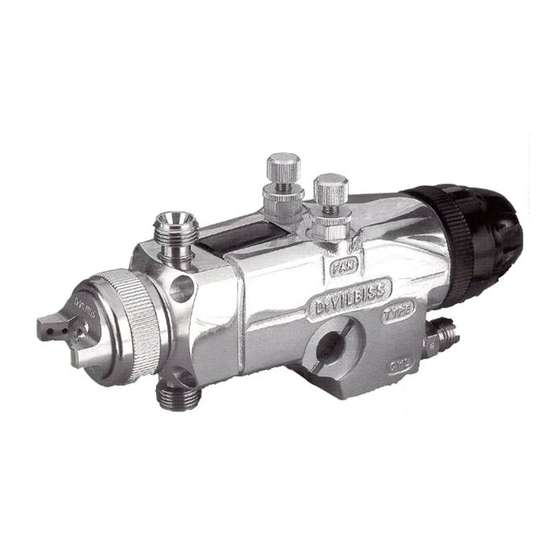
Description The AGGS-522 is a production spray gun suitable for use with automatic and semi-automatic machines. The design utilizes high volume low pressure atomization air (HVLP) to reduce overspray and improve coating efficiency. To handle a wide range of coating materials the material passages are manufactured from high grade stainless steel. -
Page 3: Specifications
365 X 63 2.0mm *NOTE: If you need to pre-set the flow rate, when using the AGGS-522 spray gun, by jetting material without any atomizing air it will be necessary to compensate for the back pressure. The high performance of the AGGS-522 is obtained differently to most other HVLP guns and so it will be necessary to increase the jetted flow by approx. -
Page 4: Safety Warnings
SAFETY WARNINGS Fire and explosion Solvents and coating materials can be highly flammable or combustible when sprayed. ALWAYS refer to the coating material supplier’s instructions and COSHH sheets before using this equipment. Users must comply with all local and national codes of practice and insurance company requirements governing ventilation, fire precautions, operation and house-keeping of working areas. - Page 5 Ref. Order No. Description Ref. Order No. Description JGHV-24 RETAINING RING AGG-39 SEAL RING CHART 1 AIR CAP AGGS-29 LOOKING RING 22* AGG-4 CHART 1 FLUID TIP VALVE SEAT JGHV-69 FRONT BAFFLE AGG-5 SPACER 24* SSG-8102-K5 ‘O’ RING Kit of 5 AGG-88-K2 SEAL KIT OF 2 25* AGG-415-K...
-
Page 6: Preventive Maintenance
INSTALLATION IMPORTANT: In order to ensure that this equipment reaches you in first class condition, protective coatings, rust inhibitors, etc., have been used. Flush all equipment through with a suitable solvent before use to remove these agents from material passages. See figures 1 and 2 : Mount gun using the 12.7mm (1/2") diameter hole ‘X’... -
Page 7: Replacement Of Parts
5. Turn on solvent supply and flush hose and gun by triggering gun or re circulation. NOTE: It may be necessary to fit a shut-off valve to the return line on circulating systems and trigger the gun to clean front portion of the spray head and fluid tip. Air cap, clean by immersing in solvent, brush or wipe clean. - Page 8 4.3. Fit new retaining screw (15), disc springs (14), packing piece (13) and needle packing set (12) over needle (16). 4.4. Insert assembly into Spray Head and screw in retaining screw (15) by hand. 4.5. Remove needle (16) and re-insert from opposite end (See Figure 3). 4.6.
- Page 9 5.16. Re-assemble spray head and knob (36). See step 5 Connectors (31), remove connector and clean threads in the gun body. Apply a medium strength thread locking/sealing compound to the new connector’s thread and screw into gun body, do not over tighten leave approximately 2mm of thread visible above the gun body face. Recommended torque 17–18Nm (150–160lbf in).
-
Page 10: Service Checks
SERVICE CHECKS CAUSE CORRECTION 1) No pressure at the gun 1) Check air/material lines 2) Piston stops moving 2) Check adjusting knob (36) 1) Material build-up on air cap/fluid 1) Clean air cap/fluid tip 2) Replace seal. 2) Worm or damaged seal (5) 1) Thin or reduce material flow 1) Material too thick or too much 1) Reduce air pressure or increase... - Page 11 © 2007 ITW Finishing Systems and Products...
- Page 12 ITW Finishing Systems and Products ITW Oberflächentechnik GmbH & Co. Ringwood Road, Bournemouth, Justus-von-Liebig-Straße 31 BH11 9LH, 63128 Dietzenbach England. Tel (060 74) 403-1 Tel. No. (01202) 571111 Telefax: (060 74) 403300 Telefax No. (01202) 581940, Website address Website address http://www.itw-finishing.de http://www.itweuropeanfinishing.com ITW Automotive Finishing UK...
Need help?
Do you have a question about the AGGS-522 and is the answer not in the manual?
Questions and answers