dji MATRICE 200 User Manual
Hide thumbs
Also See for MATRICE 200:
- Quick start manual (75 pages) ,
- Safety manuallines (25 pages) ,
- Quick start manual (14 pages)
Table of Contents
Advertisement
Quick Links
Advertisement
Table of Contents

Subscribe to Our Youtube Channel
Related Manuals for dji MATRICE 200


Summary of Contents for dji MATRICE 200
- Page 1 MATRICE 200 User Manual V1.0 2017.06...
-
Page 2: Using This Manual
Afterwards, prepare for your first flight by using the Quick Start Guide. Refer to this manual for more comprehensive information. Watch the video tutorials Please watch the tutorial video below to learn how to use Matrice 200 correctly and safely: http://www.dji.com/matrice-200-series/info#video Download the DJI GO 4 app Download and install the DJI GO 4 app before use. -
Page 3: Table Of Contents
Contents Using this manual Legends Before Flight Watch the video tutorials Download the DJI GO 4 app Download the DJI Assistant 2 Product Profile Introduction Feature Highlights Assemble the Aircraft Preparing Remote Controller Aircraft Diagram Remote Controller Diagram Aircraft Flight Controller... - Page 4 MATRICE 200 User Manual DJI GO 4 Equipment Editor SkyPixel Flight Flight Environment Requirements Flight Limits and No-Fly Zones Preflight Checklist Calibrating the Compass Auto Takeoff and Auto Landing Starting/Stopping the Motors Stop the Motor Mid-flight Flight Test Appendix Specifications Aircraft Status Indicator Description...
-
Page 5: Product Profile
Product Profile This chapter describes the features of the Matrice 200, shows how to assemble the aircraft, and contains diagrams of the aircraft and remote controller with component explanations. © 2017 DJI All Rights Reserved. -
Page 6: Introduction
* The Zenmuse XT Gimbal Adapter is required when mounting the Zenmuse XT gimbal to the Matrice 200 series aircraft. Both DJI GO 4 and DJI Pilot support the Zenmuse X5S, X4S, and Z30. DJI Pilot is required if using the Zenmuse XT. Assemble the Aircraft... - Page 7 MATRICE 200 User Manual Mounting the Propellers Propellers Press the propeller down Propellers without silver onto the mounting plate with silver rings go on and rotate in the lock rings go on motors without motors with direction until secure. any marks.
-
Page 8: Preparing Remote Controller
MATRICE 200 User Manual Removing the Intelligent Flight Battery Make sure to press the battery removal button when removing the battery. Preparing Remote Controller Tilt the Mobile Device Holder to the desired position then adjust the antennas as shown. 1. Press the button on the side of the Mobile Device Holder to release the clamp, attach your mobile device, then tighten the clamp to secure it. -
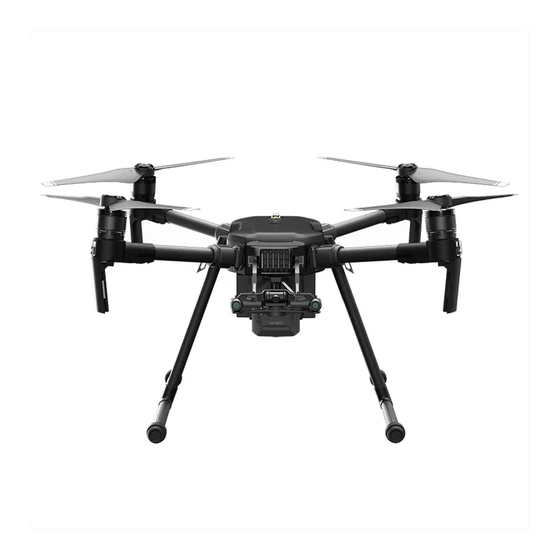
Page 9: Aircraft Diagram
1. FPV Camera 11. Aircraft Status Indicator 12. Linking Button/Linking Indicator 2. Forward Vision System 13. USB Port 3. DJI Gimbal Connector V2.0 (DGC2.0) 14. USB Mode Switch 4. Gimbal and Camera Detachment Button 15. Battery Removal Button 5. Frame Arms 16. -
Page 10: Remote Controller Diagram
[11] Camera Settings Dial Turn the dial to adjust camera settings. (Only functions when the remote controller is connected to a mobile device running the DJI GO 4 app.) [12] Record Button Press to start recording video. Press again to stop recording. - Page 11 Reserved extended port. [18] HDMI A Port HDMI A Port is for video output. [19] USB Port Connection to mobile device for DJI GO 4 app. [20] C1 Button Customizable through the DJI GO 4 app. [21] C2 Button Customizable through the DJI GO 4 app.
-
Page 12: Aircraft
Aircraft This section describes the features of the Flight Controller, Vision System, and the Intelligent Flight Battery. -
Page 13: Flight Controller
Aircraft Flight Controller The Matrice 200 flight controller features several important upgrades. Safety modes include Failsafe and Return-to-Home. These features ensure the safe return of your aircraft if control signal is lost. The flight controller can also save critical flight data from each flight to the on-board storage device. -
Page 14: Flight Status Indicator
(or nose) of the aircraft. Front and rear LEDs can be turned off in the DJI GO 4 app. The Aircraft Status Indicators communicate the system status of the flight controller. Refer to the table below for more information about the Aircraft Status Indicators. -
Page 15: Vision System And Infrared Sensing System
GPS signal is not available. The Vision System constantly scans for obstacles, allowing the Matrice 200 to avoid them by going over, going around, or hovering. The Infrared Sensing System consists [4] of two infrared modules on top of the aircraft. These scan for obstacles on top side of the aircraft and is active in certain flight modes. - Page 16 1. Power on the Intelligent Flight Battery and toggle the USB Mode Switch left. 2. Connect the Matrice 200 and the PC with a male to male USB cable. 3. Launch DJI Assistant 2 and log in with a DJI account.
- Page 17 DO NOT power off or unplug the USB cable after calibration. Wait for data calculation. Using the Vision System The Vision System is activated automatically when the Matrice 200 is turned on. No further action is required. The Vision System enables precision hovering indoors or in environments where GPS signal isn't available.
- Page 18 MATRICE 200 User Manual Using Infrared Sensing System The Infrared Sensing System can only be used to avoid large, diffuse, and reflective obstacles (reflectivity >10%). Please be mindful of blind spots (Grey) of the Infrared Sensing System. The performance of your Vision System and Infrared Sensing System is affected by the surface being flown over.
- Page 19 MATRICE 200 User Manual Keep sensors clean at all times. Dirt or other debris may adversely affect their effectiveness. Vision System is only effective when the aircraft is at altitudes of 0.3 to 10 meters. The Vision System may not function properly when the aircraft is flying over water.
-
Page 20: Return-To-Home (Rth)
Smart RTH Use the RTH button on the remote controller or tap the RTH button in the DJI GO 4 app and follow the on-screen instructions when GPS is available to initiate Smart RTH. The aircraft will then automatically return to the last recorded Home Point. Use the remote controller to control the aircraft’s speed or altitude to avoid a collision during the Smart RTH process. - Page 21 When the aircraft is between 3 m and 20 m from the Home Point, it will return to the Home Point at the current altitude with the RTH at Current Altitude option enabled (the default setting in DJI GO 4) if flying at or above 2.5 m.
- Page 22 MATRICE 200 User Manual Note: If RTH at Current Altitude is disabled in DJI GO 4, the aircraft will land automatically when the aircraft is between 3 m and 20 m from the Home Point. c. The aircraft will land automatically if RTH is triggered and the aircraft is less than 3 m from the home point.
- Page 23 1. Landing Protection determines whether the ground is suitable for landing. If so, the Matrice 200 will land smoothly. 2. If Landing Protection determines that the ground is not suitable for landing, the Matrice 200 will hover and wait for pilot confirmation. The aircraft will hover if it detects the ground is not appropriate for landing even with a critically low battery warning.
-
Page 24: Intelligent Flight Modes
TapFly: 1. Take off and ensure the aircraft is hovering at least 6 ft (2 m) above ground. 2 meters Auto Hold 2. Launch DJI GO 4 and tap , Select TapFly, then follow the prompts. 4.07V In Flight... - Page 25 Be extra cautious when flying in too dark (< 300 lux) or too bright (>10,000 lux) environments. Enable control stick control of the gimbal inside DJI GO 4 to control gimbal orientation using the remote controller. When using the control sticks, the gimbal will automatically switch to Free mode.
- Page 26 The aircraft automatically adjusts its speed when it senses an obstacle in front, or if it flies too close to the ground. The DJI GO 4 app will show a prompt if the aircraft flies over an obstacle or to the left or right of the obstacle.
- Page 27 Use the roll stick on the remote controller or the remote control to circle the subject. The aircraft slider in DJI GO 4 to circle the subject. will not be able to avoid obstacles while in Profile Mode. Use this mode in open areas.
- Page 28 Tripod Mode Tap the icon in DJI GO 4 to enable Tripod Mode. Tripod Mode reduces the Matrice 200’s maximum speed (this can be adjusted in DJI GO 4 app), and the control stick sensitivity of the remote controller is dulled to give you the precision you need for accurate framing.
-
Page 29: Flight Recorder
10.0km/h 2.0m/s 2.0m You can drag on a subject in DJI GO 4 or move the gimbal control sticks to change the subject's position in the shot. Spotlight Pro can be used in S-mode, A-mode, TapFly and Tripod mode. Flight Recorder Flight data is automatically recorded to the internal storage of the aircraft. - Page 30 Matrice 200 requires the two batteries to have similar properties, e.g. internal resistance. Pairing batteries in the beginning is recommended. Pairing can be done using DJI GO 4. DJI GO 4 will also prompt you when batteries that are not paired are not in use. The Intelligent Flight Battery Charging Hub will charge paired batteries simultaneously.
- Page 31 Power Outlet * It will take approximately 1.5 hours to fully charge the Matrice 200 Intelligent Flight Battery, and 3 hours for the remote controller. It will take a longer time to charge the Intelligent Flight Battery and remote controller together.
- Page 32 MATRICE 200 User Manual Always align the grooves on the Intelligent Flight Battery with the battery slot tracks. Press the release button to detach batteries after charging is complete. DO NOT leave metal terminals exposed to open air when not in use.
- Page 33 1 hour Updating the Firmware DJI will release firmware updates when available. Refer to the official DJI website and follow the instructions below to update the firmware. 1. Download the latest firmware update program from the official DJI website.
- Page 34 4.35 V before each flight. 2. End the flight as soon as DJI GO 4 displays the “Low Battery Level Warning” in low temperature environments. You will still be able to control the aircraft’s movement when this warning is triggered.
- Page 35 MATRICE 200 User Manual Battery Level LED1 LED2 LED3 LED4 Battery Level 88%~100% 75%~88% 63%~75% 50%~62.5% 38%~50% 25%~38% 13%~25% 0%~13% © 2017 DJI All Rights Reserved.
-
Page 36: Remote Controllers
Remote Controllers This section describes the features of the remote controller that includes aircraft and remote controller operations and dual remote controller mode. -
Page 37: Remote Controller Profile
Remote Controller Operations Turning the Remote Controller On and Off The Matrice 200 remote controller is powered by a 2S rechargeable battery with a capacity of 6000 mAh. The battery level is indicated by Battery Level LEDs on the front panel. - Page 38 MATRICE 200 User Manual Charging the Remote Controller Charge the remote controller via the supplied charger. Power Outlet Controlling the Camera Shoot videos/photos and adjust the camera settings via the Shutter Button, Camera Settings Dial, Video Recording Button, and Gimbal Dial on the remote controller.
- Page 39 MATRICE 200 User Manual Controlling the Aircraft This section explains how to control the orientation of the aircraft through the remote controller. Control can be set to Mode 1, Mode 2 or Mode 3, or to a custom mode. Mode 1...
- Page 40 Push the stick up to fly forward and down to fly backward. The Matrice 200 will hover in place if the stick is centered. Push the stick further away from the center position for a larger pitch angle and faster flight.
- Page 41 The Flight Mode Switch is locked to P-mode, regardless of the Flight Mode Switch's position. To change flight modes, go to the Camera View in DJI GO 4 and enable Multiple Flight Modes in Main Controller Settings. After enabling multiple flight modes, toggle the switch to P for Position mode and S for Sport Mode.
-
Page 42: Dual Remote Controller Mode
MATRICE 200 User Manual Connecting Your Mobile Device Tilt the Mobile Device Holder to the desired position. Press the button on the side of the Mobile Device Holder to release the clamp, then place your mobile device into the clamp. Adjust the clamp to secure your mobile device. - Page 43 Connection Status:OFF Search Master When in Slave, the remote controller cannot link to the aircraft nor control aircraft orientation. Select Master in DJI GO 4 if you wish to connect and control the aircraft with the remote controller. © 2017 DJI All Rights Reserved.
-
Page 44: Remote Controller Status Led
MATRICE 200 User Manual 2. Search the “Master” remote controller in the surrounding area. Remote Controller Settings Master and Slave Set Remote Controller Status Master Slave Master ID: 28172d Slave ID: 14f93f Connection Status:OFF Search Master 3. Select the Master remote controller from the Master list and input the password to connect. -
Page 45: Linking The Remote Controller
The remote controller comes linked to your aircraft before delivery. Linking is only required when using another remote controller for the first time. Follow these steps to link a remote controller: 1. Power on the remote controller, connect to your mobile device, and launch DJI GO 4. 2. Power on the Intelligent Flight Battery. - Page 46 A Slave remote controller cannot link to the aircraft and so therefore cannot control the orientation of the aircraft. Select Master in DJI GO 4 if you wish to link a remote controller it to the aircraft.
-
Page 47: Gimbal And Camera
Gimbal and Camera This section focuses on the technical specifications of the camera and explains how to use the gimbal. -
Page 48: Camera
To store photos and videos, plug the Micro SD card into the slot shown below before powering on the Matrice 200. The Matrice 200 comes with a 16 GB Micro SD card and can support card sizes of up to 128 GB. We recommend you use a UHS-3 type Micro SD card because the fast read and write capability of these cards enables you to store high-resolution video data. -
Page 49: Gimbal
Use the Shutter and Record buttons on the remote controller to shoot photos or videos. For more information on how to use these buttons, please refer to Controlling the Camera. DJI GO 4 Use DJI GO 4 to shoot photos or videos. For more information, refer to the camera and gimbal User Manual. Gimbal... - Page 50 2.0m Gimbal Operation Modes Three gimbal operation modes are available. Switch between the different operation modes in DJI GO 4's Camera View. Note that your mobile device must be connected to the remote controller for changes to take effect. Refer to the table below for details:...
-
Page 51: Dji Go 4
DJI GO 4 This section introduces the main functions of the DJI GO 4 app. -
Page 52: Equipment
Skypixel Both DJI GO 4 and DJI Pilot support the Zenmuse X5S, X4S, and Z30. DJI Pilot is required if using the Zenmuse XT. This manual uses DJI GO 4 as an example. Please refer to the actual user interface. - Page 53 5. AirSense Status : AirSense Status displays information about nearby manned aircraft to ensure flight safety, including the distance between DJI aircraft and manned aircraft. AirSense will instruct users to land if nearby aircraft are detected. 6. GPS Signal Bars : Shows current GPS signal strength.
- Page 54 MATRICE 200 User Manual 11. Battery Level : This icon shows current battery level. Tap to view the battery information menu, set various battery warning thresholds, and view battery warning history. 12. General Settings : Tap to enter the General Settings menu to set metrics to enable live streaming, display flight routes, and so on.
- Page 55 MATRICE 200 User Manual 22. Flight Telemetry (1) Tap to switch to map view. (2) Flight Attitude and Radar Function: The red arrow shows which direction the aircraft is facing. The ratio of gray area to blue area indicates the aircraft’s pitch.
-
Page 56: Editor
MATRICE 200 User Manual Editor A dedicated video editor is built into the DJI GO 4 app. After recording several video clips and downloading them to your mobile device, go to Editor on the home screen. You can then select a template and a specified number of clips that automatically combine, creating a short film for sharing. -
Page 57: Flight
Flight This section describes safe flight practices and flight restrictions. -
Page 58: Flight Environment Requirements
1640 feet (500 m) . Maximum flight altitude & Radius Limits Maximum flight altitude and radius limits may be changed in the DJI GO 4 app. Be aware that the maximum flight altitude cannot exceed 1640 feet (500 meters). In accordance with these settings,... - Page 59 Fly the aircraft only within your line of sight. No-Fly Zones All No-Fly Zones are listed on the DJI official website at http://www.dji.com/flysafe/no-fly. No-Fly Zones are divided into Airports and Restricted Areas. Airports include major airports and flying fields where manned aircraft operate at low altitudes.
- Page 60 The value of R varies based on the definition of the restricted areas. (3) A “warning zone” has been set around the Restricted Area. When the aircraft approaches within 0.062 miles (100 m) of this zone, a warning message will appear in DJI GO 4. Restricted Areas...
-
Page 61: Preflight Checklist
7. Ensure that the sensors for the Obstacle Sensing System are clean. Calibrating the Compass Only calibrate the compass when the DJI GO 4 app or the status indicator prompts you to do so. Observe the following rules when calibrating your compass: DO NOT calibrate your compass where there is a chance of strong magnetic interference, such as near magnets, parking structures, or steel reinforcements underground. -
Page 62: Auto Takeoff And Auto Landing
Use auto takeoff only if the Aircraft Status Indicators are blinking green. Follow the steps below to use the auto takeoff feature: 1. Launch the DJI GO 4 app and tap GO FLY to enter Camera View. 2. Complete all steps on the pre-flight checklist. -
Page 63: Starting/Stopping The Motors
If Landing Protection is not operational, the DJI GO 4 app will display a landing prompt when the Matrice 200 descends below 0.7 meters. Pull down on the throttle or use the auto landing slider to land. -
Page 64: Flight Test
MATRICE 200 User Manual Please check that CSC is activated inside DJI GO 4 app, then the user can stop the aircraft mid-air. Flight Test Takeoff/Landing Procedures 1. Place the aircraft in an open, flat area with the battery level indicators facing towards you. -
Page 65: Appendix
Appendix... -
Page 66: Specifications
Angular Vibration Range ±0.01° Controllable Range Pitch: -130° to +40°; Roll: ±20°; Pan: ±320° Max Controllable Speed Pitch: 180°/s; Roll:180°/s; Pan:270°/s Interface Type DGC2.0 Mechanical Range Pitch: -140° to +50°; Roll: -50° to +90°; Pan: ±330° © 2017 DJI All Rights Reserved. - Page 67 MATRICE 200 User Manual Remote Controller Model GL6D10A Operating Frequency 2.400-2.483 GHz; 5.725-5.825 GHz 2.4 GHz: 4.3 miles (7 km, FCC); 2.2 miles (3.5 km, CE); 2.5 miles (4 km, SRRC) Max Transmitting Distance 5.8 GHz: 4.3 miles (7 km, FCC); 1.2 miles (2 km, CE);...
- Page 68 MATRICE 200 User Manual Charger Model IN2C180 Voltage 26.1 V Rated Power 180 W Battery (Standard) Name Intelligent Flight Battery Model TB50-4280mAh-22.8V Capacity 4280 mAh Voltage 22.8 V Battery Type 6S LiPo Energy 97.58 Wh Net Weight 515 g Operating Temperature -4°...
-
Page 69: Aircraft Status Indicator Description
DJI Assistant 2 or the DJI GO 4 app. For the Zenmuse Z30 and XT, only M200 aircraft firmware can be updated via DJI Assistant 2 or the DJI GO 4 app. Gimbal firmware must be updated via a Micro SD card. -
Page 70: After-Sales Information
Method 1: Using the DJI GO 4 App Power on the remote controller and connect it with the DJI GO 4 app. A prompt will appear if a new firmware upgrade is available. To start upgrading, connect a mobile device to the Internet and follow the on-screen instructions. - Page 71 This content is subject to change. Download the latest version from http://www.dji.com/matrice-200-series If you have any questions about this document, please contact DJI by sending a message to DocSupport@dji.com. © 2017 DJI All Rights Reserved.
Need help?
Do you have a question about the MATRICE 200 and is the answer not in the manual?
Questions and answers