dji MATRICE 200 Series User Manual
Hide thumbs
Also See for MATRICE 200 Series:
- User manual (90 pages) ,
- Disclaimer and safety manuallines (20 pages) ,
- Quick start manual (15 pages)
Advertisement
Quick Links
Advertisement
Chapters

Related Manuals for dji MATRICE 200 Series


Summary of Contents for dji MATRICE 200 Series
- Page 1 MATRICE 200 SERIES M210/M210 RTK User Manual V1.2 2018.02...
-
Page 2: Using This Manual
Download the DJI GO 4 app Be sure to use the DJI GO Scan the QR code or visit “https://m.dji.net/djigo4” to download the app. For the best experience possible, use mobile devices running Android v4.4 or iOS v9.0 or above. -
Page 3: Table Of Contents
Contents Using this manual Legends Before Flight Watch the video tutorials Download the DJI GO 4 app Download the DJI Assistant 2 Introduction Feature Highlights Assemble the Aircraft Preparing the Remote Controller Aircraft Diagram Remote Controller Diagram Aircraft Flight Controller... - Page 4 Flight Test Appendix Aircraft Status Indicator Description Upgrading the Firmware Using the Zenmuse XT Gimbal and Camera Single Downward Gimbals Dual Downward Gimbals Mounting the Upward Gimbal and GPS Module Carrying Box Descriptions After-Sales Information © 2018 DJI All Rights Reserved.
- Page 5 This chapter describes the features of the Matrice 210/Matrice 210 RTK, shows how to assemble the aircraft, and contains diagrams of the aircraft and remote controller with component explanations. © 2018 DJI All Rights Reserved.
-
Page 6: Introduction
The M210/M210 RTK can support a single upward gimbal or dual downward gimbals.* It is equipped with many expansion ports to broaden its applications. The M210 RTK has a built-in DJI D-RTK , which provides more accurate heading data for positioning. -
Page 7: Assemble The Aircraft
MATRICE 200 Series User Manual Assemble the Aircraft Unfolding the D-RTK Antennas For the M200 series, only mount the D-RTK antennas to the M210 RTK. Unfold the D-RTK antennas and tighten the screws. Installing the Landing Gears Unfolding the Aircraft Unfold the frame arm, slide the arm lock to the end of the frame arm, then rotate it about 90°... - Page 8 MATRICE 200 Series User Manual Mounting the Gimbal and Camera Press the gimbal Align the white Rotate the gimbal detachment button and red dots and lock to the locked to remove the cover. insert the gimbal. position. Make sure to press down the gimbal detachment button when rotating the gimbal lock to remove the gimbal and camera.
-
Page 9: Preparing The Remote Controller
MATRICE 200 Series User Manual Mounting the D-RTK Ground System For the M200 series, only mount the D-RTK Ground System to the M210 RTK. 1. Rotate the screws to secure the antenna bracket, and install the battery. 2. Rotate the clamp to secure the battery, and install the Datalink Pro antenna. - Page 10 MATRICE 200 Series User Manual Mounting the Datalink Pro Air System to the Remote Controller For the M200 series, only mount the Datalink Pro Air System to the M210 RTK remote controller. M2×8 M3×5 Remove the screws. Thread the Datalink Pro antennas onto the mounting board with through the clips.
-
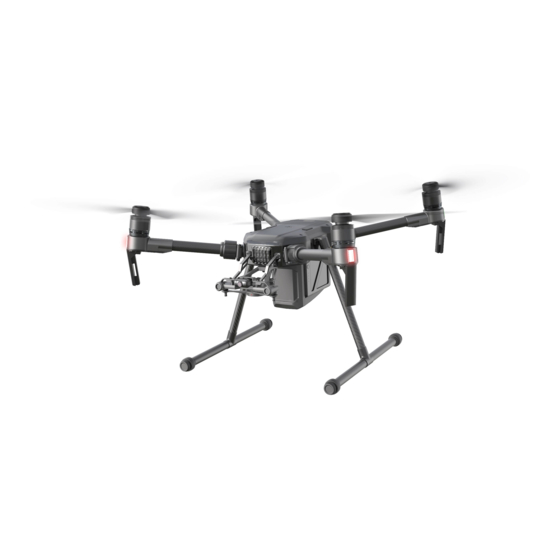
Page 11: Aircraft Diagram
MATRICE 200 Series User Manual Aircraft Diagram 16 17 18 19 Folded 1. FPV Camera 14. D-RTK Antennas** 2. Forward Vision System 15. USB Port 3. DJI Gimbal Connector v2.0 (DGC2.0) 16. Expansion Ports 4. Gimbal Detachment Button 17. RC/Aircraft Linking 5. -
Page 12: Remote Controller Diagram
Relay aircraft control and video signa. [22] Shutter Setting Button [15] Monitor Mounting Bracket Press and rotate the Camera Setting Dial Used to mount the DJI CrystalSky monitor. to set the shutter speed. [16] Control Sticks [23] Aperture Setting Button... - Page 13 Switch between P-mode, S-mode, and A-mode. [34] Handle Bar [35] USB Port Connection to mobile device for DJI GO 4 app if used a third party mobile device. [36] HDMI A Port HDMI A Port is for video output. [37] CAN Bus Used to connect external devices.
-
Page 14: Aircraft
Aircraft This section describes the features of the Flight Controller, Vision System, and the Intelligent Flight Battery. -
Page 15: Flight Controller
(Sport). A minimum braking distance of 164 feet (50 meters) is required in windless conditions. stick movement on the remote controller will translate into a large travel distance of the aircraft. distance of 164 feet (50 meters) is required in windless conditions. © 2018 DJI All Rights Reserved. -
Page 16: Flight Status Indicator
MATRICE 200 Series User Manual Atti Mode Warning The aircraft will enter A-mode in the following two instances: Passive: When there is weak GPS signal or when the compass experiences interference where the Vision System is unavailable. Active: In A-mode, the Vision System and some advanced features are disabled. Therefore, the aircraft cannot position or auto-brake in this mode and is easily affected by its surroundings, which may result in horizontal shifting. -
Page 17: Vision System And Infrared Sensing System
MATRICE 200 Series User Manual No GPS and Forward and Downward Vision Systems Braking Warning Remote Controller Signal Lost Low Battery Warning Critical Low Battery Warning IMU Error — Solid Red Critical Error Fast alternating red and yellow Compass Calibration Required... - Page 18 MATRICE 200 Series User Manual Detection Range The detection range of the Vision System is depicted below. Note that the aircraft cannot sense and avoid obstacles that are not within the detection range. 60cm 40cm Ultrasonic sensor detection range is depicted below.
- Page 19 Calibration The Forward and Downward Vision System cameras are calibrated prior to delivery. However, these cameras are vulnerable to impact and will require occasional calibration via DJI Assistant 2. Calibration with the included Visual Calibration Plate. 1. Power on the Intelligent Flight Battery and toggle the USB Mode Switch left.
- Page 20 MATRICE 200 Series User Manual Follow the steps below to use the Vision System: that the Vision System cannot work properly on surfaces without clear pattern variations. 2. Turn on the aircraft. The aircraft will hover in place after takeoff. The aircraft status indicators will flash green twice, which indicates the Vision System is working.
-
Page 21: Return-To-Home (Rth)
MATRICE 200 Series User Manual The performance of your Vision System and Infrared Sensing System is affected by the surface operating above sound-absorbing materials and the cameras may not function correctly in suboptimal environments. The aircraft will switch from P-mode to A-mode automatically if neither GPS nor Vision System and Infrared Sensing System are available. - Page 22 Smart RTH Use the RTH button on the remote controller or tap the RTH button in the DJI GO 4 app and follow the on-screen instructions when GPS is available to initiate Smart RTH. The aircraft will then automatically return to the last recorded Home Point. Use the remote controller to control the aircraft’s speed or altitude to avoid a collision during the Smart RTH process.
- Page 23 MATRICE 200 Series User Manual Battery Aircraft Status Flight Level Remark DJI GO 4 App Indicator Instructions Warning Tap “Go-home” to have the aircraft return to the Home Fly the aircraft point and land automatically, back and land or “Cancel” to resume normal...
- Page 24 MATRICE 200 Series User Manual Use the Failsafe RTH for example: 1. Record Home Point 2. Remote Control Signal Lost 3. Signal Lost for Extended Time 4. RTH (Adjustable Altitude) Elevate to Failsafe Altitude Hovering at 0.7 meters above the Home Point Failsafe Altitude Height over HP<=Failsafe Altitude...
- Page 25 2. If Landing Protection determines that the ground is not suitable for landing, the aircraft will hover and 3. If Landing Protection is inactive, the DJI GO 4 app will display a landing prompt when the aircraft the environment is appropriate for landing.
-
Page 26: Intelligent Flight Modes
If an obstacle is within one meter of the aircraft, the aircraft will descend to 0.7m above the Intelligent Flight Modes The aircraft supports Intelligent Flight Modes, including TapFly, ActiveTrack, and Tripod Mode. Tap in DJI GO 4 or press the Function button on the remote controller to enable an Intelligent Flight Mode. TapFly Introduction direction without using the remote controller. - Page 27 Enable control stick control of the gimbal inside DJI GO 4 to control gimbal orientation using the remote controller. When using the control sticks, the gimbal will automatically switch to Free mode.
- Page 28 MATRICE 200 Series User Manual left or right of the obstacle. However, this feature should not be relied upon for navigation between obstacles. Failsafe procedures will override TapFly. If the GPS signal weakens, the aircraft will exit Exit TapFly Use the following methods to exit TapFly: 1.
- Page 29 Use the roll stick on the Use the roll stick on the remote controller or the remote control to circle the subject. The aircraft slider in DJI GO 4 to circle the subject. Mode. Use this mode in open areas. ©...
- Page 30 Tap the icon in DJI GO 4 to enable Tripod Mode. Tripod Mode reduces the aircraft’s maximum speed (this can be adjusted in DJI GO 4 app), and the control stick sensitivity of the remote controller is dulled to give you the precision you need for accurate framing. Tripod Mode allow the aircraft to be used as a rocker arm or slide rail, shooting smoother, more stable footage.
-
Page 31: Flight Recorder
10.0km/h 2.0m/s 2.0m You can drag on a subject in DJI GO 4 or move the gimbal control sticks to change the subject's position in the shot. Spotlight Pro can be used in S-mode, A-mode, TapFly and Tripod mode. Flight Recorder Flight data is automatically recorded to the internal storage of the aircraft. - Page 32 The Intelligent Flight Battery Charging Hub is designed for use with the Battery Charger. It charges up to four Intelligent Flight Batteries simultaneously. The battery pair with more stored power will be power levels from high to low, if batteries are not paired. Pairing can be carried out using the DJI ©...
- Page 33 Pairing can be carried out using the DJI GO 4 app. Refer to the "Status LED Description” section for more information about Status LED blinking patterns. The buzzer will begin beeping when charging is complete. Refer to the “Buzzer Beeping Description”...
- Page 34 MATRICE 200 Series User Manual Always align the grooves on the Intelligent Flight Battery with the battery slot tracks. Press the release button to detach batteries after charging is complete. DO NOT leave metal terminals exposed to open air when not in use.
- Page 35 DJI does not take any responsibility for damage caused by third-party chargers. How to discharge the Intelligent Flight Battery before transporting the batteries for a trip: Fly the aircraft outdoors until there is low battery power left, or until the battery can no longer be turned on.
- Page 36 MATRICE 200 Series User Manual Turning ON/OFF Turning On: Press the Power button once, then press again and hold for two seconds to power on. The Power LED will turn red and the Battery Level Indicators will display the current battery level.
-
Page 37: D-Rtk And Datalink Pro
2. Connect the aircraft to the computer and toggle the USB Mode Switch to the RTK position to activate the D-RTK air system. 3. Connect the D-RTK Ground System to the computer with DJI Assistant 2 launched for activation. ©... - Page 38 Each time it is used, the Ground System automatically detects the offset distance from its previous coordinates automatically. If the position has changed but the Ground System does not update until the Ground System recalculates the position coordinates. The DJI GO 4 app will prompt you once the Ground System’s position has been updated successfully.
-
Page 39: Dji Airsense
ADS-B outs. 2. If there is an obstacle or steel structure between civil and DJI aircraft, the system won’t be able to receive ADS-B messages sent by manned aircraft or send out warnings. Keenly observe your 3. -
Page 40: Expansion Ports
MATRICE 200 Series User Manual Expansion Ports M210/M210 RTK provides several I/O ports, which can be customized in DJI Pilot app. USB Port Expansion Ports Pins Descriptions Number Name OSDK port I/O port I/O port I/O port I/O port I/O port... - Page 41 MATRICE 200 Series User Manual USB Mode Switch Power on the Intelligent Flight Battery and toggle the USB Mode Switch left, and connect the aircraft and the PC via a double A port USB cable for aircraft parameters configuration and firmware update.
-
Page 42: Remote Controller
Remote Controller This section describes the features of the remote controller that includes aircraft and remote controller operations and dual remote controller mode. -
Page 43: Preparing The Remote Controller
The Cendence remote controller features DJI’s Lightbridge technology for a maximum transmission distance of up to 4.3 mi (7 km).* Equipped with a DJI CrystalSky 7.85 inch monitor, which offers an HD experience. Dual transmission frequency support makes HD video downlink stable and reliable. In Dual Remote Controller mode, two remote controllers can control the aircraft and camera separately and simultaneously. - Page 44 MATRICE 200 Series User Manual Using the Charging Port Place the battery into the remote controller, and connect connector B of the battery power port, then connect the battery charger to a power outlet (100-240V, 50/60Hz). When charging is complete, the...
-
Page 45: Mounting The Monitor To The Remote Controller
MATRICE 200 Series User Manual Mounting the Monitor to the Remote Controller Mounting the DJI CrystalSky Monitor Ensure that Part B is Lock the Mounting Bracket. Use a coin to adjust unlocked. Install Part B the tightness of the into Part A. -
Page 46: Remote Controller Operations
MATRICE 200 Series User Manual Remote Controller Operations Button Types functions to the customizable buttons through the DJI GO 4 app. There are three types of button: 2. Preconfigured buttons for camera control, e.g. the Shutter Button, Recording Button, Focus Adjustment Knob, etc. - Page 47 MATRICE 200 Series User Manual Operating the Aircraft Controlling the Aircraft This section explains how to control the orientation of the aircraft through the remote controller. Control can be set to Mode 1, Mode 2 or Mode 3, or to a custom mode.
- Page 48 MATRICE 200 Series User Manual Remote Controller Aircraft Remarks (Mode 2) Moving the left stick up and down changes the aircraft’s elevation. Left Stick Push the stick up to ascend and down to descend. When both sticks are centered, the aircraft will hover in place.
- Page 49 MATRICE 200 Series User Manual P-mode (Positioning): P-mode works best when the GPS signal is strong. The aircraft utilizes GPS, stereo Vision Systems, and an Infrared Sensing System to stabilize, avoid obstacles or track moving subjects. Advanced features such as TapFly and ActiveTrack are enabled in this mode.
- Page 50 MATRICE 200 Series User Manual T h e r i g h t d i a l c o n t r o l s t h e gimbal pan. Turn the dial to the right, and the gimbal will shift clockwise.
-
Page 51: Dual Remote Controller Mode
MATRICE 200 Series User Manual Go to the Customizable Button Settings Menu in DJI GO 4. Here you can set functions for the left lever, right lever, C1-C4 buttons, and BA-BH buttons. Dual Remote Controller Mode More than one remote controller can connect to the same aircraft in Dual Remote Controller mode. - Page 52 Search Master When in Slave, the remote controller cannot link to the aircraft nor control aircraft orientation. Select Master in DJI GO 4 if you wish to connect and control the aircraft with the remote controller. 2. Search the “Master” remote controller in the surrounding area.
-
Page 53: Linking The Remote Controller
3. Enter the Camera View and tap the Linking Remote Controller button shown below. 4. The DJI GO 4 app will display a countdown box, the remote controller will be ready to link, with its display showing Connecting and a beeping sound being emitted. - Page 54 MATRICE 200 Series User Manual A Slave remote controller cannot link to the aircraft and so therefore cannot control the orientation of the aircraft. Select Master in DJI GO 4 if you wish to link a remote controller it to the aircraft.
-
Page 55: Gimbal And Camera
Gimbal and Camera This section focuses on the technical how to use the gimbal. -
Page 56: Camera
Use the Shutter and Record buttons on the remote controller to shoot photos or videos. For more information on how to use these buttons, please refer to Controlling the Camera. DJI GO 4 Use DJI GO 4 to shoot photos or videos. For more information, refer to the camera and gimbal User Manual. ©... -
Page 57: Gimbal
+320° Using the DJI GO 4 App to Control Gimbal Follow the steps below to use the DJI GO 4 app to control gimbal orientation: 1. Launch DJI GO 4 and enter the Camera View. 2. Tap and press on the screen until a blue circle is shown. - Page 58 MATRICE 200 Series User Manual Gimbal Operation Modes Three gimbal operation modes are available. Switch between the different operation modes in DJI GO 4's Camera View. Note that your mobile device must be connected to the remote controller for changes to take effect. Refer to the table below for details:...
-
Page 59: Dji Go 4
DJI GO 4 This section introduces the main functions of the DJI GO 4 app. -
Page 60: Equipment
DJI GO 4 Use the DJI GO 4 app to control the gimbal, camera, and other aircraft functions. The app features and sharing your photos and videos with others. It is recommended that you use a tablet for the best possible experience. - Page 61 5. AirSense Status : AirSense Status displays information about nearby manned aircraft to ensure flight safety, including the distance between DJI aircraft and manned aircraft. AirSense will instruct users to land if nearby aircraft are detected. 6. GPS Signal Bars to return to home.
- Page 62 MATRICE 200 Series User Manual 11. Battery Level : This icon shows current battery level. Tap to view the battery information menu, set various battery warning thresholds, and view battery warning history. 12. General Settings : Tap to enter the General Settings menu to set metrics to enable live streaming, display 13.
- Page 63 MATRICE 200 Series User Manual 22. Flight Telemetry (1) Tap to switch to map view. (2) Flight Attitude and Radar Function: The red arrow shows which direction the aircraft is facing. The ratio of gray area to blue area indicates the aircraft’s pitch.
-
Page 64: Editor
MATRICE 200 Series User Manual Editor A dedicated video editor is built into the DJI GO 4 app. After recording several video clips and downloading them to your mobile device, go to Editor on the home screen. You can then select sharing. -
Page 65: Flight
Flight... -
Page 66: Flight Environment Requirements
Flight limitations include height altitude from exceeding 1640 feet (500 m) . Maximum Flight Altitude Max Radius Home Point Height of aircraft when turned on © 2018 DJI All Rights Reserved. - Page 67 MATRICE 200 Series User Manual GPS Signal Strong Blinking Green Flight Limits DJI GO 4 App Maximum Flight Warning: Height Altitude limit reached. Warning: Distance Max Radius Flight distance must be within the max radius. limit reached. GPS Signal Weak...
- Page 68 (3) A “warning zone” has been set around the Restricted Area. When the aircraft approaches within 0.062 miles (100 m) of this zone, a warning message will appear in DJI GO 4. When flying in a safety zone, the aircraft's status indicator will blink red rapidly and seconds at which point it will switch back to blinking red.
-
Page 69: Calibrating The Compass
7. Ensure that the sensors for the Obstacle Sensing System are clean. Calibrating the Compass Only calibrate the compass when the DJI GO 4 app or the status indicator prompts you to do so. Observe the following rules when calibrating your compass: DO NOT calibrate your compass where there is a chance of strong magnetic interference, such as near magnets, parking structures, or steel reinforcements underground. -
Page 70: Auto Takeoff And Auto Landing
Use auto takeoff only if the Aircraft Status Indicators are blinking green. Follow the steps below to use the auto takeoff feature: 1. Launch the DJI GO 4 app and tap GO FLY to enter Camera View. 3. Tap“ 4. Aircraft takes off and hovers at (1.2 meters) above ground. -
Page 71: Starting/Stopping The Motors
If Landing Protection determines that the ground is not suitable for landing, the aircraft will c. If Landing Protection is not operational, the DJI GO 4 app will display a landing prompt when the aircraft descends below 0.7 meters. Pull down on the throttle or use the auto landing slider to land. -
Page 72: Flight Test
MATRICE 200 Series User Manual Please check that CSC is activated inside DJI GO 4 app, then the user can stop the aircraft mid-air. Flight Test Takeoff/Landing Procedures 2. Turn on the remote controller and your mobile device, then turn on the Intelligent Flight Battery. - Page 73 MATRICE 200 Series User Manual IP43 Protection Rating Under stable laboratory conditions, the Matrice 200 Series achieves an IP43 protection rating by IEC60529 standards when equipped with standard TB50-M200 or TB55 Intelligent Flight Batteries. However, this protection rating is not permanent and may reduce over time after long-term use.
-
Page 74: Appendix
Appendix... - Page 75 DJI 3515 Propeller Model 1760S Supported DJI Gimbals Single Downward Gimbal, Dual Downward Gimbals, Supported Gimbal Mounting Single Upward Gimbal Waterproof Level IP43 GNSS GPS+GLONASS Operating Temperature -4° to 113° F (-20° to 45° C) © 2018 DJI All Rights Reserved.
- Page 76 MATRICE 200 Series User Manual Gimbal Angular Vibration Range ±0.01° Controllable Range Pitch: -130° to +40°; Roll: ±20°; Pan: ±320° Max Controllable Speed Pitch: 180°/s; Roll:180°/s; Pan:270°/s Interface Type DGC2.0 Mechanical Range Pitch: -140° to +50°; Roll: -50° to +90°; Pan: ±330°...
- Page 77 MATRICE 200 Series User Manual Upward Infrared Sensing System Obstacle Sensing Range 0-16.4 feet (0-5 m) ±5° Operating Environment Charger Model IN2C180 Voltage 26.1 V Rated Power 180 W Battery (TB50-M200) Name Intelligent Flight Battery Model TB50-4280mAh-22.8V Capacity 4280 mAh Voltage 22.8 V...
-
Page 78: Aircraft Status Indicator Description
1. Power on the Intelligent Flight Battery and toggle the USB Mode Switch right. 2. Connect the aircraft and your mobile device via an appropriate USB cable. 3. Follow the on-screen instructions in the DJI GO 4 app to upgrade. Ensure to connect to the Inter- ©... -
Page 79: Using The Zenmuse Xt Gimbal And Camera
Upgrading the Remote Controller Firmware Method 1: Using the DJI GO 4 App Power on the remote controller and connect it with the DJI GO 4 app. A prompt will appear if a follow the on-screen instructions. Ensure the battery level is adequate for the remote controller. -
Page 80: Single Downward Gimbals
MATRICE 200 Series User Manual Single Downward Gimbals The dual downward gimbal connector is mounted onto the aircraft at the factory. To use the M210 connector and mount the single downward gimbal connector. 1. Detach the dual downward gimbal connector from the aircraft by gently removing the three 2. - Page 81 MATRICE 200 Series User Manual 3. Disconnect the gimbal signal control cable and gimbal video cable from the dual downward gimbal connector. 4. Remove the three screws on the top of the single downward gimbal connector. 5. Connect the gimbal signal control cable and gimbal video cable to the single downward gimbal connector.
-
Page 82: Dual Downward Gimbals
MATRICE 200 Series User Manual 7. Mount the single downward gimbal connector to the aircraft using the three damping balls. Dual Downward Gimbals A dual downward gimbal connector is required to use the M210 or M210 RTK’s dual downward gimbals. - Page 83 MATRICE 200 Series User Manual 4. Remove the four screws on the top of the dual downward gimbal connector. 5. Connect the gimbal signal control cable and gimbal video coaxial cable to the dual downward gimbal connector accordingly. Tighten the spring pad with screws to secure the gimbal video coaxial cable.
- Page 84 Gimbal Connector II Gimbal Connector I's camera view will show on the main interface in the DJI Pilot app, while Gimbal Connector II's camera view will show on the assistant interface. You can switch between them. Single upward gimbal connector and dual downward gimbal connector should be used separately.
-
Page 85: Mounting The Upward Gimbal And Gps Module
MATRICE 200 Series User Manual Mounting the Upward Gimbal and GPS Module The built-in compass and GPS will fail to work if a single upward gimbal is in use. And the D-RTK antennas cannot receive the GPS signal when the aircraft is flying under a bridge or other tall buildings. - Page 86 MATRICE 200 Series User Manual as doing so could damage the antenna. Follow the steps below to mount the Upward Gimbal and GPS Module on the M210: Mount the upward gimbal, and connect it to the DGC2.0 port. Mount the GPS module.
-
Page 87: Carrying Box Descriptions
MATRICE 200 Series User Manual Carrying Box Descriptions 1. Landing gear ×2 2. Propeller pair ×4 1. Aircraft 2. Remote controller 3. CrystalSky monitor/iPAD 6. IN2CH charging hub 7. WCH2 charging hub 8. Charger 10. Gimbal and camera (only X4S) - Page 88 This content is subject to change. Download the latest version from http://www.dji.com/matrice-200-series If you have any questions about this document, please contact DJI by sending a message to © 2017 DJI All Rights Reserved.
- Page 89 MATRICE 200 SERIES V2 M210 V2 / M210 RTK V2 Quick Start Guide 快速入门指南 快速入門指南 クイックスタートガイド 퀵 스타트 가이드 Kurzanleitung Guía de inicio rápido Guide de démarrage rapide Guida di avvio rapido Snelstartgids Guia de início rápido Guia de início rápido Краткое...
- Page 90 **Please note that this list of items applies to the M210 RTK V2. Although similar, the M210 V2 aircraft does not include the D-RTK antennas and mounting bracket. When using the M210 RTK V2, more accurate positioning data can be achieved when using a DJI D-RTK 2 High Precision GNSS Mobile Station for Matrice Series.
- Page 91 7.85 inch ultra-bright monitor, it displays a HD live view directly via the built-in DJI Pilot app, providing a precise and responsive flying experience. Dual frequency* support makes the HD video downlink more stable. In Dual Remote Controller Mode, two remote controllers control the aircraft and camera separately, even when they are up to 656 feet (200 m) apart.*...
- Page 92 Users can access the DJI Pilot app that is built-in to the remote controller’s CrystalSky monitor. Users can also search for DJI Pilot in Google Play Store or scan the QR code to download the app onto your mobile device, and then connect the mobile device to the remote controller.
- Page 93 For more information about how to connect and use the remote controller, please refer to the user manual. You can change the stick mode and customize the C1-C4 and BA-BH buttons’ functions in the DJI Pilot app. 4. Preparing the Aircraft...
- Page 94 The M210 RTK V2 aircraft includes D-RTK antennas. Highly accurate positioning data can be obtained when using the M210 RTK V2 with the DJI D-RTK 2 High Precision GNSS Mobile Station for Matrice Series. 1. In the Camera View in the DJI Pilot app, tap on the upper right corner, and then tap RTK.
- Page 95 P-mode, the safest flight mode. After the monitor is powered on, wait for a pop-up window that asks for a selection of USB device use, and then select “DJI Pilot”. Otherwise, the app cannot be connected to the remote controller.
- Page 96 Charging Hub (IN2CH) Input Voltage 26.1 V Input Current 6.9 A MATRICE and DJI are trademarks of DJI. Download the latest version from Copyright © 2019 DJI All Rights Reserved. http://www.dji.com/matrice-200-series-v2 This content is subject to change without prior notice.
- Page 97 1NCD21RM04...
- Page 98 MATRICE 200 SERIES V2 M210 V2 / M210 RTK V2 In the Box 物品清单 物品清單 同梱物 구성품 설명서 Lieferumfang Contenido del embalaje Contenu de l'emballage Contenuto della confezione In de doos Incluído na embalagem Incluído na embalagem Комплект поставки...
- Page 99 理商。 以下の品目が製品のパッケージにすべて揃っているかご確認ください。同梱されて いない品目がある場合は、DJI または最寄りの販売店にご連絡ください。 다음 구성품이 제품 포장 안에 모두 있는지 확인하십시오 . 구성품이 하나라도 없는 경우 DJI 또는 현지 판매점에 문의하십시오 . Bitte prüfen Sie, ob alle hier aufgeführten Teile in der Verpackung Ihres Produkts enthalten sind. Falls eines oder mehrere Teile fehlen, wenden Sie sich bitte an Ihren Ansprechpartner bei DJI oder Ihren örtlichen Händler.
- Page 100 ×1 ×1 ×2 Aircraft Body Remote Controller Landing Gear 飞行器 遥控器 起落架 飛行器 遙控器 起落架 機体本体 送信機 ランディングギア 기체 본체 조종기 랜딩 기어 Chassis Fernsteuerung Landegestell Cuerpo de la aeronave Control remoto Tren de aterrizaje Corps de l'appareil Radiocommande Train d'atterrissage Velivolo Radiocomando Carrello di atterraggio...
- Page 101 ×4 ×2 ×1 TB55 Propeller (Pair)* Intelligent Flight Battery** Battery Charger 智能飞行电池 ** 螺旋桨(对)* 充电器 智能飛行電池 ** 螺旋槳(一對)* 充電器 プロペラ(1 組)* インテリジェント フライト バッテリー** バッテリー充電器 프로펠러(페어) * 인텔리전트 플라이트 배터리** 배터리 충전기 Propeller (Paar)* Intelligent Flight Battery** Akkuladegerät Hélices (par)* Batería de Vuelo Inteligente** Cargador de la batería Hélices (paire)*...
- Page 102 ×1 ×1 ×3 Mobile Device Holder Carrying Case* Gimbal Damper* 外包装箱 * 云台减震球 * 移动设备支架 外包裝箱 * 雲台減震球 * 行動裝置支架 モバイル端末ホルダー キャリーケース* ジンバルダンパー* 운반 케이스 * 모바일 기기 홀더 짐벌 댐퍼* Mobilgerätehalter Tragekoffer* Gimbal-Dämpfer* Soporte para dispositivos móviles Estuche de transporte* Amortiguador del estabilizador* Support pour appareil mobile Mallette de transport*...
- Page 103 ×6 ×1 ×1 Rear Port Cover Screw* Screwdriver (set)* Cendence Control Stick Covers (Pair)* 尾部接口保护盖螺丝 * Cendence 摇杆防尘罩(对)* 螺丝刀(套)* 尾部連接阜保護蓋螺絲 * Cendence 搖桿防塵罩(一對)* 螺絲刀(套)* リアポート用カバーねじ* ドライバー(セット)* Cendence コントロールスティック カ バー(1 組)* 후면 포트 커버 나사 * 스크루드라이버(세트)* Cendence 조종 스틱 커버(페어)* Schraube der hinteren Schraubendreher (Satz)* Anschlussabdeckung*...
- Page 104 Produktdokumentation Manuals Manuais • In the Box • Lieferumfang • Incluído na embalagem • Quick Start Guide • Kurzanleitung • Declaração de exoneração de responsabilidade e • Disclaimer and Safety Guidelines • Haftungsausschluss und Sicherheitsvorschriften diretrizes de segurança • Sicherheitsvorschriften zur Intelligent Flight Battery •...
- Page 105 Обратите внимание, что M210 RTK V2 используется в качестве примера, чтобы показать корпус дрона в этом списке. В комплект с летательным аппаратом M210 V2 не входят антенны D-RTK. Летательный аппарат поставляется с установленным разъемом двойного нижнего стабилизатора. MATRICE and DJI are trademarks of DJI. Copyright © 2020 DJI All Rights Reserved.
- Page 106 MATRICE 210 V2 Single Upward Gimbal Connector User Guide 使用说明 v1.2 2019.04...
- Page 107 This product and document are copyrighted by DJI with all rights reserved. No part of this product or document shall be reproduced in any form without prior written consent of or authorization from DJI.
- Page 108 • Please make sure that the single upward gimbal connector and the payload are properly and securely mounted before takeoff. DJI is not liable for the falling of the aircraft or damage to any parts due to incorrect installation or loose screws.
- Page 109 物品清单 上置云台套件 ×1 M2.5×14.2 螺丝 ×8 H2.0 L 型扳手 ×1 安 装 1. 将上置云台套件放置在飞行器上侧,使四个螺孔与飞行器上的上置云台安装位 对齐。 2. 使用扳手锁紧螺丝,确保安装支架稳固。 3. 连接上置云台快拆接口至飞行器 DGC2.0 云台接口 I。 • 起飞前请务必确保上置云台套件及负载已正确并稳固安装。由于用户安装 错误或螺丝未锁紧造成的部件损坏或飞行器坠落,需自行承担责任。 • 若 Matrice 210 V2 安 装 上 置 云 台, 需 额 外 安 装 外 置 GPS 套 件。Matrice 210 RTK V2 无需安装外置...
- Page 110 Indirizzo di contatto UE: DJI GmbH, Industriestrasse 12, 97618, Niederlauer, Germany Déclaration de conformité UE : Par la présente, SZ DJI TECHNOLOGY CO., LTD déclare que cet appareil est conforme aux principales exigences et autres clauses pertinentes de la directive européenne 2014/30/EU.
- Page 111 ○ : 表示该有害物质在该部件所有均质材料中的含量均在 GB/T 26572 规定的限量要求以下。 × : 表示该有害物质至少在该部件的某一均质材料中的含量超出 GB/T 26572 规定的限量要求。 (产品符合欧盟 ROHS 指令环保要求) This content is subject to change. Download the latest version from http://www.dji.com/matrice-200-series-v2 MATRICE is a trademark of DJI. Copyright © 2019 DJI All Rights Reserved. Printed in China. YC.BZ.SS000909.02...
Need help?
Do you have a question about the MATRICE 200 Series and is the answer not in the manual?
Questions and answers