Table of Contents
Advertisement
Advertisement
Chapters
Table of Contents
Troubleshooting

Subscribe to Our Youtube Channel
Related Manuals for CleaverBrooks CFC


Summary of Contents for CleaverBrooks CFC
- Page 1 Table Of Contents Clearfire Condensing Boiler Model CFC Gas High Efficiency Boiler Operation, Service, and Parts Manual Manual Part No. 750-263 07/2008 CLEAVER-BROOKS MILWAUKEE, WISCONSIN — ANSI STANDARD Z21.13b-2004 CSA 4.9b-2004 LOW PRESSURE BOILER ANSI STANDARD Z21.13b-2005 — CSA 4.9b-2005...
- Page 2 WARNING ! DANGER WARNING ! DANGER If the information in this manual is not fol- Improper installation, adjustment service or maintenance can cause equipment lowed exactly, a fire or explosion may re- damage, personal injury or death. Refer sult causing property damage, personal injury or loss of life.
- Page 3 WARNING ! DANGER WARNING ! DANGER The installation must conform to the re- A hot water boiler installed above radia- quirements of the authority having juris- tion level or as required by the Authority diction or, in the absence of such having jurisdiction, must be provided with a low water cutoff device either as a part requirements, to the National Fuel Gas...
- Page 4 WARNING ! DANGER DO NOT OPERATE, SERVICE, OR REPAIR THIS EQUIPMENT UNLESS YOU FULLY UNDERSTAND ALL APPLICABLE SECTIONS OF THIS MANUAL. DO NOT ALLOW OTHERS TO OPERATE, SERVICE, OR REPAIR THIS EQUIPMENT UNLESS THEY FUL- LY UNDERSTAND ALL APPLICABLE SECTIONS OF THIS MANUAL. FAILURE TO FOLLOW ALL APPLICABLE WARNINGS AND INSTRUCTIONS MAY RESULT IN SEVERE PERSONAL INJURY OR DEATH.
-
Page 5: Table Of Contents
TABLE OF CONTENTS Section 1 — Introduction Clearfire Features and Benefits ......1-2 Standard Equipment . - Page 6 Control Setpoints ........4-2 Model CFC Boiler / Burner Controller ......4-2 CB Falcon Display/Operator Interface .
- Page 7 Introduction CFC Features and Benefits ....... . 1-2 Standard Equipment ........1-3 The Boiler .
-
Page 8: Cfc Features And Benefits
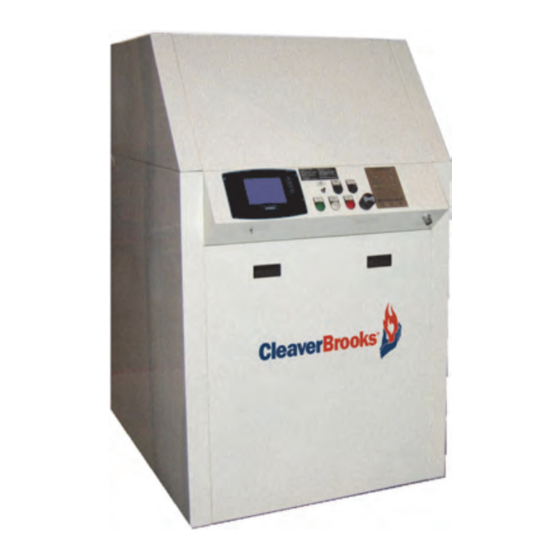
Compact Firetube Design (Figure 1-1 & Figure 1-2) The CFC boiler is a single pass down fired durable Firetube boiler. The extended heating surface tubes provide for very high levels of performance in a compact space. The boiler is designed to fire natural gas or propane. -
Page 9: Standard Equipment
Chapter 1 — Introduction B. STANDARD EQUIPMENT 1. The Boiler The boiler is designed for a Maximum Allowable Working Pressure (MAWP) of 60 psig (4.1 Bar) in accordance with the ASME Code for Low Pressure Section IV Hot Water Boilers and is stamped accordingly. -
Page 10: Control
Figure 1-7 Control panel (hinged access panel open) 5. Component/Connection Locations Figure 1-8 shows the CFC component orientation and heat flow path. Note the downfired design of the burner and the orientation of the hot water outlet and return connections. The return water connection is at the bottom of the vessel and the hot water outlet is near the top. -
Page 11: Optional Equipment
[by others] that are not part of Cleaver-Brooks scope of supply. In either case, the Cleaver-Brooks authorized representative should be consulted for project specifics. These are the options that are available for the CFC boiler from Cleaver-Brooks: A. Reusable air filter. - Page 12 Ignition and “Finned” High Flame Rod Efficiency AluFer Tubes Insulation Mat Cold Water Return ASME Code Pressure Vessel Flue Gas Outlet Filling and Draining cock Cleaning Cover Condensate Drain Figure 1-8 CFC Heat Flow and Component Orientation Part No. 750-263...
- Page 13 Chapter 1 — Introduction Auto air vent Safety Valve (optional; shipped (shipped loose) loose) Low Water Cutoff Probe Figure 1-9 Boiler Controls Water Side Inspection Port Return Water Temperature Sensor Return Water In Figure 1-10 Return Temperature Mounting Part No. 750-263...
- Page 14 Chapter 1 — Introduction Figure 1-11 Temperature Sensor, Top of Pressure Vessel The stack can be mounted on the right (Figure 1-12) or left (Figure 1-13) side on the back of the boiler base. The flue gas duct sizes may be reduced at the vent connection. See also Chapter 4 - Stack and Intake Vent Sizing and Installation.
- Page 15 Section 2 Installation Assembly ..........2-3 Packaging .
-
Page 16: Section 2 - Installation
Section 2 — Installation Warning Caution Provisions for combustion and ventilation air must The boiler must be installed such that the gas be in accordance with the National Fuel Gas ignition system components are protected from Code, ANSI Z223.1, or the CAN/CSA B149 water (dripping, spraying, rain, etc.) during Installation Codes, or applicable provisions of the appliance operation and sevice. -
Page 17: Assembly
Section 2 — Installation ASSEMBLY 1. Packaging The Cleaver-Brooks Model CFC boiler is shipped in three parcels. The pressure vessel assembly mounted on a skidded crate, the control panel in a box, and the outer casing with insulation in a skidded box. -
Page 18: Mounting Legs
Section 2 — Installation 3. Mounting Legs (see Figure 2-2) 1. Remove (4) boiler legs (1a) from the packaging and remove thetop two nuts and bolts (1) on the boiler mounting legs (1a) 2. Remove the wooden skid cross beam from the front of the boiler 3. - Page 19 Section 2 — Installation Notice Do not over tighten the straps; doing so will reduce the insulation’s effectiveness. Figure 2-3 Insulation blanket Part No. 750-263...
-
Page 20: Casing Assembly
Section 2 — Installation 5. Casing Assembly 1. After removing the nuts and washers, attach the electrical supplychannels (2), left and right, on the mounting studs projectingfrom the top plate of the boiler (see Figure 2-4). Do not installnuts and washers. - Page 21 Section 2 — Installation Mains Supply Cable Figure 2-6 Casing Assembly Part No. 750-263...
-
Page 22: Base Mounting
Section 2 — Installation 6. Base mounting The Model CFC boiler is of a condensing design. Based on local requirements the condensate can be piped to an appropriate treatment location or the optional treatment tank can be mounted under the boiler (see Figure 2-7). -
Page 23: Flue Gas / Combustion Air Connections
The high efficiency of the CFC boiler may cause water vapor to condense out of the flue gases. The flue gases from the Model CFC boiler should be removed via a gas-tight, temperature and corrosion resistant flue gas pipeline. Only flue gas systems approved and tested by the relevant region or province are to be connected to the boiler. -
Page 24: Gas Connections
Installation must follow these guidelines and those of any local authorities having installation jurisdiction. 2. Gas Train Components CFC boilers are equipped with a gas train that meets the requirements of CSA and ASME CSD-1, and also the requirements Figure 2-10 Gas Regulator and of FM and GE-GAP (formerly IRI). -
Page 25: Gas Piping
CFC units are not standardly equipped with an upstream gas pressure regulator. Therefore, a regulator must be installed at each CFC unit. Do not use a common regulator to regulate pressure for a Pressure multiple unit installation. Note: Gas connection is at the rear of the Test boiler, left hand side as you face the rear of the boiler. -
Page 26: Gas Supply Pipe Sizing
Section 2 — Installation supports and not supported by the boiler gas train or the bottom of the drip leg. Do not pipe across the top of the boiler as the burner swings up for service and must have proper clearance. All gas piping and components to the boiler gas train connection must comply with NFPA 54, local codes, and utility requirements as a minimum. - Page 27 Section 2 — Installation To verify the input of each device that is connected to the gas piping, obtain the btu/hr input and divide this input by the calorific value of the gas that will be utilized. For instance, a unit with 750,000 btu/ hr input divided by a gas calorific value of 1060 will result in a cfh flow of 707.
- Page 28 Section 2 — Installation Table 2-3: Gas Line Capacity - Schedule 40 Metallic Pipe Pipe Size Nominal 1" 1-1/4" 1-1/2" 2" 2-1/2" 3" 4" Actual I.D. 1.049" 1.380" 1.610" 2.067" 2.469" 3.068" 4.026" Length in feet **Maximum Capacity in Cubic Feet of Gas per Hour (cfh) 1,390 2,090 4,020...
- Page 29 Section 2 — Installation Table 2-4: Gas Line Capacity - Schedule 40 Metallic Pipe Pipe Size Nominal 1/2" 3/4" 1" 1-1/4" 1-1/2" 2" 2-1/2" 3" 4" Actual I.D. 0.622 0.824 1.049" 1.380" 1.610" 2.067" 2.469" 3.068" 4.026" Length in feet **Maximum Capacity in Cubic Feet of Gas per Hour (cfh) 1,510 3,040...
- Page 30 Section 2 — Installation Table 2-5: Gas Line Capacity - Schedule 40 Metallic Pipe Pipe Size Nominal 1/2" 3/4" 1" 1-1/4" 1-1/2" 2" 2-1/2" 3" 4" Actual I.D. 0.622 0.824 1.049" 1.380" 1.610" 2.067" 2.469" 3.068" 4.026" Length in feet **Maximum Capacity in Cubic Feet of Gas per Hour (cfh) 2,350 4,920...
- Page 31 Section 2 — Installation Table 2-6: Gas Line Capacity - Schedule 40 Metallic Pipe Pipe Size Nominal 1/2" 3/4" 1" 1-1/4" 1-1/2" 2" 2-1/2" 3" 4" Actual I.D. 0.622 0.824 1.049" 1.380" 1.610" 2.067" 2.469" 3.068" 4.026" Length in feet **Maximum Capacity in Cubic Feet of Gas per Hour (cfh) 3,190 6,430...
-
Page 32: Gas Header
Pipe sizes based on Table 2-2. Table 2-7: Multiple Unit Manifold, CFC 500 Table 2-8: Multiple Unit Manifold, CFC 750 CFC 500 Boilers... - Page 33 Section 2 — Installation Figure 2-12 Gas Piping Part No. 750-263 2-19...
-
Page 34: Boiler Water Piping
4. Pressure drop curves The information in Figures 2-16 through 2-26 and in Tables 2-13 and 2-14 can help in determining pump requirements for Model Figure 2-15 Pressure Relief CFC installations. Valve Piped to Safe Point of Discharge 2-20 Part No. 750-263... - Page 35 Section 2 — Installation Hydraulic Resistance CFC 500 Pressure PSI Flow - GPM Figure 2-16 Pressure Drop Curve, CFC 500, U.S. Flow Rates Hydraulic Resistance CFC 500 Pressure m bar Metric 10 11 12 13 14 15 16 Flow m 3/h Figure 2-17 Pressure Drop Curve, CFC 500, Metric Flow Rates Part No.
- Page 36 Section 2 — Installation Hydraulic Resistance CFC 750 Pressure PSI Flow - GPM Figure 2-18 Pressure Drop Curve, CFC 750, U.S. Flow Rates Hydraulic Resistance MCF750 Metric Pressure m bar 9 10 11 12 13 14 15 16 Flow m 3/h...
- Page 37 Section 2 — Installation Hydraulic Resistance CFC 1000 Pressure - PSI Flow - GPM Figure 2-20 Pressure Drop Curve, CFC 1000, U.S. Flow Rates Hydraulic Resistance CFC 1000 Pressure mbar Flow m3/h Figure 2-21 Pressure Drop Curve, CFC 1000, Metric Flow Rates Part No.
- Page 38 Hydraulic Resistance CFC 1500 U.S. Standards Pressure- PSI 8.8 22 44 66 88 110 132 154 176 198 220 242 264 Flow - GPM Figure 2-22 Pressure Drop Curve, CFC 1500, U.S. Flow Rates Hydraulic Resistance CFC 1500 Metric Pressure mbar Flow m3/h...
- Page 39 Hydraulic Resistance CFC 1800 U.S. Standards Pressure - PSI Flow - GPM Figure 2-24 Pressure Drop Curve, CFC 1800, U.S. Flow Rates Hydraulic Resistance CFC 1800 Metric Pressure mbar 5 10 15 20 25 30 35 40 45 50 55 60 65 70 75 80...
- Page 40 Hydraulic Resistance CFC 2500 Pressure - PSI U.S. Standards Flow - GPM Figure 2-26 Pressure Drop Curve, CFC 2500, U.S. Flow Rates Table 2-13: Maximum flow rate through ClearFire boilers (U.S. flow rates) System Temperature Drop Boiler Flow Rate GPM Size 10.5...
-
Page 41: Condensate Removal And Treatment
The responsible authority will inform you of any requirements for raising the pH value from 4.3 to the frequently prescribed higher value. The CFC neutralization system contains the granulate NEUTRALAT which comprises natural components and brings about an increase in pH of the condensate flowing through it. The... -
Page 42: Condensate Tank Setup Options
Section 2 — Installation 1. Condensate Tank Setup Options The boiler is supplied with boiler legs (standard) which are sized to permit the installation of the condensate collection tank. There are two (2) condensate tank styles available: (1) The condensate is piped directly to a drain through the piping and water trap supplied during installation (see Figure 2-29). -
Page 43: Installation
Figure 2-33 Condensate Table 2-15: Neutralization Granulate Treatment Tank Model No. of Bags (single boiler Multiple boilers CFC 500, 750, 1000 Add 1 bag per boiler CFC 1500, 1800 Add 2 bags per boiler CFC 2500 Add 2 bags per boiler Part No. -
Page 44: Condensate Piping For Multiple Boilers
Section 2 — Installation I. CONDENSATE PIPING FOR MULTIPLE BOILERS More than one Model CFC boiler can be piped into a common condensate neutralization tank. See Figure 2-34 and Figure 2-35 for the suggested layout. A condensate trap with a minimum 6 inch water column must be provided to prevent the flue gas from entering the boiler room. -
Page 45: Electrical Connections
A qualified electrician or service technician must make the electrical connections to the boiler. For typical CFC electrical component mounting see the electrical diagram mounted on the inside of the removable front panel. For specific information on your boiler electrical system refer to the Cleaver-Brooks wiring diagram provided with the boiler. - Page 46 Section 2 — Installation Figure 2-36 Electrical Connection Diagram 2-32 Part No. 750-263...
-
Page 47: Wiring Diagrams
Section 2 — Installation K. WIRING DIAGRAMS Figure 2-37 Wiring Diagram (base configuration) Part No. 750-263 2-33... - Page 48 Section 2 — Installation Figure 2-38 Wiring Diagram (with available options) 2-34 Part No. 750-263...
- Page 49 Chapter 3 Stack and Intake Vent Sizing and Installation Venting Connections - General ......3-2 Appliance Categories .
-
Page 50: Venting Connections - General
The Model CFC boiler is rated as a Category IV boiler according to ANSI Z21.13. Depending on the application, the specifying engineer may dictate alternative category flue venting as deemed appropriate. -
Page 51: Vent Terminal Location
Chapter 3 — Stack and Intake Vent Sizing and Installation 3. Vent Terminal Location Give special attention to the location of the vent termination to avoid possibility of property damage or personal injury. 24" Minimum Flue Gas Vent (w/Screen) 18" Minimum Air Intake (w/Screen) 24"... - Page 52 Chapter 3 — Stack and Intake Vent Sizing and Installation 9. Locate or guard vent to prevent condensate from damaging exterior finishes. Use a 2' x 2' rust resistant sheet metal backing plate against brick or masonry surfaces. 10. DO NOT extend exposed stack pipe outside of building. In winter conditions condensate could freeze and block stack pipe.
- Page 53 Chapter 3 — Stack and Intake Vent Sizing and Installation Canada Installations- Refer to the latest edition of CAN/CSA- B149.1 and B149.2 A vent shall not terminate: 1. Directly above a paved sidewalk or driveway which is located between two single family dwellings and serves both dwellings. 2.
-
Page 54: Horizontal Thru-Wall Venting / Inside Combustion Air
Chapter 3 — Stack and Intake Vent Sizing and Installation B. HORIZONTAL THRU-WALL VENTING / INSIDE COMBUSTION AIR (CATEGORY III & IV) 1. Installation For boilers connected to gas vents or chimneys, vent installations Inside Air Combustion shall be in accordance with Part 7, Venting of Equipment, of the Intake latest edition of National Fuel Gas Code, or in Canada, the latest edition of CAN/CSA-B 149.1 and.2 Installation Code for Gas... -
Page 55: Horizontal Thru-Wall Venting / Direct Vent Combustion Air
Chapter 3 — Stack and Intake Vent Sizing and Installation C. HORIZONTAL THRU-WALL VENTING / DIRECT VENT COMBUSTION AIR (CATEGORY III & IV) 24" Minimum Flue Gas Vent (w/Screen) 18" Minimum Air Intake (w/Screen) 24" Minimum Figure 3-4 Horizontal Thru-wall Direct Venting System Category III Installation (Direct Vent Combustion Air/Stack Venting) 1. -
Page 56: Horizontal Thru-Wall Stack Vent Termination
Chapter 3 — Stack and Intake Vent Sizing and Installation For appliances installed in extreme cold climate, it is recommended that: 1. The stack vent be installed with a slight upward slope of not more than 1/4" per foot of horizontal run to the vent terminal. In this case, an approved condensate trap must be installed per applicable codes. -
Page 57: Vertical Venting / Inside Combustion Air
24" Minimum 24" Minimum CFC Boiler Figure 3-5 Vertical Stack with Inside Combustion Air These installations utilize the boiler-mounted blower to vent the combustion products to the outside. Combustion air is taken from inside the room and the vent is installed vertically through the roof to the outside. -
Page 58: Vertical Venting / Direct Vent Combustion Air
Chapter 3 — Stack and Intake Vent Sizing and Installation be taken during assembly to insure that all joints are sealed properly and are airtight. For certain installations PVC or CPVC may be used. Contact your authorized Cleaver-Brooks representative for details. To prevent the condensation accumulation in the vent, it is required to install the horizontal portion of vent with a slight upward slope of not more than 1/4"... - Page 59 Chapter 3 — Stack and Intake Vent Sizing and Installation These installations utilize the boiler-mounted blower to draw combustion air from outside and vent combustion products to the outside. UL 17-38 Certified Venting Material (e.g. AL29-4C) MUST be used. The vent must be installed to prevent flue gas leakage. Care must be taken during assembly to insure that all joints are sealed properly and are airtight.
- Page 60 1. Stack design using room air for combustion Boiler Stack Stack/Vent Maximum length of breeching or Boiler Size Connection Size stack [feet]* 6" Standard 6" CFC 500 4" Option 4" CFC 750 6" Standard 6" 8" Standard 8" CFC 1000 6" Option 6"...
- Page 61 Boiler Air Intake Duct in Connection Intake Duct & Vent/Stack Flue Gas Vent in Feet** Connection Size Feet* 6" Standard 4" 6" CFC 500 4" Option 4" 4" CFC750 6" Standard 4" 6" 8" Standard 6" 8" CFC1000 6" Option 6"...
- Page 63 Control Setpoints ........4-2 Model CFC Boiler / Burner Controller ......4-2 CB Falcon Display/Operator Interface .
-
Page 64: Operating Conditions
Depress all manual reset buttons for all controls prior to starting. Figure 4-1 Opening Control Panel D. MODEL CFC BOILER / BURNER CONTROLLER The Model CFC boiler uses the CB Falcon hydronic boiler control system. Primary controller functions include: • Flame supervision • Heating/modulation control •... -
Page 65: Cb Falcon Display/Operator Interface
Controller. Warning Figure 4-3 Controller status The Model CFC is factory tested. Nevertheless, all burner safety LEDs and reset button controls should be checked upon installation, prior to initial firing. Failure to verify burner control functioning could result in severe bodily injury or death. -
Page 66: Operation Page
Chapter 4 — CFC Commissioning Home page Status page 3. Operation Page The operation page displays the CB Falcon running operation, including setpoint and firing rate values. From this page the user can change setpoints, manually control the boiler’s firing rate,... -
Page 67: Lockouts And Alerts
F. CONTROLLER CONFIGURATION The CB Falcon controller should be factory configured for the specific CFC boiler model. Prior to starting the boiler, verify that the factory default settings are correct for your application. Please refer to CB default settings, Table 4-1, and make any changes at this time if needed. - Page 68 Chapter 4 — CFC Commissioning Table 4-1 CB Falcon factory parameter settings - Model CFC Min. Parameter Installation Parameter Group Parameter Name Access Range Default Setting Max. Range Units Setting System ID & Access Boiler Name Service Boiler 1 System ID & Access...
- Page 69 Chapter 4 — CFC Commissioning Min. Parameter Installation Parameter Group Parameter Name Access Range Default Setting Max. Range Units Setting Burner Control Ignition Preignition time Service seconds Burner Control Ignition Lightoff rate Service 1000 See Table 4-2 3000 Burner Control Ignition...
- Page 70 Chapter 4 — CFC Commissioning Min. Parameter Installation Parameter Group Parameter Name Access Range Default Setting Max. Range Units Setting Annunciation Configuration Annunciator 2 short name Service Annunciation Configuration Annunciator 2 long name Service LOW WATER Annunciation Configuration Annunciator 3 location...
- Page 71 Chapter 4 — CFC Commissioning Min. Parameter Installation Parameter Group Parameter Name Access Range Default Setting Max. Range Units Setting Domestic HW Configuration DHW enable User Disabled Outlet sensor & Domestic HW Configuration DHW demand source Service DHW switch DHW priority has priority...
- Page 72 Chapter 4 — CFC Commissioning Min. Parameter Installation Parameter Group Parameter Name Access Range Default Setting Max. Range Units Setting Anti-condensation DHW anti-condensation Configuration setpoint Service °F Anti-condensation DHW anti-condensation Configuration pump force off Service Disabled Anti-condensation Anti-condensation > Outlet...
-
Page 73: Changing Parameter Settings
Chapter 4 — CFC Commissioning 1. Changing Parameter Settings To access the CB Falcon configuration menu, press <Configure> on the Status page. Some parameters require a password entr y before allowing changes. The <Login> button will appear when any password- protected parameter is displayed on the screen. -
Page 74: Burner Sequence
In addition to providing modulation control, the CB Falcon is responsible for flame supervision and burner sequencing. The CFC boiler uses direct spark ignition (no gas pilot) to light the main flame. Flame sensing is accomplished with a flame rod, or ionization electrode. -
Page 75: Fan Speed Settings
Chapter 4 — CFC Commissioning 7. Pre-Ignition Time will energize the ignitor and check for flame. 8. Trial for Ignition. 9. The ignition and the gas valve are switched on. 10.The ignition is turned off at the end of the direct burner ignition period. -
Page 76: Power-Up
2. Review available gas pressure to assure it is compatible with the main gas regulators upstream of the Model CFC gas train. Note: The maximum rated inlet pressure to the CFC gas train is 1/2 psig (14.0" WC). An upstream regulator and overpressure protection are required if building supply gas pressure is greater than 1 psig. - Page 77 Chapter 4 — CFC Commissioning • Before proceeding, review Section 4.3 - Control Setpoints for initial LGPS, HGPS, and CAPS settings. Note: Close the downstream manual gas shut-off valve before checking pressure switches and CAPS. While performing the following safety checks, use the CB Falcon Annunciation screen to monitor the status of the circuits involved.
-
Page 78: Low Water Cutoff Check
3. Press RESET-TEST switch once to reset. 5. Low and High Fire Adjustments All CFC boilers are factory tested firing natural gas at an altitude of 1000 ft ASL. Operating under different conditions may require re- adjustment of the gas valve. -
Page 79: Modulation Off Point
7. Setting Combustion Note: A Combustion Analyzer is required to properly set-up the Model CFC burner. Do not attempt to fire and adjust the burner without this equipment. Note: Ensure boiler is filled with water prior to burner startup. - Page 80 Chapter 4 — CFC Commissioning Manual Modulation - use the procedure below to change the burner firing rate manually. 1. On the CB Falcon Operation screen, press the 2. A numeric keypad will appear, Firing rate display in the Modulation section.
-
Page 81: High Air Pressure Switch Settings
The High Air Pressure witch (HAPS) is used to safely shut down the boiler in case of a blocked flue or blocked condensate condition. The HAPS switch setting for each model CFC can be found below: Table 4-4 HAPS Settings... -
Page 82: Post Start-Up Checkout Procedure
Chapter 4 — CFC Commissioning The High Limit setting is considered a safety parameter. Any changes made will require a password login and reset of the CB Falcon. J. POST START-UP CHECKOUT PROCEDURE 1. Ensure proper air venting to expansion tank. -
Page 83: Service And Maintenance
Chapter 5 Service and Maintenance Cleaning Procedure / Disassembly ........... 5-2 Condensate Neutralization ............5-3 Assembly ................5-3 Ignition Electrode and Flame Rod ..........5-4 Troubleshooting ..............5-4 Caution Label all wires prior to disconnection when servicing controls. Wiring errors can cause improper and dangerous operation.Failure to do so may result in equipment failure. -
Page 84: Cleaning Procedure / Disassembly
Chapter 5 — Service and Maintenance On an annual basis the boiler vessel and burner combustion system must be checked and cleaned. This work is to be carried out by an authorized Cleaver-Brooks Service Technician. A. CLEANING PROCEDURE / DISASSEMBLY 1. -
Page 85: Condensate Neutralization
For the CFC 750-1000, the granulate tank requires three (3) 6.5 lb. bags of NEUTRALAT. The CFC 1500- 1800 requires four (4) 6.5 lb. bags of NEUTRALAT. -
Page 86: Ignition Electrode And Flame Rod
Chapter 5 — Service and Maintenance D. IGNITION ELECTRODE AND FLAME ROD The ignition and ionization electrodes should be checked on an annual basis. If damaged it should be replaced as shown in Figure 5-5 with the electrode turned towards the burner mantle after it is inserted into the burner head. - Page 87 Chapter 5 — Service and Maintenance Flame Rod 1/2” 1/8” 1/8” Booster Ignitor Bottom of Burner Canister Figure 5-6 Flame Rod and Figure 5-7 Ignitor Electrodes Ignitors Electrode spacing for the booster ignitor should be 1/8”. The distance of the nearest booster ignitor electrode to the mantle is approximately 1/2”...
- Page 89 Chapter 6 Parts Recommended Spare Parts List Model CFC ......... 6-1 Boiler mechanical assembly ............6-2 Boiler mechanical assembly parts list ......... 6-3 Connection Sizes ..............6-3 Gas train ................. 6-4 Gas train parts list ..............6-4 MSOV Kit ................6-4 Electrical Assemblies ..............
-
Page 90: Boiler Mechanical Assembly
Chapter 6 — Parts Figure 6-1. Boiler mechanical assembly Part No. 750-263... -
Page 91: Boiler Mechanical Assembly Parts List
Chapter 6 — Parts Table 6-2. Boiler mechanical assembly parts list BOILER SIZE 1000 1500 1800 2500 Table 6-3. Connection Sizes BOILER SIZE 1000 1500 1800 2500 Part No. 750-263... -
Page 92: Gas Train
Chapter 6 — Parts Figure 6-2. Gas train Table 6-4. Gas train parts list BOILER SIZE Table 6-5. MSOV Kit BOILER SIZE 1000 1500 1800 2500 1’’ NPT KIT# 380-01046 1.25’’ NPT KIT# 380-1047 BUTTERBALL VALVE 941-01944 941-01944 941-01944 941-01945 941-01945 941-01945 NIPPLE, CLOSED... -
Page 93: Electrical Assemblies
Chapter 6 — Parts Figure 6-2. Electrical Assemblies INCOMING POWER CUSTOMER CONNECTION TERMINALS Part No. 750-263... -
Page 94: Electrical Assemblies Parts List
Chapter 6 — Parts Table 6-6. Electrical Assemblies Parts List ITEM PART NO. DESCRIPTION See Table 6-6 CONTROL PANEL 833 03577 DISPLAY, SYSTEM 833-03725 DISPLAY, LOCAL 832 02410 POWER SUPPLY (INCLUDED W/SYSTEM DISPLAY) 833 03639 FALCON CONTROLLER 832 00235 TRANSFORMER 832 02451 IGNITION TRANSFORMER 833 03547... - Page 95 Chapter 6 — Parts Table 6-9. CFC Optional Parts List DESCRIPTION PART NO. DIRECT VENT KIT, CFC 500, 750 & 1000 880-01312 DIRECT VENT KIT, CFC 1500 & 1800 880-01313 DIRECT VENT KIT, CFC 2500 880-2451 AIR INLET FILTER, CFC 500, 750 & 1000 843-266 AIR INLET FILTER, CFC 1500, 1800, &...
-
Page 97: Appendix A - Cb Falcon Hydronic Control
APPENDIX A - CB FALCON HYDRONIC CONTROL... - Page 99 Hydronic Control PRODUCT DATA FEATURES Safety and Boiler Protection • Frost Protection, Slow Start, Anti-condensate, Boiler Delta-T, Stack Limit, Boiler Limit, DHW Limit, Outlet T- Rise Limit Integrated Control Functions: • Primary Flame Safeguard Control • Internal or external spark generator •...
- Page 100 CB FALCON HYDRONIC CONTROL • Digital Outputs • High Limit Control (Meets UL 353) • Pump Control (3 outputs, 5 different • Fifteen Item Fault Code History including equipment programmable features) status at time of lockout • Combustion Blower • Fifteen Item Alert Code Status including equipment •...
- Page 101 TABLE OF CONTENTS Application ................................. Features ................................Overview ................................Installation ................................Wiring ................................. Startup ................................16 Parameter Control Blocks (PCB) ........................16 Programming Safety Parameters ........................17 Annunciator ................................ 48 Fault Handling ..............................51 Lockouts and Alerts ............................ 51 Alarms for Alerts ............................51 Sensor Signal Conditioning ........................
- Page 102 FEATURES, continued Access codes through the display allow for different levels of • Lockout causes the burner control to shutdown and setup. requires manual or remote reset to clear the lockout. • It always causes the alarm contact to close. —...
- Page 103 WARNING Explosion Hazard. Cycle and Time History Improper configuration can cause fuel buildup and The non-volatile memory will contain the following parameters explosion. and status values related to cycle counts and elapsed Improper user operation may result in property loss, operation time: physical injury, or death.
- Page 104 ICP Device Mates with … Plug # Description Manf. Part Number Flame Detection Molex 0050841060 (Shell), 0002082004 (Pin, 14-20 AWG) Interface PWM Combustion Molex 0039012040 (Shell), 0039000059 (Pin, 18-24 AWG) Blower Interface Comm. Interface EDZ1100/9 (SCREW) Line Voltage I/O Lumberg 3623 06 K129 (IDC, Pins 1 - 6) 3615-1 06 K129 (SCREW, Pins 1 - 6)
-
Page 105: Overview
OVERVIEW Functions provided by the CB Falcon include automatic boiler • Output control of gas valve (Pilot and Main) and sequencing, flame supervision, system status indication, firing External Ignition Transformer rate control, load control, CH/DHW control, limit control, • Digital inputs for room limit control, high limit system or self-diagnostics and troubleshooting. - Page 106 single ModBus address to service the requests of the Operating Temperature: -40°F to 150°F (-40°C to 66°C) Modbus master in a Lead/Lag arrangement. THIS IS A FUTURE ENHANCEMENT. Storage/Shipping Temperature: -40°F to 150°F The local S7910 Keyboard Display and the 833-3577 Operator (-40°C to 66°C).
-
Page 107: Installation
When Installing This Product… 1. Read these instructions carefully. Failure to follow them Table 1. NTC Sensors (temperature vs. resistance) could damage the product or cause a hazardous condi- tion. 12K NTC (kOhm)* 10K NTC (kOhm)* 2. Refer to the wiring diagram provided as part of the appli- Temp C (F) Beta of 3750 Beta of 3750... - Page 108 3. Connect the ground wire of the main power connector, A ground return wire is required in the appliance to reduce the the CH pump, the DHW pump (if present) and the igni- high frequency components of the actual return current. tion wire to the central ground terminal.
- Page 109 Table 2. Wire Sizes. Maximum Leadwire Distance (in Application Recommended Wire Size Recommended Part Number(s) feet) Line Voltage 14, 16, 18 AWG Copper TTW60C, THW75C, THHN90C Terminals conductor, 600 volt insulations, moisture- resistance wire Remote Reset/ 22 AWG two-wire twisted Beldon 8443 or equivalent 1000 pair, insulated for low voltage...
- Page 110 FAN POWER (25 VDC) FAN GND PWM OUT TACHOMETER 24 VAC EGND 24 VAC RTN L2 FOR 120VAC OR 24VAC RETURN (OPTOS) INLET TEMP INLET TEMP RTN HEADER TEMP PUMP A HEADER TEMP RTN OUTLET TEMP A PUMP B CB FALCON OUTLET TEMP RTN OUTLET TEMP B HYDRONIC...
- Page 111 Table 3. Recommended Grounding Practices. Ground Type Recommended Practice Earth ground 1. Earth ground must be capable of conducting enough current to blow the 20A fuse (or breaker) in the event of an internal short circuit. 2. Use wide straps or brackets to provide minimum length, maximum surface area ground conductors.
- Page 112 Table 4. CB Falcon Contact. (Continued) Commercial Connector Function Description and Rating (All Models) MAIN VALVE 24VAC, 120 VAC: 44.4 ALR, 7.4 Amps run PILOT VALVE 24VAC, 120 VAC: 44.4 ALR, 7.4 Amps run INTERLOCK Per Model Input Rating ALARM 24VAC, 120 VAC: 6.3 ALR, 0.63 Amps full load ALARM 24VAC, 120 VAC: 6.3 ALR, 0.63 Amps full load...
- Page 113 Table 4. CB Falcon Contact. (Continued) Commercial Connector Function Description and Rating (All Models) REMOTE RESET Open/Ground Input that has functionality corresponding to pushing/releasing the local reset. TOD (Time of Day) Open/Ground Input which switches operating set points. TOD/REMOTE RESET COMMON Ground reference for time of day and remote reset inputs MODULATION 4 - 20mA (+) 4 to 20 mA Current modulation signal out into a 600 Ohm...
-
Page 114: Startup
STARTUP Parameter Control Blocks (PCB) The CB Falcon Parameters are listed in control blocks of parameters. There are three parameter control blocks (PCB) The CB Falcon is shipped in the unconfigured condition, so that may be installed into the memory of the Falcon: when power is applied, all safety loads are off and the burner 1. -
Page 115: Programming Safety Parameters
1. The user edits safety data in the enabled section. At any WARNING time, if "exit" is chosen, the session is ended and the Falcon remains in an unconfigured state. In this case Explosion Hazard. the burner control status indicates “Safety data setup Improper configuration can cause fuel buildup and needed.”... - Page 116 Table 7. System Operation Settings. Parameter Comment CH enable Enable, Disable This parameter determines whether the CH loop is enabled or disabled. When disabled the demand caused by the CH Sensor is ignored. It may be disabled to turn it off temporarily, or because the application does not use this feature. DHW enable Enable, Disable This parameter determines whether the DHW loop is enabled or disabled.
- Page 117 Table 8. General Configuration Settings. (Continued) Parameter Comment Burner name text The Burner Name is a text parameter stored in the CB Falcon to identify the burner. OEM ID text The OEM ID is a text parameter stored in the Falcon intended for use by an OEM to record identification information related to the OEM's configuration and setup of the CB Falcon.
- Page 118 CH ENABLE SENSOR DEMAND TERMINALS DHW ENABLE PRIORITY INPUT OUTPUT SLAVE COMMAND EXISTS CONTROL PARAMETER LL SLAVE ENABLE CH PUMP DEMAND “pRATE” = 0 TO 99.99% OF CAPACITY PRIORITY: CH <>DWH LL<>DHW DHW PUMP DEMAND RELOAD “mRATE” = ANALOG% OR RPM CH FROST PROTECT BURNER DEMAND DHW PRIORITY OVERRIDE TIME DEMAND...
- Page 119 DETERMINE IF DHW DEMAND SHOULD IGNORE AN ANTI SHOR T CYCLE (ASC) DELAY... M24972 Fig. 6. Burner demand priority control. CH Loop Demand and Rate Pump demand may be driven by the selected demand source input (Stat input, a remote stat, or by the sensor alone). The CH (Central Heating) Demand and Rate source compares a selected input sensor to a setpoint.
- Page 120 CH ENABLE CH DEMAND SOURCE STAT SETTINGS ARE: ENVIRACOM REMOTE STAT TOP: STAT AND SENSOR (ON/OFF MESSAGE, REMOTE STAT AND SENSOR WITH TIMEOUT) CH PUMP LCI AND SENSOR DEMAND BOTTOM: SENSOR ONLY HEADER CH BURNER DEMAND OUTLET HYSTERESIS SETPOINT DEMAND BURNER CH SENSOR SELECT STATE: ON/OFF...
- Page 121 Table 9. Central Heating Parameters. (Continued) Parameter Comment CH time-of-day setpoint Degrees or None This setpoint is used when the time-of-day input (J10-2) is on. If the ODR function is inactive then the setpoint is used as-is. If the ODR function is active (input on J10-2) then this setpoint provides one coordinate for the shifted (because TOD is on) outdoor reset curve, as described in “CH outdoor reset enable”...
- Page 122 Table 9. Central Heating Parameters. (Continued) Parameter Comment CH P-gain 0-100 CH I-gain These parameters are the gains applied to the proportional, integral, and differential terms of CH D-gain the PID equation for the CH loop. CH outdoor reset enable Enable, Disable If outdoor reset feature is enabled and the sensor is functioning properly, then the current outdoor temperature is used to determine the setpoint by interpolation.
- Page 123 The DHW function is implemented as shown in Fig. 10. DHW ENABLE DOMESTIC HOT WATER (DHW) SETTINGS ARE: TOP: INLET SENSOR AND DHW SWITCH 2: OUTLET SENSOR AND DHW SWITCH 3: REMOTE STAT AND DHW SENSOR SENSOR IS SHORTED BOTTOM: DHW SENSOR ONLY SENSOR SIGNAL CONDITIONING...
- Page 124 Table 10. Domestic Hot Water Parameters. Parameter Comment DHW demand source DHW Sensor Only, Remote Stat and DHW Sensor, DHW Switch and Inlet Sensor, DHW switch and Outlet Sensor The DHW demand source may be selected from four options. In all cases, for burner demand to exist, the selected sensor must be generating a demand as determined by setpoint and hysteresis values.
- Page 125 The DHW function is implemented as shown in Fig. 10. DHW ENABLE DOMESTIC HOT WATER (DHW) SETTINGS ARE: TOP: INLET SENSOR AND DHW SWITCH 2: OUTLET SENSOR AND DHW SWITCH 3: REMOTE STAT AND DHW SENSOR SENSOR IS SHORTED BOTTOM: DHW SENSOR ONLY SENSOR SIGNAL CONDITIONING...
- Page 126 Table 11. CH Frost Protection Parameters. (Continued) Parameter Comment CH FP pump overrun time MM:SS This time indicates how long the CH pump should continue to run after CH frost protection pump demand ends. DHW frost protection enable Enable, Disable The DHW frost protection feature is enabled or disabled by this parameter.
- Page 127 Rate Limits and Override The priority bits indicates the TRUE or FALSE status for each of the following: The Limit and Override subsystem consists of three separate concepts: Anticondensation > Delta-T Anticondensation > Stack limit • Safety limit functions that cause a burner control to lockout Anticondensation >...
- Page 128 Stack limit (Safety limit and Rate limit) The stack limit is a safety limit. However, the stack rate limit portion which attempts to reduce the firing rate to avoid reaching the stack limit is not. Table 13. Limits and Rate Override: Stack Limit Parameters. Parameter Comment Stack limit enable...
- Page 129 If the monitored temperature is not within 12°F of the limit, then no rate limiting occurs. The stepped rate limit shall STEPPED MODULATION RATE LIMITING behave as illustrated below: MAXIMUM MODULATION Assuming that rate limiting has not been in effect, when the RATE (NO LIMIT) monitored temperature crosses a threshold that is 10°F away from the limit, then the maximum allowed firing rate is reduced...
- Page 130 Slow Start and Forced Rate limits The Forced Rate limit causes the burner to stay at a fixed firing rate immediately after lightoff, just after the end of the Run Stabilization time (if any). This is optionally followed by a slow start function limit that limits the ramp-up speed of the firing rate when the water is colder than a threshold.
- Page 131 Table 15. Limits and Rate Override: Slow Start Limit Parameters. (Continued) Parameter Comment CH slow start enable Enable, Disable This parameter enables or disables the slow start limit function for CH and LL demand sources. It uses the CH forced rate parameter as the starting point for the slow start. If the forced rate parameter is invalid or zero and slow start is enabled, then the slow start function does not occur and an alert is issued.
- Page 132 Anticondensation Anticondensation operates only when the burner is firing, and is active only if enabled for the demand source (i.e. CH, DHW) The anticondensation function reduces condensation effects currently controlling the burner. when the temperature is below a threshold by increasing the firing rate and optionally shutting off the pump.
-
Page 133: Burner Control
Burner Control LOW FIRE PROVING SWITCH (LFS) (J7-1) A control may use an LFS, such as during ignition to prove The Burner Control uses the following Inputs/Outputs: that a damper is in the proper position. The equipment setup will define the response to the LFS signal. STAT, REMOTE STAT, AND LCI AS DEMAND INPUTS (J8-3) The presence of a demand may be configured to be the on condition of the Stat input, a message from a Remote Stat, the... - Page 134 BLOWER MOTOR (J5-6,7) FLAME VOLTAGE (TEST JACKS) The blower output will be operated to control a blower motor: This voltage will represent the flame strength using a 0 to 10V the terminal will be energized at the start of prepurge and range, where 0.8 volts indicates the presence of flame.
- Page 135 Table 19. Burner Control Safety Parameters. (Continued) Parameter Comment Interlock open response Lockout, Recycle During prepurge after a delay to establish airflow, and during Ignition, MFEP, and Run, the burner control requires the ILK to remain on. If it opens during Ignition, MFEP, or Run then this parameter determines the response: either a lockout or a recycle back to the Safe Start check.
- Page 136 IGNITER MAY BE ON THROUGHOUT PFEP, OR ONLY DURING FIRST HALF. IGNITER PILOT MAIN FLAME REQUIRED. FAILURE TO IGNITE OPTIONS: • LOCKOUT • COUNT RECYCLES, THEN LOCKOUT • COUNT RECYCLES, THEN DELAY MM:SS • RECYCLE (NO LIMIT) RUN STABILIZATION (MAY BE ZERO) MFEP PFEP STANDBY...
- Page 137 Table 19. Burner Control Safety Parameters. (Continued) Parameter Comment Igniter on during Pilot Flame Establishing Period or First half of PFEP This parameter is not needed and ignored if DBI (Direct Burner Ignition) is selected, because the igniter is always on throughout the timed 4 second DBI period. Otherwise the igniter may be on throughout the PFEP, or only during the first half of it: •...
- Page 138 Table 19. Burner Control Safety Parameters (Continued) Parameter Comment Pilot test hold Enable, Disable This parameter is provided to support the pilot turndown test required by burner standards for Intermittent and Interrupted pilots. It is ignored if Pilot Type is DBI. If the Pilot type is Interrupted or Intermittent and this parameter is enabled, the burner control sequence will hold (forever) at 1 second into the Ignition state.
- Page 139 Table 21. Modulation Output Parameters. Parameter Comment Modulation output Fan Speed, 4-20mA, 0-10V This parameter selects the type of modulation output. The Falcon software responds by driving the appropriate circuit to provide modulation of firing rate. This parameter also affects the interpretation or the type of all parameters which specify rates.
- Page 140 Table 22. Fan Speed Modulation Parameters. (Continued) Parameter Comment Fan gain up 1-100 This is the gain for speeding up the fan. Fan gain down This is the gain for slowing down the fan. Fan speed-up ramp RPM per second Whenever the burner is firing it will be commanded to increase its RPM no faster than the rate provided by this parameter.
- Page 141 FROST PROTECTION AND OVERRUN TO BOILER PUMP CH PUMP CONTROL: ON CH FROST PROTECTION PUMP DEMAND (SELECTIONS ARE: ON/AUTO) OUTLET HIGH LIMIT ACTIVE OVERRUN TIME HIGH LIMITS AND LOAD MANUAL CONTROL DO NOT CAUSE EXERCISE PUMP ONLY IF OVERRUN TIME EXERCISE PUMP DEMAND IT IS NOT FORCED OFF.
- Page 142 FROST PROTECTION PARAMETER AND OVERRUN TO BOILER PUMP CONNECTION TO PUMP A, B, OR C OTHER NAMES ARE INTERNAL SIGNALS. DHW FROST PROTECTION PUMP DEMAND 1–9 ON/OFF PRIORITY. CIRCLED NUMBERS ARE REASONS WHY PUMP IS ON. NUMBERS WITHIN SQUARES ARE REASONS WHY PUMP IS OFF. THE LOWEST NUMBERED REASON THAT EXPLAINS THE ACTUAL PUMP CONDITION IS USED.
-
Page 143: Boiler Pump
PARAMETER SYSTEM PUMP CONTROL: ON CONNECTION TO PUMP A, B, OR C (SELECTIONS ARE: ON/AUTO) SLAVE COMMAND FOR OTHER NAMES ARE INTERNAL SIGNALS. SYSTEM PUMP, NO OVERRUN 1–4 ON PRIORITY. SLAVE COMMAND FOR EXERCISE PUMP DEMAND SYSTEM PUMP, WITH OVERRUN LL MASTER PUMP DEMAND SYSTEM PUMP (WILL NOT OCCUR UNLESS... - Page 144 CH PUMP WOULD BE ON, BUT IT IS FORCED OFF CH THESE DO NOT INTERACT, BECAUSE THEY ARE BY ANTI-CONDENSATION MUTUALLY EXCLUSIVE (ULTIMATELY DRIVEN BY “DEMAND PRIORITY” WHICH SELECTS ONLY DHW PUMP WOULD BE ON, ONE OR THE OTHER). BUT IT IS FORCED OFF DHW BY ANTI-CONDENSATION EXERCISE PUMP DEMAND BOILER PUMP IS...
- Page 145 ON WHEN: • SLAVE COMMAND ONLY AUXILIARY PUMP CONTROL: ON • CH PUMP IS ON • DHW PUMP IS ON (SELECTIONS ARE: ON/AUTO) • EITHER CH OR DHW PUMP IS ON SLAVE COMMAND FOR AUXILIARY PUMP “CH...” OR “EITHER...” AUXILIARY PUMP OUTPUT AUXILIARY PUMP DEMAND...
-
Page 146: Annunciator
ANNUNCIATOR • PII: Interlocks (typically indicating the gas valve status) monitored from the end of a call for heat, up to the Ignition Trial Period of the next demand cycle The Annunciator section monitors the status of a series string (including standby) then ignored during Run. - Page 147 TERMINAL TABLE J6-2 J6-1 ANNUNCIATOR NAMES J6-3 J7-6 J7-5 J7-4 MASTER SWITCH J5-1 J7-3 J6-5 J7-2 WATER LEVEL J7-1 LIMIT CONTROL MASTER WATER LIMIT CONTROL SWITCH LEVEL STACK VENT FAN HIGH GAS PRESSURE LOW GAS PRESSURE AIRFLOW SWITCH STACK HIGH GAS LOW GAS AIRFLOW VENT...
-
Page 149: Fault Handling
FAULT HANDLING Alarms for Alerts The Alarm Parameter Control Block (see the section above) determines which alerts will cause an alarm (by closing the Lockouts and Alerts alarm contacts) and which will be reported silently. The CB Falcon implements two kinds of faults: lockouts and Thus an alarm might be on because of a lockout or an alert. -
Page 150: Burner Control Operation
BURNER CONTROL OPERATION a. No flame is present, or flame is lost (if enabled-lock- out). b. Lockout Interlock opens) if enabled). Safety Shutdown of Burner Control c. IAS Purge and Ignition enabled and the Interlock opens. Functions d. Pilot terminal energized (if programmed as Inter- rupted Pilot). - Page 151 5. After the ILK switch is closed and the purge rate proving The INITIATE sequence also delays the burner motor from fan RPM is achieved (or High Fire Switch is closed) - being energized and de-energized from an intermittent AC prepurge time is started.
-
Page 152: Parameter Glossary
PARAMETER GLOSSARY Table 30. Parameter Glossary. Parameter Name Short Description Ref. Page Absolute max fan The fan will never be commanded to operate above the RPM provided by this parameter, speed regardless of the rate request. Absolute min fan The fan will never be commanded to operate below the RPM provided by this parameter, speed regardless of the rate request, except by commanding it to turn off. - Page 153 Table 30. Parameter Glossary. Parameter Name Short Description Ref. Page Annunciator 8 The location of the contacts monitored by the A8 annunciator input. location Annunciator 8 long The long name (up to 20 characters) of the A8 annunciator input. name Annunciator mode The annunciator may be fixed, in which the labels and locations of the inputs is pre- assigned, or programmable in which these things may be altered.
- Page 154 Table 30. Parameter Glossary. Parameter Name Short Description Ref. Page Boiler pump overrun This time indicates how long the Boiler pump should remain on after demand ends. time Burner cycle count Burner cycle count. Incremented upon each entry to Run. Can be written to a new value (e.g.
- Page 155 Table 30. Parameter Glossary. Parameter Name Short Description Ref. Page CH outdoor reset If outdoor reset is enabled then the current outdoor temperature is used to determine the enable Setpoint by interpolation using CH Setpoint (or CH Time-Of-Day Setpoint if TOD is on), the min water temperature, and the min and max outdoor temperatures.
- Page 156 Table 30. Parameter Glossary. Parameter Name Short Description Ref. Page DHW forced rate For DHW demand, if this time is non-zero then, upon entry to Run, the firing rate will be held time at the DHW forced rate. DHW frost The DHW frost protection feature can be enabled to turn the DHW pump and possibly fire protection enable the burner whenever the DHW input sensor is too cold.
- Page 157 Table 30. Parameter Glossary. Parameter Name Short Description Ref. Page Fan during off cycle If this parameter is non-zero for a control that is enabled as a LL slave, then it provides the rate modulation rate (e.g. fan speed) that should be used when the LL master indicates this burner should be off but should run its fan at the off cycle rate.
- Page 158 Table 30. Parameter Glossary. Parameter Name Short Description Ref. Page Lead lag hysteresis The time needed for one step of hysteresis shift, when the off hysteresis threshold or on Not available step time hysteresis threshold is shifted due to a burner-on or burner-off event, respectively. Zero at this time.
- Page 159 Table 30. Parameter Glossary. Parameter Name Short Description Ref. Page Minimum stage off Whenever the LL master turns off a stage, it will remain off for at least the amount of time Not available time specified here, before it is requested to turn on again. at this time.
- Page 160 Table 30. Parameter Glossary. Parameter Name Short Description Ref. Page Purge rate proving This parameter specifies the input used to confirm the Prepurge rate has been reached. PWM frequency This parameter provides the frequency of the pulse-width modulation for variable speed fan control.
-
Page 161: Global Modbus
CB Falcon GLOBAL MODBUS PIM: Plug In Module. Plug that can be inserted into the R7910A to enable Lead Lag and to backup and restore parameter settings in the CB Falcon. The following definitions are used in this section: RTU: Remote Terminal Unit serial transmission mode. Mode Modbus: Application layer communication protocol standard used to encode data for Modbus where each 8-bit byte is sent adopted by the Modbus-IDA trade association. - Page 162 Data organization is intended to allow for efficient register access. Status data is organized into register blocks by Table 32. RS-485 Signals. application function and a function status change indicator is used to denote when any data has changed within the register Signal Terminal block since the last time the registers were read (see the...
- Page 163 Table 33. CB Falcon Global Modbus Register Map Address Register Read/ (hex) (dec) Parameter Write Format Note 0000 0000 Status Change Register is cleared (all bits zeroed) after read. Identifies register groups that have new status in them. Bit map: 15-11=Reserved (always 1) 10=Alert log 9=Lockout history...
- Page 164 Table 33. CB Falcon Global Modbus Register Map. (Continued) Address Register Read/ (hex) (dec) Parameter Write Format Note 0003 0003 Annunciation I/O Only applicable when Annunciation is enabled Bit map: 15-8=Reserved (always 0) 7=Annunciator 8 6=Annunciator 7 5=Annunciator 6 4=Annunciator 5 3=Annunciator 4 2=Annunciator 3/LFS 1=Annunciator 2/HFS...
- Page 165 Table 33. CB Falcon Global Modbus Register Map. (Continued) Address Register Read/ (hex) (dec) Parameter Write Format Note 0013-001F 0019- RESERVED 0031 BURNER CONTROL STATUS 0020 0032 Burner control status 0=Disabled 1=Locked out 2=Standby Hold 3=Unconfigured safety data 4-15=Reserved 16=Normal Standby 17=Preparing 18=Firing 19=Postpurge...
- Page 166 Table 33. CB Falcon Global Modbus Register Map. (Continued) Address Register Read/ (hex) (dec) Parameter Write Format Note 002B-002F 0043- RESERVED 0047 SENSOR STATUS 0030 0048 Outlet sensor state 0=None, 1=Normal, 2=Open, 3=Shorted, 4=Outside high range, 5=Outside low range, 6=Not reliable 0031 0049 Inlet sensor state...
- Page 167 Table 33. CB Falcon Global Modbus Register Map. (Continued) Address Register Read/ (hex) (dec) Parameter Write Format Note 0045 0069 CH frost pump demand 0=Off 1=On 0046 0070 CH frost burner demand 0=Off 1=On 0047 0071 Active CH on hysteresis -40°-130°...
- Page 168 Table 33. CB Falcon Global Modbus Register Map. (Continued) Address Register Read/ (hex) (dec) Parameter Write Format Note 006B 0107 System pump idle days Number of days that LL pump has not run (sat idle). count 006C 0108 Boiler pump status See Table 42.
- Page 169 Table 33. CB Falcon Global Modbus Register Map. (Continued) Address Register Read/ (hex) (dec) Parameter Write Format Note 00A6- 0166- RESERVED 00AF 0175 SYSTEM CONFIGURATION 00B0 0176 Product type Product family (MSB): 0=Unknown product 1=Hydronic boiler control Product ID (LSB): 0=Residential control 1=Commercial control 00B1...
- Page 170 Table 33. CB Falcon Global Modbus Register Map. (Continued) Address Register Read/ (hex) (dec) Parameter Write Format Note 00C4 0196 Prepurge rate RPM or % 00C5 0197 Lightoff rate RPM or % 00C6 0198 Postpurge rate RPM or % 00C7 0199 CH forced rate RPM or %...
- Page 171 Table 33. CB Falcon Global Modbus Register Map. (Continued) Address Register Read/ (hex) (dec) Parameter Write Format Note 00E4 0228 Flame sensor type 0=None (no sensor) 1=Flame rod, 2=UV power tube 00E5 0229 Purge rate proving 0=None, 1=HFS, 2=Fan speed 00E6 0230 Lightoff rate proving...
- Page 172 Table 33. CB Falcon Global Modbus Register Map. (Continued) Address Register Read/ (hex) (dec) Parameter Write Format Note 0105 0261 Fan slow-down ramp 0-7000 RPM/sec 0106 0262 Fan gain up 0-65535 0107 0263 Fan gain down 0-65535 0108 0264 Fan minimum duty cycle 1-100% 0109-010F 0265- RESERVED...
- Page 173 Table 33. CB Falcon Global Modbus Register Map. (Continued) Address Register Read/ (hex) (dec) Parameter Write Format Note 0173-017F 0371- Annunciator 6 configuration R/W See Table 36. 0383 0180-018C 0384- Annunciator 7 configuration R/W See Table 36. 0396 018D-0199 0397- Annunciator 8 configuration R/W See Table 36.
- Page 174 Table 33. CB Falcon Global Modbus Register Map. (Continued) Address Register Read/ (hex) (dec) Parameter Write Format Note 01D7 0471 Delta T degrees 0°-130° (0.1°C precision) 01D8 0472 Delta T response 0=Lockout 2=Recycle & delay 01D9 0473 Delta T delay 0-600 seconds, 0xFFFF=Not configured 01DA 0474...
- Page 175 Table 33. CB Falcon Global Modbus Register Map. (Continued) Address Register Read/ (hex) (dec) Parameter Write Format Note 0201 0513 CH ODR minimum outdoor -40°-130° (0.1°C precision) temperature 0202 0514 CH ODR minimum water -40°-130° (0.1°C precision) temperature 0203 0515 CH ODR boost time 0-600 seconds 0204...
- Page 176 Table 33. CB Falcon Global Modbus Register Map. (Continued) Address Register Read/ (hex) (dec) Parameter Write Format Note 0260-0270 0608- Lockout history record 1 Most recent lockout. See Table 34. 0624 0271-0281 0625- Lockout history record 2 2nd newest lockout. See Table 34. 0641 0282-0292 0642- Lockout history record 3...
- Page 177 Table 33. CB Falcon Global Modbus Register Map. (Continued) Address Register Read/ (hex) (dec) Parameter Write Format Note 039C- 0924- Alert log record 11 11th newest alert. 03A1 0929 03A2-03A7 0930- Alert log record 12 12th newest alert. 0935 03A8- 0936- Alert log record 13 13th newest alert.
- Page 178 Table 36. LCI, ILK Terminal Configuration. Byte Offset Parameter Read/Write Format Note Interlock short name Unused 4-23 Interlock name 750-265...
- Page 179 Each alert log record has the format described in Table 38. Table 38. CB Falcon Alert Log Record. Byte Offset Parameter Read/Write Format Note Alert code See Table 39. Cycle See registers 128-129 (decimal). Hours See registers 130-131 (decimal). Unused Occurrence count Number of occurrences of most recent alert.
- Page 180 Table 39. CB Falcon Alert Codes. (Continued) Code Description Note PIM incompatible with product was inserted into socket PIM application parameter revision differs from application processor PIM safety parameter revision differs from safety processor PCB incompatible with product contained in PIM Parameter PCB in PIM is too large for product Range PCB in PIM is too large for product Alert PCB in PIM is too large for product...
- Page 181 Table 39. CB Falcon Alert Codes. (Continued) Code Description Note DHW modulation range (max minus min) was too small Min modulation rate was < absolute min rate Min modulation rate was invalid, % vs. RPM Manual rate was invalid, % vs. RPM Slow start enabled, but forced rate was invalid 108-114 RESERVED Fan was limited to its Minimum Duty Cycle...
- Page 182 Table 39. CB Falcon Alert Codes. (Continued) Code Description Note Lead Lag slave was suspended due to fault LL header temperature was invalid Lead Lag was suspended due to no enabled PIM installed 208-221 RESERVED CH frost protection temperature was invalid CH frost protection inlet temperature was invalid DHW frost protection temperature was invalid 225-230 RESERVED...
- Page 183 Table 39. CB Falcon Alert Codes. (Continued) Code Description Note Abnormal Recycle: Flame was on during Safe Start check Abnormal Recycle: Flame was on during Drive to Purge Rate Abnormal Recycle: Flame was on during Measured Purge Time Abnormal Recycle: Flame was on during Drive to Lightoff Rate Abnormal Recycle: Flame was not on at end of Ignition period Abnormal Recycle: Flame was lost during Main Flame Establishing Period Abnormal Recycle: Flame was lost early in Run...
- Page 184 Table 39. CB Falcon Alert Codes. (Continued) Code Description Note 374-466 RESERVED Internal error: EEPROM write was attempted before EEPROM was initialized Internal error: EEPROM cycle count address was invalid Internal error: EEPROM days count address was invalid Internal error: EEPROM hours count address was invalid Internal error: Lockout record EEPROM index was invalid Internal error: Request to write PIM status was invalid Internal error: PIM parameter address was invalid...
- Page 185 Table 40. Burner Control States. (Continued) State Name Prepurge - Drive to Purge Rate Prepurge - Measured Purge Time Prepurge - Drive to Lightoff Rate Preignition Test Preignition Time Pilot Flame Establishing Period Main Flame Establishing Period Direct Burner Ignition Postpurge Lockout Safety Processor Offline...
- Page 186 Table 41. Pump Status Codes. (Continued) Status Description Note Pump B On - CH frost protection Pump C On - CH frost protection Pump A On - DHW demand Pump B On - DHW demand Pump C On - DHW demand Pump A On - DHW frost protection Pump B On - DHW frost protection Pump C On - DHW frost protection...
- Page 187 changed. If the Modbus master writes the correct OEM address is provided. The Modbus master provides the starting password, the status register indicates this result and all data register address, the number of registers to write, the total with OEM access level and below can be changed. number of bytes, followed by the actual data itself.
- Page 188 Table 43. Modbus Exception Codes. (Continued) Code Name Comment 0x03 ILLEGAL_DATA_VALUE Data in register write is invalid for register 0x10 READ_MULTIPLE_NOT_OK Exceeded maximum registers allowed in read 0x11 ACCESS_FAILURE Invalid password access level for register 0x12 LOGIN_FAILURE Unrecognized password given for login Block Data Transfer the least significant Modbus address, 0x2004, contains the first 2 bytes of data with the first byte in the high order (most...
- Page 189 8. Write 0 (Download) to Transfer Direction register. This NOTE: Not all registers in the Modbus register map (see write starts actual download to begin (Transfer Status Table 33) are included in the PCB “public” register register should change to transfer in progress). context.
- Page 190 Table 45. Fault Code and Troubleshooting. (Continued) Code Description Recommended Troubleshooting of Lockout Codes Waiting for safety data verification Internal Fault. 1. Reset Module. Internal fault: Hardware fault 2. If fault repeats, replace module. Internal fault: Safety Relay key feedback error Internal fault: Unstable power (DCDC) output Internal fault: Invalid processor clock Internal fault: Safety relay drive error...
- Page 191 Table 45. Fault Code and Troubleshooting. (Continued) Code Description Recommended Troubleshooting of Lockout Codes Modulation fault Internal sub-system fault. 1. Review alert messages for possible trends. Pump fault 2. Correct possible problems. Motor tachometer fault 3. If fault persists, replace module. AC inputs phase reversed 1.
- Page 192 Table 45. Fault Code and Troubleshooting. (Continued) Code Description Recommended Troubleshooting of Lockout Codes DHW high limit 1. Check wiring and correct any possible errors. 2. Replace the DHW high limit. 3. If previous steps are correct and fault persists, replace the module.
- Page 193 Table 45. Fault Code and Troubleshooting. (Continued) Code Description Recommended Troubleshooting of Lockout Codes Flame lost in run 1. Inspect the main fuel valve (s) and connection (s). 2. Make sure that the fuel pressure is high enough to supply fuel to the combustion chamber.
- Page 194 Table 45. Fault Code and Troubleshooting. (Continued) Code Description Recommended Troubleshooting of Lockout Codes Interrupted Airflow Switch failed to close 1. Check wiring and correct any possible wiring errors. 2. Check Interrupted Airflow switch(es) to assure proper function. 3. Verify voltage through the airflow switch to the IAS input with a voltmeter.
- Page 195 Table 45. Fault Code and Troubleshooting. (Continued) Code Description Recommended Troubleshooting of Lockout Codes Main valve OFF 1. Check Main Valve terminal wiring and correct any errors. 2. Reset and sequence the module. If fault persist, replace the module. Ignition OFF 1.
- Page 196 Table 45. Fault Code and Troubleshooting. (Continued) Code Description Recommended Troubleshooting of Lockout Codes Invalid BLOWER/HSI output setting 1. Return to program mode and recheck. 2. If fault repeats, verify electrical grounding. Invalid Delta T limit enable setting 3. If fault repeats, replace module. Invalid Delta T limit response setting Invalid DHW high limit enable setting Invalid DHW high limit response setting...
-
Page 197: Appendix B - Falcon Display/Operator Interface
APPENDIX B - CB FALCON DISPLAY / OPERATOR INTERFACE... - Page 199 833-3577 CB-Falcon System Operator Interface USER GUIDE FEATURES • Individual and multiple boiler status, configuration, history, diagnostics, and trend analysis. • Allows configuration and monitoring of the 833-3639 system. • Allows monitoring of the 833-3639 burner control sequence, flame signal, diagnostics, historical files, and faults.
-
Page 200: Preface
833-3577 CB-FALCON SYSTEM OPERATOR INTERFACE PREFACE Included Power Supply: Inputs: 85 to 264 Vac, 47-63 Hz; 120 to 370 Vdc Output: 12 Vdc; 0 to 2.1 A. This User Guide is intended to provide a general overview of Power: 25W the 833-3577 Operator Interface. -
Page 201: Safety Features
833-3577 CB-FALCON SYSTEM OPERATOR INTERFACE SAFETY FEATURES 12. Wire the connector to the power supply and the RS-485 cables using the wiring diagram in Fig. 2. 13. Ensure the 9-pin connector plug is aligned with the The 833-3577 contains software that incorporates many header pin when inserting the 9-pin connector plug back features that are designed to guide you safely through the onto the 833-3577. -
Page 202: Quick Setup
833-3577 CB-FALCON SYSTEM OPERATOR INTERFACE LOCAL DISPLAY COM2 COM1 NEUTRAL (L2) 120VAC (L1) EARTH MEAN WELL S-25-12 GROUND POWER SUPPLY 12 DC OUT + DC OUT (COMMON GND) V ADJ WIRING KEY ECOM LINE VOLTAGE LOW VOLTAGE HYDRONIC CONTROL DATA DO NOT CONNECT THE LOCAL DISPLAY TO TERMINALS 1 2 3. -
Page 203: Page Navigation
833-3577 CB-FALCON SYSTEM OPERATOR INTERFACE The 833-3639 icon button will appear in one of four colors indicating the boiler status. • Blue: Normal operation • Red: Lockout condition • Gray: Standby mode (burner switch off) • Gray and crossed out: 833-3639 communication error (disconnected or powered off) Up to 8 833-3639s can be displayed on the System Home page. - Page 204 833-3577 CB-FALCON SYSTEM OPERATOR INTERFACE HOME PAGE STATUS SUMMARY BUTTON FLOW BACK BUTTON FLOW CONFIGURATION HISTORY STATUS DIAGNOSTICS MENU DETAIL SAFETY PASSWORD CONFIGURATION CONFIGURATION CONFIGURATION VERIFICATION GROUP GROUP GROUP M28201 Fig. 5. Page flow. Keyboard keep the original text value. Pressing the OK or Cancel buttons returns the user to the page displayed prior to the Some pages request user entry of characters.
-
Page 205: Configuration Password
833-3577 CB-FALCON SYSTEM OPERATOR INTERFACE No specific order for configuring the 833-3639 is required. All parameters are enabled for editing, though some may not be applicable (e.g., a configuration parameter may disable an 833-3639 feature). Selecting a parameter group from the menu displays parameters exclusively applicable for the functional group on the page (see Fig. - Page 206 833-3577 CB-FALCON SYSTEM OPERATOR INTERFACE Three levels of write access to 833-3639 parameters are permitted. Each access level has defined rights when interfacing with configuration and status parameters in the 833-3639. • End user: the lowest access rights (no password login). The end user can, in most cases, only read or view 833- 3639 parameters.
- Page 207 833-3577 CB-FALCON SYSTEM OPERATOR INTERFACE button is enabled that allows the user to conduct verification sessions (the Verify button in Fig. 8 is not yet enabled because the user hasn’t logged in). NOTE: When the user proceeds with the safety parameter configuration the 833-3577 requests that the 833- 3639 enter this mode.
- Page 208 833-3577 CB-FALCON SYSTEM OPERATOR INTERFACE Fault/Alarm Handling Each 833-3639 reports a fault code when a lockout condition occurs for one of the following annunciations: • Burner control • Lockout • Lead/Lag control A less serious alarm condition may also occur that is treated as warning instead of a fault.
- Page 209 833-3577 CB-FALCON SYSTEM OPERATOR INTERFACE Table 3. 833-3639 Alert Log. (Continued) number with description. Detailed information for a specific fault entry that also includes burner control sequence state, Data Comment burner run-time hours, annunciation status, etc., is viewed by selecting (touching the History line) the lockout entry in the list Alert code Unique code defining which (see “Fault/Alarm Handling”...
- Page 210 833-3577 CB-FALCON SYSTEM OPERATOR INTERFACE Fig. 19. 833-3639 alert log. Fig. 21. 833-3639 alert detail. To see additional detail about a lockout or alert, select the Operation Page lockout/alert in the list to display the lockout detail or alert detail pages, as shown in Fig. 20 and 21. The operation page displays the 833-3639 running operation, including setpoint and firing rate values.
- Page 211 833-3577 CB-FALCON SYSTEM OPERATOR INTERFACE Fig. 25. Diagnostic page (digital I/O). Fig. 23. Programmable annunciation. 833-3639 analog I/O can also be viewed on the 833-3577. A snapshot of the diagnostic status is displayed and updated as it changes in the 833-3639. The analog I/O data is displayed as bar charts with the I/O level represented in the I/O range (see Fig.
- Page 212 833-3577 CB-FALCON SYSTEM OPERATOR INTERFACE A 2-dimensional graph with status data values shown on the Y axis over time specified on the X axis is displayed. Status for the most recent time is represented on the left side of the graph with older status running towards the right side of the graph.
-
Page 213: Configuration
833-3577 CB-FALCON SYSTEM OPERATOR INTERFACE CONFIGURATION Each 833-3639 can be configured individually from the 833- 3577. The 833-3639 configuration is grouped into the following functional groups: • System Identification & Access • CH - Central Heat Configuration • Outdoor Reset Configuration •... - Page 214 833-3577 CB-FALCON SYSTEM OPERATOR INTERFACE 833-3639 Configuration Parameters Once all 833-3639s are located the 833-3639s must be synchronized with the 833-3577 before they can be displayed. The following pages list the configuration parameters New 833-3639s are not displayed on the Home page until this available for each 833-3639 installed on the system.
- Page 215 833-3577 CB-FALCON SYSTEM OPERATOR INTERFACE Table 6. Central Heat Configuration Parameters. Table 5. System Identification Information. Parameter Comment Status Comment CH on hysteresis Differential from setpoint when boiler is turned on. 0 °C - 130 °C (32 °F - Product Type Type of product that the burner is 266 °F) OS Number...
- Page 216 833-3577 CB-FALCON SYSTEM OPERATOR INTERFACE Table 7. Outdoor Reset Configuration Parameters. Table 8. Domestic Hot Water (DHW) Parameter Comment Configuration Parameters. Lead Lag minimum -40 °C - 130 °C (-40 °F - 266 °F) Parameter Comment water temperature DHW enable Disable or Enable Domestic Hot Lead Lag outdoor 0-600 seconds...
- Page 217 833-3577 CB-FALCON SYSTEM OPERATOR INTERFACE Modulation Configuration Parameters Pump Configuration Parameters Table 9 displays Modulation configuration parameters. Table 10 displays Pump configuration parameters. Fig. 37. Pump configuration. Fig. 36. Modulation configuration. Table 10. Pump Configuration Parameters. Table 9. Modulation Parameter Comment Configuration Parameters.
- Page 218 833-3577 CB-FALCON SYSTEM OPERATOR INTERFACE Table 10. Pump Configuration Parameters. (Continued) Table 11. Statistics Configuration Parameters. Parameter Comment Parameter Comment DHW pump overrun 0-600 seconds Burner cycles 0-999,999 time 0 = Not configured Burner run time Hours DHW pump frost 0-600 seconds CH pump cycles 0-999,999...
- Page 219 833-3577 CB-FALCON SYSTEM OPERATOR INTERFACE Stack Limit Configuration Parameters Other Limit Configuration Parameters Table 13 displays stack limit configuration parameters. Table 14 displays other limit parameters. Fig. 40. Stack Limit configuration. Fig. 41. Other Limit configuration. Table 13. Stack Limit Configuration Parameters. Table 14.
- Page 220 833-3577 CB-FALCON SYSTEM OPERATOR INTERFACE Anti-Condensation Configuration Parameters Frost Protection Parameters Table 15 displays anti-condensation parameters. Table 16 displays frost protection parameters. Fig. 42. Anti-condensation configuration. Fig. 43. Frost Protection configuration. Table 15. Anti-Condensation Configuration Parameters. Table 16. Frost Protection Configuration Parameters. Parameter Comment Parameter...
- Page 221 833-3577 CB-FALCON SYSTEM OPERATOR INTERFACE Annunciation Configuration Parameters Safety Configuration Parameters Table 17 displays annunciation configuration parameters. Table 18 through 21 display safety parameters. Fig. 44. Annunciation configuration. Fig. 45. Burner Control Interlocks control. Table 17. Annunciation Configuration Parameters. Table 18. Burner Control Interlocks Configuration.
- Page 222 833-3577 CB-FALCON SYSTEM OPERATOR INTERFACE Table 20. Burner Control Ignition Configuration. Parameter Comment Pilot test hold Ignition source Hot Surface Igniter External ignition Internal ignition Pilot type Direct burner ignition Intermittent Interrupted Lightoff rate Preignition time 0-600 seconds 0 = Not configured Pilot Flame 15 secs Establishing Period...
- Page 223 833-3577 CB-FALCON SYSTEM OPERATOR INTERFACE Safety Parameter Verification After successful login, the user presses the Begin button to start safety parameter verification. See Fig. 51. When any of the safety configuration parameters are changed, the safety parameter verification procedure must be performed before the 833-3639A will resume burner control.
- Page 224 833-3577 CB-FALCON SYSTEM OPERATOR INTERFACE After the first safety parameter group has been confirmed by After all safety parameter groups have been verified, the user the user (by pressing the Yes button), the next safety must press the Reset button on the 833-3639A within 30 parameter group waits for verification as shown in Fig.
- Page 225 833-3577 CB-FALCON SYSTEM OPERATOR INTERFACE If for some reason the user does not press the Reset button Table 22. 833-3639 System on the 833-3639A within 30 seconds, the configuration is Configuration Parameters. (Continued) cancelled, as shown in Fig. 57. Parameter Comment Modulation output 4-20mA...
-
Page 226: Monitoring
833-3577 CB-FALCON SYSTEM OPERATOR INTERFACE MONITORING The 833-3577 can direct the 833-3639 to start or stop its burner control function. The user is required to enter the installer password, if not already entered, before the burner Monitoring of the hydronic system is accomplished through control can be stopped or started. - Page 227 833-3577 CB-FALCON SYSTEM OPERATOR INTERFACE Table 25. DHW Status. Data Comment Demand source CH, DHW, Lead Lag, or Frost Protection (parameter that has current priority) DHW status Disabled, Normal, Suspended DHW demand Yes or No request DHW temperature DHW temperature (NTC 10K analog) or N/A (digital switch) DHW sensor state None, Monitor, Blocked, Lockout,...
- Page 228 833-3577 CB-FALCON SYSTEM OPERATOR INTERFACE Table 26. Burner Control Status. (Continued) Data Comment Burner Lockout/Hold Display source for lockout/hold status Delay time Running display of delay time when burner control in delay state. Firing rate % or RPM. Adjustable when firing rate control set to Manual.
- Page 229 833-3577 CB-FALCON SYSTEM OPERATOR INTERFACE Fig. 71. Demand and Modulation Status menu (top). Fig. 70. Burner Control Status menu (bottom). Burner control can be turned on and off in the 833-3639 by the user. Table 28 displays the status page data for 833-3639 demand and modulation.
- Page 230 833-3577 CB-FALCON SYSTEM OPERATOR INTERFACE Table 29 displays the status page data for the pump in the 833-3639. Table 30. 833-3639 Pump Status. Data Comment Auxiliary pump On or Off (Auxiliary pump switch) Auxiliary pump idle Days days Boiler pump On or Off (Boiler pump switch) Boiler pump idle days Days Boiler pump overrun...
- Page 231 833-3577 CB-FALCON SYSTEM OPERATOR INTERFACE The bar graph displayed for this status is the flame signal. Fig. 76. 833-3639 Pump Status menu (middle). Fig. 78. Flame Detection Status menu. NOTE: This same status is also displayed for burner control status. A separate status group is defined, however, to provide a bar graph of the flame signal and to automatically launch a flame signal trend analysis.
- Page 232 833-3577 CB-FALCON SYSTEM OPERATOR INTERFACE Fig. 79. 833-3639 Statistics Status menu (top). Fig. 81. Stack Limit Status menu. Table 34 shows the status page data when Delta T Limit is configured for the 833-3639. Table 34. Delta T Limit Status. Data Comment Delta T limit...
- Page 233 833-3577 CB-FALCON SYSTEM OPERATOR INTERFACE Table 35. Outdoor Status. Data Comment Outdoor temperature Outdoor temperature (same as bar graph) Outdoor sensor state None, Monitor, Open, Short, Alarm (None=no outdoor temp sensor) The bar graph displayed for this status is the outdoor sensor temperature.
- Page 234 833-3577 CB-FALCON SYSTEM OPERATOR INTERFACE The bar graph and trend analysis displayed for this status is the outlet sensor temperature. See Fig. 60. Table 38 shows the status page data when Lead Lag is configured for the 833-3639. Table 38. Lead Lag Status. Data Comment Type...
- Page 235 833-3577 CB-FALCON SYSTEM OPERATOR INTERFACE Fig. 89. Lead Lag Status menu (middle). Fig. 91. Trend analysis page. Up to 4 833-3639 status variables can be viewed at the same time on one trend analysis graph. Select the status variables for the graph on the menu page (see Fig. 92). This menu displays when the Trend Analysis button is selected on the 833-3639 status page.
- Page 236 833-3577 CB-FALCON SYSTEM OPERATOR INTERFACE Fig. 95. Trend analysis page with demand source. Fig. 93. Trend analysis menu page. If any of the status variables has degrees as a unit of Each status variable displayed in the trend analysis is measurement, degrees is used for the main Y axis (on the left represented by a different colored line, as follows: of the graph).
- Page 237 833-3577 CB-FALCON SYSTEM OPERATOR INTERFACE NOTE: For system trend analysis graphs the Clear button isn’t present, so no status variables can be cleared. A snapshot of the trend analysis graph can be taken and saved to the 833-3577. The user is asked to confirm the save before it occurs.
-
Page 238: 833-3639 Diagnostics
833-3577 CB-FALCON SYSTEM OPERATOR INTERFACE Table 39. 833-3639 Trend Analysis Data. (Continued) Data Comment Central Heat Operation Analysis Domestic Hot Water Operation Analysis Vessel Analysis Trend Analysis Snapshot The trend analysis snapshot file is stored in Comma Separated Value (CSV) format in the 833-3577 so it can be imported into a spreadsheet program such as Microsoft Excel. - Page 239 833-3577 CB-FALCON SYSTEM OPERATOR INTERFACE Table 40. 833-3639 Digital I/O Data. Data Comment Load Control Input On/Off STAT On/Off Pre-ignition interlock On/Off Interlock On/Off Time Of Day On/Off Annunciator 1-6 On/Off High Fire/Annunciator 7 On/Off Low Fire/Annunciator 8 On/Off Reset switch On/Off Pilot test hold On/Off...
-
Page 240: Display Setup And Diagnostics
833-3577 CB-FALCON SYSTEM OPERATOR INTERFACE INSTALLER CHECKOUT Diagnostics Tests Pressing the Diagnostics Test button launches the diagnostic tests. The first test displayed on the right side of the screen is the last selected test shown, as seen in Fig. 104. This screen enables the user to perform the following tests: Modulation Test: enables the user to verify that the burner is firing at the correct rate. - Page 241 833-3577 CB-FALCON SYSTEM OPERATOR INTERFACE Fig. 108. Setup settings changed. Fig. 110. Screen disabled for cleaning. When the user wants to clean the touch screen, the “CLEAN Pressing the “SYSTEM CONFIGURATION” button starts up SCREEN” button is selected to freeze touch input temporarily for the system configuration.
- Page 242 833-3577 CB-FALCON SYSTEM OPERATOR INTERFACE Table 42. Configurable Parameters. (Continued) Table 42. Configurable Parameters. (Continued) Table Page Table Page Parameter Comment Parameter Comment CH enable Disable or Enable Central CH maximum -40 °C - 130 °C (-40 °F - 266 Heating Loop outdoor °F)
- Page 243 833-3577 CB-FALCON SYSTEM OPERATOR INTERFACE Table 42. Configurable Parameters. (Continued) Table 42. Configurable Parameters. (Continued) Table Page Table Page Parameter Comment Parameter Comment DHW enable Disable or Enable Domestic Hot CH maximum RPM or % Water Loop modulation rate Sensor for Central Heat demand demand: RPM or %...
- Page 244 833-3577 CB-FALCON SYSTEM OPERATOR INTERFACE Table 42. Configurable Parameters. (Continued) Table 42. Configurable Parameters. (Continued) Table Page Table Page Parameter Comment Parameter Comment Auxiliary Auto Auxiliary 0-999,999 pump control pump cycles Auxiliary CH pump is ON Boiler pump 0-999,999 pump is on DHW pump is ON cycles when...
- Page 245 833-3577 CB-FALCON SYSTEM OPERATOR INTERFACE Table 42. Configurable Parameters. (Continued) Table 42. Configurable Parameters. (Continued) Table Page Table Page Parameter Comment Parameter Comment Enabled PII enable Enabled anticondensa Disabled Disabled tion enable LCI enable Enabled Normal (no change) Disabled anticondensa CH pump forced off Interrupted Enable during purge and...
-
Page 246: Advanced Setup
833-3577 CB-FALCON SYSTEM OPERATOR INTERFACE Table 42. Configurable Parameters. (Continued) Table 42. Configurable Parameters. (Continued) Table Page Table Page Parameter Comment Parameter Comment Pilot test hold ON Absolute maximum fan speed Ignition Hot Surface Igniter source External ignition Absolute Internal ignition minimum fan speed Pilot type... - Page 247 833-3577 CB-FALCON SYSTEM OPERATOR INTERFACE be enabled for the Software Server Connectivity check to function properly (the Check button). If the Ethernet interface is disabled, the check procedure fails. The 833-3577 must be assigned an IP address by a DHCP server for it to operate on the local network, so the Use DHCP box should be checked.
-
Page 248: System Time
833-3577 CB-FALCON SYSTEM OPERATOR INTERFACE Display Diagnostics System Time Pressing the Diagnostics button displays a page (Fig. 113) System time can be configured in the 833-3577 and applied to that permits some 833-3577 hardware diagnostics to be all 833-3639s that exist in the installation. A date and time is performed. - Page 249 833-3577 CB-FALCON SYSTEM OPERATOR INTERFACE Fig. 116. Code version—top view. Fig. 118. Processor Reset. When the CPU is reset, the 833-3577 will reboot and automatically seek out all Modbus™ devices connected to it. When the search is complete, the 833-3577 will report how many burner/boiler systems were found, as shown in Fig.
- Page 250 833-3577 CB-FALCON SYSTEM OPERATOR INTERFACE Table 43. Status Tables. Name Table # Page # Burner Control Demand and Modulation Inlet High Limit Pump Flame Detection Statistics Stack Limit Delta T Limit Outdoor Fig. 119. User Preferences. CH Frost Protection The Multiple Modbus™ Masters (share interface) checkbox DHW Frost Protection permits the Modbus™...
-
Page 251: Appendix C - Gas Valve
APPENDIX C - GAS VALVE INSTALLATION AND MAINTENANCE... -
Page 253: Application
V4730C/V8730C/V4734C 1:1 Gas/Air Servo Regulated Gas Valves Product data CONTENTS Application ............1 Features ..............1 Specifications ............2 Ordering Information..........3 Installation ............13 Electrical Connections ........14 Adjustments and Final Checkout ......14 Operation ............15 Troubleshooting..........16 Service Information ..........16 Note: Photo shows valve with manual safety shutoff valve and venturi installed. -
Page 254: Specifications
V4730C/V8730C/V4734C 1:1 Gas/Air Servo Regulated Gas Valves SPECIFICATIONS The specifications in this section are related to the Venturi Mixing Unit (VMU) and Combination Gas Valve. Models: See Table 1 Table 1: Model Information Model Number Size (in.) Voltage/Frequency V1 + V2 Total Current Capacity (Natural Gas 0.64sp.gr) V4730C1006 120 Vac, 50/60 Hz... -
Page 255: Ordering Information
V4730C/V8730C/V4734C 1:1 Gas/Air Servo Regulated Gas Valves ORDERING INFORMATION When purchasing replacement and modernization products from Accessories: your TRADELINE® wholesaler or distributor, refer to the FL020008 Mesh Screen. TRADELINE® Catalog or price sheets for complete ordering Flange Kits (see Table 2). number. - Page 256 V4730C/V8730C/V4734C 1:1 Gas/Air Servo Regulated Gas Valves Fig. 1: V4730C/V8730C Gas Valves, 1/2 in. (13 mm) and 3/4 in. (19 mm) size, dimensions in in. (mm). Fig. 2: V4730C/V8730C Gas Valves, 1 in. (25 mm) size, dimensions in in. (mm). EN2R-9074 0612R1-NE...
- Page 257 V4730C/V8730C/V4734C 1:1 Gas/Air Servo Regulated Gas Valves Fig. 3: V4730C/V8730C Gas Valves, 1-1/4 in. (32mm) size, dimensions in in. (mm). Fig. 4: V4734C Gas Valves 1-1/4 in. (32mm) size, dimensions in in. (mm). EN2R-9074 0612R1-NE...
- Page 258 V4730C/V8730C/V4734C 1:1 Gas/Air Servo Regulated Gas Valves Fig. 5: Venturi 150-335 kW, with 1/2 in. to 1 in. gas valves and valve shutoff kit installed dimensions in in. (mm). See Table 3 for dimensions Table 3: Dimensions in inches (millimeters) Valve Size in inches 1/2, 3/4 6 - 1/4 (159)
- Page 259 V4730C/V8730C/V4734C 1:1 Gas/Air Servo Regulated Gas Valves Fig. 6: Venturi 500kW, with V4730 gas vlave and valve shutoff kit installed, dimensions in in. (mm), part 1. EN2R-9074 0612R1-NE...
- Page 260 V4730C/V8730C/V4734C 1:1 Gas/Air Servo Regulated Gas Valves Fig. 7: Venturi, 500 kW, with V4730 gas valve and valve shutoff kit installed, dimensions in in. (mm), part 2 EN2R-9074 0612R1-NE...
- Page 261 V4730C/V8730C/V4734C 1:1 Gas/Air Servo Regulated Gas Valves Fig. 8: V4734 + VMU 500/680 EN2R-9074 0612R1-NE...
- Page 262 V4730C/V8730C/V4734C 1:1 Gas/Air Servo Regulated Gas Valves Fig. 9: Capacity curves for V4730C/V8730C and VMU 150 Venturi, 1/2 in. size. Fig. 10: Capacity curves for V4730C/V8730C and VMU 300 Venturi, 3/4 in. size EN2R-9074 0612R1-NE...
- Page 263 V4730C/V8730C/V4734C 1:1 Gas/Air Servo Regulated Gas Valves Fig. 11: Capacity curves for V4730C/V8730C and VMU 300 Venturi, 1 in. size. Fig. 12: Capacity curves for V4730C/V8730C and VMU 335 Venturi, 1-1/4 in. size. EN2R-9074 0612R1-NE...
- Page 264 V4730C/V8730C/V4734C 1:1 Gas/Air Servo Regulated Gas Valves Fig. 13: Capacity curves for V4730C/V8730C and VMU 500 Venturi, 1-1/4 in. size. Fig. 14: Capacity curves for V4734C/V8734C and VMU 680 Venturi, 1-1/4 in. size. EN2R-9074 0612R1-NE...
-
Page 265: Installation
V4730C/V8730C/V4734C 1:1 Gas/Air Servo Regulated Gas Valves INSTALLATION When Installing This Product... Mounting Locations 1. Read these instructions carefully. Failure to follow them could The distance between the gas valve and the wall/ground must be damage the product or cause a hazardous condition. a minimum of 11-5/16 in. -
Page 266: Electrical Connections
V4730C/V8730C/V4734C 1:1 Gas/Air Servo Regulated Gas Valves ELECTRICAL CONNECTIONS WARNING Electrical Shock Hazard. Can cause severe injury or death. Disconnect the power supply before beginning wiring to prevent electrical shock. More than one disconnect may be involved. Wiring 1. Use 14, 16 or 18 AWG copper conductor, 600 volt insulation, moisture-resistant wire for line voltage connections. -
Page 267: Operation
V4730C/V8730C/V4734C 1:1 Gas/Air Servo Regulated Gas Valves OPERATION The V4730C/V8730C/V4734C are normally closed valves. The 13. To test the second SSOV, remove the 1/8 in. (3 mm) NPT plug from the flange pressure tap point 4. valves open when energized and close when power is removed. 14. -
Page 268: Troubleshooting
V4730C/V8730C/V4734C 1:1 Gas/Air Servo Regulated Gas Valves TROUBLESHOOTING 3. If there is still no voltage at the valve leadwires or terminal WARNING block, make sure all appropriate contacts in the thermostat Electrical Shock Hazard. Can cause severe inju- or controller, limits and flame safeguard control are closed. If ry, death or property damage. - Page 270 e-mail: info@cleaver-brooks.com Web Address: http://www.cleaver-brooks.com...
Need help?
Do you have a question about the CFC and is the answer not in the manual?
Questions and answers
need help changing outdoor reset curve controller set up
To change the outdoor reset curve controller setup for a CleaverBrooks CFC, follow these steps:
1. Go to the Falcon Master host.
2. Start from the Home page.
3. Navigate to the Lead Lag Master configuration group.
4. Enter Advanced Settings.
5. Adjust the parameters that define the outdoor reset (ODR) curve:
- Minimum outdoor temperature (e.g., 0°F).
- CH setpoint temperature (e.g., 180°F).
- Maximum outdoor temperature (e.g., 80°F).
- Low water temperature (e.g., 70°F).
6. The ODR curve endpoints are defined by:
- (Minimum Outdoor Temp, CH Setpoint)
- (Maximum Outdoor Temp, Low Water Temp)
7. Ensure the minimum boiler water temperature parameter is set appropriately to maintain a lower limit for the ODR setpoint.
Adjust these values as needed for your specific application.
This answer is automatically generated
can some one call me im not seeing these options