
Related Manuals for Ricoh Y033


Summary of Contents for Ricoh Y033
- Page 1 Soleil-PJ1Training Y033/Y034/Y036 Service Training Soleil-PJ2 Version 1.0 Slide 1 This training course provides service technician training for the Soleil-PJ series.
-
Page 2: Service Training
Soleil-PJ1Training Y033/Y034/Y036 Service Training Important Changes Slide 2 This section provides an overview of the machine, and the options that can be installed. - Page 3 Soleil-PJ1Training Changes from the predecessor model Brightness of the lamp increased from 2500lm to 3300lm. Position of the intake fan changed from the left side of the unit to the bottom of the unit. New speaker system (DiMAGIC) with 3 sound modes: - Normal mode - Music mode - Narration mode...
- Page 4 Soleil-PJ1Training Changes from the predecessor model connection port layout Bottom view of the Intake fan New air flow Slide 4 No additional notes...
- Page 5 Soleil-PJ1Training Y033/Y034/Y036 Service Training Product Overview Slide 5 This section provides an overview of the machine, and the options that can be installed.
- Page 6 31.7 cm from the wall for 80-inch display 18.8 cm from the wall for 48-inch display The Y033 cannot be used as a network projector. This model does not work with 'Network Utility‘, ‘Projector Management Utility’, or @Remote.
-
Page 7: Main Specifications
Soleil-PJ1Training Main Specifications Comparison with the Predecessor Model Soleil-PJ2a Soleil-PJ2b Soleil-PJ2d Solel-PJ1a Soleil-PJ1b Y033 Y034 Y036 (PJWX4141) (PJWX4141N) (PJWX4141NI) Type Brightness 2500 lm 3300 lm High-pressure mercury lamp High-pressure mercury lamp Lamp type (Standard mode: 225 W, Eco (Standard mode: 250 W, Eco mode: 170 W) - Page 8 Soleil-PJ1Training Features This product can be installed by users. This product is designed for user maintenance. Regular on-site maintenance is not needed. There is no display panel, but LEDs show the symptoms for troubleshooting (blinking/lit, number of times the LEDs blink, etc). ...
-
Page 9: Projection Distance
Soleil-PJ1Training Projection Distance Screen 48 inch 261mm 188mm 117mm 91mm 60 inch 310mm 235mm 166mm 115mm 80 inch 393mm 317mm 249mm 155mm a. From the screen to the front of the body b. From the screen to the optical outlet c. -
Page 10: Network Feature
Easy network setup For network projection, Soleil-PJ2 has an installation-free network utility. Just download the file from the Ricoh website to your PC or execute the program on the attached CD, and you are ready to project images. -
Page 11: Network Features
Soleil-PJ1Training Network Features @Remote capability Remaining Lamp hour information Power and status reporting Projection server function JPEG files stored on a web server can be projected without a PC. Files can be uploaded onto the web server using the supplied software: JPEG conversion tool type A. - Page 12 Soleil-PJ1Training New Options - Interactive Function Soleil-PJ2d contains an electronic pen, adapters for the projector and computer, and a drawing software as accessories. Drawing software Adapters Adapters Drawing software Electronic pen Electronic pen For Projector (Cartridge) For Projector (Cartridge) Support language :English/Chinese/ Japanese Support language :English/Chinese/ Japanese For PC (USB dongle)
- Page 13 Soleil PJ1b (PJ WX4130N), Regulus (PJ X3241N, PJ WX3231N) Connectivity Connection with less than 10 units in a meeting is preferable Free download from the iTunes store *You need to install iTunes on your PC before searching for the Ricoh Smart presenter. Operating instructions http://www.ricoh.co.jp/software/other/rtp/ Slide 13...
- Page 14 Soleil-PJ1Training Low Energy Consumption 3,500 hour lamp life and lower power consumption in Eco mode 0.5W power consumption in standby mode Slide 14 Note that in the service mode menu, Eco Mode is referred to as ‘Low Mode’.
-
Page 15: Consumables And Options
Soleil-PJ1Training Consumables and Options Replacement lamp (Y216) Mercury lamp Life: 3500 hours (standard mode), 5000 hours (Eco mode) » The lamp is regarded as having reached its yield when its maximum brightness has decreased to 50% of the original level. -
Page 16: Cabinet And Stand
Soleil-PJ1Training Cabinet and Stand Please note that these options will be locally procured or purchased from 3 parties. ■ ■ ■ ■ Simple cabinet Smart stand Simple cabinet Smart stand Size: W400xD230xH450mm Stand part: W261xD148mm Size: W400xD404xH605 – 805mm, Top face: W350xD404mm Material: Steel, Powder coating Material: Steel, Melamine coating Supplied with screws x 2... - Page 17 Soleil-PJ1Training Installation Patterns [A] Standard The projector is placed in front of a screen onto which the images are projected. [B] Rear The projector is placed behind the screen onto which the images are projected. [C] Ceiling The projector is mounted on the ceiling in front of a screen onto which the images are projected.
-
Page 18: Reliability Information
Soleil-PJ1Training Reliability Information Average monthly projection time: 58.3 hrs/month 2.65 hrs/day x 22 working days/month Failure Rate 1st year: 0.00269 cases/unit/month 2nd year: 0.0032 cases/unit/month 3rd year: 0.00406 cases/unit/month The failure rate of a projector increases with its total power-up time. - Page 19 Soleil-PJ1Training Lamp Near-end/End Alerts There is no near-end alert. The lamp end alert occurs when the machine calculates that the life time has expired. If used in Normal Mode only, the alert appears after 3,500 hrs projection time ...
- Page 20 Soleil-PJ1Training Disposal of Broken Lamps Projector lamps normally contain mercury vapour. These lamps can rupture due to impact or being used longer than their life expectancy. The time that the breakage will occur differs widely for each lamp and its circumstances of use.
-
Page 21: Operation At High Altitude
Soleil-PJ1Training Operation at High Altitude In a high-altitude location (higher than 1500 m above sea level) where air is thin, cooling efficiency is reduced so use the projector with [High Altitude Mode] turned [On]. Slide 21 No additional notes... -
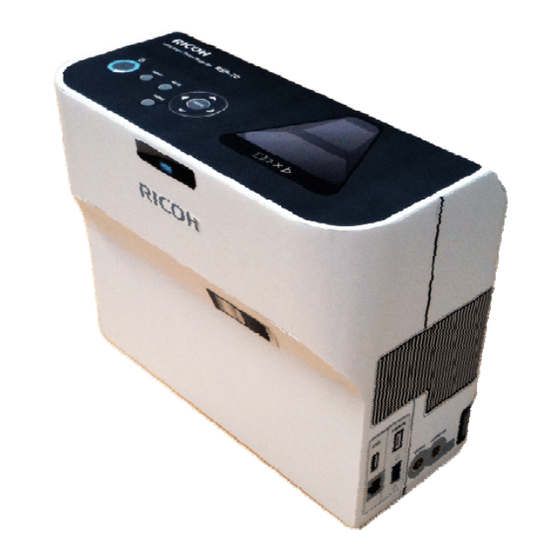
Page 22: External View
Soleil-PJ1Training External View Lens Basic operation keys Intake vent Optical receiver Exhaust vent Speaker Right Left Focus adjuster Front Interfaces Slide 22 Optical receiver: For the remote controller... -
Page 23: Operation Panel
Soleil-PJ1Training Operation Panel The three LEDs are used to show symptoms for troubleshooting. Remote Controller Slide 23 No additional notes... -
Page 24: Connection Ports
Soleil-PJ1Training Overview Connection Ports Interface 1. USB port: For connecting a USB memory device or USB device cable. Accepts JPEG and MPEG2 file formats. 2. HDMI port: For connecting an HDMI (High-Definition Multimedia Interface) cable. 3. Video In port: For inputting image signals from a video player. - Page 25 Soleil-PJ1Training Optical Components: DLP Projectors The DMD chip is the central part of this type of projector. In this model, it is called the DLP chip, not the DMD chip. A DMD chip consists of many small pixel-sized mirrors laid out on a semi- conductor chip.
- Page 26 Soleil-PJ1Training DLP Chip R, G, and B signals from the image generating device are sent to the DLP chip, and timed so that the red signal arrives at the same time that the red part of the wheel is in the beam path, and similarly for the green and blue signals.
- Page 27 Soleil-PJ1Training Optical Components of this Series Free-form surface mirror: Allows this to be an ultra short throw projector Concave Mirror Cylinder Mirror DMD (Digital Microo- mirror Device) Relay lens Light Pipe (also known as the Rod) Mercury Lamp Color Wheel Focus Lever Slide 27 No additional notes...
- Page 28 Soleil-PJ1Training Optical Components of this Series 1. Dust Shield Glass 2. Mirror 3. Projection Lens Slide 28 No additional notes...
-
Page 29: Color Wheel
Soleil-PJ1Training Color Wheel In this series, the color wheel has cyan, yellow, and white sectors in addition to the usual red, green, and blue. Slide 29 No additional notes... -
Page 30: Component Layout
Soleil-PJ1Training Component Layout 1. Exhaust fan 2. Exhaust duct 3. Lamp housing 4. Lamp fan 5. Interface board 6. Intake fan (for cooling the DMD) 7. Main board 8. Network board (for Y034/Y036) 9. Lamp ballast 10. PSU Slide 30 No additional notes... -
Page 31: Air Flow
Soleil-PJ1Training Air Flow 1. Intake fan 2. Lamp fan 3. Intake vent 4. Exhaust fan Slide 31 No additional notes... -
Page 32: System Block Diagram
Soleil-PJ1Training System Block Diagram System Block Diagram Slide 32 Slide 32 Network board: Y034/Y036... - Page 33 Soleil-PJ1Training Boards Main board (MB): Power/signal control and processing DMD board (DMD BD): Image signal processing and DMD control Network board (for Y034/Y036): Network connection Lamp driver (Ballast): Starts the lamp When the lamp is being lit, the voltage is over 10,000V.
-
Page 34: Service Training
Soleil-PJ1Training Y033/Y034/Y036 Service Training Basic Points about Service Slide 34 This section explains the basic points about servicing the machine. -
Page 35: Entering Service Mode
Soleil-PJ1Training Entering Service Mode Hold down “Enter" and "Menu" simultaneously for 2 seconds. Then press the left button, then the down button, then the up button. Then press and hold the [Enter] button on the projector for longer than 2 seconds. -
Page 36: Led Display
Soleil-PJ1Training LED Display LEDs The status of the three LEDs on the front panel indicate the machine’s condition. See the table ‘LED Display’ in the Troubleshooting section of the service manual. Slide 36 No additional notes... - Page 37 Soleil-PJ1Training Y033/Y034/Y036 Service Training Replacing Components Slide 37 This section shows the main points about replacing parts, and how to calibrate the machine after installing new parts.
- Page 38 Soleil-PJ1Training Replacement Flow Chart This shows which parts must be removed to access the various components of the machine. Slide 38 See the service manual for details of the procedures. The next few slides will cover the main points.
- Page 39 Soleil-PJ1Training Adjustments Required after Replacement Keystone Sub Contrast Color Wheel Index Delay Main Board Operation Panel Board Optical Engine The above table shows which adjustments are needed after replacing the Main Board or Optics Engine. The adjustments are in the service manual. Slide 39 Keystone ...
-
Page 40: Replacing The Lamp
Soleil-PJ1Training Replacing the Lamp To replace the lamp, unplug the power cord and then wait for 60 minutes. Slide 40 No additional notes... -
Page 41: Replacing The Mainboard
Soleil-PJ1Training Replacing the Main Board You must enter the color wheel index delay after installing the new board. Input the last 3 digits of the value printed on the label attached to the optics engine unit. Also you must do keystone calibration and sub- contrast adjustment. - Page 42 Soleil-PJ1Training Replacing the Optics Engine After replacing the optics section, input the value of color wheel index delay that is specific to the new unit. The value is printed on the label attached to the unit. You must input the last three digits on the label.
- Page 43 Soleil-PJ1Training Optics Engines These are not the same for each model. The lenses are different, for a start. Make sure that you have the correct assembly for the model that you are working on. The optics engine contains the DMD board, DMD chip, lens, and rod.
- Page 44 Soleil-PJ1Training Equipment Required for the Adjustments Personal computer (Windows PC, using Windows XP, Vista, 7, or 8) Cables: RGB Cable and Control (USB-A to Mini- B) Cable Protractor: Used to measure angles for the Keystone Calibration Slide 44 No additional notes...
- Page 45 Soleil-PJ1Training Before you Start the Adjustments Copy the current settings data to EEPROM: Press the [Up], [Down], [Left] and [Right] buttons simultaneously. Enter service mode. See the service manual for the procedure. The buzzer beeps for 3 seconds if you enter service mode successfully.
- Page 46 Soleil-PJ1Training Adjustments Do the necessary adjustments as described in the service manual. Keystone Calibration Sub Contrast Color Wheel Index Delay Slide 46 No additional notes...
- Page 47 Soleil-PJ1Training Y033/Y034/Y036 Service Training Updating Firmware Slide 47 This section explains the basic points about updating the firmware.
- Page 48 Soleil-PJ1Training Preparation Before you begin firmware update, the SiLabs driver software must be installed on your computer. Slide 48 See the service manual for details.
- Page 49 Soleil-PJ1Training Procedure Unplug the projector power cord. Connect a USB cable to the control port, and to your computer. While holding down the Input and Mute buttons, plug in the power cord. Start DLP_FlashLoader on your computer. ...
- Page 50 Soleil-PJ1Training Alternative Procedure for Y034/Y036 Copy the firmware data onto a USB memory device. Check the power cord of the projector is disconnected. Connect the USB memory device to the projector. While holding down the [Power] and [Input] buttons, plug in the power cord.
- Page 51 Soleil-PJ1Training Y033/Y034/Y036 Service Training Troubleshooting Slide 51 For basic troubleshooting procedures, see the service manual.
- Page 52 Soleil-PJ1Training LED Display The combination of LED indicators show if a problem has occurred. These are the Power, Input, and AV Mute indicators. Slide 52 No additional notes...
- Page 53 Soleil-PJ1Training Symptom The Troubleshooting section of the service manual contains some notes on symptom troubleshooting. Slide 53 No additional notes...
- Page 54 Soleil-PJ1Training Slide 54 No additional notes...
Need help?
Do you have a question about the Y033 and is the answer not in the manual?
Questions and answers