Table of Contents
Advertisement
Quick Links
IMPORTANT:
THESE INSTRUCTIONS ARE TO
REMAIN WITH THE HOMEOWNER
SAVE THESE INSTRUCTIONS
SAFETY NOTICE
If this stove is not properly installed, a house
fi re may result. For your safety, follow the
installation directions. Consult local building
inspector or officials about restrictions and
installation inspection requirements in your
area.
TESTED and LISTED
to ULC S628 / UL 1482
Meets the U.S. Environmental Protection
Agency's July 1990 Particulate Emission
Standards
100610-24
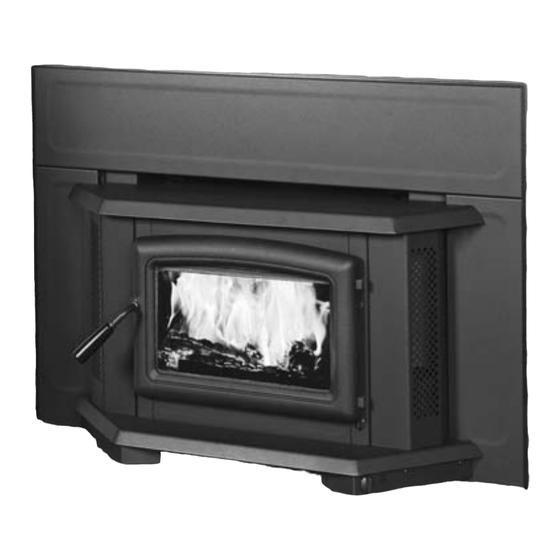
Super Insert
INSTALLATION
AND OPERATING
INSTRUCTIONS
MODEL:
SUPER INSERT
DESIGN-D
SPND.BODYB
SPND.BODYB
5055.101.B
Advertisement
Table of Contents

Related Manuals for Pacific energy SPND.BODYB


Summary of Contents for Pacific energy SPND.BODYB
- Page 1 TESTED and LISTED to ULC S628 / UL 1482 Meets the U.S. Environmental Protection MODEL: Agency's July 1990 Particulate Emission Standards SUPER INSERT DESIGN-D SPND.BODYB 100610-24 SPND.BODYB 5055.101.B...
-
Page 2: Table Of Contents
Avoiding a Chimney Fire ............15 Maintenance ..................16 Baffle Removal ................16 Replacement Parts ................17 Appendix A ..................18 Understanding & Operating Your Pacifi c Energy Stove ....18 Troubleshooting ................19 Firebrick Installation ................20 Label ..................23 SPND.BODYB 100610-24... -
Page 3: Safety
Canada by Wood Wood Energy Energy Technical Technical Training Training (WETT) CERTIFIED www.wettinc.ca www.nficertified.org Fig. # 1 Mantel or Top Facing 30" 21" with mantle shield e n t 20.5" 6.5" j a c Fireplace 16" Hearth 2" SPND.BODYB 100610-24... - Page 4 Consult CAN/CSA-B365 Installation Code for Solid-Fuel-Burning appliances and equipment in Canada, and N.F.P.A. 211 Standard for chimneys, fi replaces, vents and Solid-Fuel-Burning appliances in USA. MINIMUM EMBER PROTECTION DIMENSIONS 22 1/2” 16” Non-combustible fi replace hearth Non-combustible fl oor covering 2” SPND.BODYB 100610-24...
-
Page 5: Dimensions
Dimensions 42 5/8” 6 1/2” 8 1/8” 28 7/8” 19 9/16” 20 3/4” 9 1/2” 23 3/4” 21 1/2” 18” 28 1/8” 10” 21 1/8” 36” SPND.BODYB 100610-24... -
Page 6: Installation
SPND.3OFFSETA - 3” fl ue offset box. Only this offset box is approved for use with this insert. The use of any other offset box may cause a hazard and/ or void any warranty. SPND.BODYB 100610-24... -
Page 7: Full Flue Liner (Required In Canada) Fig #2
1) Inspect your fi replace for damage or other physical defects. The fi replace must be in good working condition. If in doubt about its condition, seek professional advice. Check for creosote build up or other obstructions inside the chimney, SPND.BODYB 100610-24... -
Page 8: Fan Speed Controller Relocation
3) Disconnect the wires from the fans (LHS & RHS) and Fig. # 10 Fig. # 11 thermal snap switch. Take note of where the wires are routed and secured. They must be positioned correctly to avoid damage. Fig. # 7 SPND.BODYB 100610-24... - Page 9 (Fig.17), refi t ash lip, sides and top. Ensure that the power cable is correctly routed through the surround and it Fig. # 13 is not touching the fi rebox side. Wire placement is important to prevent damage to wires. Fig. # 16 Fig. # 17 SPND.BODYB 100610-24...
-
Page 10: Surround Assembly And Installation
1/4" Nuts Part C 6) Remove the two screws located at the top of the left and Part A right panels. Remove front panels and set aside to prevent damage (Fig. #22). Fig. # 22 Part C Part B SPND.BODYB 100610-24... - Page 11 Fig. # 28 9) Slide the securing fl ange up so that the fastening screws are at the top of the slots in the surround. (Fig.25 & 26) Fig. # 25 SCREWS Fig. # 26 Screw at top of slot. SPND.BODYB 100610-24...
-
Page 12: Combustion Air
(Fig. #29 & 30). good air circulation. Anything that may cause a negative pressure can cause gases or fumes to be pulled into the living area. Fig. # 29 Fig. # 31 O/A Cover Screw SPND.BODYB 100610-24... -
Page 13: Operation
Add a few small pieces of dry wood on top. 3) Ignite the paper and close the door. 4) After the fi re has established itself, open the door and add a few small logs. Close door. SPND.BODYB 100610-24... -
Page 14: More Wood, More Heat
Other waste should not be placed in this container! Speed Control G (green) L1 (white) L2 (black) SPND.BODYB 100610-24... -
Page 15: Creosote
Chimney fi res are easy to detect; they usually involve one or more of the following: - Flames and sparks shooting out of the top of the chimney - A roaring sound - Vibration of the chimney SPND.BODYB 100610-24... -
Page 16: Maintenance
To remove broken glass, undo the four retaining screws and remove the frame noting position for re-assembly. Remove all particles of glass. Be careful, as they are very sharp. Install new glass complete with gasket. Replace frame and screws. SPND.BODYB 100610-24... -
Page 17: Replacement Parts
17 ..Firebrick Set ........BRIC.SSERA 18 ..Boost Manifold ..........4105 Fig. # 33 PART REVISION 1 Parts may be ordered from your nearest Pacifi c Energy dealer. Contact Pacifi c Energy for the location of the dealer nearest you. SPND.BODYB 100610-24... -
Page 18: Understanding & Operating Your Pacifi C Energy Stove
(smoke). 5 to 10 minutes more Pacific Energy has and then set the air designed a system that control to the desired solves the problem by position. -
Page 19: Troubleshooting
Stove Won't Burn 1) Combustion air supply - Check outside air supply for obstructions is blocked (see Combustion Air section) 2) Draft too low - Chimney plugged or restricted Inspect and clean - Chimney oversized or otherwise unsuitable Consult Dealer SPND.BODYB 100610-24... -
Page 20: Firebrick Installation
9” X 4 1/2” X 1 1/4” (230 mm x 115 mm x 32 mm) 5096.99 PEHS-12 7 1/4” X 4 1/2” X 1 1/4” (184 mm x 115 mm x 32 mm) 245.0 PEHS-61 080500-2 WINDBRICK 5055.104 SPND.BODYB 100610-24... - Page 21 NOTES: SPND.BODYB 100610-24...
- Page 22 NOTES: SPND.BODYB 100610-24...
-
Page 23: Label
CONDITIONS OF USE, CREOSOTE BUILDUP MAY OCCUR RAPIDLY. CAUTION MANUFACTURED BY: PACIFIC ENERGY FIREPLACE PRODUCTS LTD. 2975 ALLENBY RD., DUNCAN, BC V9L 6V8 HOT WHILE IN OPERATION. DO NOT TOUCH. KEEP CHILDREN, CLOTHING AND FURNITURE AWAY. CONTACT MAY CAUSE SKIN BURNS. - Page 24 PACIFIC ENERGY FIREPLACE PRODUCTS LTD. www.pacifi cenergy.net Technical Support: 1-250-748-1184 2975 Allenby Rd., Duncan, B.C. V9L 6V8 Printed in Canada SPND.BODYB 100610-24...
Need help?
Do you have a question about the SPND.BODYB and is the answer not in the manual?
Questions and answers