Sign In
Upload
Download
Table of Contents
Contents
Add to my manuals
Delete from my manuals
Share
URL of this page:
HTML Link:
Bookmark this page
Add
Manual will be automatically added to "My Manuals"
Print this page
×
Bookmark added
×
Added to my manuals
Manuals
Brands
Symbol Manuals
Handhelds
MC3504
User manual
Symbol MC3504 User Manual
Mc35 series enterprise digital assistant
Hide thumbs
1
2
3
4
5
6
Table Of Contents
7
8
9
10
11
12
13
14
15
16
17
18
19
20
21
22
23
24
25
26
27
28
29
30
31
32
33
34
35
36
37
38
39
40
41
42
43
44
45
46
47
48
49
50
51
52
53
54
55
56
57
58
59
60
page
of
60
Go
/
60
Contents
Table of Contents
Bookmarks
Table of Contents
Table of Contents
1 First Things First
Package Contents
Preparing to Use Your MC35
Installing the Battery Pack
Charging the MC35
Starting up MC35
System Procedures
Recalibrating the Screen
Creating Backup Files
Resetting the Device
Securing Your Device
2 Getting Started
Features Summary
Performance
Display
Audio
Phone Features
Connectivity
GPS Technology
Battery Pack
Design and Ergonomics
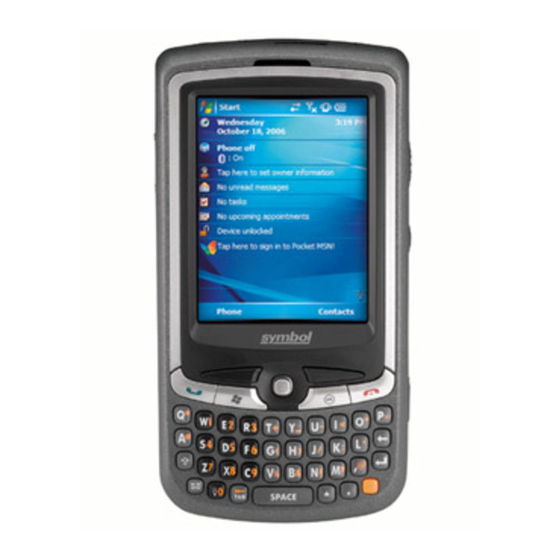
MC35 Tour
Front View
Rear View
Left View
Right View
Hardware and Command Interface
Hardware Interface
Command Interface
Today Screen
Start Menu
Pop-Up Menus
Notifications
3 Managing Programs
Accessing Programs
Opening a Program
Switching between Programs
Program List
Using Search
Using File Explorer
Using Activesync
Installing Microsoft Activesync
Connecting the Device to Your Computer
Creating a Partnership (First Time Only)
Synchronizing with Your Computer
7 Getting Connected
Infrared Connection
Bluetooth Connection
Synchronizing with a Server
Wifi Connection
Synchronizing Information
Synchronizing Inbox
Synchronizing Calendar
Synchronizing Contacts
Using Activesync to Exchange Files
Activesync Errors
4 Entering Data
Using the QWERTY Keypad
Using the Input Panel
Using the Soft Keyboard
Using Block Recognizer
Using Letter Recognizer
Using Transcriber
Using the Star Key
Writing on the Screen
Drawing on the Screen
Recording a Message
Using My Text
5 Using the Phone Function
Dialer Screen
Dialer Buttons
Advertisement
Quick Links
Download this manual
MC35 Series EDA
User Guide
MC3504/MC3574
Table of
Contents
Previous
Page
Next
Page
1
2
3
4
5
Advertisement
Table of Contents
Need help?
Do you have a question about the MC3504 and is the answer not in the manual?
Ask a question
Questions and answers
Related Manuals for Symbol MC3504
Handhelds Symbol MC3090G - Win CE 5.0 Core User Manual
User manual (114 pages)
Handhelds Symbol MC3000 User Manual
Symbol scanner user guide (152 pages)
Handhelds Symbol MC3000 Integrator Manual
Rugged mobile computer (212 pages)
Handhelds Symbol MC3000 User Manual
(172 pages)
Handhelds Symbol MC35 Quick Start Manual
(2 pages)
Handhelds Symbol MC3574 User Manual
Mc35 series enterprise digital assistant (60 pages)
Handhelds Symbol MC3000-K Quick Start Manual
Mc3000 series (4 pages)
Handhelds Symbol MC50 Integrator Manual
(174 pages)
Handhelds Symbol MC70 User Manual
Snitcher asset management (18 pages)
Handhelds Symbol MC9000-G Product Reference Manual
(646 pages)
Handhelds Symbol MC9090G User Manual
Symbol mc9090g: user guide (246 pages)
Handhelds Symbol MC9090-G RFID User Manual Supplement
Mobile computer (78 pages)
Handhelds Symbol MC18 Product Reference Manual
(94 pages)
Handhelds Symbol MC909X Integrator Manual
(296 pages)
Handhelds Symbol MC909X User Manual
(21 pages)
Handhelds Symbol MC1000 User Manual
(86 pages)
This manual is also suitable for:
Mc3574
Table of Contents
Print
Rename the bookmark
Delete bookmark?
Delete from my manuals?
Login
Sign In
OR
Sign in with Facebook
Sign in with Google
Upload manual
Upload from disk
Upload from URL


Need help?
Do you have a question about the MC3504 and is the answer not in the manual?
Questions and answers