
Related Manuals for ProBoat ZELOS 48G


Summary of Contents for ProBoat ZELOS 48G
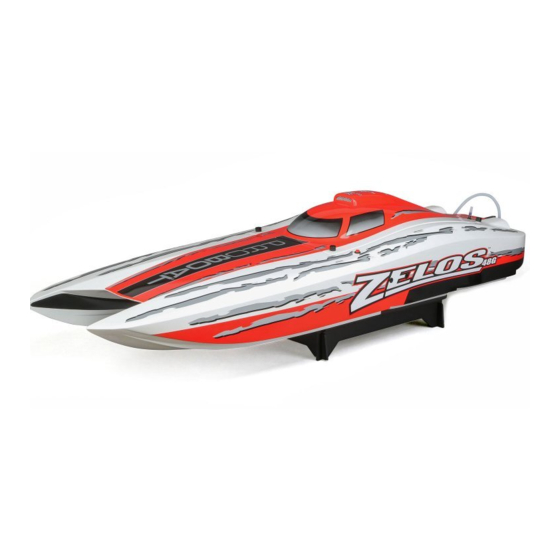
- Page 1 48-INCH GAS CATAMARAN Owners Manual • Bedienungsanleitung • Manuel de l’Utilisateur • Manuale utente PRB09004...
-
Page 2: Safety Precautions And Warnings
NOTICE All instructions, warranties and other collateral documents are subject to change at the sole discretion of Horizon Hobby, LLC. For up-to-date product literature, visit http://www.horizonhobby.com and click on the support tab for this product. Meaning of Special Language The following terms are used throughout the product literature to indicate various levels of potential harm when operating this product: NOTICE: Procedures, which if not properly followed, create a possibility of physical property damage AND little or no possibility of injury. -
Page 3: Table Of Contents
Product Inspection Carefully remove the boat and radio transmitter from the box. Inspect the boat for damage. If you find damage is present, please contact the retailer where you purchased your boat. Table of Contents Specifications Boat Stand Assembly ............4 48.5 in (1231.9mm) Length Canopy Removal .............. 4 Beam (width) 16.5 in (419.1mm) Propeller Installation ............4 Weight 20.4 lb (9.2 kg) Rudder Installation ............4 Auto Bailers ..............5 Hull Material Fiberglass Testing and Servicing ............ 5 Dynamite ® 30cc High- Engine Replacement . -
Page 4: Boat Stand Assembly
Boat Stand Assembly 1. Attach the side stand pieces to the end pieces as shown. 2. Use medium CA or epoxy adhesive to secure the side stand to the ends. 3. Allow the adhesive to dry before placing your boat on the stand. Canopy Removal 1. Loosen the 4 screws located at each corner of the canopy. 2. Remove the canopy from the hull starting with the 2 rear screws. Ensure that the 4 screws have disengaged from their bases before lifting the canopy carefully. Propeller Installation 1. Correctly align the propeller with the drive dog on the prop shaft. 2. Tighten the nut on the prop shaft. 3. Disassemble in reverse order. Tip: Propeller balancing can add several mph to top speed and reduce vibration. There are several different propeller balancing tools available. Read the instructions that accompany the propeller balancing tool, as removing material from the correct part of the propeller is crucial. Rudder Installation 1. Install the rudder in the mount using 2 screws and 2 locknuts as shown. -
Page 5: Auto Bailers
Auto Bailers Your boat is equipped with two auto bailers. Each auto bailer works as a mechanical one-way valve. Inside the auto bailer is a ball bearing and a rubber seal. The ball bearing is free to move when the bailer is not in contact with water, allowing water to exit the hull. Once submerged, the pressure from the water presses the ball bearing against the rubber seal, preventing water from entering the hull. 1. Keep the inside of the hull clean and free of debris to ensure the auto bailers will work properly. 2. When you apply throttle and the boat is on plane, the auto bailers are out of the water. The boat’s forward momentum drives the ball bearing back, opening the valve and allowing the water inside the the boat to exit the hull. 3. Once you remove the boat from from the water, tip the nose of the boat upwards and water in the hull will run from the auto bailers. Testing and Servicing Replacement Under normal use, it is not necessary to service the 1. Use a soldering iron to apply heat to the auto bailer. auto bailers often because there are no wearable parts. Place the soldering iron on the middle ring of the auto However, if you run your boat in salt water or in water bailer while holding the bailer with a pair of pliers. with high chemical content, it may be necessary to 2. As the bailer heats up, lightly apply back and forth inspect the components inside the auto bailers for wear. lateral pressure to the bailer. The bind between the PRB286043 has the necessary parts to replace worn bailer and the epoxy will weaken. -
Page 6: Charging The Receiver Battery
Charging the Receiver Battery Instructions NOTICE: Never charge a battery in the boat or Choose a charger designed to charge the included damage may result. 7.4V 3300mAh 2S 15C LiPo. We recommend the Dynamite ® Prophet™ Sport LiPo AC Balance Charger (DYNC2005CA). Refer to your charger manual for charging instructions and safety information. Receiver Battery Installation 1. Remove the 2 clips and lid from the battery compartment. 2. Install the battery in the battery compartment. 3. Connect the battery EC3™ connector to the ON/ OFF switch. 4. Install the lid on the box and secure the lid using the clips. IMPORTANT: After boating, always remove the battery before transporting or storing the boat. CAUTION: Before boating, use a LiPo voltage checker (DYN4071) to check your battery charge. Failure to use a fully charged battery may result in a runaway boat, which could cause injury to people and property damage. Antenna Tube Installation Install the receiver antenna in the tube as shown. Do not bend the end of the antenna over the antenna tube and place the cap over it. The antenna does not have to be outside of the tube to operate properly. -
Page 7: Spektrum Dx2E Radio System
Spektrum DX2E Radio System TH TRIM ST TRIM AVC / ST RATE Adjusts the amount the front wheels move when the steering Adjust to make the vehicle drive straight Adjusts the neutral wheel is turned left or right. with no input at the steering wheel. point of the electronic speed control. STEERING WHEEL Control REVERSE SWITCH steering. Allows you to change the Right and direction of steering (ST. REV) and Left steering throttle (TH. REV) controls (default with ST. settings are “N” for steering and REV Switch “R” for throttle). on N (see ST. REV switch). POWER SWITCH THROTTLE TRIGGER Power on or off the transmitter. -
Page 8: Binding
Binding The receiver will keep the binding to the transmitter until another binding is done. The included transmitter and receiver are bound at If you encounter problems, obey binding instructions and the factory. If you need to rebind, follow the instructions refer to the troubleshooting guide for other instructions. If below. needed, contact the appropriate Horizon Product Support 1. Ensure the transmitter and vehicle are both powered office. OFF. 2. Remove the radio box cover and install the bind plug NOTICE: Do not attempt to bind the transmitter and in the BIND/battery port of the receiver. Power the receiver if there are other compatible transmitters in bind receiver through any other port. mode within 400 feet. Doing so may result in unexpected 3. Power ON the vehicle. The receiver LED will blink binding. green. Failsafe 4. Stand approximately 8–12 feet (2.4–3.7m) from the vehicle. With the steering wheel and throttle trigger In the unlikely event that the radio connection is lost in the failsafe positions (neutral), press and hold during use, the receiver will drive the servos to their pre the bind button and power ON the transmitter. The programmed failsafe positions (normally no throttle and transmitter’s green LED will blink after 3 seconds, straight steering). -
Page 9: Fuel Safety And Use Instructions
Fuel Safety and Use Instructions • Always observe all warnings, precautionary • Always ensure that gasoline and fuel are stored in a statements and instructions supplied by the fuel clearly marked container well away from the reach of manufacturer/provider. children. • Fuel is a fire accelerant. Never operate your vehicle • Always mix and store your fuel safely in a sealed, near open flames. Never smoke while operating your water-resistant container specifically made for vehicle or while handling fuel. gasoline. • Always only use a mixture of gasoline and two-cycle • Always store fuel in a cool, dry location. Do not oil for fuel. Do not use glow (nitro) fuel. allow fuel containers to come in direct contact with concrete, as the fuel may absorb moisture. • Always use caution when handling gasoline. • Always responsibly discard fuel if there is • Always run your model engine in a well-ventilated condensation and/or water inside the fuel container. area. Model engines produce harmful carbon monoxide fumes. • Never allow fuel to come into contact with eyes or mouth. Gasoline and other fuels used in model •... -
Page 10: Vehicle Starting And Running
Vehicle Starting and Running 1. Remove the canopy. 4. With the boat on a stand and the propeller unobstructed, pull the starter cord in a continuous 2. Power on your transmitter, then power on the motion to start the engine. The engine should start receiver. within 6 pulls. 3. Verify that there is fuel in the fuel line. Place your 5. Replace the canopy before placing the boat in the thumb over the carburetor and slowly pull the starter water. cord. You will immediately see fuel flow through the fuel line into the carburetor. CAUTION: Refer to the included engine owners manual before attempting to start the engine. Failure to follow all instructions can lead to damage to your vehicle, property damage and bodily injury. CAUTION: Always keep all body parts, hair and dangling or loose items away from a spinning propeller, as these could become entangled. Breaking in the Engine Break in the engine by running at slow RPM for 1/3 tank Water Blockage and mid RPM for the remainder of the tank. Ensure water If there is reduced water flow during consistent speed, is flowing out of the auto bailers. return the boat to shore and inspect it for debris that may be blocking the rudder inlet or the hull water pick up. NOTICE: Do not adjust carburetor settings during break-in. Doing so will cause engine damage or complete engine failure. -
Page 11: Boating Tips
Boating Tips When making turns, decrease the throttle to reduce the Avoid boating near other watercraft, stationary objects, probability of flipping the boat over. waves, wakes and other rapidly moving water, wildlife, floating debris or overhanging trees. You should also be Never operate your boat in less than 12 inches (30.5cm) careful to avoid boating in areas where there are many of water. people, such as swimming areas, park waterways or If you need to retrieve your boat from the water, use fishing areas. Consult local laws and ordinances before fishing equipment or another boat. choosing a location to pilot your boat. NOTICE: When running at full speed in choppy water, Maximum speeds are only achieved when the water the prop may exit and re-enter the water repeatedly and conditions are smooth and there is little wind. A sharp very quickly, subjecting the propeller and flex shaft to turn, wind or waves can turn over a boat when it is some stress. Frequent stress may damage the propeller moving quickly. Always pilot your boat for the wind and and flex shaft. water conditions so that the boat does not turn over. When running your boat for the first time, we CAUTION: Never operate your boat in extreme recommend calm wind and water conditions so that you temperatures or turbulent water. can learn how the boat responds to your control. CAUTION: Never attempt to retrieve a downed boat by swimming. Boat Characteristics • Due to the boat’s scale design, engine torque and NOTICE: The boat may tip and/or flip, in this case. aggressive propeller—which are key to providing • When possible, make left hand turns at full speed in a speeds upwards of 50MPH—the boat will exhibit... -
Page 12: Stopping The Engine
Stopping the Engine Any time you want to stop the engine, especially if there is a problem, stop the engine by pressing the KILL switch. CAUTION: Do not touch the engine or muffler after use. They can become extremely hot, which can cause injury or fire. When You Are Finished 1. Power off the receiver. 2. Power off the transmitter. 3. Disconnect and remove the battery from the boat. CAUTION: Never power off the transmitter or receiver before stopping the engine. You will lose control of your vehicle. Tip: Always remove the canopy before storage or moisture may allow mold and mildew to grow in the boat. Zelos™ 48-Inch Gas Catamaran... -
Page 13: After Boating
After Boating • Drain water from inside the hull using the auto NOTICE: When you are finished boating, never leave bailers. the boat in direct sunlight or in a hot, enclosed area such as a car. Doing so can damage the boat. • Wipe exhaust residue from the boat. • Rinse the deck, hull, and metal hardware, then dry them with a clean towel. Coat the metal hardware with water displacement fluid to help prevent corrosion. • Fully dry the inside and outside of the boat, including the water cooling system. Remove the hatch before storing your boat. • Apply an automotive wax coating to the exterior of your boat to prevent oxidation and to protect against damage caused by fuel or other harmful chemicals. • Repair any damage or wear to the boat. • Lubricate the flex shaft. • Make note of lessons learned from the trimming of your boat, including water and wind conditions. Steering Trim Use the ST. Trim knob on the transmitter to adjust the steering trim to center the rudder. If the servo arm is not close to its desired neutral position after the binding process and the rudder cannot be centered using trim, please take the following steps: 1. Make sure the ST. Trim knob is set to “0” or neutral. 2. Adjust the linkage to the servo so the rudder is centered when the steering is at neutral. -
Page 14: Engine Tuning
Engine Tuning Before making adjustments: • Ensure there are no leaks or obstructions in the High-Speed Needle (on Low-Speed Needle fuel tank, fuel tubing or the carburetor. Any faults (on the right side). the left side). Close the can affect engine operation and tuning. high-speed needle by Close the low-speed • The carburetor needle is very sensitive. Adjusting turning it clockwise until needle by turning the needle even 1/16 of a turn is a significant it clockwise until it it stops, then turn it change. Be careful when making adjustments. counterclockwise 1 1/2 stops, then turn it Running a lean engine can lead to premature turns out (open). counterclockwise 1 engine wear or complete engine failure. 1/4 turns out (open). • The needles have markings to designate high and low speed. Carburetor Factory Settings The engine can be tuned from the factory settings to optimize performance under various conditions. If you lose track of the engine settings, return to these factory carburetor settings. Idle Screw (below the needles). Center the screw so the slot is straight up and down. -
Page 15: Spark Plug Test
Spark Plug Test CAUTION: Before testing the spark plug, clean up spilled fuel and close fuel containers. Failure to do 0.6–0.7mm can result in injury, fire or damage. 0.24–0.27 in Remove the spark plug from the engine and attach the plug wire and boot to the spark plug. Place the threaded end of the spark plug against the muffler. Pull the starter cord in a quick continuous motion to turn over the engine and ensure there is a spark. If there is no spark: • Adjust the spark plug gap to 0.6–0.7mm (0.24–0.27 in) • Install a new spark plug (LOSR5017) CAUTION: Do not test the spark plug near the spark plug hole or residual fuel may ignite. Flooded Engine 7. Carefully spray motor fluid (DYN5500) into the cylinder head through the spark plug hole while Fuel slowly pulling the starter cord. The spray will displace any remaining water and fuel from inside the engine. The engine will not start if too much fuel is in the 8. Spray motor fluid onto the spark plug’s center cylinder. Excess fuel can be expelled by following these electrode to remove any excess fuel. Allow it to steps. We recommend using safety goggles. completely dry. 1. Disconnect and remove the spark plug. 9. Replace the spark plug and make sure the boot is 2. Pull the starter cord in a continuous motion. -
Page 16: Maintenance
Maintenance 1. Inspect the engine and engine mounts for damage or 3. Inspect the tuned muffler for damage and leaks. wear. Replace, clean or repair as needed. Tighten the screws. 2. Inspect the condition of the spark plug and wire. 4. Clean and check the carburetor for leakage and Replace as needed. smooth operation. Clutch The centrifugal clutch automatically engages when the engine rpm is increased. Be sure that the idle speed adjustment is set low enough so that the propeller does not rotate at idle. Periodically disassemble the clutch and If worn to within clean debris from the clutch shoes and the inner clutch 1mm, replace with bell. PRB292003. Note Clutch Housing Bearing the direction of operation (arrows). For prolonged clutch bearing life, keep the bearing well lubricated (DYNE0100). In the event that your boat takes on water or flips and the bearing gets wet, clear the bearing of water. Failing to do so can lead to premature bearing failure or complete bearing seizure. Water Cooling System If water does not stream out of the water outlets while the boat is moving forward, immediately stop the engine and clean the obstruction from the water cooling system. The engine and muffler have separate circulation connections. -
Page 17: Drivetrain Lubrication
Drivetrain Lubrication NOTICE: Ensure the correct flex shaft end is inserted in the clutch. Failure to do so may result in damage. Always replace the drivetrain parts when they are 8. Assemble in reverse order. Tighten the drive dog set damaged or show visible wear or injury and damage screw on the flat spot on the prop shaft, applying may result. threadlock as needed. Lubricating the flex shaft is vital to the life of the drivetrain. The lubricant also acts as a water seal, keeping NOTICE: Running the boat in saltwater could cause water from entering the hull through the stuffing tube. some parts to corrode. If you run the boat in saltwater, rinse it thoroughly in freshwater after each use and Lubricate the flex shaft and all moving parts after every lubricate the drive system. 30 minutes of operation. Lubricate the prop shaft after every 90 minutes of operation. NOTICE: Because of its corrosive effects, running RC 1. Remove 3 nuts and 3 screws from the prop strut on boats in saltwater is at the discretion of the modeler. the bottom of the boat. 2. Slide the strut down out of the mount. Tip: Use paper or cloth to touch the flex shaft and other lubricated parts. 3. Remove the flex shaft by sliding it out of the clutch, the stuffing tube and the prop shaft. Mark or otherwise note the flex shaft end in the clutch. 4. Loosen the set screw of the drive dog using a 2mm hex driver. 5. Remove the nut, propeller and drive dog from the prop shaft. -
Page 18: Troubleshooting Guide
Troubleshooting Guide Problem Possible Cause Solution Boat will not respond to throttle but responds to Throttle channel is reversed Reverse throttle channel on transmitter other controls Damaged propeller, shaft or engine Replace damaged parts Extra noise or extra vibration Propeller is out of balance Balance or replace propeller Receiver battery charge is low Completely recharge battery Receiver battery is damaged Replace battery and follow battery instructions Blocking or friction on shaft or propeller Disassemble, lubricate and correctly align parts Boat conditions may be too cold Make sure battery is warm before use Reduced run time or Loosen drive dog and move out away from the boat underpowered Drive dog is too close to the prop strut prop strut a small amount Too little lubrication on flex shaft Fully lubricate flex shaft Vegetation or other obstacles block Remove vegetation or obstacles from rudder or the rudder or propeller propeller Transmitter is too close to the boat Move powered transmitter a few feet from boat, during binding process disconnect and reconnect battery to boat Boat or transmitter is too close to Move boat and transmitter to another location and Boat will not Bind... -
Page 19: Engine Troubleshooting Guide
Engine Troubleshooting Guide Problem Possible Cause Solution Out of fuel Refill the tank and follow starting instructions Remove the spark plug. Pull the starter cord in a Engine flooded quick continuous motion. Replace and test Fuel mixture is old or bad Mix fresh fuel per instructions Spark plug is not working Repair or replace the spark plug Check servo operation. Set it to neutral and reset Throttle servo failed/Setup is wrong the linkage according to your radio and model Engine does not start manufacturer’s specifications Return the carburetor to the factory settings and Carburetor is incorrectly adjusted retune if necessary Engine stop switch is malfunctioning Check and replace the stop switch if necessary Check the piston and cylinder for wear or damage Piston and cylinder is worn and replace if necessary Wiring is disconnected or damaged Connect wiring, repair or replace damaged parts Receiver switch is off Power on receiver switch Out of fuel Refill the tank and follow starting instructions Let the engine cool. Reset the carburetor to Engine may be overheated factory settings and restart Engine idle is too low Follow the instructions to increase idle speed Return the carburetor to the factory settings and Carburetor is incorrectly adjusted retune if necessary... -
Page 20: Warranty And Service Contact Information
Limited Warranty distributor or Horizon directly. This will enable Horizon to better answer your questions and service you in the event that you may need any assistance. For questions or assistance, What this Warranty Covers please visit our website at www.horizonhobby.com, submit a Horizon Hobby, LLC, (Horizon) warrants to the original Product Support Inquiry, or call the toll free telephone number purchaser that the product purchased (the “Product”) will be referenced in the Warranty and Service Contact Information free from defects in materials and workmanship at the date section to speak with a Product Support representative. -
Page 21: Fcc Information
Warranty and Service Contact Information Country of Horizon Hobby Contact Information Address Purchase Horizon Service Center servicecenter.horizonhobby. (Repairs and Repair Requests) com/RequestForm/ productsupport@ Horizon Product Support United States of 4105 Fieldstone Rd horizonhobby.com (Product Technical Assistance) America Champaign, Illinois, 61822 USA 877-504-0233 websales@horizonhobby.com Sales 800-338-4639 Units 1–4 , Ployters Rd, Staple Tye sales@horizonhobby.co.uk Service/Parts/Sales: United Kingdom Harlow, Essex, CM18 7NS, Horizon Hobby Limited +44 (0) 1279 641 097 United Kingdom Horizon Technischer Service service@horizonhobby.de Christian-Junge-Straße 1 Germany 25337 Elmshorn, Germany Sales: Horizon Hobby GmbH... -
Page 22: Replacement Parts
Replacement Parts / Ersatzteile / Pièces de Rechange / Pezzi di Ricambio Part # English Deutsch Français Italiano Revêtement de tube de Guaina premistoppa: PRB292001 Stuffing Tube Liner: Rockstar 48 Schlauchdichtung: Rockstar 48 remplissage Rockstar 48 Rockstar 48 Joint torique d’échappement PRB296002 Exhaust O-Ring: Rockstar 48 O-Ring Auslass Rockstar 48... -
Page 23: Recommended Parts
(18M) Bootsband (18 m) transparent souple (18 m) flessibile (18 m) Anfänger-Werkzeugsatz: Ensemble d’outils de DYNT0502 Start Up Tool Set: Proboat Set messa in moto: Proboat Proboat démarrage : Proboat Pinces à liaison à billes de Pinze per nodi sferici deluxe: RVO1005... - Page 24 53739 Created: 12/2016 ©2017 Horizon Hobby, LLC Pro Boat, the Pro Boat logo, Zelos, Dynamite, Prophet, DSMR, EC3, Magnum Force 2 and the Horizon Hobby logo are trademarks or registered trademarks of Horizon Hobby, LLC. The Spektrum trademark is used with permission of Bachmann Industries, Inc. All other trademarks, service marks and logos are property of their respective owners.
Need help?
Do you have a question about the ZELOS 48G and is the answer not in the manual?
Questions and answers