Table of Contents
Advertisement
Available languages
Available languages
Quick Links
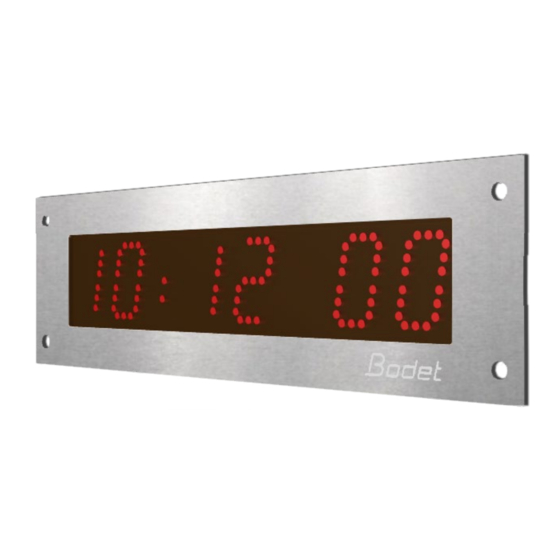
HORLOGE DIGITALE pour hôpital
DIGITAL CLOCK for hospitals
Style 5S Hôpital – IND IMP AFNOR
Style 5S Hospital – IND IMP AFNOR
Notice d'installation et de mise en service
Installation and operation manual
BODET SA
BP30001
49340 TREMENTINES I France
Tél. support France: 02.41.71.72.99
Tel. support (intl): +33 241 71 72 00
Fax France: 02.41.71.72.01
www.bodet-time.com
Fax (intl) : +33 241 71 72 02
S'assurer à réception que le produit n'a pas été endommagé durant le transport pour réserve au transporteur.
When receiving goods, please check that the item is not broken. If the product is damaged, a claim
should be addressed to the shipping company.
1
Advertisement
Table of Contents

Related Manuals for Bodet Style 5S Hospital


Summary of Contents for Bodet Style 5S Hospital
- Page 1 HORLOGE DIGITALE pour hôpital DIGITAL CLOCK for hospitals Style 5S Hôpital – IND IMP AFNOR Style 5S Hospital – IND IMP AFNOR Notice d’installation et de mise en service Installation and operation manual BODET SA BP30001 49340 TREMENTINES I France Tél.
-
Page 2: Table Of Contents
Table of contents – Initial checks 1.1 Unpacking the clock 1.2 Cleaning – Installation 2.1 Clock installation 2.2 Installing the keypad 2.3 Electrical connections for various synchronisation cards – Connecting to the time distribution network 3.1 Parallel distribution with inverted polarity –... - Page 3 Table des matières – Vérification initiale 1.1 Déballage de l’horloge 1.2 Nettoyage – Installation mécanique 2.1 Montage de l’horloge 2.2 Montage du pupitre 2.3 Branchements électriques des différentes cartes de synchronisation – Raccordement sur réseau de distribution horaire 3.1 Distribution parallèle à polariré inversées –...
-
Page 4: I - Initial Checks
Retain this manual for reference for the lifespan of your clock. The information supplied is non-binding; Bodet reserves the right to make changes to equipment, including functional, technical and aesthetic changes or changes to colours, without notice. -
Page 5: Installation
Configuration keys: S and + Connector for wiring synchronisation via impulse Example of a Style 5S Hospital Impulse synchronisation electronic board 2) Set the brightness by pressing the "S" and "+" keys on the back of the clock (see above). -
Page 6: Electrical Connections For Various Synchronisation Cards
2.3 Electrical connections for various synchronisation cards Below are the wiring diagrams for the electronic boards for the various synchronisations. IND (independent) synchronisation card Connector for control keypad Refer to the keypad instructions (supplied with the keypad) Neutral (blue) Phase (brown) IMP (impulse) synchronisation card Connector for control keypad Refer to the keypad instructions... -
Page 7: Connecting To The Time Distribution Network
– Connecting to the time distribution network Connect the 100-240VAC 50/60Hz mains power supply. (See page 6.) 3.1 Parallel distribution with inverted polarity Minute // (12-24-48 Volt), ½ minute // (24 Volt) and AFNOR 1) Ensure that the clock is designed to be synchronised by "Impulse" or to be connected to a time code distribution network that meets the AFNOR standard . -
Page 8: Basic Configuration
– Basic configuration 5.1 Setting time/date/year To set time, date and year, press and hold "S" for 3 seconds. Hold down for 3 seconds Set hour Set minutes Set year Set month Set day End of menu... -
Page 9: Configuration Menu
5.2 Configuration menu Access the configuration menu by pressing and holding "S" then "+" for 3 seconds. Hold down for 3 seconds Select display mode: 12 or 24 hr (default 24 hr) Select energy-saving mode (default Eco) EcoP mode: Select looped switch-off time from 0 to 23 (default: 23) Select looped switch-on time from 0 to 23 (default: 6) Show display options (default HH:MM) -
Page 10: Memory Backup
– Memory backup Style clocks have a permanent backup feature that is used to store all of the configuration parameters and the display settings (for approx. 20 years), even in the event of a prolonged power cut. – Technical specifications Style clocks comply with Electromagnetic Compatibility Directive 89/336/EEC and Low Voltage Directive 73/23/EEC by referring to EN 60950. -
Page 11: Maintenance Menu
VIII – Maintenance menu To access the maintenance menu, open the configuration menu by pressing and holding "S", then "+" for 3 seconds. Release both keys, then press and hold "S", then "+" again for 7 seconds. 8.1 AFNOR synchronisation Hold down for 3 seconds Open configuration menu Hold down for 7 seconds... -
Page 12: Impulse Synchronisation
8.2 IMPULSE synchronisation Hold down for 3 seconds Open configuration menu Hold down for 7 seconds Software version May differ from the version shown depending on the date of purchase. Select synchronisation mode Min: minute impulse (default) 1:2M: ½ minute impulse Reset clock (enabled if “rstY”... -
Page 13: What To Do If
– What to do if… What to do if… Check that…... -
Page 14: I - Vérification Initiale
Conserver ce manuel pendant toute la durée de vie de votre horloge afin de pouvoir vous y reporter à chaque fois que cela sera nécessaire. Données non contractuelles. Bodet se réserve le droit d’apporter aux appareils certaines modifications fonctionnelles, techniques, esthétiques, ou de couleurs, sans préavis. -
Page 15: Installation Mécanique
– Installation mécanique 2.1 Montage de l’horloge 1) Câbler la carte électronique (Cf. page 6) et le pupitre de commande (en option) sur le bornier de la carte électronique au dos de l’horloge. Marron Blanc Vert Jaune Câblage du pupitre Touches de configuration: S et + Connecteur pour câblage en synchronisation par impulsions... -
Page 16: Branchements Électriques Des Différentes Cartes De Synchronisation
2.3 Branchements électriques des différentes cartes de synchronisation Ci-dessous, les schémas de câblage en fonction des cartes électroniques pour les différentes synchronisations. Carte de synchronisation IND (indépendante) Câblage du pupitre de commande Se reporter à la notice du pupitre (livrée avec ce dernier) Neutre (bleu) Phase (marron) Carte de synchronisation IMP (impulsions) -
Page 17: Raccordement Sur Réseau De Distribution Horaire
– Raccordement sur réseau de distribution horaire Brancher l’alimentation secteur 100-240VAC 50/60Hz. (Cf. page 6). 3.1 Distribution parallèle à polariré inversées Minute // (12-24-48 Volt), 1/2 Minute // (24 Volt) et AFNOR 1) Vérifier que l’horloge est bien synchronisée par “Impulsion” ou qu’elle peut être intégrée à un réseau de distribution horaire temps codé... -
Page 18: Configuration
– Configuration 5.1 Réglage Heure/Date/Année Accéder au réglage de l’heure, de la date et de l’année en appuyant sur «S» pendant 3 secondes. Maintenir l’appui pendant 3 secondes Réglage de l’heure Réglage des minutes Réglage de l’année Réglage du mois Réglage du jour Fin du menu... -
Page 19: Menu Configuration
5.2 Menu configuration Accéder au menu configuration en appuyant sur «S» (maintenir l’appui) puis sur «+» pendant 3 secondes. Maintenir l’appui pendant 3 secondes Choix du mode d’affichage : 12H ou 24H (24H par défaut) Choix des options du mode économie d’énergie (Eco par défaut) Mode EcoP : Choix de l’heure d’extinction en boucle de 0 à... -
Page 20: Sauvegarde Mémoire
– Sauvegarde mémoire Les horloges Style possèdent un dispositif de sauvegarde permanent leur permettant de mémoriser l’ensemble des paramètres de configuration et les choix d’affichage (pendant environ 20 ans), même en cas de coupure secteur prolongée. – Caractéristiques techniques Les horloges Style respectent la directive compatibilité électromagnétique 89/336/CEE et la Directive Basse Tension 73/23/CEE par référence à... -
Page 21: Menu Technicien
VIII – Menu technicien Pour entrer dans le menu technicien, accéder au menu configuration en appuyant sur «S» (maintenir l’appui) puis sur «+» pendant environ 3 secondes. Ensuite, après avoir relâché ces deux touches, appuer de nouveau sur «S» puis «+» pendant environ 7 secondes. 8.1 Synchronisations AFNOR Maintenir l’appui pendant 3 secondes Accès au menu configuration Maintenir l’appui pendant 7 secondes Version du logiciel... -
Page 22: Synchronisation Impulsion
8.2 Synchronisation IMPULSION Maintenir l’appui pendant 3 secondes Accès au menu configuration Maintenir l’appui pendant 7 secondes Version du logiciel Susceptible d’évoluer par rapport à la version ci-contre en fonction de votre date d’achat. Choix du mode de synchronisation Min: impulsion minute (par défaut) 1:2M: impulsion 1/2 minute Redémarrage de l’horloge (actif si «rstY»... -
Page 23: Que Faire Si
– Que faire si...? ...Vérifier. Que faire si...? ...Vérifier que... - Page 24 Style 5S OP IMP - LED verte Style 5S OP IMP – green LED 946 352 Style 5S OP AFNOR – LED verte Style 5S OP AFNOR – green LED © 2014 BODET SA. Tous droits réservés. All rights reserved.
Need help?
Do you have a question about the Style 5S Hospital and is the answer not in the manual?
Questions and answers