Table of Contents
Advertisement
Available languages
Available languages
Notice d'installation et de mise en service
Installation and operation manual
www.bodet-time.com
S'assurer à réception que le produit n'a pas été endommagé durant le transport pour réserve au transporteur.
When receiving goods, please check that the item is not broken. If the product is damaged, a claim
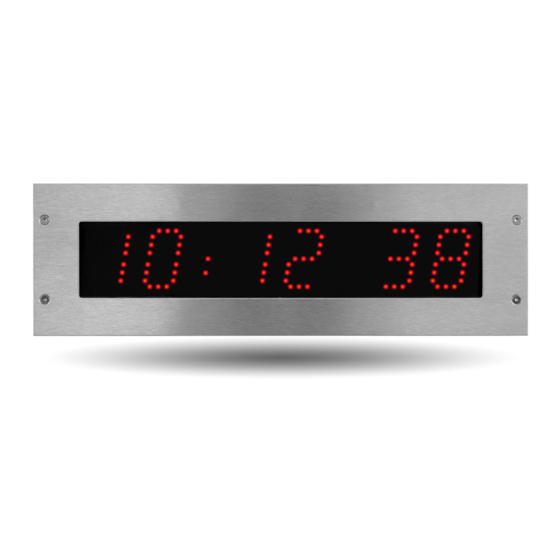
HORLOGE DIGITALE pour hôpital
DIGITAL CLOCK for hospitals
Style 5S Hôpital – NTP
Style 5S Hospital – NTP
Style 7S Hôpital - NTP
Style 7S Hospital - NTP
BODET Time & Sport
1, rue du Général de Gaulle
49340 TREMENTINES I France
Tél. support France: 02.41.71.72.99
Tel. support (intl): +33 241 71 72 33
should be addressed to the shipping company.
1
Advertisement
Table of Contents

Subscribe to Our Youtube Channel
Related Manuals for Bodet Style 5S Hospital NTP


Summary of Contents for Bodet Style 5S Hospital NTP
- Page 1 Style 7S Hôpital - NTP Style 7S Hospital - NTP Notice d’installation et de mise en service Installation and operation manual BODET Time & Sport 1, rue du Général de Gaulle 49340 TREMENTINES I France Tél. support France: 02.41.71.72.99 www.bodet-time.com Tel.
-
Page 2: Table Of Contents
Table of contents I – Initial checks 1.1 Unpacking the clock 1.2 Cleaning 1.3 Pre-requisites – Installation 2.1 Clock installation 2.2 Installing the keypad – Default configuration – Basic configuration 4.1 Setting time/date/year 4.2 Manual configuration menu – Web interface 5.1 Home page 5.2 Network configuration 5.3 Time configuration and synchronisation... - Page 3 Table des matières – Vérification initiale 1.1 Déballage de l’horloge 1.2 Nettoyage 1.3 Pré-requis – Installation mécanique 2.1 Montage de l’horloge 2.2 Montage du pupitre – Configuration par défaut – Configuration basique 4.1 Réglage Heure/Date/Année 4.2 Menu configuration manuelle – Configuration avancée 5.1 Accueil 5.2 Configuration réseau 5.3 Configuration de l’heure et synchronisation...
-
Page 4: I - Initial Checks
To programme the clock you must install BODET Detect software (Cf. page 7). This software is available to download for free on the BODET website www.bodet-time.com. Note: the BODET clock must be connected to a PoE network socket via a PoE switch or a PoE injector. (802.3af, class 3: multicast, class 0: unicast). -
Page 5: Installation
– Installation 2.1 Clock installation 2.1.1 Mounting without back cover According to the model of the clock make the cut-out following the dimensions listed in table below Style 5S OP Style 7S OP Dimensions in mm a) Insert the clock in the cut-out in order to mark the position of the mountig screws. b) Remove the clock and drill 4 holes Ø... - Page 6 2.1.2 Mounting with back cover According to the model of the clock make the cut-out following the dimensions listed in table below Style 5S OP Style 7S OP Dimensions in mm - Insert the back cover in the cut-out tn order to mark the position of the mountig screws. a) Remove the back cover and drill 2 holes Ø...
- Page 7 2.1.3 Connections - Connect the electronic board (see next page) and the keypad (optional) to the terminal strip on the back of the clock. Brown White Green Yellow Connecting the keypad Configuration keys: S and + Connector for wiring synchronisation via impulse Example of a Style 5S Hospital Impulse synchronisation electronic board - Set the brightness by pressing the "S"...
-
Page 8: Installing The Keypad
• Time zone: EUR • Synchronisation: Multicast • Synchronisation address: 239.192.54.1 These four parameters are printed on the electronic board. • Clock name: "BODET-@MAC" • Pool period for unicast synchronisation: 15 mins. • SNMP disabled • Trap type: V2C • Temperature alarm threshold: -5°C to +55°C •... -
Page 9: Basic Configuration
– Basic configuration 4.1 Setting time/date/year To set time, date and year, press and hold "S" for 3 seconds. Hold down for 3 seconds Set hour Set minutes Set year Set month Set day End of menu 4.2 Manual configuration menu Accss the configuration menu by pressing and holding "S"... -
Page 10: Web Interface
1) Open an web browser and enter the IP address of the clock in the address bar. The clock IP address is allocated automatically or entered by the installer (see page 9). 2) Run BODET Detect software and click on to open the appropriate web server for the networked clock (refer to the software instructions, ref.: 607548). -
Page 11: Network Configuration
The following information is displayed: • MAC Address: This is the clock’s MAC address. This address is unique to each device. This number is indicated on a label on the back of the Bodet clock. • Name: User-defined clock name. -
Page 12: Time Configuration And Synchronisation
5.3 Time configuration and synchronisation The Time Configuration page is divided into two parts. One is used to set the time zone, the other to set the synchronisation mode. The following information is displayed: • Time zone: The time zone can be selected from the dropdown menu (summer/winter time is handled automatically depending on the selected time zone). - Page 13 The Multicast address of the clients (receivers) must be the same as that on which the server broadcasts. By default, Bodet products transmit or receive using the Multicast address: 239.192.54.1 The Multicast addresses are included between 224.0.0.0 and 239.255.255.255.
-
Page 14: Parameters
5.4 Parameters This page is used to configure the clock display on the network. The following information is displayed: • Luminosity: Used to set clock brightness between 4 levels from 1 (low) to 4 (high). Default brightness is 3. • Mode 12H/24H: Used to display the time in 12- hour or 24-hour mode. Example: 8:00 (in 12-hour mode) or 20:00 (in 24-hour mode). -
Page 15: Alarm Configuration
5.5 Alarm configuration This page is used to enable clock supervision, to define the information to be transmitted and the destination server. One or more settings can be defined and configured as alarms. The following information is displayed: • Enable SNMP Trap: If enabled, error messages are sent to the SNMP Manager(s) automatically. - Page 16 • Server access: This setting is used to trigger an alert if a user connects to the web server of the clock. • Authentication failure: This setting is used to trigger an alert if a user sends an incorrect ID to the web server of the clock. •...
-
Page 17: System And Protection
5.6 System and protection This page is divided into four parts as follows: Part 1: Information panel displaying software version, time elapsed since the clock was powered on and the date of manufacture of the product (year/week). Part 2: A warning message to inform the user that once set, the correct password must be used to establish the connection with the web server. -
Page 18: Memory Backup
– Memory backup Style clocks have a permanent backup feature which stores all of the configuration parameters and display settings, even in the event of prolonged power failure. – Technical specifications • Synchronisation: RFC 2030-compliant (SNTP V4), unicast and multicast mode or via DHCP. •... -
Page 19: Maintenance Menu
VIII – Maintenance menu To access the maintenance menu, open the configuration menu by pressing and holding "S" then “+” for 3 seconds. Release both keys, then press and hold "S", then "+" again for 7 seconds. Hold down for 3 seconds Open configuration menu Hold down for 7 seconds Software version... -
Page 20: What To Do If
– What to do if… What to do if… Check that… 1) The signal type sent by the master clock is the same as the There is no synchronisation clock’s signal type. after installation. 2) The NTP server is on the same network as the slave (IP addresses, subnet mask and gateways). -
Page 21: I - Vérification Initiale
Ne jamais utiliser d’alcool, d’acétone ou autres solvants susceptibles d’endommager l’horloge. 1.3 Pré-requis Pour la mise en service des horloges, installer le logiciel BODET Detect (Cf. page 22). Ce logiciel est disponible sur le site internet www.bodet-time.com, en téléchargement gratuit. -
Page 22: Installation Mécanique
– Installation mécanique 2.1 Montage de l’horloge 2.1.1 Montage sans fond d’encastrement Selon le modèle de l’horloge, faire un découpe en suivant les dimensions listées dans le tableau ci-dessous Style 5S OP Style 7S OP Dimensions en mm a) Présenter l’horloge de manière à marquer l’emplacement des 4 trous de foxation. b) Percer les 4 trous au diamètre 6 mm pour y insérer les chevilles. - Page 23 2.1.2 Montage avec fond d’encastrement Selon le modèle de l’horloge, faire un découpe en suivant les dimensions listées dans le tableau ci-dessous Style 5S OP Style 7S OP Dimensions en mm a) Présenter le fon d’encastrementde manière à marquer l’emplacement des 6 trous de foxation. b) Percer 2 trous ( ) au Ø...
- Page 24 2.1.3 Connexions - Câbler le réseau Ethernet sur la prise RJ45 et le pupitre de commande (en option) sur le bornier de la carte électronique au dos de l’horloge. Marron Blanc Vert Jaune Câblage du pupitre Touches de configuration: S et + Prise RJ45: réseau Ethernet - Régler la luminosité: ce réglage s’effectue en appuyant sur les touches capacitives «S»...
-
Page 25: Montage Du Pupitre
• Synchronisation : Multicast • Adresse de synchronisation : 239.192.54.1 Ces quatre paramètres sont inscrit sur la carte électronique. • Nom de l’horloge : «BODET-@MAC» • Période de pool pour synchronisation unicast : 15 minutes. • SNMP désactivé • Type de trap : V2C •... -
Page 26: Configuration Basique
– Configuration basique 4.1 Réglage Heure/Date/Année Accéder au réglage de l’heure, de la date et de l’année en appuyant sur «S» pendant 3 secondes. Maintenir l’appui pendant 3 secondes Réglage de l’heure Réglage des minutes Réglage de l’année Réglage du mois Réglage du jour Fin du menu 4.2 Menu configuration manuelle... -
Page 27: Configuration Avancée
• Product : type de produit + SF (Simple Face) ou DF (Double Face) + SUP (Supervisée). • Name : nom donné par l’utilisateur à l’horloge (par défaut: Bodet-@MAC). • Synchro : état de la synchronisation (Strat 2 indique que l’horloge est à 2 « niveaux » de la source de synchronisation) + adresse IP du serveur sur lequel l’horloge se synchronise. -
Page 28: Configuration Réseau
Ce numéro est indiqué sur la carte électronique aui dos de l’horloge. • Name : nom donné par l’utilisateur à l’horloge (par défaut: Bodet-@MAC). • Case à cocher Enable DHCP : permet de définir automatiquement les paramètres IP du produit sur le réseau. -
Page 29: Configuration De L'heure Et Synchronisation
5.3 Configuration de l’heure et synchronisation La page Time Configuration est divisée en deux parties. L’une permet de configurer le fuseau horaire et l’autre le mode de synchronisation. Ci-dessous le descriptif des informations affichées : • Time zone : à l’aide du menu déroulant, il est possible de choisir le fuseau horaire (la gestion de l’heure été/hiver est automatique en fonction de la zone horaire sélectionnée). - Page 30 été renseigné. L’adresse multicast des clients doit être identique à celle diffusé par le serveur. Par défaut les produits Bodet émettent et reçoivent sur l’adresse multicast :239.192.54.1. Les adresses multicast sont comprises entre 224.0.0.0 et 239.255.255.255.
-
Page 31: Paramétrage
5.4 Paramétrage Cette page permet de paramétrer l’affichage de l’horloge sur le réseau. Ci-dessous le descriptif des informations affichées : • Luminosity : permet de régler la luminosité de l’horloge parmis 4 niveaux de 1 (faible) à 4 (élevé). Par défaut la luminosité est fixée à 3. •... -
Page 32: Configuration Des Alarmes
5.5 Configuration des alarmes Cette page permet d’activer la supervision de l’horloge, de définir les informations qui seront transmises et le serveur de destination. Il est possible de sélectionner le ou les paramètres à définir comme alarmes et de les configurer. Ci-dessous le descriptif des informations affichées : •... - Page 33 • Authentication failure : ce paramètre permet de déclencher une alarme lorsqu’un utilisateur effectue une identification erronée du serveur web de l’horloge. • Periodic Status : ce paramètre permet de vérifier que le produit est toujours en bon état de fonctionnement (cas où les alarmes seraient «perdues»). Cette vérification peut donc être effectuée sur un cycle horaire.
-
Page 34: Système Et Protection
5.6 Système et protection Cette page est divisée en quatre parties qui sont les suivantes : 1ère partie : présentation de la version du programme (logiciel), la durée depuis la mise sous tension de l’horloge et la date de fabrication du produit (année/semaine). 2ème partie : un message de prévention indique qu’une fois défini, il est obligatoire d’utiliser le bon mot de passe pour établir la connexion avec le serveur web. -
Page 35: Sauvegarde Mémoire
– Sauvegarde mémoire Les horloges Style possèdent un dispositif de sauvegarde permanent leur permettant de mémoriser l’ensemble des paramètres de configuration et les choix d’affichage, même en cas de coupure secteur prolongée. – Caractéristiques techniques • Synchronisation : conforme RFC2030 (SNTP V4), mode unicast, multicast ou via DHCP. •... -
Page 36: Menu Technicien
VIII – Menu technicien Pour entrer dans le menu technicien, accéder au menu configuration en appuyant sur «S» (maintenir l’appui) puis sur «+» pendant environ 3 secondes. Ensuite, après avoir relâché ces deux touches, appuer de nouveau sur «S» puis «+» pendant environ 7 secondes. Maintenir l’appui pendant 3 secondes Accès au menu configuration Maintenir l’appui pendant 7 secondes... -
Page 37: Que Faire Si
– Que faire si...? ...Vérifier. Que faire si...? ...Vérifier que 1) Vérifier que le type de signal émis par l’horloge mère est de Pas de synchronisation même type que celui de l’horloge. après l’installation 2) Le serveur NTP est sur le même réseau que la réceptrice (adresses IP, masque de sous réseau et Passerelles).
Need help?
Do you have a question about the Style 5S Hospital NTP and is the answer not in the manual?
Questions and answers