Table of Contents
Advertisement
Quick Links
Advertisement
Table of Contents

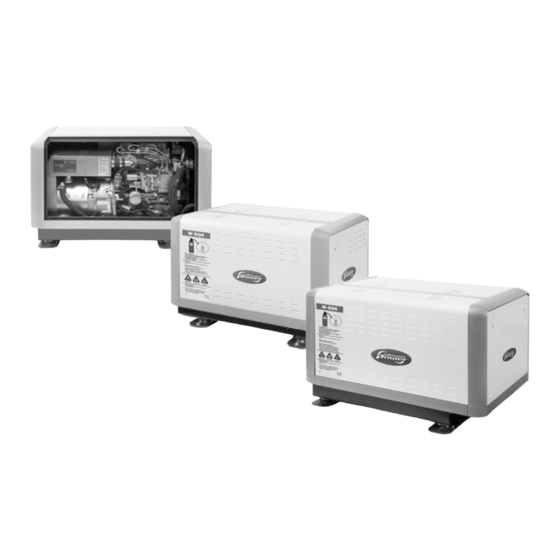
Related Manuals for Whisper Power W-SQ 6


Summary of Contents for Whisper Power W-SQ 6
- Page 1 INSTALLATION MANUAL W-SQ 6 / 8 / 12 / 16 - 1500 RPM - Mobile diesel generating set 230V / 50Hz Digital Diesel Control WHISPERPOWER BV Kelvinlaan 82 9207 JB Drachten Netherlands Tel.: +31-512-571550 Fax: +31-512-571599 V1.1 December 2016 www.whisperpower.com...
-
Page 2: Table Of Contents
CONTENTS CONTENTS INTRODUCTION ................................3 General ................................3 Generating sets for vehicles ..........................3 1.2.1 Marine and mobile generators ......................3 1.2.2 Why two radiators ..........................4 1.2.3 Why the alternator should be liquid-cooled ..................4 INSTALLATION ................................5 General ................................5 Location ................................ -
Page 3: Introduction
INTRODUCTION 1 INTRODUCTION GENERAL GENERATING SETS FOR VEHICLES This installation manual applies to the installation of 1.2.1 Marine and mobile generators WhisperPower gensets in vehicles. This manual is valid for the following models: WhisperPower generators originate from the marine sector. But there are also specially designed Whispers Part number Description available for mobile applications, suitable for supplying... -
Page 4: Why Two Radiators
INTRODUCTION 1.2.2 Why two radiators The optimum engine operating temperature is between 87° and 92° Celsius. The radiator reduces the temperature of the cooling liquid by only 5°C to 12°C. The returning “cold” coolant therefore has a minimum temperature of approx. -
Page 5: Installation
INSTALLATION 2 INSTALLATION Figure 4: Schematic installation diagram GENERAL LOCATION To ensure reliability and durability of the equipment, it is When looking for a proper place for a generator in a very important that the installation is carried out with the vehicle all relevant aspects have to be taken into account ... -
Page 6: Instructions For Optimal Sound And Vibration Insulation
INSTALLATION INSTRUCTIONS FOR OPTIMAL SOUND VENTILATION AND VIBRATION INSULATION 2.4.1 General Position the generating set as low as possible in the vehicle. The generating set is secured to the base frame The generating set normally draws air from the engine by means of flexible engine mountings. -
Page 7: Air Strainer Element
INSTALLATION WHEN NOT USING THE FILTER, THIS HOLE SHOULD BE OPENED 50230003 AIRCLEANER 50230005 ADAPTER 50230006 AIRCLEANER + ADAPTER Figure 6: Mounting of the air strainer element 2.4.2 Air strainer element CONNECTIONS Applying a generator in a vehicle, where combustion air is The generating set comes with all supply lines and output taken in from below the vehicle, there is often much dust, cables (i.e. - Page 8 INSTALLATION Coolant generator in Battery positive (+) Fuel out Ø8mm Fuel in Ø8mm Battery negative (–) Coolant engine out Coolant engine in Coolant generator out Expansion tank Exhaust 1½” AC power output Remote control Figure 7: W-SQ6 connections December 2016 / W-SQ6/8/12/16 for mobile applications / EN...
- Page 9 INSTALLATION Expansion tank Ø8mm Exhaust 1½” Remote control AC power output Figure 8a: W-SQ8 connections Coolant engine out Coolant generator out Battery negative (–) 25mm² Fuel out Ø8mm Fuel in Ø8mm Battery positive (+) 25mm² Coolant generator in Coolant engine in Figure 8b: W-SQ8 connections EN / W-SQ6/8/12/16 for mobile applications / December 2016...
- Page 10 INSTALLATION Expansion tank Ø8mm Exhaust 1½” Remote control AC power output Figure 9a: W-SQ12 connections Coolant engine out Coolant generator out Fuel out Ø8mm Fuel in Ø8mm Battery negative (–) 25mm² Battery positive (+) 25mm² Coolant generator in Coolant engine in Figure 9b: W-SQ12 connections December 2016 / W-SQ6/8/12/16 for mobile applications / EN...
- Page 11 INSTALLATION Expansion tank Ø8mm Exhaust 1½” Remote control AC power output Figure 10a: W-SQ16 connections Coolant engine out Coolant generator out Coolant generator in Coolant engine in Fuel in Ø8mm Fuel out Ø8mm Battery positive (+) 35mm² Battery negative (–) 35mm²...
-
Page 12: Fuel Supply
INSTALLATION 2.5.1 Fuel supply Driving the tank empty below the level of the suction pipe of the generator could make it FUEL TANK necessary to bleed the fuel system. Fuel tanks should be made of appropriate material such as (stainless) steel or plastic. Steel tanks should not be FUEL LIFT PUMP galvanised or painted inside. - Page 13 INSTALLATION Fig. 12 Fuel supply (fuel tank is below the generating set) 1 Fuel return 2 Fuel supply 3 Prefilter / Water separator (optional) 4 Extra fuel lift pump (optional) 5 Fuel tank Figure 13: Fuel line assembly with vertical mounted pump and fuel lift pump mounted in an angle EN / W-SQ6/8/12/16 for mobile applications / December 2016...
-
Page 14: Radiator Cooling
INSTALLATION FUEL PIPES When the tank is above the generating set (figure 11) we recommend ending the return line on the top of the tank. When the return is on the top - in case of a leakage the return line cannot overflow because of siphoning. One will only need a fuel cock in the fuel supply line. - Page 15 INSTALLATION figure 16). Bends in the piping, that can trap air bubbles, should be avoided or ventilated (refer to figure 17). Piping should not be fitted above the radiator! Figure 18: Alternator cooling system: open expansion tank Figure 16: Air traps should be avoided with overflow pillar For the alternator cooling system we use an open -non pressurised- system.
- Page 16 INSTALLATION the level of the manifold. Additional filling has to be done via the expansion tank. For large engine cooling systems with long pipes or for extra reserve there is an extra-large expansion tank with a content of 7 litres and an alarm for low coolant level that can be supplied as an option (refer to figure 19).
- Page 17 INSTALLATION HOW AND WHERE TO MOUNT THE RADIATORS The radiator kit includes rubber mountings to prevent vibrations to be transferred to the body of the vehicle (fig. 22). Due to the difference between vehicles general instructions are not available. One has to find out where the best place for mounting is.
-
Page 18: Dry Exhaust System
INSTALLATION 2.5.3 Dry exhaust system Roof mounted radiators The radiators on the roof is often the best option from the GENERAL REMARKS point of view of keeping the noise of the fans away from A dry exhaust muffler system should be very effective in people and it will give the best result in dissipating the silencing the exhaust when applying the right mufflers. - Page 19 INSTALLATION A negative feature of a dry exhaust system is the heat INSTALLATION OF THE EXHAUST radiated by its components. Measures are taken to Before determining the location of the generator set one overcome the heat problem: The exhaust bend to bring the has to consider how to get away with the exhaust.
-
Page 20: Electrical Installation (12 Volt)
INSTALLATION 2.5.4 Electrical installation (12 Volt) One can mount the control panel after drilling a hole in the dashboard using the plastic cover. Refer to the DIGITAL DIESEL CONTROL SYSTEM dimensional drawings in chapter 4. The electrical control system is standard in 12 Volt with negative earth. - Page 21 INSTALLATION back of the remote panel. Refer to fig. 31. The sense wires must be connected directly on the second battery before a Remove bypass main switch and be protected by a 3 Amps fuse. between J7 - J18 (Monitoring the generator starter battery does not require an extra sense connection).
- Page 22 INSTALLATION main battery and the starter battery. Also a small charger OTHER RECOMMENDATIONS AND WARNINGS can be used to charge the starter battery only, such as the The battery should be secured for poor road conditions WBC Handy 20 or 70 included in the battery installation and the terminals should be insulated.
-
Page 23: Ac Power System (230 Volt)
INSTALLATION 2.5.5 AC power system (230 Volt) GROUNDING The electric power supplied by the generator The AC alternator windings are not grounded. is of a high voltage and dangerous to people. The housing of the alternator and all other metal parts are Before working (installation) on the system grounded To make a connection between “neutral”... -
Page 24: Installation Specifications
INSTALLATION SPECIFICATIONS 3 INSTALLATION SPECIFICATIONS GENERAL Check all DC connections, check if the battery switch/ circuit breaker is closed. Make a hole for combustion air in the sound shield. Open the fuel valve. Check if there are no air leaks in Mount an air inlet filter (if required). -
Page 25: Technical Data
INSTALLATION SPECIFICATIONS TECHNICAL DATA W-SQ6 EN W-SQ8 Model W-SQ6 W-SQ8 Dimensions (l x w x h) 80.5 x 52.5 x 58.0 cm 90 x 58 x 63 cm Weight including sound shield 240kg 335 kg Max. operation angle 25° 25° Remote panel 15 m cable Digital Diesel Control System Battery capacity min. -
Page 26: Installation Materials
INSTALLATION SPECIFICATIONS INSTALLATION MATERIALS FUEL KIT article no description dimensions 50230091 Filter head for fuel strainer/water separator M14 × 1.5 mm 50221618 Parallel male coupling M14 - 8 mm 50221619 Parallel male coupling M14 - 10 mm 50221620 Hose connection, outer cone M16 ×... - Page 27 INSTALLATION SPECIFICATIONS BATTERY INSTALLATION KIT (W-SQ 6, 8 and 12) article no description dimensions 61112002 WBC-Handy 20 charger 12V / 2A 157 × 33 × 34 mm 40290093 battery terminal (NEG-) 40290094 battery terminal (POS+) 40290099 M8 battery pole adapter set 40290098 isolation caps (red &...
- Page 28 INSTALLATION SPECIFICATIONS DRY EXHAUST KIT 1½” for W-SQ6, 8, 12 and 16 article no description Exhaust hose SS 500mm fem./male 11/2” 50220043 50220042 Insulation blanket 35x60 exhaust hose 1 1/2 Absorption muffler steel 11/2” 50230523 Resonance muffler steel 11/2” 50230524 Insulation blanket 80x75 muffler SDHC 11/2”...
- Page 29 INSTALLATION SPECIFICATIONS Figure 34: Engine cooling kit, exhaust kit and alternator cooling kit EN / W-SQ6/8/12/16 for mobile applications / December 2016...
- Page 30 INSTALLATION SPECIFICATIONS RADIATOR COOLING KIT ALTERNATOR 230VAC W-SQ16 (see 2.5.2.1 for TopCool alternative) article no description 50230307 Radiator AP 430 230VAC 50221103 Straight reducer m/f 1”-3/4” 50221064 Male nipple 1” 50221044 TEE fitting 1” 50221010 Male hose connection 1x25 50221004 Male hose connection 3/4x20 50212405 Temperature switch 35-45°C...
- Page 31 INSTALLATION SPECIFICATIONS RADIATOR COOLING KIT ENGINE 12VDC FOR W-SQ6 Same as article no. 40201879, except: article no description 50230302 Radiator cooler AP 300/2 E 12VDC TOTAL 40201871 Radiator cooling kit engine 12VDC W-SQ6 RADIATOR COOLING KIT ENGINE 12VDC FOR W-SQ6 Same as article no.
- Page 32 INSTALLATION SPECIFICATIONS RADIATOR COOLER KIT ENGINE 230VAC W-SQ12 and W-SQ16 (see 2.5.2.1 for TopCool alternative) article no description 50230311 Radiator AP 430/2 230 VAC W–SQ12 and 16 50221502 Hose clamp stainless19-29 Male nipple 1” 50221064 50221044 T-stuk-1” 50221014 Male hose connection 1x35 Straight reducer m/f 1”-3/4”...
-
Page 33: Diagrams & Drawings
DIAGRAMS & DRAWINGS 4 DIAGRAMS & DRAWINGS LAYOUT GENERATOR CONTROL FOR W-SQ6, 8 AND 12 WITH 230VAC FAN Fig. 35: Layout generator control for W-SQ6, 8 and 12 with 230VAC radiator fan EN / W-SQ6/8/12/16 for mobile applications / December 2016... -
Page 34: Layout Generator Control For W-Sq6 With 12Vdc Fan
DIAGRAMS & DRAWINGS LAYOUT GENERATOR CONTROL FOR W–SQ6 WITH 12VDC FAN Fig. 36: Layout generator control for W-SQ6 with 12VDC radiator fan December 2016 / W-SQ6/8/12/16 for mobile applications / EN... -
Page 35: Layout Generator Control For W-Sq6 With 24Vdc Fan
DIAGRAMS & DRAWINGS LAYOUT GENERATOR CONTROL FOR W-SQ6 WITH 24VDC FAN Optional control for two speeds fans. See chapter 4.9 Fig. 37: Layout generator control for W-SQ6 with 24VDC radiator fan EN / W-SQ6/8/12/16 for mobile applications / December 2016... -
Page 36: Layout Generator Control For W-Sq16 With 230Vac Fan
DIAGRAMS & DRAWINGS LAYOUT GENERATOR CONTROL FOR W-SQ16 WITH 230VAC FAN Fig. 38: Layout generator control for W-SQ16 with 230VAC radiator fan December 2016 / W-SQ6/8/12/16 for mobile applications / EN... -
Page 37: Wiring Colours W-Sq6, 8 And 12
DIAGRAMS & DRAWINGS WIRING COLOURS W-SQ6, 8 AND 12 Cable code number colour cross section battery > starter motor 25 mm² starter motor > DDC 6 mm² starter motor > LCP 2,5 mm² battery > ground black 25 mm² ground > LCP ground (GND) black 4 mm²... -
Page 38: Wiring Colours W-Sq16
DIAGRAMS & DRAWINGS WIRING COLOURS W-SQ16 Cable code number colour cross section battery > starter motor 35 mm² starter motor > DDC 6 mm² starter motor > LCP 2,5 mm² battery > ground black 35 mm² ground > LCP ground (GND) black 4 mm²... -
Page 39: Ac Wiring Diagram 230V / 50Hz
DIAGRAMS & DRAWINGS AC WIRING DIAGRAM 230V / 50HZ Fig. 39: AC wiring diagram EN / W-SQ6/8/12/16 for mobile applications / December 2016... -
Page 40: Electrical Diagram Radiator Fan Control 230Vac
DIAGRAMS & DRAWINGS ELECTRICAL DIAGRAM RADIATOR FAN CONTROL 230VAC Fig. 40: Electrical diagram for standard fan control using 230V AC radiator fans Fig. 41: Electrical diagram fan control using 230V AC radiator fans – with two speeds fans (optional) December 2016 / W-SQ6/8/12/16 for mobile applications / EN... -
Page 41: Electrical Diagram Radiator Fan Control 12 / 24 Vdc
DIAGRAMS & DRAWINGS ELECTRICAL DIAGRAM RADIATOR FAN CONTROL 12 / 24 VDC Fig. 42: Electrical diagram fan control using 12V or 24V DC radiator fans (optional) EN / W-SQ6/8/12/16 for mobile applications / December 2016... -
Page 42: Wiring Diagram Electronic Governor (Standard For W-Sq6, 8 And 12)
DIAGRAMS & DRAWINGS 4.10 WIRING DIAGRAM ELECTRONIC GOVERNOR (STANDARD FOR W-SQ6, 8 AND 12) Fig. 43: Electronic governor In addition to the mechanical governor, the W-SQ6, 8 and The actuator controls the engine speed. This actuator 12 are standard equipped with an electronic governor. A replaces the standard hold solenoid that is on all other governor keeps the speed (RPM=Rotations Per Minute) of mechanical controlled WhisperPower engines. -
Page 43: Remote Control Panel Drawings
DIAGRAMS & DRAWINGS 4.11 REMOTE CONTROL PANEL DRAWINGS Fig. 44: WhisperPower remote panel The remote panel comes in a carton that can be used as a template to drill the mounting hole. EN / W-SQ6/8/12/16 for mobile applications / December 2016... -
Page 44: Dimensions W-Sq6
DIAGRAMS & DRAWINGS 4.12 DIMENSIONS W-SQ6 Fig. 45: Outer dimensions (mm) W-SQ6 CONNECTIONS W-SQ6: BOX DIMENSIONS W-SQ6: • exhaust: • length 80.5 cm (31.7’) 1 ½” • fuel hose: 5/16” (8 mm) • width 52.5 cm (20.7’) • radiator alternator: 3/4”... -
Page 45: Dimensions W-Sq8
DIAGRAMS & DRAWINGS 4.13 DIMENSIONS W-SQ8 Fig. 46: Outer dimensions (mm) W-SQ8 CONNECTIONS W-SQ8: BOX DIMENSIONS W-SQ8: • exhaust: 1 ½” • length 900 mm (35.4”) • fuel hose: 5/16” (8 mm) • width 575 mm (22.6”) • radiator alternator: 3/4”... -
Page 46: Dimensions W-Sq12
DIAGRAMS & DRAWINGS 4.14 DIMENSIONS W-SQ12 Fig. 47: Outer dimensions (mm) W-SQ12 CONNECTIONS W-SQ12: BOX DIMENSIONS W-SQ12: • exhaust: 1 ½” • length 1060 mm (41.7”) • fuel hose: 5/16” (8 mm) • width 575 mm (22.6”) • radiator alternator: 3/4”... -
Page 47: Dimensions W-Sq16
DIAGRAMS & DRAWINGS 4.15 DIMENSIONS W-SQ16 Fig. 48: Outer dimensions (mm) W-SQ16 CONNECTIONS W-SQ16: BOX DIMENSIONS W-SQ16: • exhaust: 1 ½” • length 1160 mm (45.7”) • fuel hose: 5/16” (8 mm) • width 680 mm (26.8”) • radiator alternator: 3/4”... - Page 48 Kelvinlaan 82, 9207 JB Drachten, Netherlands Tel : + 31-512-571550 / Fax : + 31-512-571599 www.whisperpower.com / info@whisperpower.com...
Need help?
Do you have a question about the W-SQ 6 and is the answer not in the manual?
Questions and answers