
Related Manuals for YOKOGAWA UP350


Summary of Contents for YOKOGAWA UP350
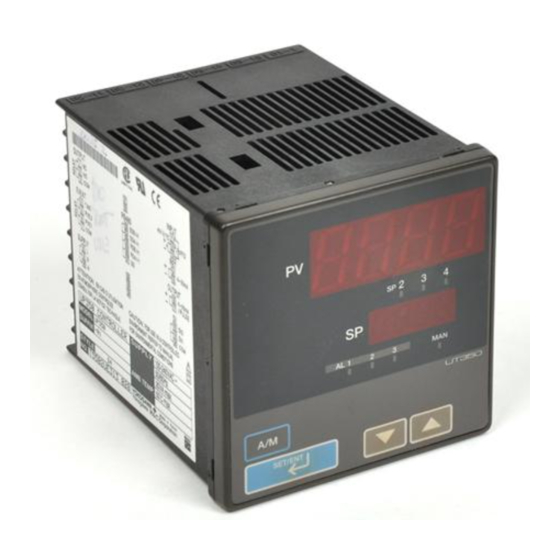
- Page 1 Instruction Manual Model UP350 Program Controller User’s Manual IM 05E01D02-41E IM 05E01D02-41E 1st Edition...
- Page 2 Blank Page...
- Page 3 (2) Read this manual carefully to gain a thorough understanding of how to operate this product before starting operation. (3) This manual describes the functions of this product. Yokogawa M&C Corporation (hereinafter simply referred to as Yokogawa) does not guarantee the application of these functions for any particular purpose.
- Page 4 Draws attention to information that is essential for understanding the operation and/or features of the controller. I Regarding Force Majeure Yokogawa M&C Corporation assumes no liability for any loss or damage, direct or indirect, caused by the use of or unpredictable defects of the product. IM 05E01D02-41E...
-
Page 5: Table Of Contents
Toc-1 <Int> <Rev> Model UP350 Program Controller User’s Manual IM 05E01D02-41E 1st Edition CONTENTS Installation ....................1-1 Model and Suffix Codes .................. 1-1 How to Install ....................1-2 How to Connect Wires ..................1-5 Hardware Specifications ................1-7 Terminal Wiring Diagrams ................1-11 Initial Settings .................. - Page 6 Toc-2 <Int> <Rev> Troubleshooting and Maintenance ............5-1 Troubleshooting ....................5-1 Maintenance ....................5-4 5.2.1 Cleaning ................... 5-4 5.2.2 Replacing Brackets ................5-4 5.2.3 Attaching Terminal Cover ..............5-4 5.2.4 Replacing Parts with a Limited Service Life ........5-6 5.2.5 Replacing Control Output Relays ............
-
Page 7: Installation
Model and Suffix Codes Before using the controller, check that the model and suffix codes match your order. Model Suffix Code Description UP350 Program controller (provided with retransmission output and 15 V DC loop power supply as standard) Type Standard type... -
Page 8: How To Install
<Toc> <1. Installation> How to Install NOTE To install the controller, select a location where: no one may accidentally touch the terminals, mechanical vibrations are minimal, 150mm corrosive gas is minimal, temperature can be maintained at about 23 C and 150mm 150mm the fluctuation is minimal,... - Page 9 <Toc> <1. Installation> I External Dimensions and Panel Cutout Dimensions UP350 Unit: mm Large bracket Small bracket 1 to 10 mm (Panel thickness) General installation Side-by-side close installation +0.8 117 min. [(N-1) 96+92] 145 min. (53) "N" stands for the number of controllers to be installed.
- Page 10 <Toc> <1. Installation> I How to Install Turn off the power to the controller before installing it on the panel because there is a possibility of electric shock. CAUTION After opening the mounting hole on the panel, follow the procedures below to install the controller: Insert the controller into the opening from the front of the panel so that the terminal board on the rear is at the far side.
-
Page 11: How To Connect Wires
I For DC Relay Wiring I For AC Relay Wiring UP350 External AC power supply UP350 External DC power supply... - Page 12 Power supply, grounding, relay contact outputs 600 V PVC insulated wires, JIS C 3307, 0.9 to 2.0 mm Thermocouple Shielded compensating lead wires, JIS C 1610, (See Yokogawa Electric's GS 6B1U1-E.) Shielded wires (three conductors), UL2482 (Hitachi Cable) Other signals Shielded wires...
-
Page 13: Hardware Specifications
<Toc> <1. Installation> Hardware Specifications PV Input Signals • Number of inputs: 1 (terminals • Input type: Universal input system. The input type can be selected with the software. • Sampling period: 250 ms • Burnout detection: Functions at TC, RTD, standard signal (0.4 to 2 V or 1 to 5 V) Upscale, downscale, and off can be specified. - Page 14 <Toc> <1. Installation> Control Output Universal output system, The output type can be selected with the software. • Current output (Standard type: terminals Number of outputs 1 (switched between a voltage pulse output and current output) Output signal 4-20 mA DC Load resistance or less Output accuracy...
- Page 15 <Toc> <1. Installation> Safety and EMC Standards • Safety: Compliant with IEC1010-1: 1990 and EN61010-1: 1992 Approved by CSA1010 CSA1010 installation category (overvoltage category): CATII (IEC1010-1) Approved by UL508 • EMC standards: This instrument complies with the following EMC standards (the instrument continues to operate at a measuring accuracy of within 20% of the range during tests): EMI (emission), EN61326-1: 1997+Am1: 1998...
- Page 16 1-10 <Toc> <1. Installation> Signal Isolations • PV input terminals: Isolated from other input/output terminals. Not isolated from the internal circuit. • 15 V DC loop power supply terminals: Not isolated from 4-20 mA analog output and voltage pulse control output. Isolated from other input/output terminals and internal circuit.
-
Page 17: Terminal Wiring Diagrams
1-11 <Toc> <1. Installation> Terminal Wiring Diagrams NOTE Do not use unassigned terminals as relay terminals. Terminal wiring diagrams are shown on and after the next page. IM 05E01D02-41E 1st Edition : May 31,2000-00... -
Page 19: Initial Settings
<Toc> <2. Initial Settings> Initial Settings This chapter describes examples of setting PV input types, and control output types. Carrying out settings described herein allows you to perform basic control. Refer to examples of various settings to understand how to set parameters required. Refer to “6.1 Parameter Map”... -
Page 20: Names And Functions Of Front Panel Parts
<Toc> <2. Initial Settings> Names and Functions of Front Panel Parts 1. Process 4. Event indicator variable (PV) lamps display 2. Setpoint display 5. Light-loader 3. Status indicator interface lamps keys 8. SET/ENT key 6. PRG 1 and 7. RESET key PRG 2 keys Name of Part Function... -
Page 21: Setting Pv Input Type (Setting First At Power-On)
<Toc> <2. Initial Settings> I Factory-set Values of Main Parameters Item Factory-set defaults of standard type controllers Control output Time proportional PID relay output (variable) Control action Reverse action (variable) PID parameters P = 5.0%, I = 240 sec, D = 60 sec Setting PV Input Type (Setting First at Power-on) NOTE... - Page 22 <Toc> <2. Initial Settings> Press the SET/ENT key once to register the Press the SET/ENT key once to display the required setpoint. parameter “RL” (minimum value of PV input range). Displays parameter PVE1 PVE2 PRG1 PRG2 “RL”. PVE1 PVE2 PRG1 PRG2 SET/ENT RESET...
- Page 23 <Toc> <2. Initial Settings> I Instrument Input Range Codes Instrument Input Instrument Input Type Measurement Accuracy Range Code Input Range Set the data item PV Input Type "IN" to the OFF option to leave the PV input Unspecified type undefined. -200 to 1370 C -300 to 2500 F -199.9 to 999.9 C...
- Page 24 <Toc> <2. Initial Settings> NOTE The controller may automatically initialize the registered operating parameter setpoints if any change is made to the data item PV Input Type (IN), Maximum Value of PV Input Range (RH), Minimum Value of PV Input Range (RL), PV Input Decimal Point Position (SDP), Maximum Value of PV Input Scale (SH) or Minimum Value of PV Input Scale (SL).
-
Page 25: Changing Pv Input Type
<Toc> <2. Initial Settings> Changing PV Input Type The following operating procedure describes an example of changing the setting of K-type thermocouple (-199.9 to 500.0 C) to RTD Pt100 (-199.9 to 500.0 C) and a measurement range of 0.0 to 200.0 C. PV input terminal Thermocouple/mV/V input...... - Page 26 <Toc> <2. Initial Settings> Press the SET/ENT key once to register the Press the SET/ENT key once to display the setpoint. parameter “RL” (minimum value of PV input range). Displays parameter PVE1 PVE2 PRG1 PRG2 “RL”. PVE1 PVE2 PRG1 PRG2 SET/ENT RESET SET/ENT...
-
Page 27: Setting Control Output Type
<Toc> <2. Initial Settings> Setting Control Output Type The following operating procedure describes an example of changing time proportional PID relay output (0: factory-set default) to current output (2). Control output terminal Values in parentheses are setpoints Time proportional PID relay (0)/on-off(3) output......Current (2)/time proportional PID voltage pulse (1) output..... - Page 28 2-10 <Toc> <2. Initial Settings> Press the SET/ENT key once to register the Press the SET/ENT key for more than 3 seconds. setpoint. This returns you to the display shown at power-on (figure below). Stop (RESET) state PVE1 PVE2 PRG1 PRG2 Displays PV.
-
Page 29: Programming
<Toc> <3. Programming> Programming This chapter explains how to create programs by citing specific examples. Create user programs by referring to the given programming examples. Programming is not possible when the controller is set in Run mode (PRG). Place the controller in Stop (RESET) mode before you start programming. -
Page 30: Example Of Program Pattern Setup Charts
<Toc> <3. Programming> Example of Program Pattern Setup Charts Complete the following setup chart before setting programs in the controller. Filling in the chart makes it easier for you to input program data into the controller. See “3.8 Program Pattern Setup Charts” for more details. In the following chart, fill in the fields with bold-face borders. -
Page 31: Creating Program Patterns
<Toc> <3. Programming> Creating Program Patterns The following operating procedure describes an example of creating the program dis- cussed in “3.1 Overview of Program Patterns.” NOTE Before creating the program, reverify the Maximum Value of PV Input Range (RH), Mini- mum Value of PV Input Range (RL), Program Time Unit (TMU), and Segment Setting Method (SEG.T) parameters. - Page 32 <Toc> <3. Programming> Bring the operating display into view Press the SET/ENT key once to register the (appears at power-on). setpoint. Stop (RESET) state Displays PV. PVE1 PVE2 PRG1 PRG2 PVE1 PVE2 PRG1 PRG2 SET/ENT RESET SET/ENT RESET Press the SET/ENT key once to display the Press the...
- Page 33 <Toc> <3. Programming> Press the SET/ENT key once to display the Press the SET/ENT key once to register the parameter “1.EON”. setpoint. Displays parameter “1.EON”. PVE1 PVE2 PRG1 PRG2 PVE1 PVE2 PRG1 PRG2 SET/ENT SET/ENT RESET RESET Press the key to display the Press the SET/ENT key once to display the...
- Page 34 <Toc> <3. Programming> Press the SET/ENT key once to display the Press the SET/ENT key once to register the parameter “1.SP1”. setpoint. Displays parameter “1.SP1”. PVE1 PVE2 PRG1 PRG2 PVE1 PVE2 PRG1 PRG2 SET/ENT SET/ENT RESET RESET Press the key to display the Press the SET/ENT key once to display the...
- Page 35 <Toc> <3. Programming> Press the key to display the Press the key to display the required setpoint. required setpoint. The figure below shows an example of the The figure below shows an example of the parameter set to “1 hr and 20 min”. parameter set to “10 min”.
-
Page 36: Changing Program Patterns
<Toc> <3. Programming> Changing Program Patterns The following operating procedure describes an example of changing the program pattern created in “3.3 Creating Program Patterns,” as shown in the figure below. Example of Changing Program Pattern 1 Temperature The “Segment-2 Target Setpoint (1.SP2)”... - Page 37 <Toc> <3. Programming> Press the SET/ENT key once to display the Press the SET/ENT key several times to display parameter “LL”. the parameter “1.SP2”. Displays Displays parameter parameter “LL”. “1.SP2”. PVE1 PVE2 PRG1 PRG2 PVE1 PVE2 PRG1 PRG2 SET/ENT SET/ENT RESET RESET Press the...
-
Page 38: Program Parameter Map
3-10 <Toc> <3. Programming> Program Parameter Map Operating Display SET/ENT Press this key for more than 3 seconds to move to the operating LL communication display. SET/ENT interface selection Press this key for more than 3 seconds to move to the operating parameter setting display. -
Page 39: Lists Of Program Parameters
3-11 <Toc> <3. Programming> Lists of Program Parameters * Parameters relating to PV or program setpoints should all be set in real numbers. For example, use temperature values to define program setpoints and PV event setpoints for temperature input. * The “User Setting” column in the table below is provided for the customer to record setpoints. - Page 40 3-12 <Toc> <3. Programming> Parameter Name of Setting Range and Description Initial Value User Target Item Symbol Parameter Setting in CD-ROM Segment-1 OFF, 0.00 to 99.59 (hour and minute or minute and second) segment time Ramp setting: OFF, 0.0 to 100.0% of PV input range span (1.TM1) (1 hr or 1 min.) Use the TMU setup parameter to set the time unit.
- Page 41 3-13 <Toc> <3. Programming> G Program-2 Parameters Parameter Name of Setting Range and Description Initial Value User Target Item Symbol Parameter Setting in CD-ROM PV event-1 type OFF, 1 to 10 1: PV high limit (energized, no stand-by action) (2.AL1) 2: PV low limit (energized, no stand-by action) 3: Deviation high limit (energized, no stand-by action) 4: Deviation low limit (energized, no stand-by action)
- Page 42 3-14 <Toc> <3. Programming> Parameter Name of Setting Range and Description Initial Value User Target Item Symbol Parameter Setting in CD-ROM Segment-2 0.0 to 100.0% of PV input range 0.0% of PV target setpoint input range (2.SP2) Segment-2 OFF, 0.00 to 99.59 (hour and minute or minute and second) segment time Ramp setting: OFF, 0.0 to 100.0% of PV input range span (2.TM2)
- Page 43 3-15 <Toc> <3. Programming> List of PV Event Types Alarm type code Alarm type code Alarm action Alarm action Contact Contact Contact Contact Alarm type Alarm type closes opens closes opens “Open/close” shows status of relay contact, “Open/close” shows status of relay contact, if alarm if alarm if alarm...
-
Page 44: Explanation Of Program Functions
3-16 <Toc> <3. Programming> Explanation of Program Functions I Programming You can create programs using either method 1 or 2 described below. The controller is factory-set to “method 1”. To create programs using method 2, change the setpoint of the SEG.T (Segment Setting Method) setup parameter to “1”. Before you begin programming, determine whether your programs are created using the time unit of “hour and minute”... - Page 45 3-17 <Toc> <3. Programming> <Controller Settings> Setpoint of TMU (Time Unit of Program) Setup Parameter When changing the setpoint linearly over an hour 0 (factory-set default) When changing the setpoint linearly over a minute Note: The “Time Unit of Program (TMU)” parameter is the time unit you use when creating programs. When creating a soak segment during programming, set a time (“hour and minute”...
- Page 46 3-18 <Toc> <3. Programming> I Controller Behavior at the Start of Program Operation You can determine how the controller should behave at the start of program operation. 1. Letting the controller run from a starting target setpoint A starting target setpoint refers to a setpoint from which program operation begins. The controller operates in such a manner that the setpoint changes to the target setpoint over the segment time set for segment 1, irrespective of what the PV value is.
- Page 47 3-19 <Toc> <3. Programming> 3. Letting the controller start from the current PV and run according to ramp settings defined for segment 1 of the created program Starting Point of Operation Controller Behavior Begins to run from point C1 (ignores the time setting defined for segment 1). Begins to run from point C1 (ignores the time setting defined for segment 1).
- Page 48 3-20 <Toc> <3. Programming> I Program Linking Use this function to append program pattern 2 to program pattern 1 so the controller runs according to the resulting single program pattern. You can also append program pattern 2 to program pattern 1. Precautions when Linking Programs There may be a case that a difference exists between the target setpoint defined for the final segment of a program pattern to be run first and the starting target setpoint of a pro-...
- Page 49 3-21 <Toc> <3. Programming> I Suspending the Progress of a Program (Wait Function) When a running program moves from one segment to another, the wait function places the program in a wait (stand-by) state, by using a wait zone and a wait time, until any deviation is cancelled.
-
Page 50: Program Pattern Setup Charts
Fill in the fields with bold-face borders in the order of steps 1 to 10, as shown below. Then, input these setup data items to the UP350. 1. Maximum value of PV input range: Setpoint of the “Maximum Value of PV Input Range (RH)” setup parameter 2. - Page 51 Program time unit (TMU) Starting target setpoint (SSP) Program name Segment setting method (SEG.T) Start code (STC) Model UP350 - Junction code (JC) Serial No. Unit Maximum value of PV input range (RH) 100% Minimum value of PV input range (RL) Segment No.
- Page 52 Blank Page...
-
Page 53: Operations
<Toc> <4. Operations> Operations This chapter describes key entries for operating the controller. For operations using external contact inputs, see “1.5 Terminal Wiring Diagrams.” If you cannot remem- ber how to carry out an operation during setting, press the key for more than 3 SET/ENT seconds. -
Page 54: Performing/Canceling Auto-Tuning
<Toc> <4. Operations> Performing/Canceling Auto-tuning Perform auto-tuning when you have finished creating program patterns. Make sure the controller is in Run state (PRG) before carrying out auto-tuning. See “4.4 Starting (PRG)/ Stopping (RESET) the Controller,” to change to PRG. PID constants are obtained by using the current program setpoint value at the start of auto- tuning. -
Page 55: Setting Pid Manually
<Toc> <4. Operations> Press the SET/ENT key once to register the During auto-tuning, the panel indications setpoint. (This starts auto-tuning.) become as shown below. If the key is pressed when AT = OFF, SET/ENT auto-tuning will be cancelled. In this case, PID contains the value existing before auto-tuning. - Page 56 <Toc> <4. Operations> Press the SET/ENT key once to register the Press the SET/ENT key once to register the setpoints. setpoint. PVE1 PVE2 PRG1 PRG2 PVE1 PVE2 PRG1 PRG2 SET/ENT SET/ENT RESET RESET The same steps can be used for integral Press the SET/ENT key once to display the...
-
Page 57: Starting (Prg)/Stopping (Reset) The Controller
<Toc> <4. Operations> Starting (PRG)/Stopping (RESET) the Controller The following operating procedure starts program operation. Bring the operating display into view (appears at power-on). Stop (RESET) state Displays PV. PVE1 PVE2 PRG1 PRG2 PRG1 and PRG2 SET/ENT lamps OFF. RESET Press key for 2 seconds. - Page 58 <Toc> <4. Operations> I Diagram of Operating State Transition RESET State PV display: Displays the PV input value. SP display: Displays the PV input value. LED lamps: The PRG1, PRG2 and HLD lamps OFF. Control output: Provides the preset output value, which is factory-set to 0% (see the “PO”...
-
Page 59: Enabling/Disabling Hold Mode Of Program Operation
<Toc> <4. Operations> Enabling/Disabling Hold Mode of Program Operation The following operating procedure brings program pattern 1 into a pause during operation. This procedure also applies to program pattern 2. NOTE If a contact input is on (hold mode is set) when the hold mode is enabled and disabled with the input, the mode cannot be cancelled by key operation. -
Page 60: Changing Program Setpoints When In Hold Mode
<Toc> <4. Operations> Changing Program Setpoints when in Hold Mode The following operating procedure changes program setpoints when program operation is put in hold mode. Before changing program setpoints, enable the hold mode of program operation as in- structed in “4.5 Enabling/Disabling the Hold Mode of Program Operation.” When you have finished changing the setpoints, cancel the hold mode. -
Page 61: Executing "Advance" Function
<Toc> <4. Operations> Executing “Advance” Function The following operating procedure advances a segment or segments during program operation. Bring the operating display into view Press the key once to display “1”. (appears at power-on). Blinks during change. Displays PV. PVE1 PVE2 PRG1 PRG2... - Page 62 Blank Page...
-
Page 63: Troubleshooting And Maintenance
<Toc> <5. Troubleshooting and Maintenance> Troubleshooting and Maintenance Troubleshooting I Troubleshooting Flow If the operating display does not appear after turning on the controller’s power, follow the measures in the procedure below. If a problem appears complicated, contact our sales representative. Is the instrument defective? Is key... - Page 64 <Toc> <5. Troubleshooting and Maintenance> I Errors at Power on The following table shows errors that may be detected by the fault diagnosis function when the power is turned on. Error indication Description Control Event Retransmission Communi- Remedy (on PV display unit) of error output output...
- Page 65 <Toc> <5. Troubleshooting and Maintenance> I If a Power Failure Occurs during Operation G Momentary power failures shorter than 20 ms The controller is not affected at all and continues normal operation. G Power failures of 20 ms or longer •...
-
Page 66: Maintenance
<Toc> <5. Troubleshooting and Maintenance> Maintenance This section describes the cleaning and maintenance of the UP350. 5.2.1 Cleaning The front panel and operation keys should be gently wiped with a dry cloth. NOTE Do not use alcohol, benzine, or any other solvents. - Page 67 <Toc> <5. Troubleshooting and Maintenance> I Attaching Terminal Cover The procedure for attaching the terminal cover is as follows. Do not touch the terminals on the rear panel when power is being supplied to the controller. Doing so may result in electric shock. Before attaching the terminal cover, turn off the source circuit breaker and use a tester to CAUTION check that the power cable is not conducting any electricity.
-
Page 68: Replacing Parts With A Limited Service Life
<Toc> <5. Troubleshooting and Maintenance> 5.2.4 Replacing Parts with a Limited Service Life The following UP350 parts have a limited service life. The service life given in the table assume that the controller is used under normal operating conditions. Part... -
Page 69: Replacing Control Output Relays
<Toc> <5. Troubleshooting and Maintenance> 5.2.5 Replacing Control Output Relays This subsection describes how to replace the control output relays. The replacement must be performed by an engineer qualified for the work. Always turn off the power before starting the work in order to avoid electric shock. Do not pull out the internal unit for any other purpose other than to replace the control output relays. - Page 70 (Note) Be careful not to damage the RJC sensor. The location and number of the relays differ depending on the model code of the UP350. Confirm the location of the control output relay to be replaced before pulling out the relay.
- Page 71 <Toc> <5. Troubleshooting and Maintenance> Insert the internal unit into the housing. Apply power to the controller and confirm that the initial operating display is shown. If the operating display is not shown properly, turn off the controller and pull out the internal unit.
- Page 72 Blank Page...
-
Page 73: Parameters
<Toc> <6. Parameters> Parameters This chapter contains a parameter map as a guideline for setting parameters, and lists of parameters for recording User Settings. Parameter Map IM 05E01D02-41E 1st Edition : May 31,2000-00... - Page 74 <Toc> <6. Parameters> UP350 Parameter Map Operating Display PV/SP Hold-mode Remaining Segment PV/Segment No. display display SP display Time display SET3S SET3S SET3S Menu OP.PA SET/ENT To switch the parameter display, press the key. SET3S To program To program parameter 1...
- Page 75 <Toc> <6. Parameters> SET/ENT Press the key once. PV/OUT SET/ENT SET3S Press the key for 3 seconds. display Press the key once. STUP Password input Password (No password is required check display when PWD = 0.) Setup Parameter Setting Display Control function Input/Output related...
-
Page 76: Lists Of Parameters
<Toc> <6. Parameters> Lists of Parameters * Parameters relating to PV or program setpoints should all be set in real numbers. For example, use temperature values to define program setpoints and PV event setpoints for temperature input. * The “User Setting” column in the table is provided for the customer to record setpoints. * The column “Target Item in CD-ROM”... - Page 77 <Toc> <6. Parameters> Parameter Target Item Name of Parameter Setting Range and Description Initial Value User Setting Symbol in CD-ROM ON/OFF control hysteresis In ON/OFF control: 0.0 to 100.0% of PV input range span ON/OFF control: 0.5% of PV input range span Direct/reverse action 0: reverse action, 1: direct action...
- Page 78 <Toc> <6. Parameters> I Setup Parameters G Control Function-related Parameters Parameter Target Item Name of Parameter Setting Range and Description Initial Value User Setting Symbol in CD-ROM PV event-1 hysteresis 0.0 to 100.0% of PV input range span 0.5% of PV input range span (HY1)
- Page 79 <Toc> <6. Parameters> G Input-/Output-related Parameters Parameter Target Item Name of Parameter Setting Range and Description Initial Value User Setting Symbol in CD-ROM PV input type (PV INPUT OFF (0) OFF (0), 1 to 18, 30, 31, 35 to 37, 40, 41, 50, 51, 55, 56 terminals) See Instrument Input Range Codes in “2.
- Page 80 <Toc> <6. Parameters> Parameter Target Item Name of Parameter Setting Range and Description Initial Value User Setting Symbol in CD-ROM SELECT display-1 OFF (0), 201 to 1015 OFF (0) registration Select the desired parameter from among the operating and (C.S1) setup parameters, then register the number (D register No.) accompanying that parameter.
- Page 81 PID constants. This function does not work when the controller is performing on-off control. The UP350 employs the “Limit Cycle Method.” As shown in the figure below, the controller temporarily changes its control output in a step-waveform manner.
- Page 82 The UP350 carries out control by automatically switching between groups of PID constants according to the temperature zone. You can set a maximum of three temperature zones. When shipped from the factory, the UP350 is configured so that it operates in zone 1 only and using only one group of PID constants.
- Page 83 6-11 <Toc> <6. Parameters> G Selection of PID Constants when the Control Range is Split into Three Zones As shown in the figure below, three zones are set for the controller to automatically switch from one group of PID constants to another. Two zones can also be set for the controller to select between two groups of PID constants.
- Page 84 6-12 <Toc> <6. Parameters> G Selecting PID Constants According to the Deviation PID constants can be selected according to the deviation in two ways. One method is to select a group of PID constants only by a deviation from a program setpoint. The other method is to use a reference point, as discussed earlier, as well as a deviation from a program setpoint, to switch between groups of PID constants.
- Page 85 6-13 <Toc> <6. Parameters> <Controller Settings> • Splitting the control range into two zones To split the control range into two zones, define reference point 1 (i.e., the 1.RP operating parameter). Define the 1st and 2nd groups of PID constants (i.e., the 1.P, 1.I and 1.D operat ing parameters for the 1st group and the 2.P, 2.I and 2.D operating parameters for the 2nd group).
- Page 86 6-14 <Toc> <6. Parameters> I Hysteresis (Setpoints for On-Off Control and PV Event Setpoints) Hysteresis can be set in on-off control setpoints and PV event setpoints as well. With the hysteresis settings, it is possible to prevent relays from chattering. •...
- Page 87 6-15 <Toc> <6. Parameters> I Useful Operating Display (SELECT Display) Registering frequently changed parameters in the SELECT display after ordinary operating displays will allow you to change settings easily. A maximum of four displays can be registered. Useful operating display (SELECT display) Ordinary operating displays (example) PVE1...
- Page 88 6-16 <Toc> <6. Parameters> I Cycle Time A cycle time can only be set if the type of control output is time proportional PID relay output or time proportional voltage pulse output. A cycle time refers to one period consisting of on- and off-state time lengths. The ratio of the on-state time to the off-state time differs according to the value of the control output.
-
Page 89: Function Block Diagram And Descriptions
<Toc> <7. Function Block Diagram and Descriptions> Function Block Diagram and Descriptions This chapter contains the function block diagram for “Standard type.” For details on this function block diagram, refer to the descriptions mentioned later. IM 05E01D02-41E 1st Edition : May 31,2000-00... - Page 90 <Toc> <7. Function Block Diagram and Descriptions> I Function Block Diagram for Standard Type PV input terminals Contact input INPUT Input selection Program Unit selection pattern selection Input range conversion Start program 1 Start program 2 Input bias when DI1=ON when DI2=ON Input filter Program 1...
- Page 91 <Toc> <7. Function Block Diagram and Descriptions> Functions and Parameters for “Standard Type” in Initial State (Factory-set default) Functions and parameters in initial state are given in the tables below. For details on each parameter, refer to, “6.2 Lists of Parameters.” I PV Input PV input (INPUT) is a universal input, which can receive signals from thermocouple, RTD, or DC voltage signals.
- Page 92 <Toc> <7. Function Block Diagram and Descriptions> I Contact Input Changing the setpoint of the parameter DIS (DI function selection) allows you to change the function of contact input. G When DIS=OFF No function for contact input. G When DIS=1 (factory-set default) Start program 1 (ON)/Reset program 1 (OFF) switching function is assigned to DI1 (contact input 1).
- Page 93 <Toc> <7. Function Block Diagram and Descriptions> I Contact Output PV event 1 is output via PVE1. PV event 2 is output via PVE2. Time event is output via TME. Program Parameters Function Program 1 Parameter Program 2 Parameter PV event-1 type 1.AL1 2.AL1 PV event-1 setpoint...
- Page 94 Blank Page...
- Page 95 <Int> <Toc> Revision Information G Title : Model UP350 Program Controller User’s Manual G Manual No. : IM 05E01D02-41E May 2000/1st Edition Newly published Written by Products Documents Controllers & Conditioners Division Yokogawa M&C Corporation Published by Yokogawa M&C Corporation...
- Page 96 Blank Page...
Need help?
Do you have a question about the UP350 and is the answer not in the manual?
Questions and answers