Table of Contents
Advertisement
Available languages
Available languages
Quick Links
MANUALE D'USO – Sezione 1
USER MANUAL - Section 1
BEDIENUNGSANLEITUNG - Abschnitt 1
CARACTERISTIQUES TECHNIQUES - Section 1
MANUAL DEL USUARIO - Sección 1
Le avvertenze nel presente manuale devono essere osservate congiuntamente al "MANUALE D'USO - Sezione2".
The warnings in this manual must be observed together with the "USER MANNUAL- Section 2".
Die Warnungen in diesem Handbuch müssen in Verbindung mit der "BEDIENUNGSANLEITUNG - Abschnitt 2" beobachtet werden".
Les avertissements specifiés dans ce manuel doivent être respectés ainsi que les "CARACTERISTIQUES TECHNIQUES -Section 2".
Las advertencias del presente manual se deben tener en cuenta conjuntamente con las del "Manual del usuario" - Sección 2".
Advertisement
Chapters
Table of Contents

Subscribe to Our Youtube Channel
Related Manuals for dB Technologies VIO L210


Summary of Contents for dB Technologies VIO L210
- Page 1 MANUALE D’USO – Sezione 1 USER MANUAL - Section 1 BEDIENUNGSANLEITUNG - Abschnitt 1 CARACTERISTIQUES TECHNIQUES - Section 1 MANUAL DEL USUARIO - Sección 1 Le avvertenze nel presente manuale devono essere osservate congiuntamente al “MANUALE D’USO - Sezione2”. The warnings in this manual must be observed together with the “USER MANNUAL- Section 2”. Die Warnungen in diesem Handbuch müssen in Verbindung mit der “BEDIENUNGSANLEITUNG - Abschnitt 2”...
- Page 2 EMI CLASSIFICATION According to the standards EN 55103 this equipment is designed and suitable to operate in E3 (or lower E2, E1) Electromagnetic environments. FCC CLASS B STATEMENT ACCORDING TO TITLE 47, CHAPTER I, SUBCHAPTER A, PART 15, SUBPART B This equipment has been tested and found to comply with the limits for a Class B digital device, pursuant to part 15 of the FCC Rules.
- Page 3 ITALIANO ENGLISH DEUTSCH FRANÇAIS ESPAÑOL VIO-L210 Cod. 420120248 REV. 1.1...
-
Page 4: Table Of Contents
Italiano INDICE INDICE 1. INFORMAZIONI GENERALI ....................5 BENVENUTI! ........................5 PANORAMICA INTRODUTTIVA ..................5 RIFERIMENTI PER L’UTENTE ....................5 CARATTERISTICHE MECCANICHE ED ACUSTICHE ............. 6 DIMENSIONI E PESO ..........................6 CARATTERISTICHE ACUSTICHE ........................6 MECCANICA ............................... 7 ACCESSORI ............................... 10 CARATTERISTICHE DELLA SEZIONE DI AMPLIFICAZIONE E DI CONTROLLO .... -
Page 5: Informazioni Generali
Italiano 1. INFORMAZIONI GENERALI BENVENUTI! Grazie per aver acquistato un prodotto progettato e sviluppato in Italia da dBTechnologies! Questo modulo line-array attivo, potente e dal rapido montaggio, è frutto di una lunga esperienza nel campo della diffusione sonora. Impiega soluzioni ottimizzate in campo acustico ed elettronico, oltre che nella scelta dei materiali. PANORAMICA INTRODUTTIVA Il modulo line-array attivo a 2 vie VIO-L210 inaugura una nuova stagione nel campo della diffusione sonora per le applicazioni live indoor e outdoor di medie e grandi dimensioni. -
Page 6: Caratteristiche Meccaniche Ed Acustiche
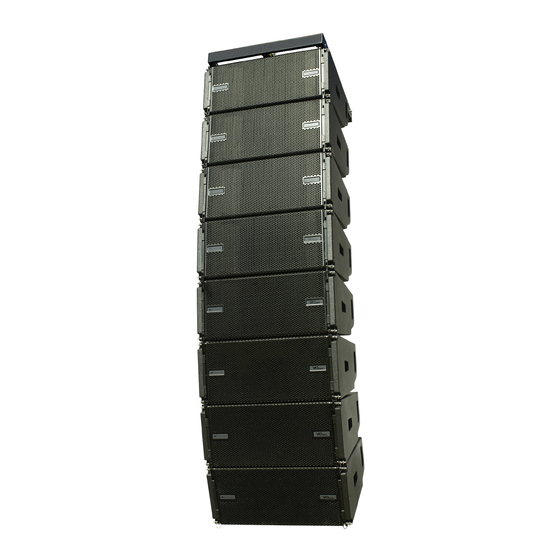
Italiano CARATTERISTICHE MECCANICHE ED ACUSTICHE DIMENSIONI E PESO La serie VIO è stata progettata con una particolare attenzione all’ottimizzazione di peso e ingombro. Il cabinet in legno, rivestito in poliurea, pesa 28,6 kg. Le misure sono: 720 mm (L), 312 mm (A), 520 mm (P). CARATTERISTICHE ACUSTICHE L’ottimizzazione acustica parte da un’accurata scelta di materiali, forma e geometria del cabinet in legno. -
Page 7: Meccanica
Italiano MECCANICA L’ergonomia del modulo ed il rapido montaggio in line-array sono garantiti da: LATO ANTERIORE 1) Sistema di ancoraggio inferiore per collegare altri moduli o il fly-bar DRK-210 (in configurazione stacked). 2) Staffe a scomparsa per l’ancoraggio ad un modulo superiore (o al fly-bar DRK-210 in configurazione flown). - Page 8 Italiano Il montaggio di 2 moduli A e B prevede pochi semplici passi: • Sul modulo A estrarre i pin [3], alzare le staffe a scomparsa [2] e fissarle nella nuova posizione coi i pin [3]. • Estrarre i pin [1] nel modulo B, sovrapporlo al modulo A, inserendo le staffe [2] come mostrato. Fissare quindi il lato anteriore dei due moduli con i pin [1] del modulo B.
- Page 9 Italiano ESEMPIO: 3° ATTENZIONE Nell’esempio è mostrato il caso in cui si voglia impostare un angolo di 3° tra 2 moduli. Prima di ogni altra operazione verificare che, una volta inserito il braccio mobile [6], il foro dell’angolo prescelto risulti contenuto all’interno dell’asola come mostrato. •...
-
Page 10: Accessori
• DRK-210 è stato progettato per sospendere fino a 25 VIO L210 (oppure 16 moduli Sub) per un massimo di 750 kg con un singolo punto di aggancio. I componenti di sospensione del VIO L210 permettono di connettere fino a 10 moduli (max 300 kg) senza limiti sull’angolazione del line array. -
Page 11: Caratteristiche Della Sezione Di Amplificazione E Di Controllo
Italiano CARATTERISTICHE DELLA SEZIONE DI AMPLIFICAZIONE E DI CONTROLLO L’amplificatore digitale in classe D è il cuore dei moduli VIO-L210. Permette di eorgare fino a 900 W RMS, in modo silenzioso ed efficiente, non necessitando di un sistema di ventilazione. Il controllo del sistema è... -
Page 12: Sezione Di Input, Output E Di Controllo
Italiano SEZIONE DI INPUT, OUTPUT E DI CONTROLLO 1. INGRESSO E RILANCIO AUDIO (“Balanced audio”) Ingresso e uscita compatibili con cavi XLR blanciati. In particolare, “Input” è utilizzato per il collegamento con il segnale audio proveniente dal mixer o da un altro diffusore, “Output Link”... -
Page 13: Sezione Di Alimentazione
Italiano TIPO LED FASE DI ACCENSIONE IN FUNZIONE WARNING BLOCCO PER DELLO SPEAKER NORMALE GENERICO ANOMALIA DELLO SPEAKER LIMITER SPENTO SPENTO, SI LAMPEGGIO LAMPEGGIO CICLICO ACCENDE SOLO MOMENTANEO CONTINUO IN CASO DI INTERVENTO SPENTO LAMPEGGIO SEGNALAZIONE SPENTO SIGNAL IN PRESENZA DI NORMALE DI SEGNALE AUDIO IN... -
Page 14: Dbtechnologies Composer
Italiano 2. DBTECHNOLOGIES COMPOSER Il software dBTechnologies Composer, gratuitamente scaricabile dal sito www.dbtechnologies.com, è lo strumento per la corretta progettazione di sistemi audio consigliato per tutta la serie VIO. Suggerisce la soluzione per gli spazi da sonorizzare, indicando l’angolazione dei moduli del line-array per ottenere la copertura desiderata ed il preset da utilizzare. - Page 15 Italiano La sezione LAs PREDICT contiene tutte le informazioni per la corretta configurazione flown o stack di un sistema VIO. Per accedervi occorre completare prima l’inserimento dei dati di progetto, presenti nella sezione Composer. Nella sottopagina System Data, vengono suggeriti: l’angolazione dei vari moduli, vari parametri relativi alla sezione “DSP preset”...
- Page 16 Italiano Nella sezione Safety Data, è possibile trovare una simulazione del centro di gravità del sistema flown con DRK-210. In particolare, l’utente può scegliere fra i riferimenti EUROCODE 3 o BGV-C1. I risultati relativi sono evidenziati in colore verde se sicuri, in colore rosso se si eccede il carico massimo ammesso per l’angolazione prescelta (e di cui pertanto è...
- Page 17 Italiano Nel caso in cui, in configurazione flown, si utilizzi un solo motore, “SINGLE” indica la posizione del gancio singolo da utilizzare su DRK-210 (che prevede posizioni graduate descritte da un’etichetta posta sul fly-bar stesso). Inoltre esiste un verso “FRONT” o “REAR” relativo a come si orienta il gancio per il motore.
-
Page 18: Parametri Dsp Preset E Controllo Remoto
La configurazone acustica in line-array dei moduli VIO L210 può essere ottimizzata, grazie alle funzioni di controllo gestite dal DSP. L’interfaccia per l’utilizzo è semplice e immediata: impiega due rotary della sezione “DSP Preset”... - Page 19 Italiano • Posizionare il rotary “HIGH FREQUENCY COMPENSATION” in base al tipo di installazione ed angolazione impostata nel line-array. Questo rotary agisce sulla sezione delle medio-alte frequenze e va impostato nella posizione: • 1 - FLAT (non c’è enfasi su nessuna particolare banda di frequenze) •...
-
Page 20: Collegamenti
Italiano 4. COLLEGAMENTI COLLEGAMENTO E RILANCIO DELL’ALIMENTAZIONE MODULO 1 MODULO 2 Nell’illustrazione sopra è mostrato un generico caso di collegamento in cui un modulo 1 è sopra al modulo 2. Utilizzare allo scopo cavi con connettori powerCON TRUE1® (non forniti). •... -
Page 21: Collegamento E Rilancio Del Segnale Audio E Rdnet
Italiano COLLEGAMENTO E RILANCIO DEL SEGNALE AUDIO E RDNET MODULO 1 MODULO 2 Nell’illustrazione sopra è mostrato un generico caso di collegamento in cui un modulo 1 è sopra al modulo 2, questa volta illustrando i collegamenti audio e di rete. Utilizzare allo scopo cavi non forniti, con connettori XLR (audio) e etherCON/RJ45 (rete). - Page 22 Italiano VIO-L210 Cod. 420120248 REV. 1.1...
-
Page 23: Installazione E Configurazione
Italiano 5. INSTALLAZIONE E CONFIGURAZIONE CONTENUTO DELLA CONFEZIONE Verificate che il contenuto dell’imballo del modulo VIO-L210 sia completo. L’imballo contiene: • Modulo VIO-L210 • fusibile per il funzionamento nel range 110-120V~ (vedere la sezione CARATTERISTICHE DELLA SEZIONE DI AMPLIFICAZIONE E DI CONTROLLO per ulteriori informazioni) •... - Page 24 L210 (oppure 16 moduli Sub) per un massimo di 750 kg con un singolo punto di aggancio. I componenti di sospensione del VIO L210 permettono di connettere fino a 10 moduli (max 300 kg) senza limiti sull’angolazione del line array. Ogni altra configurazione,...
- Page 25 Italiano • Portare gli ulteriori 4 moduli con un secondo carrello DT-VIOL210 sotto ai primi 4 attualmente sospesi. • Porre i freni al carrello, effettuare la regolazione degli angoli come descritto nella fase precedente. • Rimuovere il coperchio e i tubolari anteriori di DT-VIOL210. •...
- Page 26 Italiano • Sollevare leggermente il line-array per verificare la correttezza di agganci ed angoli. Eventualmente verificare con l’inclinometro laser (non fornito) che l’inclinazione del fly-bar corrisponda a quella di progetto. Verificare che tutti i pin siano interamente inseriti e bloccati. •...
-
Page 27: Installazione Stacked (Esempio Di 1 O 4 Moduli Su Sub318)
Italiano INSTALLAZIONE STACKED (ESEMPIO DI 1 o 4 MODULI SU SUB318) • E’ possibile montare al massimo 4 moduli in configurazione stacked su fly-bar DRK-210. • Utilizzare DBTECHNOLOGIES COMPOSER per impostare i parametri di progetto, per motivi di sicurezza. • Porre su SUB 318 (installato su un piano privo di inclinazione) il fly-bar DRK-210. -
Page 28: Risoluzione Dei Problemi
Italiano 6. RISOLUZIONE DEI PROBLEMI Il modulo non si accende: 1. Verificare la corretta presenza dell’alimentazione a monte dell’impianto. 2. Verificare che l’alimentazione o il collegamento di rilancio di alimentazione sia correttamente inserito. Il modulo si accende ma non emette nessun suono: 1. -
Page 29: Aggiornamento Del Firmware
Italiano 7. AGGIORNAMENTO DEL FIRMWARE È molto importante mantenere aggiornato il firmware del prodotto, per garantirne una piena funzionalità. Controllare periodicamente il sito http://www.dbtechnologies.com nella sezione “DOWNLOADS”. 1. Scaricare ed installare USB BURNER MANAGER nella sezione “SOFTWARE & CONTROLLER” sul proprio computer. -
Page 30: Specifiche Tecniche
Italiano 8. SPECIFICHE TECNICHE GENERALE Tipologia: Modulo line-array attivo a 2 vie DATI ACUSTICI Risposta in frequenza [- 6 dB]: 67 - 20000 Hz Risposta in frequenza [± 3 dB]: 78 - 18100 Hz Max SPL: 134 - 136 dB (frequency/preset dependent) 1 x 1.4”... -
Page 31: Processore
Italiano PROCESSORE Controller interno: DSP 28/56 bit 48 kHz Funzioni avanzate: Filtri FIR Limiter: Peak, RMS, Termico INTERFACCIA UTENTE Audio Attenuation, 2 rotary a 8 posizioni (Coupling, Compensation) Controlli: Led di segnalazione: Limiter, Signal, Mute/prot, Ready Led di stato (rete RDNet) Link, Active, Remote Preset Active INGRESSI ED USCITE Ingressi e rilanci di alimentazione:... -
Page 32: Specifiche Meccaniche
Italiano SPECIFICHE MECCANICHE Materiale: cabinet in legno - finitura polliurea nera Griglia: interamente in metallo - lavorazione CNC Maniglie integrate (2x lato) Predisposizioni anteriori di Staffe a scomparsa, punti integrati nel cabinet con pin a sgancio montaggio: rapido Predisposizioni posteriori di Staffa graduata e braccio mobile con pin a sgancio rapido montaggio: Montaggio flown e stacked:... - Page 33 English TABLE OF CONTENTS 1. GENERAL INFORMATION ....................34 WELCOME! ........................34 INTRODUCTORY OVERVIEW .................... 34 USER REFERENCES ......................34 MECHANICAL AND ACOUSTIC CHARACTERISTICS ............35 SIZE AND WEIGHT ........................... 35 ACOUSTIC CHARACTERISTICS ........................35 MECHANICS ............................. 36 ACCESSORIES ............................39 AMPLIFICATION AND CONTROL SECTION CHARACTERISTICS ........
-
Page 34: General Information
English 1. GENERAL INFORMATION WELCOME! Thank you for purchasing a product designed and developed in Italy by dBTechnologies! This powerful and quick to assembly active line array module is the result of years of experience in the field of sound systems. It implements optimized solutions in the acoustic and electronic fields as well as in the choice of materials. -
Page 35: Mechanical And Acoustic Characteristics
English MECHANICAL AND ACOUSTIC CHARACTERISTICS SIZE AND WEIGHT The VIO Series has been designed with particular attention to the optimization of weight and size. The wooden cabinet, coated in polyurea, weighs 63 lbs (28.6 kg). The measurements are: 28.35 in (720 mm) (L), 12.3 in (312 mm) (H), 20.5 in (520 mm) (W). ACOUSTIC CHARACTERISTICS The acoustic optimization begins with the careful choice of the wooden cabinet's materials, shape and geometry. -
Page 36: Mechanics
English MECHANICS The module's ergonomics and the quick assembly in line arrays are guaranteed by: FRONT SIDE 1) Lower anchorage system for the connection of other modules or the DRK-210 fly-bar (in a stacked configuration). 2) Retractable brackets for anchoring to a higher module (or to the DRK-210 fly-bar in a flown configuration). 3) Pins for fastening the retractable brackets in open/closed position [2]. - Page 37 English The assembly of the 2 modules A and B requires a few easy steps: • On module A, remove the pins [3], raise the retractable brackets [2] and fasten them to the new position using the pins [3]. • Remove the pins [1] from module B, place it on top of module A, inserting the brackets [2] as shown.
- Page 38 English The example shows the case in which you want to set a 3° angle between the 2 modules. Before carrying out any other operation, make sure that once the movable arm is inserted [6], the hole of the chosen angle is contained inside the loop as shown. •...
-
Page 39: Accessories
• DRK-210 was designed for the suspension of up to 25 VIO L210 (or 16 Sub modules) for a maximum of 1653 lbs (750 kg) with a single coupling point. The VIO L210 suspension components allow you to connect up to 10 modules (661 lbs (300 kg) max) without limiting the angulation of the line array. -
Page 40: Amplification And Control Section Characteristics
English AMPLIFICATION AND CONTROL SECTION CHARACTERISTICS The class D digital amplifier is the heart of the VIO-L210 modules. It allows delivering up to 900 W RMS, silently and efficiently, without ventilation. The system is controlled by a powerful DSP that makes it possible to configure the line array in any usage context, instantly and quickly. -
Page 41: Input, Output And Control Section
English INPUT, OUTPUT AND CONTROL SECTION 1. AUDIO INPUT AND RE-LAUNCH (“Balanced audio”) Input and output compatible with balanced XLR cables. In particular, the “Input” is used for connection with the audio signal originating from the mixer or from another loudspeaker, the “Output Link”... -
Page 42: Power Section
English LED TYPE TURNING THE NORMAL GENERIC SPEAKER SHUTS SPEAKER ON OPERATION WARNING DOWN DUE TO MALFUNCTION LIMITER TURNED OFF, TEMPORARY CONTINUOUS CYCLIC TURNS ON ONLY FLASHING FLASHING IN THE EVENT OF INTERVENTION FLASHING IN THE NORMAL SIGNAL SIGNAL PRESENCE OF A OF INPUT AUDIO SIGNAL MUTE/... -
Page 43: Dbtechnologies Composer
English 2. DBTECHNOLOGIES COMPOSER dBTechnologies Composer software, available for free download from www.dbtechnologies.com, is a tool for the proper designing of the audio systems, recommended for the entire VIO series. It offers a solution for the spaces to sonorize, indicating the angle of the line array modules in order to achieve the desired coverage and the preset to use. - Page 44 English The LAs PREDICT section contains all the information necessary for the proper configuration, flown or stack, of a VIO system. To access it, you need to first enter the project's data, included in the Composer section. The System Data sub-page provides the following suggestions: the angulation of the various modules, various parameters relating to the “DSP preset”...
- Page 45 English In the Safety Data section, you can find a simulation of the flown system's centre of gravity with DRK-210. In particular, the user can choose between EUROCODE 3 or BGV-C1 references. The related results are shown in green, if safe, and in red, if the maximum permissible load for the chosen angle is being exceeded (and which is therefore forbidden to use).
- Page 46 English In the event that only one engine is being used in a flown configuration, “SINGLE” indicates the position of the single hook to use on DRK-210 (which requires graduated positions described by a label placed on the fly-bar). In addition, there is a “FRONT” or “REAR” direction for directing the hook for the engine.
-
Page 47: Dsp Preset Parameters And Remote Control
The acoustic configuration in a line array of the VIO L210 modules can be optimized, thanks to the control functions managed by DSP. The user interface is simple and straightforward: it employs two rotaries of the “DSP Preset”... - Page 48 English • Place the “HIGH FREQUENCY COMPENSATION” rotary depending on the type of installation and angulation set in the line array. This rotary acts on the mid-high frequencies and should be set to the position: • 1 - FLAT (no emphasis on any particular frequency range) •...
-
Page 49: Connections
English 4. CONNECTIONS CONNECTING AND RE-LAUNCHING THE POWER SUPPLY MODULE 1 MODULE 2 The illustration above shows a generic connection, in which module 1 is under module 2. For this purpose, use cables with powerCON TRUE1® connectors (not provided). • Connect the power supply of module 1 AUTO-RANGE MAINS INPUT (A). -
Page 50: Connecting And Re-Launching The Audio Signal And Rdnet
English CONNECTING AND RE-LAUNCHING THE AUDIO SIGNAL AND RDNET MODULE 1 MODULE 2 The illustration above shows a generic connection, in which module 1 is above module 2, this time showing audio and network connections. For this purpose, use non-provided cables, with XLR (audio) and etherCON/RJ45 (network) connectors. - Page 51 English VIO-L210 Cod. 420120248 REV. 1.1...
-
Page 52: Installation And Configuration
English 5. INSTALLATION AND CONFIGURATION PACKAGE CONTENT Check that the package content of the VIO-L210 module is complete. The package contains: • VIO-L210 Module • fuse for operation in the 110-120V~ range (see the AMPLIFICATION AND CONTROL SECTION CHARACTERISTICS section for more information) •... - Page 53 L210 (or 16 Sub modules) for a maximum of 1653 lbs (750 kg) with a single coupling point. The VIO L210 suspension components allow you to connect up to 10 modules (661 lbs (300 kg) max) without limiting the angulation of the line array. Any other...
- Page 54 English • Bring the additional 4 modules with a second DT-VIOL210 cart under the first 4, currently suspended. • Apply brakes to the cart and adjust the angles as described in the previous step. • Remove the cover and the tubes on the front of DT-VIOL210. •...
- Page 55 English • Slightly lift the line array to verify the correctness of hooks and angles. If necessary, check with a laser inclinometer (not provided) that the inclination of the fly-bar corresponds to the one in the project. Check that all the pins have been fully inserted and are locked. •...
-
Page 56: Stacked Installation (Example Of 1 Or 4 Modules On Sub318)
English STACKED INSTALLATION (EXAMPLE OF 1 OR 4 MODULES ON SUB318) • It is possible to install a maximum of 4 modules in a stacked configuration on the DRK-210 fly-bar, for safety reason. • Use the DBTECHNOLOGIES COMPOSER to set the project parameters. •... -
Page 57: Troubleshooting
English 6. TROUBLESHOOTING The module does not turn on: 1. Check the correct power supply upstream of the system. 2. Check that the power supply or the re-launch connection of the power supply is properly inserted. The module turns on but does not make any sound: 1. -
Page 58: Firmware Update
English 7. FIRMWARE UPDATE IT IS very important to keep the product firmware up to date, to ensure full functionality. Regularly check the website http://www.dbtechnologies.com under the “DOWNLOADS” section. 1. Download and install on your PC the USB BURNER MANAGER under the “SOFTWARE &... -
Page 59: Technical Specifications
English 8. TECHNICAL SPECIFICATIONS GENERAL Type: Active 2-way line array module ACOUSTIC DATA Frequency response [- 6 dB]: 67 - 20,000 Hz Frequency response [± 3 dB]: 78 - 18,100 Hz Max SPL: 134 - 136 dB (frequency/preset dependent) 1 x 1.4” (Coil:3”) Type of HF transducer: Titanium 2 x 10”... -
Page 60: Processor
English PROCESSOR Internal control: DSP 28/56 bit 48 kHz Advanced functions: FIR Filters Limiter: Peak, RMS, Thermal USER INTERFACE Audio Attenuation, 2 rotaries with 8 positions (Coupling, Compensation) Controls: LED indicators: Limiter, Signal, Mute/prot, Ready Status LEDs (RDNet network) Link, Active, Remote Preset Active INPUTS AND OUTPUTS Power supply inputs and re-launches: PowerCON®... -
Page 61: Mechanical Specifications
English MECHANICAL SPECIFICATIONS Material: wooden cabinet - black polyurea finish Grille: full metal - CNC machining Handles integrated (2x side) Front mounting setups: Retractable brackets, built-in cabinet points with quick-release pins Rear setups for assembly: Graduated bracket and movable arm with quick-release pins Flown and stacked assembly: With DRK-210 fly-bar accessory Width:... - Page 62 Deutsch INHALTSVERZEICHNIS 1. ALLGEMEINE INFORMATIONEN ..................63 HERZLICH WILLKOMMEN! ....................63 EINLEITENDER ÜBERBLICK ....................63 ANHALTSPUNKTE FÜR DEN BENUTZER ................63 MECHANISCHE UND AKUSTISCHE EIGENSCHAFTEN ............64 GRÖSSE UND GEWICHT ........................... 64 AKUSTISCHE EIGENSCHAFTEN ........................ 64 MECHANIK ............................... 65 ZUBEHÖR ..............................68 EIGENSCHAFTEN DES VERSTÄRKUNGS- UND STEUERBEREICHS ........
-
Page 63: Allgemeine Informationen
Deutsch 1. ALLGEMEINE INFORMATIONEN HERZLICH WILLKOMMEN! Danke, dass Sie sich für den Kauf eines von dBTechnologies in Italien entworfenen und entwickelten Produkts entschieden haben! Dieses leistungsstarke und schnell montierbare aktive Line-Array-Modul ist das Ergebnis jahrelanger Erfahrung im Bereich der Soundsysteme. Es implementiert optimierte Lösungen im akustischen und elektronischen Bereich sowie bei der Materialauswahl. -
Page 64: Mechanische Und Akustische Eigenschaften
Deutsch MECHANISCHE UND AKUSTISCHE EIGENSCHAFTEN GRÖSSE UND GEWICHT Die VIO-Serie wurde mit einem besonderen Augenmerk auf weniger Gewicht und ein kleineres Format entworfen. Das hölzerne Gehäuse hat eine Polyurea-Beschichtung und wiegt 28,6 kg. Die Maße sind: 720 mm (L), 312 mm (H), 520 mm (W). AKUSTISCHE EIGENSCHAFTEN Die akustische Optimierung beginnt bereits bei der sorgfältigen Auswahl der Materialien, Form und Geometrie... -
Page 65: Mechanik
Deutsch MECHANIK Die Modul-Ergonomie und eine schnelle Montage des Line-Arrays sind gewährleistet durch: VORDERSEITE 1) Unteres Verankerungssystem für den Anschluss anderer Module oder der DRK-210-Flybar (in gestapelter Konfiguration). 2) Versenkbare Halterungen für die Verankerung an einem oberen Modul (oder an der DRK-210 Flybar in Flown-Konfiguration). - Page 66 Deutsch Die Montage der zwei Module A und B erfordert einige einfache Schritte: • Am Modul A die Stifte [3] entfernen, die versenkbaren Halterungen [2] anheben und mit den Stiften [3] an der neuen Position befestigen. • Entfernen Sie die Stifte [1] von Modul B, setzen Sie sie auf das Modul A und setzen Sie die Halterungen [2] wie dargestellt ein.
- Page 67 Deutsch BEISPIEL 3 GRAD Das Beispiel zeigt das Einstellen eines 3-Grad-Winkels zwischen 2 Modulen. Bevor Sie einen anderen Vorgang durchführen, stellen Sie sicher, dass nach dem Einsetzen des beweglichen Arms [6] das Langloch im gewählten Winkel in der Schlaufe liegt (siehe Abbildung). •...
-
Page 68: Zubehör
Deutsch ZUBEHÖR Für eine schnelle Montage sind optional folgende Zubehörteile vorgesehen: • DRK-210, Flybar für Flown- und gestapelte Verwendung der Line-Array VIO-L210-Module. • DT-VIOL210, Wagen zum Transport von bis zu vier VIO-L210-Modulen. Mithilfe dieses Zubehörteils kann, ausschließlich für Transportzwecke, ein DRK-210-Flybar auf dem Deckel angebracht werden. DRK-210 DT-VIOL210 ACHTUNG... -
Page 69: Eigenschaften Des Verstärkungs- Und Steuerbereichs
Deutsch EIGENSCHAFTEN DES VERSTÄRKUNGS- UND STEUERBEREICHS Der digitale Verstärker der Klasse D ist das Herzstück des VIO-L210. Der ermöglicht auf geräuscharme und effiziente Weise die Bereitstellung von bis zu 900 W RMS, ohne die Notwendigkeit einer Lüftungsanlage. Das System wird von einem leistungsfä- higen DSP gesteuert, wodurch der Line Array in jedem Verwen- dungskontext sofort und schnell konfiguriert werden kann. -
Page 70: Input-, Output- Und Steuerbereich
Deutsch INPUT-, OUTPUT- UND STEUERBEREICH 1. AUDIO-EINGANG UND RÜCKLAUF („symmetrisches Audio“) Eingang und Ausgang kompatibel mit symmetrischen XLR-Kabeln. Insbesondere wird der „Eingang“ für die Verbindung mit dem vom Mischer oder einem anderen Lautsprecher stammenden Audiosignal verwendet, der „Ausgangs-Anschluss“ wird für den Rücklauf des Signals zu den anderen Modulen des Line Arrays in Daisy-Chain-Konfiguration verwendet. -
Page 71: Versorgungsbereich
Deutsch LED-TYP BEIM EINSCHALTEN BETRIEB WARNUNG ABSCHALTUNG DES LAUTSPRECHERS NORMAL GENERISCHE WEGEN DES LAUTSPRECHERS LIMITER ERLOSCHEN ERLOSCHEN, KURZES KONTINUIERLICHES EIGENSTÄNDIGES BLINKEN ZYKLISCHES BLINKEN AUFLEUCHTEN NUR BEI EINEM EINGRIFF ERLOSCHEN BLINKEN SIGNAL NORMAL ERLOSCHEN SIGNAL MIT SIGNAL AUDIO-EIN EINGANG STUMM / LEUCHTET FÜR EINIGE ERLOSCHEN KURZES BLINKEN... -
Page 72: Dbtechnologies Composer
Deutsch 2. DBTECHNOLOGIES COMPOSER DBTechnologies Composer-Software, die zum kostenlosen Download unter www.dbtechnologies.com zur Verfügung steht, ist ein Instrument für die korrekte Gestaltung der für die gesamte VIO-Serie empfohlenen Audiosysteme. Es bietet eine Lösung dafür, die Räume zu sonorisieren und zeigt dazu den Winkel der Line-Array-Module an, um die gewünschte Abdeckung und die Voreinstellung zu erreichen. - Page 73 Deutsch Der Abschnitt „LAs PREDICT“ enthält alle Informationen, die für die ordnungsgemäße Konfiguration, überflogen oder gestapelt, eines VIO-Systems erforderlich sind. Um darauf zuzugreifen, müssen Sie zuerst die Projektdaten eingeben, die im Abschnitt Komponieren enthalten sind. Die Systemdaten-Seite bietet die folgenden Vorschläge: die Winkeleinstellung der verschiedenen Module, verschiedene Parameter, die sich auf den Abschnitt „DSP-Voreinstellung“...
- Page 74 Deutsch Im Bereich Sicherheitsdaten finden Sie eine Simulation des Schwerpunkts beim Flown-System mit DRK-210. Insbesondere kann der Benutzer zwischen EUROCODE 3 oder BGV-C1 Referenzen wählen. Die zugehörigen Ergebnisse werden grün, wenn sicher und rot dargestellt, wenn die maximal zulässige Belastung für den gewählten Winkel überschritten wird (und daher verboten ist).
- Page 75 Deutsch Wenn nur ein Motor in einer Flown-Konfiguration verwendet wird, zeigt „SINGLE“ die Position des einzelnen Hakens an, der auf dem DRK-210 verwendet werden soll (der abgestufte Positionen erfordert, die von einem Etikett auf dem Flybar beschrieben sind). Zusätzlich gibt es eine „FRONT“ oder „REAR“ Richtung für das Lenken des Hakens für den Motor.
-
Page 76: Dsp-Voreinstellungsparameter Und Fernsteuerung
Deutsch 3. DSP-VOREINSTELLUNGSPARAMETER UND FERNSTEUERUNG Der Einsatz eines Line Arrays bringt eine Reihe von Vorteilen in verschiedenen Kontexten mit sich, insbesondere: • homogene SPL entlang des Frontvektors der Lautsprecher, was besonders bei mittleren und langen Distanzen zu einem • direkten akustischen Verhalten führt, das es erlaubt, den Klang präzise auf das Publikum zu fokussieren und unnötige Verluste in Bereichen zu vermeiden, in denen keine akustische Abdeckung erforderlich ist. - Page 77 Deutsch • Die Einstellung des Drehreglers „HOCHFREQUENZKOMPENSATION“ hängt von der Installationsart und der Winkeleinstellung des Line Arrays ab. Dieser Drehregler wirkt auf die mittleren Frequenzen und sollte eingestellt werden auf die Position: • 1 - FLAT (ohne Betonung einer bestimmten Frequenz) •...
-
Page 78: Verbindungen
Deutsch 4. VERBINDUNGEN VERBINDUNG UND START DER STROMVERSORGUNG MODUL 1 MODUL 2 Die obige Abbildung zeigt eine allgemeine Verbindung, bei der das Modul 1 über Modul 2 liegt. Verwenden Sie dazu Kabel mit powerCON TRUE1®-Steckverbindern (nicht mitgeliefert). • Schließen Sie die Stromversorgung des Moduls 1 AUTO-RANGE MAINS INPUT (A) an. •... -
Page 79: Verbindung Und Rücklauf Von Audiosignal Und Rdnet
Deutsch VERBINDUNG UND RÜCKLAUF VON AUDIOSIGNAL UND RDNET MODUL 1 MODUL 2 Die obige Abbildung zeigt eine allgemeine Verbindung, bei der das Modul 1 über Modul 2 liegt und diesmal Audio- und Netzwerkverbindung zeigt. Verwenden Sie dazu keine Kabel mit XLR-(Audio) und etherCON- / RJ45- (Netzwerk) Anschlüssen. - Page 80 Deutsch VIO-L210 Art.-Nr. 420120248 REV. 1.1...
-
Page 81: Installation Und Konfigurierung
Deutsch 5. INSTALLATION UND KONFIGURIERUNG VERPACKUNGSINHALT Überprüfen Sie, ob die Lieferung des Moduls VIO-L210 vollständig ist. Die Verpackung enthält: • VIO-L210-Modul • Sicherung für den Betrieb im Bereich 110-120 V ~ (siehe Abschnitt EIGENSCHAFTEN DES VERSTÄRKUNGS- UND STEUERBEREICHS für weitere Informationen) •... - Page 82 Deutsch • Sichern Sie die Bremsen an den Rädern DT-VIOL210. • Auf der Rückseite legen Sie die beweglichen Arme [6] in die Halterungen [4] ein, siehe dazu Abschnitt MECHANIK. • Setzen Sie die Stifte entsprechend den zuvor berechneten Winkeln in die Arme ein (für diesen Vorgang müssen Sie die Module nicht heben).
- Page 83 Deutsch • Bringen Sie die 4 zusätzlichen Module mit einem zweiten DT-VIOL210-Wagen unter die 4 bereits aufgehängten Module. • Stellen Sie die Bremsen am Wagen fest und fixieren Sie die Ecken, wie im vorherigen Schritt beschrieben. • Entfernen Sie die Abdeckung und die vorderen Rohre des DT-VIOL210. •...
- Page 84 Deutsch • Heben Sie das Line Array leicht an und überprüfen Sie die Aufhängung und die Winkeleinstellung. Falls erforderlich prüfen Sie mit einem Laser-Neigungssensor (nicht mitgeliefert), dass die Neigung der Flybar mit der Planung übereinstimmt. Prüfen Sie, ob alle Stifte vollständig eingesteckt und verriegelt sind. •...
-
Page 85: Gestapelte Installation (Beispiel Für 1 Oder 4 Module Auf Sub318)
Deutsch GESTAPELTE INSTALLATION (BEISPIEL FÜR 1 ODER 4 MODULE AUF SUB318) • Es sollten nicht mehr als 4 Module übereinander auf der DRK-210-Flybar gestapelt werden. • Verwenden Sie aus Sicherheitsgründen den DBTECHNOLOGIES COMPOSER, um die Projektparameter einzustellen. • Platzieren Sie die DRK-210-Flybar auf den SUB 318 (auf ebenem Grund ohne Neigung installiert). -
Page 86: Problemabhilfe
Deutsch 6. PROBLEMABHILFE Das Modul lässt sich nicht einschalten: 1. Überprüfen Sie das Vorhandensein der korrekten, der Anlage vorgeschalteten Versorgung. 2. Überprüfen Sie, dass die Stromversorgung oder der Rücklauf der Stromversorgung korrekt sind. Das Modul lässt sich einschalten, gibt jedoch keine Töne ab: 1. -
Page 87: Firmware-Aktualisierung
Deutsch 7. FIRMWARE-AKTUALISIERUNG ES ist sehr wichtig, die Produkt-Firmware auf dem neuesten Stand zu halten, um die volle Funktionalität zu gewährleisten. Überprüfen Sie regelmäßig die Website http://www.dbtechnologies.com unter dem Abschnitt DOWNLOADS. 1. Laden und installieren Sie den USB BURNER MANAGER aus dem Abschnitt SOFTWARE &... -
Page 88: Technische Daten
Deutsch 8. TECHNISCHE DATEN ALLGEMEINE DATEN Typ: 2-Wege Line-Array-Modul AKUSTIK-DATEN Frequenzgang [- 6 dB]: 67 - 20000 Hz Frequenzgang [± 3 dB]: 78 - 18100 Hz Max. SPL: 134 - 136 dB (Frequenz / voreingestellt) 1 x 1,4-Zoll (Spule: 3”) Typ des HF-Messumformers: Titan 2 x 10-Zoll (Schwingspule: 2,5“) -
Page 89: Prozessor
Deutsch PROZESSOR Interner Controller: DSP 28/56 bit 48 kHz Erweiterte Funktionen: FIR-Filter Limiter (Begrenzer): Peak, RMS, Thermoschalter BENUTZEROBERFLÄCHE Audio-Dämpfung, 2 Drehregler mit 8 Positionen (Kopplung, Bedienelemente: Kompensation) Anzeigeleuchten: Limiter, Signal, Stumm / Prot, Bereit Status-LEDs (RDNet-Netzwerk) Link, Active, Remote Preset Active EINGÄNGE UND AUSGÄNGE Eingänge und Wiedereinschaltung PowerCON®... -
Page 90: Mechanische Spezifikationen
Deutsch MECHANISCHE SPEZIFIKATIONEN Material: Holzgehäuse - Polyurea-Beschichtung, schwarz Gitter: Vollmetall - CNC-Verarbeitung Griffe eingebaut (2 pro Seite) Vorne vorgesehene Auslegungen für Versenkbare Halterungen, im Gehäuse eingebaute Haltepunkte mit Montage : Schnellspannstift Hinten vorgesehene Auslegungen Verstellbare Halterung und beweglicher Arm mit Schnellspanner für Montage : Flown- und Stapelmontage: mit DRK-210 Flybar-Zubehör... - Page 91 Français TABLE DES MATIÈRES 1. GÉNÉRALITÉS ........................92 BIENVENUS ! ........................92 INTRODUCTION ........................ 92 RÉFÉRENCES POUR L'UTILISATEUR .................. 92 CARACTÉRISTIQUES MÉCANIQUES ET ACOUSTIQUES ........... 93 DIMENSIONS ET POIDS..........................93 CARACTÉRISTIQUES ACOUSTIQUES ......................93 MÉCANIQUE ............................. 94 ACCESSOIRES ............................97 CARACTÉRISTIQUES DE LA SECTION D'AMPLIFICATION ET DE CONTRÔLE ....
-
Page 92: Généralités
Français 1. GÉNÉRALITÉS BIENVENUS ! Merci d'avoir acheté un produit conçu et développé en Italie par dBTechnologies ! Ce module line-array actif, puissant à montage rapide, est le résultat d’une longue expérience dans le secteur de la diffusion sonore. Il adopte des solutions optimisées dans le domaine acoustique et électronique ainsi que pour le choix des matériaux utilisés. -
Page 93: Caractéristiques Mécaniques Et Acoustiques
Français CARACTÉRISTIQUES MÉCANIQUES ET ACOUSTIQUES DIMENSIONS ET POIDS La série VIO a été conçue avec une attention particulière à l'optimisation du poids et de l'encombrement. Le coffret est en bois, revêtu en polyuréa, il pèse 28,6 kg. Les dimensions sont : 720 mm (L), 312 mm (H), 520 mm (P). CARACTÉRISTIQUES ACOUSTIQUES L’optimisation acoustique commence par une sélection attentive des matériaux, de la forme et de la géométrie du... -
Page 94: Mécanique
Français MÉCANIQUE L’ergonomie du module et le montage rapide en line-array sont garantis par : CÔTÉ AVANT 1) Système d’ancrage inférieur pour relier d’autres modules ou le fly-bar DRK-210 (en configuration superposée). 2) Étrier escamotable pour l’ancrage à un module supérieur (ou au fly-bar DRK-210 en configuration flown). 3) Goujon pour la fixation en position ouverte/fermée des étriers escamotables [2]. - Page 95 Français Le montage des 2 modules A et B prévoit quelques étapes simples seulement : • Sur le module A extraire les goujons [3], soulever les étriers escamotables [2] et les fixer dans la nouvelle position avec les goujons [3]. •...
- Page 96 Français EXEMPLE : 3° ATTENTION L’exemple montre le cas où on voudrait positionner les 2 modules avec un angle de 3°. Avant toute autre opération vérifier que, après avoir inséré le bras mobile [6], le trou de l’angle choisi résulte contenu à...
-
Page 97: Accessoires
à ce qui est indiqué dans les manuels correspondant aux accessoires. • DRK-210 a été conçu pour suspendre jusqu’à 25 VIO L210 (ou bien 16 modules Sub) pour un poids maximum de 750 kg avec un seul point d’ancrage. -
Page 98: Caractéristiques De La Section D'amplification Et De Contrôle
Français CARACTÉRISTIQUES DE LA SECTION D'AMPLIFICATION ET DE CONTRÔLE L'amplificateur numérique, classe D, est le cœur des modules VIO-L210. Il permet de débiter jusqu’à 900 W RMS, de manière silencieuse et efficace ne nécessitant pas d’un système de ventilation. Le contrôle du système est confié... -
Page 99: Section D'entrée, De Sortie Et De Contrôle
Français SECTION D'ENTRÉE, DE SORTIE ET DE CONTRÔLE 1. ENTRÉE ET RELANCE AUDIO (« Balanced audio ») Entrée et sortie compatible avec câbles XLR symétriques. En particulier, « Input » est utilisé pour le branchement avec le signal audio venant du mélangeur ou d’une autre enceinte, «... -
Page 100: Section D'alimentation
Français TYPE LED PHASE D’ALLUMAGE EN FONCTION MISE EN GARDE BLOCAGE POUR DE L'ENCEINTE NORMALE GÉNÉRIQUE ANOMALIE DE L’ENCEINTE LIMITER ÉTEINT ÉTEINT, IL CLIGNOTEMENT CLIGNOTEMENT S’ALLUME MOMENTANÉ CYCLIQUE CONTINU SEULEMENT EN CAS D’INTERVENTION ÉTEINT CLIGNOTEMENT SIGNALISATION ÉTEINT SIGNAL EN PRÉSENCE DE NORMALE D’AUDIO SIGNAL EN ENTRÉE... -
Page 101: Dbtechnologies Composer
Français 2. DBTECHNOLOGIES COMPOSER Le logiciel dBTechnologies Composer, peut être téléchargé gratuitement du site www.dbtechnologies.com, il s’agit de l’instrument conseillé pour la conception correcte de systèmes audio pour toute la série VIO. Il suggère la solution pour les espaces à sonoriser, en indiquant l’angle des modules du line-array pour obtenir la couverture souhaitée et le pré-réglage à... - Page 102 Français La section LAs PREDICT contient toutes les informations pour la configuration correcte en flown ou stack d’un système VIO. Pour y accéder il faut compléter avant tout la saisie des données de conception, présentes dans la section Composer. Dans la page-écran System Data, sont suggérés : l’angle des différents modules, les différents paramètres relatifs à...
- Page 103 Français Dans la section Safety Data, il est possible de trouver une simulation du centre de gravité du système flown avec DRK-210. En particulier, l’utilisateur peut choisir entre les références EUROCODE 3 ou BGV-C1. Les résultats relatifs sont mis en évidence en vert s’ils sont sûrs, en rouge si on excède la charge maximale admise pour l’angle choisi (et qu’il est donc interdit d’utiliser).
- Page 104 Français Au cas où, en configuration flown, on utiliserait un seul moteur, « SINGLE » indique la position du crochet simple à utiliser sur le DRK-210 (qui prévoit les positions graduées décrites sur l’étiquette située sur le fly-bar). En outre il existe un côté « FRONT » ou « ARRIÈRE» relatif à...
-
Page 105: Paramètres Pré-Réglage Dsp Et Contrôle Àdistance
Au fur et à mesure que le nombre de modules du line-array augmente, les basses fréquences s’ajoutent selon une acoustique cohérente. La configuration acoustique en line-array des modules VIO L210 peut être optimisée, grâce aux fonctions de contrôle gérées par le DSP. - Page 106 Français • Positionner la commande rotative « HIGH FREQUENCY COMPENSATION » (COMPENSATION HAUTES FRÉQUENCES) en fonction du type d’installation et angle réglé dans le line-array. Cette commande rotative agit sur la section des fréquences moyennes supérieures et doit être réglée dans la position : •...
-
Page 107: Connexions
Français 4. CONNEXIONS BRANCHEMENT ET RELANCE DE L’ALIMENTATION MODULE 1 MODULE 2 Dans l’illustration ci-dessus est représenté un cas de branchement générique où un module 1 est au-dessus du module 2. Utiliser pour cela des câbles avec connecteurs powerCON TRUE1® (non fournis). -
Page 108: Branchement Et Relance Du Signal Audio Et Rdnet
Français BRANCHEMENT ET RELANCE DU SIGNAL AUDIO ET RDNET MODULE 1 MODULE 2 Dans l’illustration ci-dessus est représenté un cas de branchement générique où un module 1 est au-dessus du module 2, cette fois-ci avec l’illustration des branchements audio et de réseau. Utiliser à... - Page 109 Français VIO-L210 Code 420120248 RÉV. 1.1...
-
Page 110: Installation Et Configuration
Français 5. INSTALLATION ET CONFIGURATION CONTENU DE L'EMBALLAGE Vérifier que le contenu de l’emballage du module VIO-L210 est complet. L’emballage contient : • Module VIO-L210 • fusible pour le fonctionnement dans la fourchette de tension 110-120V~ (voir la section CARACTÉRISTIQUES DE LA SECTION D'AMPLIFICATION ET DE CONTRÔLE pour plus d’informations) •... - Page 111 Enlever les freins aux roues du DT-VIOL210 et remettre en position de repos le chariot. ATTENTION DRK-210 a été conçu pour suspendre jusqu’à 25 VIO L210 (ou bien 16 modules Sub) pour un poids maximum de 750 kg avec un seul point d’ancrage.
- Page 112 Français • Porter les 4 modules ultérieurs avec un deuxième chariot DT-VIOL210 au-dessous des premiers 4 actuellement suspendus. • Mettre les freins au chariot, effectuer le réglage des angles comme il a été décrit dans l’étape précédente. • Enlever le couvercle et les éléments tubulaires avant du DT-VIOL210. •...
- Page 113 Français • Soulever légèrement le line-array pour vérifier l’exactitude des accrochages et des angles. Éventuellement vérifier avec l’inclinomètre laser (non fourni) que l’inclinaison du fly-bar correspond à celle de conception. Vérifier que tous les goujons sont entièrement insérés et bloqués. •...
-
Page 114: Installation Stacked (Exemple De 1 Ou 4 Modules Sur Sub318)
Français INSTALLATION STACKED (EXEMPLE DE 1 OU 4 MODULES SUR SUB318) • Il est possible de monter au maximum 4 modules en configuration stacked sur fly-bar DRK-210. • Utiliser DBTECHNOLOGIES COMPOSER pour configurer les paramètres de conception, pour des raisons de sécurité. •... -
Page 115: Dépannage
Français 6. DÉPANNAGE Le module ne s'allume pas : 1. Vérifier la correcte alimentation en amont du système. 2. Vérifier que l’alimentation ou le branchement de relance de l’alimentation est correctement inséré. Le module s'allume mais n'émet aucun son : 1. -
Page 116: Mise À Jour Du Micrologiciel
Français 7. MISE À JOUR DU MICROLOGICIEL IL très important de mettre à jour périodiquement le micrologiciel du produit, pour assurer sa pleine fonctionnalité. Visiter régulièrement le site http://www.dbtechnologies.com à la section « DOWNLOADS ». 1. Télécharger et installer USB BURNER MANAGER dans la section « SOFTWARE &... -
Page 117: Spécifications Techniques
Français 8. SPÉCIFICATIONS TECHNIQUES INFORMATIONS GÉNÉRALES Type : Module line-array actif à 2 voies DONNÉES ACOUSTIQUES Réponse en fréquence [- 6 dB] : 67 - 20000 Hz Réponse en fréquence [± 3 dB] : 78 - 18100 Hz Max SPL : 134 - 136 dB (frequency/preset dependent) HF : 1 x 1.4”... -
Page 118: Processeur
Français PROCESSEUR Contrôleur interne : DSP 28/56 bit 48 kHz Fonctions avancées : Filtres FIR Limiter : Peak, RMS, Thermique INTERFACE UTILISATEUR Audio Attenuation, 2 commandes rotatives à 8 positions (Coupling, Commandes : Compensation) Led de signalisation : Limiter, Signal, Mute/prot, Ready Led d’ é tat (réseau RDNet) Link, Active, Remote Preset Active ENTRÉES ET SORTIES Entrées et relances d’alimentation :... -
Page 119: Spécifications Mécaniques
Français SPÉCIFICATIONS MÉCANIQUES Matériau : coffret en bois - finition polyuréa noire Grille : entièrement en métal - usinage CNC Poignées intégrées (2 de chaque côté) Prédispositions avant de Étriers escamotables, points intégrés dans le coffret avec goujon à montage : décrochage rapide Prédispositions arrière de Étrier gradué... - Page 120 Español ÍNDICE 1. INFORMACIÓN GENERAL ....................121 ¡BIENVENIDOS! ......................121 INTRODUCCIÓN ......................121 REFERENCIAS PARA EL USUARIO ................... 121 CARACTERÍSTICAS MECÁNICAS Y DEL SONIDO ............122 DIMENSIONES Y PESO ........................... 122 CARACTERÍSTICAS ACÚSTICAS ......................122 MECÁNICA ............................. 123 ACCESORIOS ............................126 CARACTERÍSTICAS DE LA SECCIÓN DE AMPLIFICACIÓN Y CONTROL ......
-
Page 121: Información General
Español 1. INFORMACIÓN GENERAL ¡BIENVENIDOS! ¡Gracias por adquirir este producto diseñado y desarrollado en Italia por dBTechnologies! Este módulo line-array activo, potente y de rápido montaje, nace tras una larga experiencia en el campo de la megafonía. Emplea soluciones optimizadas en campo acústico y electrónico, además de la excelente selección de sus materiales. -
Page 122: Características Mecánicas Y Del Sonido
Español CARACTERÍSTICAS MECÁNICAS Y DEL SONIDO DIMENSIONES Y PESO La serie VIO ha sido diseñada prestando especial atención a la optimización del peso y de las dimensiones totales. El gabinete de madera revestido de poliurea pesa 28,6 kg. Sus medidas son: 720 mm (L), 312 mm (A), 520 mm (P). CARACTERÍSTICAS ACÚSTICAS La optimización acústica comienza a partir de una cuidadosa elección de los materiales, la forma y la geometría del... -
Page 123: Mecánica
Español MECÁNICA La ergonomía del módulo y el rápido montaje en line-array están garantizados por: LADO DELANTERO 1) Sistema de fijación inferior para conectar otros módulos o el fly-bar DRK-210 (en configuración stacked, apilada). 2) Soportes retráctiles para la fijación a un módulo superior (o al fly-bar DRK-210 en configuración flown). 3) Pin para la fijación en la posición abierta o cerrada de los soportes retráctiles [2]. - Page 124 Español El montaje de dos módulos A y B prevé pocos y sencillos pasos: • En el módulo A extraer los pines [3], elevar los soportes retráctiles [2] y fijarlos en la nueva posición con los pines [3]. • Extraer los pines [1] en el módulo B y sobreponerlo al módulo A introduciendo los soportes [2] como se muestra.
- Page 125 Español EJEMPLO: 3° ¡ATENCIÓN En el ejemplo se muestra un caso en el que se desea establecer un ángulo de 3° entre 2 módulos. Antes de llevar a cabo cualquier operación, comprobar que, una vez introducido el brazo móvil [6], los orificios del ángulo elegido estén contenidos dentro del ojal, como se muestra.
-
Page 126: Accesorios
• DRK-210 ha sido diseñado para suspender hasta 25 VIO L210 (o 16 módulos Sub) hasta un máximo de 750 kg con un único punto de enganche. Los componentes de suspensión del VIO L210 permiten conectar hasta 10 módulos (máximo 300 kg) sin límites de ángulos del line array. -
Page 127: Características De La Sección De Amplificación Y Control
Español CARACTERÍSTICAS DE LA SECCIÓN DE AMPLIFICACIÓN Y CONTROL El amplificador digital clase D es el corazón de los módulos VIO-L210. Permite erogar hasta 900 W RMS en modo silencioso y eficiente sin necesidad de un sistema de ventilación. El sistema está controlado por un poderoso DSP que permite configurar en modo inmediato y rápido el line-array en cualquier contexto de uso. -
Page 128: Sección De Entradas,Salidas Y Control
Español SECCIÓN DE ENTRADAS,SALIDAS Y CONTROL 1. ENTRADA Y TRANSMISIÓN AUDIO (“Balanced audio”) Entrada y salida compatibles con cables XLR balanceados. En particular, “Input” viene utilizado para la conexión con la señal de audio proveniente del mixer o de otro altavoz, “Output Link”... -
Page 129: Sección De Alimentación
Español TIPO DE FASE DE ENCENDIDO EN FUNCIONA- ADVERTENCIA BLOQUEO POR DEL ALTAVOZ MIENTO GENÉRICA ANOMALÍA DEL NORMAL ALTAVOZ LIMITER APAGADO APAGADO, SE DESTELLO DESTELLO CÍCLICO ENCIENDE SOLO MOMENTÁNEO CONTINUO EN CASO DE INTERVENCIÓN APAGADO DESTELLO INDICACIÓN APAGADO SIGNAL EN PRESENCIA DE NORMAL DE SEÑAL AUDIO EN... -
Page 130: Dbtechnologies Composer
Español 2. DBTECHNOLOGIES COMPOSER El software dBTechnologies Composer, que puede descargarse de forma gratuita del sitio www. dbtechnologies.com, es el instrumento para el correcto diseño de sistemas de audio recomendados para toda la serie VIO. Sugiere la solución para los espacios a sonorizar, indicando el ángulo de los módulos del line-array para obtener la cobertura deseada así... - Page 131 Español La sección LAs PREDICT contiene toda la información necesaria para la correcta configuración flown o stack de un sistema VIO. Para acceder es necesario completar primero los datos del proyecto en la sección Composer. En la subpágina System Data se sugiere: el ángulo de los diversos módulos, varios parámetros relacionados con la sección “DSP preset”...
- Page 132 Español En la sección Safety Data se puede encontrar una simulación del centro de gravedad del sistema Flown con DRK-210. En particular, el usuario puede elegir entre las referencias EUROCODE 3 o BGV-C1. Los resultados se muestran en color verde si son seguros o en rojo si se excede la carga máxima admisible para el ángulo elegido (y por lo tanto está...
- Page 133 Español Si en configuración Flown se utiliza un solo motor, “SINGLE” indica la posición del gancho individual que se debe utilizar en DRK-210 (que prevé posiciones graduadas descritas en una etiqueta sobre el fly-bar). Además cuenta con una orientación del gancho para el motor: “FRONT”...
-
Page 134: Parámetros Dsp Preset Y Control Remoto
La configuración acústica en line-array de los módulos VIO L210 se puede optimizar gracias a las funciones de control gestionadas por DSP. La interfaz de uso es simple y directa: emplea dos mandos giratorios de la sección "DSP Preset"... - Page 135 Español • Colocar el mando giratorio “HIGH FREQUENCY COMPENSATION” en base al tipo de instalación y ángulo configurado en el line- array. Este mando giratorio actúa sobre la sección de frecuencias medio-altas y debe configurarse en la posición: • 1 - FLAT (no hay énfasis en ninguna banda de frecuencia particular) •...
-
Page 136: Conexiones
Español 4. CONEXIONES CONEXIONES Y TRANSMISIÓN DE LA ALIMENTACIÓN MÓDULO 1 MÓDULO 2 En la ilustración superior se muestra un caso genérico de conexión en el cual un módulo 1 está sobre el módulo 2. Para esto, utilizar cables con conectores powerCON TRUE1® (no suministrados). •... -
Page 137: Conexión Y Transmisión De La Señal Audio Y Rdnet
Español CONEXIÓN Y TRANSMISIÓN DE LA SEÑAL AUDIO Y RDNET MÓDULO 1 MÓDULO 2 En la ilustración superior se muestra un caso genérico de conexión en el cual un módulo 1 está sobre el módulo 2, esta vez ilustrando las conexiones audio y de red. Para esto, utilizar cables no suministrados con conectores XLR (audio) y etherCON/RJ45 (red). - Page 138 Español VIO-L210 Cód. 420120248 REV. 1.1...
-
Page 139: Instalación Y Configuración
Español 5. INSTALACIÓN Y CONFIGURACIÓN CONTENIDO DEL EMBALAJE Comprobar la presencia de todos los componentes del módulo VIO-L210. El embalaje contiene: • Módulo VIO-L210 • fusible para el funcionamiento en el rango 110-120V~ (para mayor información, consultar la sección CARACTERÍSTICAS DE LA SECCIÓN DE AMPLIFICACIÓN Y CONTROL) •... - Page 140 Quitar los frenos a las ruedas de DT-VIOL210 y volver a colocar el carro de transporte en posición de reposo. ¡ATENCIÓN DRK-210 ha sido diseñado para suspender hasta 25 VIO L210 (o 16 módulos Sub) hasta un máximo de 750 kg con un único punto de enganche.
- Page 141 Español • Llevar los otros 4 módulos con un segundo carro DT-VIOL210 bajo a los primeros 4 actualmente suspendidos. • Frenar el carro y regular los ángulos como descrito en la fase anterior. • Quitar la tapa y los tubos delanteros de DT-VIOL210. •...
- Page 142 Español • Levantar ligeramente el line-array para verificar que ángulos y enganches sean correctos. Eventualmente verificar con un inclinómetro láser (no incluido) que la inclinación del fly-bar corresponda con la del proyecto. Verificar que todos los pines se encuentren completamente introducidos y bloqueados. •...
-
Page 143: Instalación Stacked (Ejemplo De 1 O 4 Módulos En Sub318)
Español INSTALACIÓN STACKED (EJEMPLO DE 1 o 4 MÓDULOS EN SUB318) • Es posible montar al máximo 4 módulos en configuración stacked en fly-bar DRK-210. • Por motivos de seguridad, utilizar DBTECHNOLOGIES COMPOSER para configurar los parámetros del proyecto. • Colocar el fly-bar DRK-210 en SUB 318 (instalado sobre una superficie sin inclinación). -
Page 144: Resolución De Problemas
Español 6. RESOLUCIÓN DE PROBLEMAS El módulo no se enciende: 1. Comprobar la presencia correcta de la alimentación general del sistema. 2. Comprobar que la fuente de alimentación o la conexión de transmisión de alimentación esté insertada correctamente. El módulo se enciende pero no emite sonidos: 1. -
Page 145: Actualización Del Firmware
Español 7. ACTUALIZACIÓN DEL FIRMWARE ES muy importante mantener actualizado el firmware del producto, para garantizar su funcionalidad completa. Controlar periódicamente la página web http://www.dbtechnologies.com en la sección "DOWNLOADS". 1. Descargar e instalar USB BURNER MANAGER en la sección "SOFTWARE & CONTROLLER"... -
Page 146: Especificaciones Técnicas
Español 8. ESPECIFICACIONES TÉCNICAS GENERAL Tipo: Módulo line-array activo de 2 vías DATOS ACÚSTICOS Respuesta en frecuencia [- 6 dB]: 67 - 20000 Hz Respuesta en frecuencia [± 3 dB]: 78 - 18100 Hz Máx. SPL: 134 - 136 dB (frequency/preset dependent) 1 x 1.4”... -
Page 147: Procesador
Español PROCESADOR Regulador interior: DSP 28/56 bit 48 kHz Funciones avanzadas: Filtros FIR Limitador: Peak, RMS, Térmico INTERFAZ USUARIO Audio Attenuation, 2 mandos giratorios con 8 posiciones (Coupling, Controles: Compensation) Indicadores led: Limiter, Signal, Mute/prot, Ready Led de estado (red RDNet) Link, Active, Remote Preset Active ENTRADAS Y SALIDAS Entradas y transmisiones de ali-... -
Page 148: Especificaciones Mecánicas
Español ESPECIFICACIONES MECÁNICAS Material: gabinete de madera - acabado poliurea negra Rejilla: completamente de metal - elaboración CNC Asas integradas (2 x lado) Predisposiciones delanteras de Soportes retráctiles, puntos integrados en el gabinete con pin a montaje: desenganche rápido Predisposiciones traseras de Soporte graduado y brazo móvil con pin a desenganche rápido montaje: Montaje flown y stacked:...
Need help?
Do you have a question about the VIO L210 and is the answer not in the manual?
Questions and answers