Table of Contents
Advertisement
Available languages
Available languages
Quick Links
Advertisement
Chapters
Table of Contents

Related Manuals for dB Technologies VIOX Series


Summary of Contents for dB Technologies VIOX Series
- Page 1 MANUALE D’USO - Sezione 1 USER MANUAL - Section 1 Le avvertenze nel presente manuale devono essere osservate congiuntamente al “MANUALE D’USO - Sezione 2” The warnings in this manual must be observed together with the "USER MANUAL - Section 2".
- Page 2 EMI CLASSIFICATION According to the standards EN 55103 this equipment is designed and suitable to operate in E3 (or lower E2, E1) Electromagnetic environments. FCC CLASS B STATEMENT ACCORDING TO TITLE 47, CHAPTER I, SUBCHAPTER A, PART 15, SUBPART B This equipment has been tested and found to comply with the limits for a Class B digital device, pursuant to part 15 of the FCC Rules.
- Page 3 IMPORTANT SAFETY INSTRUCTIONS: 1. Read these instructions 2. Keep these instructions. 3. Heed all warnings. 4. Follow all instructions. 5. Do not use this apparatus near water. 6. Clean only with dry cloth. 7. Do not block any ventilation openings. Install in accordance with the manufacturer’s instructions. 8.
- Page 4 ITALIANO ENGLISH VIO X10 - VIO X12 - VIOX15 Cod. 420120280 REV. 1.0...
-
Page 5: Table Of Contents
Italiano INDICE 1. INFORMAZIONI GENERALI ......................6 BENVENUTI! ..........................6 PANORAMICA INTRODUTTIVA ....................6 RIFERIMENTI PER L’UTENTE ...................... 6 CARATTERISTICHE MECCANICHE ED ACUSTICHE ..............7 DIMENSIONI ........................7 COPERTURA ACUSTICA ....................... 7 CARATTERISTICHE DELLA SEZIONE DI AMPLIFICAZIONE E DI CONTROLLO ......8 SEZIONE DI INPUT, OUTPUT, RDNET E CONTROLLO............ -
Page 6: Informazioni Generali
Italiano 1. INFORMAZIONI GENERALI BENVENUTI! Grazie per aver acquistato un prodotto progettato e sviluppato in Italia da dBTechnologies! Questo diffusore attivo, versatile ed ergonomico, è frutto di una lunga esperienza nel campo della diffusione sonora, con l’impiego di soluzioni ottimizzate in campo acustico ed elettronico, oltre che nella scelta dei materiali. PANORAMICA INTRODUTTIVA I nuovi diffusori professionali VIO X sono equipaggiati con un compression driver da 1”... -
Page 7: Caratteristiche Meccaniche Ed Acustiche
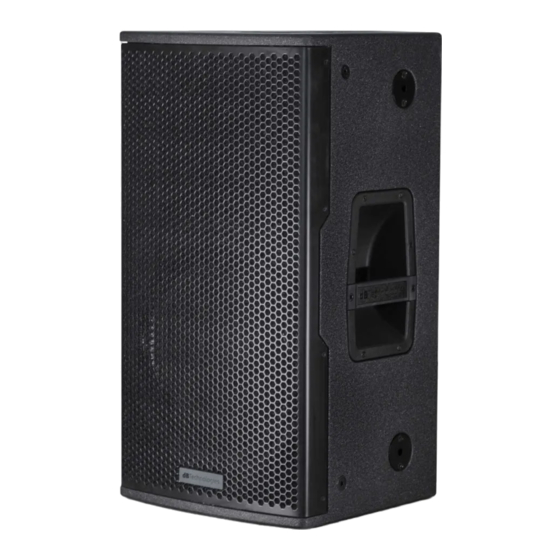
Italiano CARATTERISTICHE MECCANICHE ED ACUSTICHE DIMENSIONI La serie VIO X è stata progettata con particolare attenzione all’ottimizzazione di peso ed ingombro. Il cabinet risulta leggero ma resistente, ed integra 2 maniglie (una laterale e una superiore) nel modello VIO X10 e 3 maniglie (due laterali e una superiore) nei modelli VIO X12 e VIO X15, per una facile maneggevolezza. -
Page 8: Caratteristiche Della Sezione Di Amplificazione E Di Controllo
Italiano CARATTERISTICHE DELLA SEZIONE DI AMPLIFICAZIONE E DI CONTROLLO I/O, RDNET AND CONTROL SECTION L’amplificatore DIGIPRO G3 fornisce 900 W RMS per tutti e tre i modelli. Il sistema è silenzioso, non necessitando di un raffreddamento ventilato. Il controllo del sistema è affidato a un potente DSP dedicato che gestisce diversi parametri ATTENZIONE •... -
Page 9: Sezione Di Input, Output, Rdnet E Controllo
Italiano SEZIONE DI INPUT, OUTPUT, RDNET E CONTROLLO 1. INGRESSO E RILANCIO AUDIO (“Balanced audio”) Ingresso e uscita compatibili con cavi XLR bilanciati. In particolare, “Input” è utilizzato per il collegamento con il segnale audio proveniente da microfono, mixer o da un altro diffusore, “Output Link”... -
Page 10: Sezione Di Alimentazione
Italiano SEZIONE DI ALIMENTAZIONE 9. CONNETTORE DI ALIMENTAZIONE “MAINS INPUT” Compatibile con connettore powerCON TRUE1, l’alimentazione è dotata di funzione autorange. Riconosce automaticamente la tensione all’interno dell’intervallo [100-120V~] oppure [220-240V~]. 10. RILANCIO DI ALIMENTAZIONE “MAINS LINK” Compatibile con connettore tipo powerCON TRUE1 per il rilancio dell’alimentazione ad altri speaker. Per conoscere il numero massimo di moduli che si possono connettere in un sistema rilanciato, consultare la sezione SPECIFICHE TECNICHE. -
Page 11: Prima Accensione
Italiano 2. PRIMA ACCENSIONE CONTENUTO DELLA CONFEZIONE Verificate che il contenuto dell’imballo del diffusore VIO X sia completo. L’imballo contiene: • speaker VIO X • cavo di alimentazione • quick start e documentazione relativa alla garanzia • 1 fusibile UTILIZZO COLLEGAMENTO DEGLI INGRESSI MIXER / LINE MICROFONO... -
Page 12: Collegamento Dell'alimentazione
Italiano COLLEGAMENTO DELL’ALIMENTAZIONE ALIMENTAZIONE COLLEGAMENTO DELLE USCITE FRA PIU’ SPEAKER (rilancio del segnale audio) CAVO CON CONNETTORI XLR INGRESSO AUDIO RILANCIO - USCITA RILANCIO - INGRESSO PRIMO SPEAKER SECONDO SPEAKER E’ possibile rilanciare un segnale audio connettendo l’uscita Output Link all’ingresso Input di una seconda VIO X Nel secondo speaker, Audio Input Sensitivity deve essere sulla posizione “Line”. -
Page 13: Connessione Rdnet E Controllo Remoto
Italiano 3. CONNESSIONE RDNET E CONTROLLO REMOTO CAVO DI RETE PC/MAC RDNET CONTROL 2/8 Per il controllo remoto, collegare il Data Input del primo speaker al controller hardware (RDNet Control 2 o RDNet Control 8) con cavi equipaggiati con connettori ethernCON. Quindi connettere il Data Output del primo speaker al Data Input del secondo e così... -
Page 14: Esempi Di Utilizzo
Italiano 4. ESEMPI DI UTILIZZO • Non sono ammessi tipi di installazione diversi da quelli qui illustrati. • In nessun caso utilizzare le maniglie del diffusore per appenderlo. • Verificare sempre che il posizionamento sia stabile, e che l’installazione non costituisca fonte di pericolo per persone, animali o cose. -
Page 15: Utilizzo Wedge (Monitoring)
Italiano UTILIZZO WEDGE (MONITORING) Gli speaker della serie VIO X possono essere utilizzati come monitor per contesti live. In questo caso si appoggiano in posizione orizzontale sul lato inclinato. Ricordare le caratteristiche di copertura acustica segnalate nella sezione relativa. Utilizzare gli opportuni settaggi DSP come indicati nella tabella “DSP preset”... -
Page 16: Accessori
Italiano 5. ACCESSORI A completamento della serie, sono previsti come opzionali i seguenti accessori: • Staffe a muro (vedi le illustrazioni sottostanti) • set di stand treppiedi SSB2 • Rain Cover RC-M1, valido per tutti i modelli STAFFE ORIZZONTALI RC-M1 (RAIN COVER) SSB2 (COPPIA DI TREPPIEDI) STAFFE VERTICALI ATTENZIONE... -
Page 17: Risoluzione Dei Problemi
Italiano 6. RISOLUZIONE DEI PROBLEMI Il diffusore non si accende: 1. Verificare la corretta presenza dell’alimentazione a monte dell’impianto. 2. Verificare che il cavo di alimentazione con connettore POWERCON® TRUE1 sia correttamente inserito. 3. In caso il problema persista, contattare l’assistenza. Il diffusore si accende ma non emette nessun suono: 1. -
Page 18: Aggiornamento Del Firmware
Italiano 7. RISOLUZIONE DEI PROBLEMI È molto importante mantenere aggiornato il firmware del prodotto, per garantirne una piena funzionalità. Controllare periodicamente il sito http://www.dbtechnologies.com nella sezione DOWNLOADS. 1. Scaricare ed installare USB BURNER MANAGER nella sezione “SOFTWARE & CONTROLLER” sul proprio computer. 2. -
Page 19: Specifiche Tecniche
Italiano 8. SPECIFICHE TECNICHE GENERALE Tipologia: Diffusore attivo a 2 vie DATI ACUSTICI Risposta in frequenza [-10dB]: 73- 21.4 kHz (X10) / 62 - 22 kHz (X12) / 55 -22kHz (X15) Risposta in frequenza [-6dB]: 82- 20 kHz (X10) / 79 - 21 kHz (X12) / 72 -21kHz (X15) Max SPL: 130 dB (X10) / 132 dB (X12) / 133.5 (X15) HF voice coil:... -
Page 20: Processore
Italiano Potenza di amplificazione RMS: 900 W Potenza di picco: 1800 W PROCESSORE Controller interno: 28/56-bit DSP Convertitore A/D D/A: 24 bit/48 kHz Limiter: Peak, RMS, Termico INTERFACCIA UTENTE Controlli: Livello e selettore dell’ingresso, rotary DSP preset INGRESSI E USCITE Ingressi: 1 ingresso audio bilanciato (con selezione Line/Mic), 1 ingresso RDNet 1x XLR Link OUT, 1 uscita RDNet... -
Page 21: Dimensioni
Italiano DIMENSIONI Materiale: Cabinet in legno con finitura in poliure Griglia: Lavorazione CNC Predisposizione per staffe: Sì 2 (laterale e superiore) per X10 Maniglie: 3 (due laterali e una superiore) per X12 e X15 Montaggio su palo: Sì, 36 mm Larghezza: 280 mm (X10) / 340 mm (X12) / 400 (X15) Altezza:... - Page 22 English TABLE OF CONTENTS TABLE OF CONTENTS 1. GENERAL INFORMATION ......................23 WELCOME! ..........................23 PRODUCT OVERVIEW ....................... 23 USER REFERENCE ........................23 MECHANICAL AND ACOUSTICAL FEATURES ................24 DIMENSIONS ........................24 SOUND COVERAGE ......................24 FEATURES OF THE AMPLIFIER AND CONTROL SECTIONS ............25 INPUT, OUTPUT, RDNET AND CONTROL SECTION .............
-
Page 23: General Information
English 1. GENERAL INFORMATION WELCOME! Thanks for purchasing a product designed and developed in Italy by dBTechnologies! This ergonomic and versatile active speaker is the result of a long experience in the sound reinforcement industry, making use of optimized sound, electronic and material research solutions. PRODUCT OVERVIEW The new professional VIO X loudspeakers are equipped with a 1”... -
Page 24: Mechanical And Acoustical Features
English MECHANICAL AND ACOUSTICAL FEATURES DIMENSIONS The VIO X series has been designed with the intent to optimise weight and dimensions. The cabinet is light but resistant, it features 2 handles (one on the side and one at the top) on X10 and 3 handles (two on the sides and one at the top) on X12/X15 for easy handling. -
Page 25: Features Of The Amplifier And Control Sections
English FEATURES OF THE AMPLIFIER AND CONTROL SECTIONS I/O, RDNET AND CONTROL SECTION All the 3 models feature DIGIPRO G3 amplifier that delivers 900 W RMS. The system is silent and does not require a fan cooling. The system is controlled by a dedicated powerful DSP that manages the different parameters. -
Page 26: Input, Output, Rdnet And Control Section
English INPUT, OUTPUT, RDNET AND CONTROL SECTION 1. INPUT AND OUTPUT LINK (“Balanced audio”) Input and output compatible with balanced XLR cables. Use "Input" to connect the audio signal coming from the mixer or from another loudspeaker; use "Output Link" to link the signal to other loudspeakers in a daisy-chain configuration. -
Page 27: Power Supply Unit Section
English POWER SUPPLY UNIT SECTION 9. “MAINS INPUT” POWER CONNECTOR Compatible with powerCON TRUE1 connector, the power supply features an auto-range function. It automatically recognises the voltage within the range [100-120V~] or [220-240V~]. 10. “MAINS LINK” POWER DAISY CHAIN CCompatible with powerCON TRUE1® connectors to link the power supply to other modules. To find the maximum number of modules that can be connected in a re-linked system, see the TECHNICAL SPECIFICATIONS section. -
Page 28: First Power-Up
English 2. FIRST POWER-UP PACKAGE CONTENTS On opening the VIO X10, X12, X15 speaker package, check that no items are missing. The package contains: • VIO X speaker • power cable with POWERCON® TRUE1 connector • quick start user manual and warranty documents •... -
Page 29: Power Supply Connection
English CONNECTING THE OUTPUTS OF MULTIPLE SPEAKERS (audio daisy chain) CABLE WITH XLR CONNECTORS LINK - INPUT LINK - OUTPUT AUDIO INPUT FIRST SPEAKER SECOND SPEAKER To connect 2 or more speakers to the same audio source, it may be useful in various types of installation to relay the signal from the first speaker to a second one, and so on. -
Page 30: Remote Control And Rdnet Connection
English 3. REMOTE CONTROL AND RDNET CONNECTION NETWORK CABLE PC/MAC RDNET CONTROL 2/8 To enable remote control, connect the Data Input of the first speaker to the hardware interface (RDNet Control 2 or RDNet Control 8) using cables fitted with ethernCON connectors. Then connect the Data Output of the first speaker to the Data Input of the second, and so on. -
Page 31: Usage Examples
English 4. USAGE EXAMPLES • Types of installation other than those here described are not allowed. • Never suspend the speakers from the handles • Always check that the positioning is stable and that the installation does not pose a danger to people, animals or property. -
Page 32: Wedge (Monitoring) Use
English WEDGE (MONITORING) USE The VIO X series speakers can be used as monitors for small live contests. In this case, lay them horizontally on the tilted side. Be reminded of the sound coverage features reported in the relevant section. Use the suitable DSP settings as indicated in the "DSP preset"... -
Page 33: Accessories
English 5. ACCESSORIES To completion of the series, the following accessories are provided as options: • Wall brackets (see the pictures below) • SSB2, set of tripod stands with diameter 35 mm • Rain Cover RC-M1, valid for all models HORIZONTAL BRACKETS RC-M1 (RAIN COVER) SSB2 (PAIR OF TRIPOD STANDS) -
Page 34: Troubleshooting
English 6. TROUBLESHOOTING The loudspeaker does not power up: 1. Check that the system is connected to a working power supply. 2. Check that the power cable with the POWERCON® TRUE1 connector is plugged in correctly. 3. If the problem persists, contact an authorised service centre. The speaker turns on but does not produce any sound: 1. -
Page 35: Updating The Firmware
English 7. UPDATING THE FIRMWARE It is very important to keep the product firmware updated to ensure full functionality. Periodically check the “DOWNLOADS” section of the http://www.dbtechnologies.com website. 1. Download and install the USB BURNER MANAGER onto your computer from the “SOFTWARE &... -
Page 36: Specifications
English 7. SPECIFICATIONS GENERAL Type: 2-way active professional speaker ACOUSTICAL SPECIFICATIONS Frequency response [-10dB]: 73- 21.4 kHz (X10) / 62 - 22 kHz (X12) / 55 -22kHz (X15) Frequency response [-3dB]: 82- 20 kHz (X10) / 79 - 21 kHz (X12) / 72 -21kHz (X15) Max SPL: 130 dB (X10) / 132 dB (X12) / 133.5 (X15) HF voice coil:... -
Page 37: Processor
English RMS amplifier power: 900 W Peak power: 1800 W PROCESSOR Internal controller: 28/56-bit DSP A/D D/A converter: 24 bit/48 kHz Limiter: Peak, RMS, Thermal USER INTERFACE Controls: Input switch and level, DSP preset rotary INPUTS & OUTPUTS Inputs: 1 balanced audio input (with Line/Mic selection), 1 RDNet input 1x XLR Link OUT, 1 RDNet output Outputs: powerCON TRUE1 IN/LINK... -
Page 38: Dimensions
English DIMENSIONS Material: Wooden box / black polyurea finished Grille: Full CNC-machined Provisions for brackets: Handles: 2 (on side, on top) Pole mount: Yes, 36 mm Width: 280 mm (X10) / 340 mm (X12) / 400 (X15) Height: 550 mm (X10) / 650 mm (X12) / 750 (X15) Depth: 375 mm (X10) / 445 mm (X12) / 475 (X15) Weight:...
Need help?
Do you have a question about the VIOX Series and is the answer not in the manual?
Questions and answers