Table of Contents
Advertisement
Advertisement
Table of Contents

Subscribe to Our Youtube Channel
Related Manuals for Eneo EDCH/143E/C


Summary of Contents for Eneo EDCH/143E/C
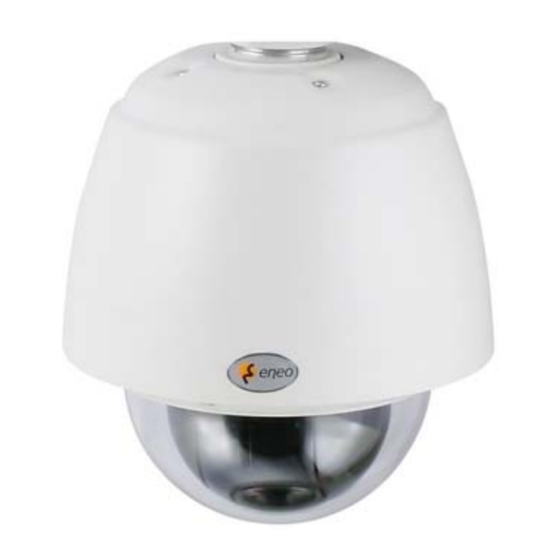
- Page 1 ALL-IN-ONE DOME CAMERA EDCH/143E/C Instruction Manual 1...
-
Page 2: Safety Instructions
Safety Instructions • Read these safety instructions and the operation manual first before you install and commission the camera. • Keep the manual in a safe place for later reference. • Protect your camera from contamination with water and humidity to prevent it from permanent damage. -
Page 3: Table Of Contents
Table of Contents Chapter 1 — Introduction ......................4 1.1 Features .............................. 4 Chapter 2 — Installation and Configuration................5 2.1 Package Contents ..........................5 2.2 Installation............................5 2.3 Basic Configuration of Dome Camera System................. 6 2.4 Setting Dome Camera Termination and Full State Bias ............7 2.5 Setting Dome Camera Address (ID)..................... -
Page 4: Chapter 1 - Introduction
Chapter 1 — Introduction 1.1 Features The dome camera and the Keyboard Controller make up the building blocks for any surveillance/security system. Using multiple Keyboard Controllers and multiple dome cameras, no place is too large for monitoring. Extensible and flexible architecture facilitates remote control functions for a variety of external switching devices such as multiplexers and DVRs. -
Page 5: Chapter 2 - Installation And Configuration
Chapter 2 — Installation and Configuration 2.1 Package Contents AIO(All In One) is design to a compact, small size, hard Dome Camera Housing. The housing is constructed of aluminum, steel and plastic. The housing is designed to be mounted both wall and ceiling type. The housing meets the Protection Classification IP66 standards for dust and moisture resistance. -
Page 6: Basic Configuration Of Dome Camera System
2.3 Basic Configuration of Dome Camera System 22 AWG UTP CABLE KEYBOARD Figure 2 – Basic Installation Diagram The dome camera must be installed by qualified service personnel in accordance with all local and federal electrical and building codes. 6... -
Page 7: Setting Dome Camera Termination And Full State Bias
Figure 3 – Layout of Switches 2.4 Setting Dome Camera Termination and Full State Bias The device which is connected at end of line, whether it is a dome camera or keyboard controller, must have the cable for communication terminated by setting the appropriate DIP switch. Without proper termination, there is potential for control signal errors. -
Page 8: Setting Dome Camera Address (Id)
2.5 Setting Dome Camera Address (ID) To prevent damage, each dome camera must have a unique address (ID). When installing multiple dome cameras using a multiplexer, it is suggested that the dome camera address match the multiplexer port number. Example: Port 1 = Dome 1, Port 2 = Dome 2 … Port 16 = Dome 16. If more than 16 dome cameras are installed using two or more multiplexers, ID of the dome camera should be ID of MUX x No. -
Page 9: Connections
ROTOCOL F2,F2E,Pelco-D,Pelco-P:default F2,F2E Sensormatic Pelco-D, Pelco-P Vicon Ernitec Reserved Philips(Bosch) Reserved Dynacolor Reserved You can set video type with dip switch. S3-D4 IDEO TYPE NTSC Select video type with D4 in S3. 2.7 Connections Connector 1 :AC+ / AC- /G /R- /R+/G •... -
Page 10: Getting Started
Connector 4 :COM/NC/NO Alarm Output The dome camera can activate external devices such as buzzers or lights. Connect the device to the NC (NO) (Alarm Out) and COM (Common) connectors. See Chapter 3 — Program and Operation for configuring alarm output. Connector 5 :BNC •... -
Page 11: Chapter 3 - Program And Operation
OSD Position The dome can move the OSD position in the OSD position setup. (AREA TITLE) (AF AE) (FUNC TITLE (CTRL KEY TO MOVE) SAVE AND EXIT(ESC TO CANCEL) (ALARM MESSAGE) (DOME ID…) (ANGLE…) OSD Position Setup Chapter 3 — Program and Operation 3.1 Dome Camera Selection Before you program or operate a dome camera, you must select the dome camera by pressing the dome camera No. -
Page 12: How To Control The On-Screen Menu Utility
3.3 How to control the On-Screen Menu Utility Function Button Call the On-screen menu utility MENU Navigate through the menu items. Joystick up or down Joystick left or right Go into the sub-menu items. or IRIS Open Joystick left or right or Change value. - Page 13 1. Press the SCAN key to enter the auto scan menu directly. Or press the MENU key to display the main menu on the monitor. Scroll to Auto Scan and push the Joystick to the right. 2. Select the” NUMBER” and set the desired number by pushing the Joystick left or right. 3.
-
Page 14: Preset (Shortcut: Prst)
Example: 2 + PRST and do step 1 to 4. In step 5, just press the Ctrl key at the start angle position, the current position will be displayed as a start position. b. Save and exit from the menu. c. - Page 15 1. Press the PRST key to enter the preset menu directly. Or press the MENU key to display the main menu on the monitor. Scroll to preset and push the Joystick to the right. 2. Select the blank preset position to be stored by pushing the Joystick up, down, right, or left. 3.
-
Page 16: Shortcut Of Preset Program
The position, which is marked with *, already has the preset view assigned. To review the stored preset, press PRST key on the *,The camera will show the stored preset scene. PRESET AREA SETUP (CTRL KEY) NUMBER 001 TILT 000.0 000.0 EXIT(ESC TO EXIT) Hold down the CTRL key while selecting the desired scene using the Joystick. -
Page 17: Tour (Shortcut: Tour)
3.7 Tour (Shortcut: TOUR) There are 4 programmable Tours. Each Tour consists of up to 42 Preset positions, Patterns, Scans or other Tours (second-level). Using second-level tours, it can be expanded to over 150 functions in a single tour. TOUR SETUP NUMBER TITLE SCAN TYPE... -
Page 18: Pattern (Shortcut: Ptrn)
NOTE: In the Tour mode, in conjunction with preset and Auto Scan, you can make the camera travel from a preset position to another preset position at a specific speed. Example: Preset 001>002>003>004>005>006, Auto Scan 01 starts at preset 002, ends at preset 003, Auto Scan 02 starts at preset 005, ends at preset 006;... -
Page 19: Alarm
Press PTRN key on the title field to display with the small OSD. Then the screen will show as below. PATTERN AREA SETUP (CTRL KEY) NUMBER 01 00.0% 0001 01.0% EXIT(ESC TO EXIT) The setting procedure is the same as above. 3.9 Alarm ALARM SETUP NO PRI FUN IN... -
Page 20: Area Title
There are 9 levels of priority. The function can be selected by Preset, Auto scan, Pattern or Tour and “0” is the highest priority. Lower priority alarms won’t be serviced until the higher priority alarm is completed. Equal priority alarms will be serviced repeatedly with the dwell time. 3.10 Area Title Enter a specific name on programmed angle between START and END. -
Page 21: Privacy Zone
3.11 Privacy Zone Hide up to 8 unwanted scenes in a camera. PRIVACY ZONE SETUP (CTRL KEY) TITLE METHOD 01 ABC BLOCK 02 DEF V.OFF ---- ---- ---- ---- ---- ---- SAVE AND EXIT(ESC TO CANCEL) 1. Place the cursor at the title field. 2. -
Page 22: Camera Menu
3.12 Camera Menu CAMERA SETUP FOCUS CONTROL WB CONTROL AE CONTROL DNR CONTROL LINE LOCK CONTROL SHARPNESS : 07 RESOLUTION : MID DIGITAL ZOOM : OFF IMAGE FLIP : OFF PRESET FREEZE : OFF SAVE AND EXIT(ESC TO CANCEL) The higher the value, the more edges in the picture will be SHARPNESS enhanced (0~15) Select high resolution mode. - Page 23 • WB (White Balance) CONTROL WB SETUP MODE R GAIN B GAIN SAVE AND EXIT(ESC TO CANCEL) AWB / WAWB / INDOOR / OUTDOOR / MANUAL MODE Computes the white balance value output using color information from the entire screen automatically. (2500 to 9500 °K) WAWB Wide range auto white balance mode.(1800 to 10500 °K) INDOOR...
- Page 24 NOTE: The WDR operates in AE1 mode only NOTE: When BACKLIGHT set ON, bad focus problem might be caused. The NIGHT SHOT option removes the IR cutoff filter of the camera and makes the camera sensitive to near infrared. Camera goes in to B&W mode at low light. AUTO Controlled by the keyboard.
-
Page 25: Dome Setup
3.14 Dome Setup CONFIGURATION MENU LANGUAGE : ENGLISH HOME FUNCTION SETUP OSD DISPLAY VIEW ANGLE SETUP INITIALIZE DATA ORIGIN OFFSET DOME RESET SYSTEM MENU SYSTEM INFORMATION SAVE AND EXIT(ESC TO CANCEL) • LANGUAGE SETUP LANGUAGE : Select the language you want. •... - Page 26 • OSD DISPLAY OSD DISPLAY SETUP CAMERA TITLE : DOMEID VIEW DIRECTION : OFF DOME OSD : ON AREA TITLE : OFF PRESET TITLE : CONSTANT FOCUS EXPOSURE : ON OSD POSITION SETUP SAVE AND EXIT(ESC TO CANCEL) : up to 6 characters. CAMERA TITLE : ON / OFF VIEW DIRECTION...
- Page 27 • VIEW ANGLE SETUP VIEW ANGLE SETUP PANNING RANGE FLIP : 90° TILT OVER ANGLE : ON SAVE AND EXIT(ESC TO CANCEL) FLIP: OFF,90°,100°,110°,120°,AUTO OFF: the dome camera moves until 90° vertically. 90°, 100°, 110°, 120°: allows the image to flip digitally when the camera moves over the setting angle vertically.
- Page 28 • INITIALIZE DATA INITIALIZE DATA FACTORY DEFAULT ERASE PROGRAMMED DATA PRESET FOCUS DEFAULT EXIT (ESC TO CANCEL) FACTORY DEFAULT Select the Factory Default to initialize the Data. FACTORY DEFAULT ARE YOU SURE ? CANCEL ERASE PROGRAMMED DATA Erase all stored data from the Flash-ROM of the selected dome camera. You will be asked to enter ON or OFF.
- Page 29 FOCUS : AUTO/MANUAL/ONE PUSH • ORIGIN OFFSET OFFSET SETUP (CTRL KEY) PAN OFFSET : 000.0 TILT OFFSET : 000.0 ENABLE : OFF SAVE AND EXIT(ESC TO CANCEL) This feature is useful to align a new dome camera exactly the same as the previously installed dome camera.
- Page 30 MOTOR SETUP Motor Setup menu provides the pan and tilt speed of a camera. User can set the desired speed with twist the Joystick left or right. During operation, pressing 153 + ON will change the speed to the SLOW mode and pressing 153 + OFF will change the speed to the Normal mode. Holding and pressing CTRL and moving the joystick will operate with the TURBO speed mode.
-
Page 31: Function Run
• SYSTEM INFORMATION SYSTEM INFORMATION CAMERA TYPE : xxxx H/W VERSION : Vx.xx ROM VERSION : Vx.xx PROTOCOL : xxxx BAUDRATE : 9600 EXIT(ESC TO EXIT) The system information provides essential information about the dome camera if service is required. When you view this screen, you can determine the camera type, ROM version. The information on this screen cannot be modified. - Page 32 RELAY OUT SETUP OUT1 : ALARM EXIT(ESC TO EXIT) You can select OUT1 and press CTRL or IRIS Open then that relay operates during the setting time only. 32...
-
Page 33: Appendix A - Specifications
Appendix A — Specifications Type EDCH-143E/C Art. No. 74222 eneo Fastrax Plug & Play Series CCIR/PAL Video standard Day&night System 1/4´´ Sensor size CCD, Sony ExView HAD Interline Transfer Imager Internal/AC line lock, phase adjustment via remote control Synchronization 50dB Signal-to-noise ratio 0,38 Lux, (colour);... -
Page 34: Optional Accessories
Up to 99 Dome ID’s (3999 by software setting) Adresses Direct mode control with Eneo EDC-KBD(M), KBD-2, KBD-NSC- Keyboard control 100 keyboard series, or in conjunction with the eneo DVR series DLR, DTR and DPR Camera remote settings via keyboard Remote control... - Page 35 ∅ 129 Deckenmontage / Ceiling mount ∅ 160 ∅ 220 Wandmontage / Wall mount Der Wandmontagearm und die Deckenhalterung sind im Lieferumfang der Domekamera nicht enthalten. Maße / Dimensions: mm Wall bracket and ceiling tube are not included with the dome camera. Figure 6 –...
-
Page 36: Appendix B - Troubleshooting
Appendix B — Troubleshooting If problems occur, verify the installation of the camera with the instructions in this manual and with other operating equipment. Isolate the problem to the specific piece of equipment in the system and refer to the equipment manual for further information. Problem Possible Solution Verify that power is connected to all pieces of... -
Page 37: Appendix C - Glossary
Appendix C — Glossary Alarm Actions The assigned responses for the dome camera when inputs change from normal to abnormal states. The dome may run a Preset, Pattern, or have no assigned action for each of the eight dome inputs. The dome may also send alarm states to the host controller for processing. -
Page 38: Line Lock
Line Lock Allows you to phase lock the video with the AC power line. When line lock is enabled, it prevents vertical video rolling when switching multiple cameras to a single monitor. If text appears slightly tinted on color monitors, disabling the line lock may prevent this problem. Name Information Relates to the display the dome name, the area where the dome is pointing, the name of the preset or pattern that is running, and alarm names. -
Page 39: Appendix D - Short Cut Key
Appendix D — Short Cut Key Short Cut Key Function Pop up preset setup menu. PRST Pop up Tour setup menu. TOUR Pop up Pattern setup menu. PTRN Pop up Auto Scan setup menu. SCAN Store the current view at the selected number. NO.+ PGM+PRST Short Cut Key Function... - Page 40 Short Cut Key Function Short Cut Key Function Go to the normal speed Go to the slow speed mode 153 + ON 153 + OFF mode Display System Information 154 + ON Flip the camera in the 180° area horizontally. 155 + ON Set the dome ID up to 3999 250 + PRST...
-
Page 41: Appendix E - Wall Mount (Not Supplied)
Appendix E — Wall Mount (not supplied) Plastic bushing (4x) Tapping screw 8x35 (4x) Mounting bracket T Locking nut Set screw Safety wire Access plate Screw machine 3x5 (2x) Protection PAD Safety ring Screw machine 3x8 1. Select a suitable mounting location and verify there is sufficient cable to reach the middle of the Wall Mount. -
Page 42: Appendix F - Ceiling Mount (Not Supplied)
Appendix F — Ceiling Mount (not supplied) 1. Select a suitable mounting location Plastic bushing (3x) and verify there is sufficient cable to connect with cables from the Ceiling mount flange housing. Tapping screw 6x35 (3x) 2. Mark and drill mounting holes in the surface using the ceiling mount Set screw flange. - Page 43 43...
- Page 44 Videor E. Hartig GmbH ® Exclusive distribution through specialised trade channels only. Videor E. Hartig GmbH Carl-Zeiss-Straße 8 · 63322 Rödermark, Germany Tel. +49 (0) 6074 / 888-0 · Fax +49 (0) 6074 / 888-100 www.videor.com...
Need help?
Do you have a question about the EDCH/143E/C and is the answer not in the manual?
Questions and answers