Table of Contents
Advertisement
Quick Links
Download this manual
See also:
User Manual
Advertisement
Table of Contents

Related Manuals for Eneo HDC-2080Z03


Summary of Contents for Eneo HDC-2080Z03
- Page 1 INSTALLATION AND OPERATION MANUAL HDC-2080Z03...
-
Page 2: Table Of Contents
Table of contents 1. Safety Instructions and Notes…....................... 2. General Descriptions................……………………………... 3. Supplied Items..................……………………………... 4. Part names…………………………….…...........…………………………... 5. Installation Instructions..................……………………... 6. Setup Menu ……………................…………………………... 7. Specifications ………………………………………………..............8. Dimensional Drawings ……………………………………………............ -
Page 3: Power Source
WARNING To prevent fire or shock hazard, do not expose the unit to rain or moisture. The symbol is intended to alert the user to the presence of important operating and maintenance(servicing) instructions in the literature accompanying the unit. The symbol is intended to alert the user to the presence of uninsulated "dangerous voltage"... -
Page 4: Safety Instructions And Notes
1. Safety Instructions and Notes • Please read this safety and operating instructions before putting the camera into operation. • Keep the manual in a safe place for later reference. • Pay attention to safety when laying the connection cable and observe that the cable is not subjected to heavy loads, kinks or damage and no moisture can get in. -
Page 5: Supplied Items
• Wide Dynamic Range • 3D Noise Reduction • Sense Up(~x8) / AGC(0~20) • Scale down the image to 720p without loss of field of view • MOTION ZOOM(Automatic Zoom IN/OUT when motion is detected) • Pointing Zoom (Set the off-centered location to be the center of zoom in Motion Zoom) •... -
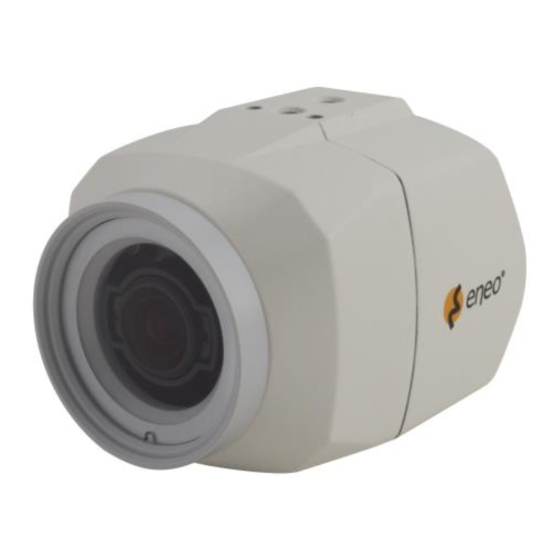
Page 6: Part Names
4. Part Names ④ Front view ③ ⑤ ① ② Window ① Window Hood ② Front Body ③ Mount Hole (Top and Bottom) ④ Rear Body ⑤ 4.1 Rear side view ⓑ ⓐ ⓓ ⓒ ⓔ OSD menu switches (Up/ Down/ Left/ Right / Enter) ⓐ... -
Page 7: Installation Instructions
5. Installation and commissioning Instructions • Make sure the power is removed before the installation. • Follow the order for applying power. First connect the low voltage (DC12V or AC24V), then plug the AC adapter to AC outlets to avoid an improper reset from power jitter and a damage from the surge voltage when no load. - Page 8 In the menu, use ▲,▼ to move menu, ◀,▶ to change the settings and press ☟ to select or enter. The actual value of FACTORY DEFAULT may differ from this manual due to further technical improvements. 6.2 MAIN menu ☟ Press to enter the setup menu for about 1 second.
- Page 9 MAIN Default Descriptions NORMAL – Optimized for the normal indoor and outdoor in the good lighting condition. WDR – Improves the visibility for the high bright area and the dark area by the double captures of image with LONG and SHORT exposures. With WDR ON, the frame rate becomes half by the double captures.
- Page 10 6.3 ZOOM/FOCUS ZOOM / FOCUS FOCUS MODE ZOOM PUSH D-ZOOM LENS REFRESH LENS INIT. RETURN RET↵ ZOOM / Default Descriptions FOCUS ZOOM PUSH, AUTO and MANUAL modes are available for focusing. ZOOM PUSH – Focusing is activated only when zoom in/out is working. FOCUS ZOOM AUTO –...
- Page 11 6.4 EXPOSURE EXPOSURE MODE AUTO BRIGHTNESS |:::::::|::::::| 10 SENS-UP AUTO↵ |::::::::|:::::| 12 MOTION DEBLUR RETURN RET↵ EXPOSURE Default Descriptions Can set EXPOSURE MODE to AUTO, IRIS Priority, SHUT. Priority, MANUAL and Flickerless. AUTO – Optimizes the video level by controlling the iris and the shutter speed automatically.
- Page 12 6.5 PICT ADJUST PICTURE WHITE BAL SHARPNESS |:::::|::::::| 10 COLOR GAIN |:::::|::::::| 10 GAMMA RETURN RET↵ PICTURE Default Descriptions ATW, ATWext, ONE PUSH and MANUAL are available for the white balance modes. ATW – White balance is continuously working along with the color temperature changes in the range of 2,000K~8,500K.
- Page 13 6.6 SPECIAL SPECIAL MIRROR/FLIP PRIVACY MOTION ↵ PIXEL DEFECT ↵ TITLE SET DISPLAY DEFOG RETURN RET↵ SPECIAL Default Descriptions Reverses the video left and right and/or up and down by MIRROR/FLIP. OFF - Normal display without mirroring or flipping Hor. – Video is reversed left and right. MIRROR/FLIP Ver.
- Page 14 MOTION can detect the changes in the motion window and displays the results in blocks and/or a text message. SENSITIVITY – Adjusts the detection sensitivity for motion. High value increases the sensitivity to detect the small motion easily. Too low sensitivity will cause the erratic detection by the tree leaves or the light level changes.
- Page 15 Enables or disables to display the OSD. ID – ON enables to display the camera ID defined by SYSTEM>COMM. SETUP>CAM ID. TITLE – ON enables to display the camera title(name) set by SPECIAL> TITLE SET. DISPLAY ZOOM RATIO – ON enables to display the zoom ratio on the bottom right corner.
- Page 16 6.7 SYSTEM SYSTEM TV SYSTEM US(60HZ) ↵ RESOLUTION 1080P COMM. SETUP LANGUAGE ☟ FACTORY DEFAULT RETURN RET↵ SYSTEM Default Descriptions Selects HDTV standards for US(60HZ) or EU(50HZ). TV SYSTEM By this selection, 2 analog video output switches to NTSC or PAL accordingly.
-
Page 17: Specifications
. Specifications HDC-2080Z03 Imaging Sensor Sony Exmor 1 / 2.9” Progressive Scan CMOS Sensor Effective Pixels 1,936(H) x 1,097(V) Min. Illumination 0.0008 Lux (@AGC MAX, DSS x2) Output Video Resolution 1920x1080( 30p/25p), 1280x720(60p/50p) TV system EU(50Hz)(switchable to US(60Hz)) Sync. System Internal Format 16:9 Video format for most popular commercial HDTV monitors HD-SDI Video Output 1.485Gbps HD-SDI (SMPTE 292M), Non-Compression... -
Page 18: Dimensional Drawings
8. Dimensional Drawings (Unit: mm)
Need help?
Do you have a question about the HDC-2080Z03 and is the answer not in the manual?
Questions and answers