
Related Manuals for 3DR SOLO


Summary of Contents for 3DR SOLO
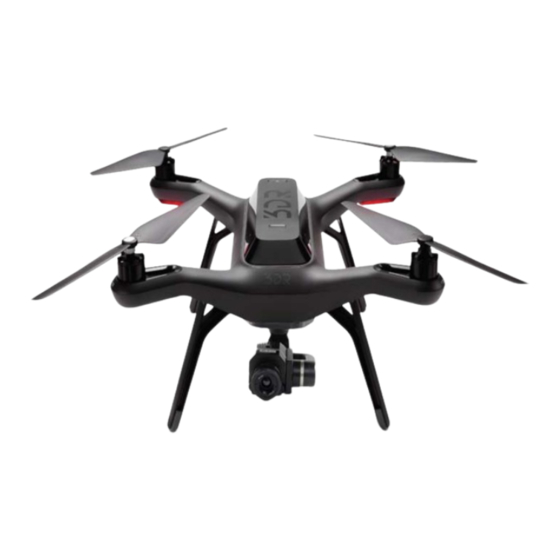
- Page 1 Thermal Gimbal for the 3DR SOLO Installation Instructions P.O. Box 4242 Middletown, New York 10941 USA Phone: 1-888-919-2263 | Outside the U.S.: +1-845-343-4077 | Fax Line: +1-845-343-4299 Version 1.3 10MAR2017...
-
Page 2: Safety Notes
This product is intended for use solely with the FLIR VUE, FLIR VUE PRO and FLIR VUE PRO-R Series of Thermal Imaging Cameras. Do not Use this product with any other device other than the 3DR Solo as it may cause damage to the gimbal assembly or the other device it is connected to. - Page 3 OEM Cameras at no charge and the warranty on your thermal camera will not be void. You will be able to control all parameters remotely on the FLIR VUE via the 3DR Solo APP directly out of the box with no camera modifications required.
- Page 4 • Connect the FLIR VUE PRO / PRO-R Thermal Camera to the Gimbal NOTE: THE VUE SERIES CAMERAS SHOULD BE INSTALLED TO THE GIMBAL BEFORE ATTACHING THE GIMBAL TO THE 3DR SOLO. Before installing the camera to the Gimbal, please remove the battery and any other power source that may be connected.
- Page 5 THERMAL GIMBAL FOR 3DR SOLO MANUAL FLIR VUE/VUE PRO Installation CONNECTING THE GIMBAL TO THE VUE/VUE PRO SERIES THERMAL CAMERAS: Step 2: Align to the USB Connector to the cover plate. The holes are aligned differently on the VUE PRO/PRO-R. (Fig. 4&5) Use the long allen-head screws provided, to mount the plate on the camera.
-
Page 6: Gimbal Installation
• Disconnect the Current Gimbal. • Connect the Thermal Gimbal Assembly to the 3DR SOLO. Before You Begin: Before installing, please remove the battery or any power source from the 3DR SOLO. Removing the cover plate: If there is no Gimbal attached, the cover plate will need to be removed. - Page 7 Installing the Gimbal GIMBAL INSTALLATION: Uninstalling your current Gimbal Assembly: If you have a gimbal currently attached to the SOLO, it will need to be re- moved before installing the 3DR Solo Thermal Gimbal Assembly. Loosen the three self retaining screws with the provided Phillips screwdriver.
- Page 8 THERMAL GIMBAL FOR 3DR SOLO MANUAL Installing the Gimbal GIMBAL INSTALLATION: Disconnect the Power / Data Cable by pressing the locking tab and gently lifting the connec- tor straight up from the board as shown: (Fig. 11&12) To disconnect the HDMI cable, gently sepa- rate the cable from the connection by pulling away from the board.
- Page 9 3DR App. Position 3* - This position will disable control through the 3DR App and pass MAVLINK/GPS Data from the SOLO to the VUE PRO and VUE PRO-R. (Fig. 15) *See Page 3 for Modification Details. When the desired toggle switch position has...
- Page 10 THERMAL GIMBAL FOR 3DR SOLO MANUAL Attaching the Gimbal ATTACHING THE GIMBAL ASSEMBLY TO THE 3DR SOLO: Attaching the Gimbal to the 3DR SOLO: Tuck the excess cable into the 3DR SOLO making certain that the wires are not pinched between the seams.
- Page 11 THERMAL GIMBAL FOR 3DR SOLO MANUAL Attaching the Leg Extenders ATTACHING THE LEG EXTENDERS: To ensure clearance of the thermal camera, we have provided leg extensions for the 3DR SOLO. To Install: First remove the existing feet from the 3DR SOLO Legs by pulling straight up.
- Page 12 Without the modification, the FLIR VUE PRO & VUE PRO-R will only allow for Stabilized Video and Tilt Control. Recording from the camera to the SD card will not be available from the 3DR Solo App. See Page 3 for more information regarding the modification.
- Page 13 THERMAL GIMBAL FOR 3DR SOLO MANUAL PWM Setup ASSIGNING PWM FUNCTIONS: Select Record Start/Stop from the Dropdown Menu (Fig. 25) Once the Record Start/Stop is selected, The configuration window will show the following options: Number of States: This should be set to TWO.
- Page 14 This setting will allow us to choose between three palettes during flight. The following states (Low, Mid, High) can be set to any palette. To control these options, they will be assigned to the Field of View (FOV) camera settings on the 3DR Solo App. (Fig. 29)
- Page 15 THERMAL GIMBAL FOR 3DR SOLO MANUAL PWM Setup ASSIGNING PWM FUNCTIONS: Touching on the palette, choose one of the following: • WhiteHot • BlackHot • GreenHot • Fusion • Ironbow • Lava • Arctic • GreyRed • InstAlert Repeat this step for the next two States (Mid & High).
- Page 16 For more information, see pages 21-23 for a reference of available options. Controlling the Thermal Camera through the GoPro App Control panel: We have adapted the Thermal Gimbal to work with the 3DR Solo GoPro App control panel on the iOS or Android Device.
- Page 17 THERMAL GIMBAL FOR 3DR SOLO MANUAL 3DR SOLO App Configuration and Setup 3DR SOLO GoPro APP AND PWM ASSIGNMENTS: Control options vary for each camera: The FLIR VUE PRO & PRO-R – Records to Camera Roll and SD Card The FLIR VUE PRO & PRO-R GPS Data – Records to Camera Roll. To record this data to the SD Card, the recording will need to be initiated on the camera before takeoff.
- Page 18 THERMAL GIMBAL FOR 3DR SOLO MANUAL 3DR SOLO App Configuration and Setup 3DR SOLO APP AND PWM ASSIGNMENTS: To access the camera settings, tap the sliders icon immediately below the record button: (Fig. 34) Tip: Once recording is engaged, the settings are locked out. Stop recording to change camera settings while flying.
- Page 19 Without the modification, the FLIR VUE PRO & VUE PRO-R will only allow for Stabilized Video and Tilt Control. Recording from the camera to the SD card will not be available from the 3DR Solo App. See Page 3 for more information regarding the modification.
- Page 20 THERMAL GIMBAL FOR 3DR SOLO MANUAL Enabling MAVLink USING MAVLINK WITH THE SOLO GIMBAL ASSEMBLY: These settings should default to the correct information. NOTE: The Serial Data Rate must be set to 57600. (Fig. 37) When the MAVLink configuration is complete, touch on the back arrow to the Settings/Accy.
- Page 21 Function Matrix: FLIR VUE PRO/PRO-R FLIR VUE PRO/PRO-R FUNCTION MATRIX: Using the 3DR Solo app currently supports the GoPro camera. We have re-mapped the following functions to work with the FLIR VUE Thermal Imaging Camera: FLIR VUE PRO / PRO-R...
-
Page 22: Gps Mode
If the baud rate is not set correctly, the GPS will not translate properly. This passes GPS data from the 3DR Solo to the Images taken on the FLIR VUE PRO/PRO-R. The geo-data will be embedded in the EXIF Data. - Page 23 THERMAL GIMBAL FOR 3DR SOLO MANUAL Warranty FLIR VUE FUNCTION MATRIX: FLIR VUE Thermal Gimbal Function Matrix: 3DR Solo app currently supports the GoPro camera. We have re-mapped the following functions to work with the FLIR VUE Thermal Imaging Camera: FLIR VUE Assignable Functions: Translates...
- Page 24 THERMAL GIMBAL FOR 3DR SOLO MANUAL Warranty LIMITED WARRANTY, EXCLUSIONS AND DISCLAIMERS In accordance with the terms and conditions of and except as excluded or disclaimed in this document, RHP INTERNATIONAL warrants that the Goods, at Delivery and for 365 days (Warranty Period), will conform to RHP INTERNATIONAL’s published Product specifications and be free from defects in materials and workmanship. CUSTOMER’S SOLE AND EXCLUSIVE REMEDY UNDER THIS WARRANTY, AT RHP INTERNATIONAL’S SOLE DISCRETION, IS THE REPAIR OR REPLACEMENT OF DEFECTIVE PRODUCTS IN A MANNER, AND BY A SERVICE CENTER, AUTHORIZED BY RHP INTERNATIONAL. IF THIS REMEDY IS ADJUDICATED TO BE INSUFFICIENT, RHP INTERNATIONAL SHALL REFUND CUSTOMER’S PAID PURCHASE PRICE AND HAVE NO OTHER OBLIGATION OR LIABILITY TO BUYER WHATSOEVER. WARRANTY EXCLUSIONS AND DISCLAIMERS. RHP INTERNATIONAL MAKES NO OTHER WARRANTY OF ANY KIND WITH RESPECT TO THE PRODUCTS, EXPRESS OR IMPLIED, INCLUDING BUT NOT LIMITED TO THE IMPLIED WARRANTIES OF MERCHANTABILITY, FITNESS FOR A PARTICULAR PURPOSE (EVEN IF BUYER HAS NOTIFIED SELLER OF ITS INTENDED USE FOR THE PRODUCTS), AND NON‐INFRINGEMENT. ROUTINE PRODUCT MAINTENANCE, SOFTWARE UPDATES, AND CALIBRATION ARE EXPRESSLY EXCLUDED FROM THIS WARRANTY. RHP INTERNATIONAL FURTHER EXPRESSLY DISCLAIMS ANY WARRANTY COVERAGE WHERE THE ALLEGED NONCONFORMITY IS DUE TO NORMAL WEAR AND TEAR, ALTERATION, MODIFICATION, REPAIR, ATTEMPTED REPAIR, IMPROPER USE, IMPROPER MAINTENANCE, NEGLECT, ABUSE, IMPROPER STORAGE, FAILURE TO FOLLOW ANY PRODUCT INSTRUCTIONS, DAMAGE (WHETHER CAUSED BY ACCIDENT OR OTHERWISE), OR ANY OTHER IMPROPER CARE OR HANDLING OF THE PRODUCTS CAUSED BY ANYONE OTHER THAN RHP INTERNATIONAL OR RHP INTERNATIONAL’S EXPRESSLY AUTHORIZED DESIGNEE. THIS DOCUMENT CONTAINS THE ENTIRE WARRANTY AGREEMENT BETWEEN CUSTOMER AND RHP INTERNATIONAL AND SUPERSEDES ALL PRIOR WARRANTY NEGOTIATIONS, AGREEMENTS, PROMISES AND UNDERSTANDINGS BETWEEN CUSTOMER AND RHP INTERNATIONAL. THIS WARRANTY MAY NOT BE MODIFIED WITHOUT THE EXPRESS WRITTEN CONSENT OF RHP INTERNATIONAL. THE APPLICABLE WARRANTY DOES NOT HAVE THE EFFECT OF EXCLUDING OR LIMITING A CUSTOMER’S STATUTORY RIGHTS OR CONSUMER GUARANTEES THAT CANNOT BE EXCLUDED OR LIMITED UNDER APPLICABLE STATUTE OR NATIONAL LEGISLATION. WARRANTY RETURN, REPAIR AND REPLACEMENT. To be eligible for warranty repair or replacement, Customer must notify RHP INTERNATIONAL within thirty (30) days of discovering of any apparent defect in materials or workmanship. Before Customer may return a Product for warranty service or repair, Customer must first obtain a returned material authorization (RMA) number from RHP INTERNATIONAL. To obtain the RMA number Owner must provide an original proof of purchase. For additional information, to notify RHP INTERNATIONAL of an apparent defect in materials or workmanship, or to request an RMA number, visit http://www.rhp‐edge.com/contacts, email: Office@RHP‐Edge.com, or by Phone: Toll Free: 1‐888‐919‐2263 | Outside the US: +1‐845‐343‐4077. Customer is solely responsible for complying with all RMA instructions ...
Need help?
Do you have a question about the SOLO and is the answer not in the manual?
Questions and answers