Table of Contents
Advertisement
Advertisement
Table of Contents

Related Manuals for Monoprice 21711


Summary of Contents for Monoprice 21711
- Page 1 MONOPRICE Select Mini 3D Printer V2 P/N 21711 User's Manual...
-
Page 2: Table Of Contents
CONTENTS SAFETY WARNINGS AND GUIDELINES ............................3 INTRODUCTION ........................................ 4 FEATURES ..........................................4 CUSTOMER SERVICE ....................................5 PACKAGE CONTENTS ....................................5 PRODUCT OVERVIEW ....................................6 USING THE MENU SYSTEM ..................................6 SETUP ............................................7 WI-FI SETUP ........................................11 SOFTWARE INSTALLATION AND SETUP ..........................12 Installing Cura for Windows ................................. -
Page 3: Safety Warnings And Guidelines
SAFETY WARNINGS AND GUIDELINES Be careful not to damage the yellow film on the build plate. Do not remove the insulating tape on the extruder nozzle. Take care to avoid touching hot parts, including heat blocks, extruder nozzle, extruded filament, and the heated build plate. -
Page 4: Introduction
INTRODUCTION Thank you for purchasing this 3D printer from Monoprice! This printer features a single extruder, which is capable of printing in PLA, ABS, and other materials. You can print from a Windows® or Mac® PC using a USB connection or can print from 3D model files stored on a microSD card, without the need for a PC connection of any kind. -
Page 5: Customer Service
If you have any problem with your order, please give us an opportunity to make it right. You can contact a Monoprice Customer Service representative through the Live Chat link on our website www.monoprice.com during normal business hours (Mon-Fri: 5am-7pm PT, Sat-Sun: 9am-... -
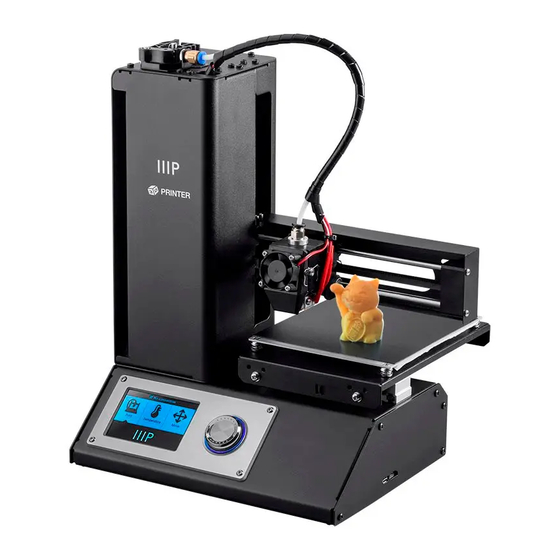
Page 6: Product Overview
PRODUCT OVERVIEW 1. Feed Mechanism 4. LCD Display 2. Filament Rack 5. Micro USB and MicroSD Ports 3. Extruder 6. Input Power Jack and Power Switch USING THE MENU SYSTEM The menu system is displayed on a lighted LCD screen. ... -
Page 7: Setup
SETUP Warning! Take care not to remove or damage the yellow tape on the build platform. This tape is essential to ensure the 3D model properly adheres to the build platform during printing. If this tape becomes damaged or wears out, replace it with painter's tape, Kapton®... - Page 8 paper can be slid between the nozzle and the platform without binding. When the extruder head is moved or when the paper is moved under it, there should be a slight amount of resistance, but the paper should not be dragged with the extruder when it is moved.
- Page 9 13. If the button under the Extruder and Platform reads Start Preheat, use the control wheel to highlight the Start Preheat entry, then press it to start preheating the extruder and build platform. The button will change to read Stop Preheat and the Extruder and Platform buttons will read the actual temperatures.
- Page 10 19. Using the included plastic scraper, clean the extruded filament from the nozzle and build platform. 20. Using the control wheel, select the Print option from the main menu. The printer will read the contents of the microSD card and display ™...
-
Page 11: Wi-Fi Setup
The nozzle is too close to the Wrong platform. This can result in damage to the nozzle and build platform. Congratulations, your 3D printer is setup and ready for use! WI-FI SETUP You can connect the printer wirelessly to a 2.4Ghz Wi-Fi® network to print models from your Android™... -
Page 12: Software Installation And Setup
Note that you may have difficulty connecting to the Wi-Fi network if you have a 2.4GHz and 5GHz network with the same SSID. Try changing the SSID of the 5GHz network if this occurs. For best results, move the printer to a location closer to the Wi-Fi router or access point. - Page 13 3. Ensure that all boxes are checked, then click Install to continue. 4. Once the files have been extracted and the Cura installation is complete, the driver installation wizard will launch. Click Next to continue. 5. Click Finish to complete the driver installation.
- Page 14 6. Click Next to continue. 7. Ensure that the box next to the Start Cura 15.04.2 option is checked, then click Finish to complete the installation and launch the program. 8. Wait for Cura to finish launching. If this is the first time you have run Cura on this machine, Cura will automatically launch the First time run wizard.
- Page 15 9. Click the button next to the Other option, then click the Next button to continue. 10. Select the Custom... option, then click Next to continue.
- Page 16 11. Click the button to the left of the Other entry, then click Next to continue. 12. Change the settings to match those shown in the images below, then click Finish to continue. 13. The program will finish launching and leave you on the main screen. Select the Basic tab, then change the settings to match those in the accompanying image for PLA filament.
- Page 17 Note that the Fill density, Support type, and Platform adhesion type options should be set according to the needs of the model you are printing. The Fill density will determine the overall strength of the finished object. If printing a decorative object, a low fill density is appropriate.
-
Page 18: Repetier-Host
15. Finally, using the included Micro USB cable, plug one end into the USB port on the printer, then plug the other end into an available USB port on your computer. Watch the right hand corner of the screen. A bubble will appear in the lower right corner of your desktop, which is telling you that Windows is installing the necessary printer drivers. -
Page 20: Technical Support
TECHNICAL SUPPORT Monoprice is pleased to provide free, live, online technical support to assist you with any questions you may have about installation, setup, troubleshooting, or product recommendations. If you ever need assistance with your new product, please come online to talk to one of our friendly and knowledgeable Tech Support Associates. - Page 21 Microsoft® and Windows® are registered trademarks of Microsoft Corporation in the United States and/or other countries. Apple®, Mac®, and OS X® are trademarks of Apple Inc., registered in the U.S. and other countries. SD® and microSD® are trademarks or registered trademarks of SD-3C, LLC in the United States, other countries, or both.
Need help?
Do you have a question about the 21711 and is the answer not in the manual?
Questions and answers