Advertisement
Quick Links
Download this manual
See also:
User Manual
ONLINE SUPPORT
Monoprice is pleased to provide free online support. For order related issues, contact the
Customer Service department through the Live Chat link on our website
www.monoprice.com during normal business hours (Mon-Fri: 5am-7pm PT, Sat-Sun: 9am-
6pm PT) or via email at support@monoprice.com
For technical issues, contact the Technical Support department through the online chat
button on our website www.monoprice.com during regular business hours, 7 days a week.
You can also get assistance through email by sending a message to tech@monoprice.com
PACKAGE CONTENTS
Please take an inventory of the package contents to ensure you have all the items listed
below. If anything is missing or damaged, please contact Monoprice Customer Service for a
replacement.
1x 3D printer base
2x Z-axis pillars
1x X-axis gantry
1x X-axis rail
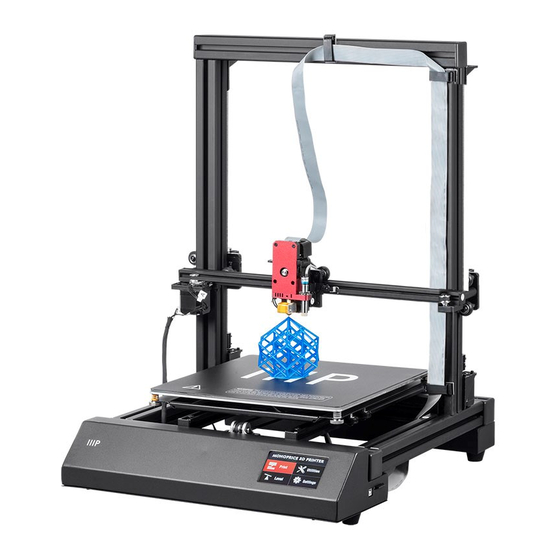
MP Maker Pro Mk.1
P/N 33013
Quick Start Guide
1
2x X-axis spacers
1x MK10 full metal extruder
1x Ribbon cable for extruder
1x Filament spool holder
Advertisement

Related Manuals for Monoprice MP Maker Pro Mk.1


Summary of Contents for Monoprice MP Maker Pro Mk.1
-
Page 1: Package Contents
Quick Start Guide ONLINE SUPPORT Monoprice is pleased to provide free online support. For order related issues, contact the Customer Service department through the Live Chat link on our website www.monoprice.com during normal business hours (Mon-Fri: 5am-7pm PT, Sat-Sun: 9am- 6pm PT) or via email at support@monoprice.com... -
Page 2: Assembly And Mounting
1x Filament spool stand 8x Hex bolts 1x AC power cord 2x Plastic belts 1x USB cable 1x Spool 1.75mm PLA filament 1x 8GB SD™ card 1x Nozzle cleaning tool 1x Hex screw drivers 1x User's manual 1x Hex key set 1x Quick start guide ASSEMBLY AND MOUNTING Remove all parts from the box and place them on a... - Page 3 Place the base on its side. Locate the Z-axis pillar with the sticker No.2. Slide the No.2 pillar into the base vertical locker, then tighten the bolt at the bottom of the base. Tighten the locking bolt by turning it clockwise, then flip the base onto its other side and install the other Z-axis pillar onto the base using the same method.
- Page 4 Remove the plastic end caps from the X-axis gantry, then slide it under the bolt heads and locking washers. Ensure that the No.3 and No.4 stickers are mated. If there is insufficient space for the gantry to fit under the bolt head, loosen it a bit more and try again.
- Page 5 Screw the X-axis spacers (No.5 and No.6) onto the X- axis rail, but do not tighten them so much that the spacers cannot move along the rail. Mount the X-axis rail assembly by inserting the X-axis spacers in between the rubber wheels on the Z-axis steppers.
- Page 6 Insert the MK12 extruder into the extruder holder on the X-axis rail. Using the four remaining hex bolts, secure the extruder the X-axis rail assembly in four places, two on each side.
- Page 7 WIRING Connect the wires and cables as shown in the image to the left. Route the ribbon cable through the ribbon cable clips before connecting it at each end. LEVELING Turn the couplers on the Z-axis steppers to make the X-axis rail level. Use a small level on the X-axis rail to ensure that it is level.
- Page 8 Touch the Level button on the Home page of the printer screen, select Level. Read the instructions on the screen, then touch Next to continue. Insert a sheet of printer paper between the nozzle and the print bed.
- Page 9 While sliding the paper back and forth under the print nozzle, touch the Z Up and Z Down buttons to adjust the Global Z Offset until you feel a slight amount of friction in moving the paper. Remove the paper, then touch the Next button to start the automatic leveling process.
Need help?
Do you have a question about the MP Maker Pro Mk.1 and is the answer not in the manual?
Questions and answers