Table of Contents
Advertisement
Quick Links
Advertisement
Chapters
Table of Contents
Troubleshooting

Related Manuals for Taylor-Dunn B0-012-10


Summary of Contents for Taylor-Dunn B0-012-10
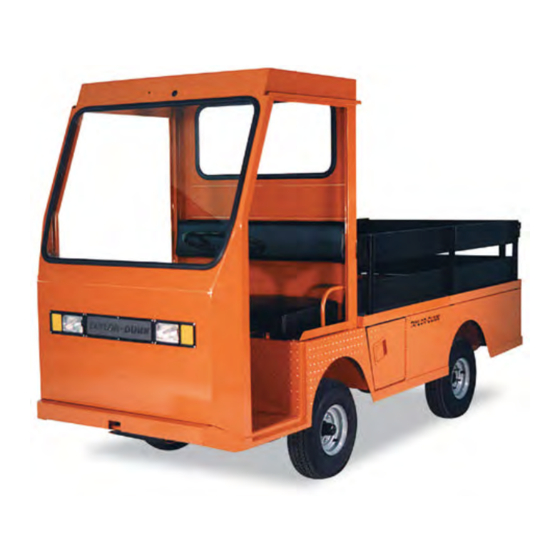
- Page 1 Shown with optional steel cab and doors Models Inlcuded: B0-012-10 ( B 2-10) T h e B e s t W a y T o G o A b o u t Y o u r B u s i n e s s...
- Page 3 Taylor-Dunn has a network of dealers distributed around the globe to support our vehicles. Information regarding vehicle sales, replacement parts, or service should be obtained through your local dealer. A dealer locator can be found on the Taylor-Dunn website at www.taylor-dunn.com.
- Page 4 SC1-00 Stock Chaser B2-48 With Stake Side Dump Bed Option E4-55 Sit Down Tow Tractor C4-25 Sit Down Tow Tractor...
-
Page 5: Table Of Contents
Section Index Taylor-Dunn ® Model B0-012-10 Operator and Service Manual Section Index Introduction Safety Rules and Operating Instructions General Maintenance Front Axle Service Steering Component Service Brakes Service Throttle Linkage Transaxle Service Motor Service Suspension Tires and Wheels Battery Service... - Page 6 B2-10 Ambulance B2-48 With Dump Bed Option B2-48 with Steel Cab, Foldaway 4-Passenger Seat and Stake Sides ET 3000 P2-50 30,000 Pound Tow Tractor ET1-50 Full Size Truck...
- Page 7 Table of Contents About this manual ......... 2 Who Should Read This Manual ....2 Responsibilities ..........2 How To Use This Manual ......3 Conventions .............. 3 How to Identify Your Vehicle ......4 Taking Delivery of Your Vehicle ....5...
-
Page 8: About This Manual
ABOUT THIS MANUAL RESPONSIBILITIES The purchase of this vehicle shows a belief in high Of the Owner... quality products manufactured in the USA. The owner of this or any Taylor-Dunn vehicle is Taylor-Dunn , a leading manufacturer of electric ®... -
Page 9: How To Use This Manual
INTRODUCTION HOW TO USE THIS MANUAL Conventions This manual is organized into five main sections: Symbols and/or words that are used to define warnings, cautions, instructions, or notes found INTRODUCTION throughout this manual. Refer to the examples below. This section describes how to use this service manual and how to identify your vehicle. -
Page 10: How To Identify Your Vehicle
INTRODUCTION HOW TO IDENTIFY YOUR VEHICLE This manual applies to vehicles with the same model and serial numbers listed on the front cover. These vehicles are designed for driving on smooth surfaces in and around facilities such as industrial plants, nurseries, institutions, motels, mobile home parks, and resorts. -
Page 11: Taking Delivery Of Your Vehicle
The only personnel authorized to repair, modify, or • Check that all wire connections, battery adjust any part of this or any Taylor-Dunn vehicle is ® cables, and other electrical connections are a factory authorized service technician. - Page 12 SC1-00 Stock Chaser B2-48 With Stake Side Dump Bed Option E4-55 Sit Down Tow Tractor C4-25 Sit Down Tow Tractor...
- Page 13 TABLE OF CONTENTS Standard Specifications* ....2 Safety Rules and Guidelines ..... 3 Driver Training Program ....3 Driver Qualifications............3 Vehicle Controls ........ 4 1) Key-Switch ..............4 2) Forward-Off-Reverse Switch ........4 3) Hour Meter (optional) ..........4 4) Battery Status Indicator, Analog ........
-
Page 14: Standard Specifications
SAFETY RULES AND OPERATING INSTRUCTIONS STANDARD SPECIFICATIONS* ITEM SPECIFICATION Occupancy Driver, 1-passenger Dimensions 302L x 114W x 122H Centimeters 119L x 45W x 48H Inches Turning Radius 317 Centimeters (125 Inches) Dry Weight 301 kg (665 lbs) Without Batteries Min/Max Battery 158 kg to 194 kg (348 lbs to 428 lbs) Weights Maximum Load... -
Page 15: Safety Rules And Guidelines
SAFETY RULES AND OPERATING INSTRUCTIONS SAFETY RULES AND DRIVER TRAINING PROGRAM GUIDELINES According to ANSI B56.8, the owner of this vehicle shall conduct an Operator Training program for all those who It is the responsibility of the owner of this vehicle to assure will be operating this vehicle. -
Page 16: Vehicle Controls
SAFETY RULES AND OPERATING INSTRUCTIONS VEHICLE CONTROLS 1) Key-Switch A key-switch, located on the right center side of the instrument panel, turns on the vehicle. Rotate the key clockwise to turn the vehicle power on, counterclockwise to turn the vehicle power off. The key-switch should be in the “OFF”... -
Page 17: Park Brake
SAFETY RULES AND OPERATING INSTRUCTIONS Steering The steering wheel and steering system are similar to an automobile. To turn right, turn the steering wheel clockwise. To turn left, turn the steering wheel counter-clockwise. If equipped with tilt steering, the release lever is located on the lower left of the steering column. -
Page 18: Charger Interlock
SAFETY RULES AND OPERATING INSTRUCTIONS Directional Signals (Optional) The turn signal lever is located on the left side of the steering column. Push the lever forward to activate the right turn signal and pull the lever back to activate the left turn signal. Hazard Light Switch (Optional) The hazard light switch is located on the left side of the steering column. -
Page 19: Battery Status Indicator, Digital Bargraph (Optional)
SAFETY RULES AND OPERATING INSTRUCTIONS Battery Status Indicator, Digital Bargraph (optional) The battery status indicator is located to the left of the hour meter. The battery status indicator has a LED bar graph that indicates the relative state of charge of the battery. -
Page 20: Vehicle Operational Guidelines
SAFETY RULES AND OPERATING INSTRUCTIONS While driving: VEHICLE OPERATIONAL • Slow down and sound the horn to warn pedestrians GUIDELINES or when approaching a corner or other intersection. • No reckless driving. Safety Guidelines • Do not drive this vehicle on steep inclines or where prohibited. -
Page 21: Parking
SAFETY RULES AND OPERATING INSTRUCTIONS Parking Before leaving the vehicle: • Set the parking brake. • Set the forward-of f-reverse switch to the ` “OFF” position. • Rotate the start switch to the “OFF” position. In addition: • If parking this vehicle on an incline, turn the wheels to the curb, or block the wheels. -
Page 22: Charging Your Vehicle
SAFETY RULES AND OPERATING INSTRUCTIONS CHARGING YOUR VEHICLE Battery electrolyte is poisonous and Explosive mixtures of Hydrogen gas are dangerous. It contains sulfuric acid. Avoid present within battery cells at all times. Do contact with skin eyes or clothing. Wear not work with or charge battery in an area rubber gloves and safety glasses while where open flames (including gas furnace... -
Page 23: Lestronic Ii® Charger Operation
SAFETY RULES AND OPERATING INSTRUCTIONS Lestronic II Charger Operation Charging Time ® The Lestronic II charger is a semi-automatic charging Average charging time is 8 to 10-hours. The time required ® system. The charger will turn itself ON when the AC to fully charge your batteries will vary depending on: power cord is connected to the AC power source and •... -
Page 24: Periodic Maintenance Checklist
SAFETY RULES AND OPERATING INSTRUCTIONS PERIODIC MAINTENANCE CHECKLIST Semi - Weekly Monthly Quaterly Annualy Maintenance Item Annual (20hrs) (80hrs) (250hrs) (1000hrs) (500hrs) Check Condition of Tires and Tire Pressure Check All Lights, Horns, Beepers and Warning Devises Check and Fill Batteries Check Brake System Check Steering System Check for Fluid Leaks... -
Page 25: Daily Visual Inspection
SAFETY RULES AND OPERATING INSTRUCTIONS Daily Visual inspection: Tire condition and pressure. External frame damage (body). Operation of all lights and warning alarms and/or horns. Smooth and proper operation of all controls such as but not limited to: • Accelerator pedal, Brake pedal, Steering, Parking brake, etc. •... - Page 27 Table of Contents Maintenance Guidelines ....... 2 Troubleshooting Guide ........ 3 Lubrication Chart .......... 4 Model C 4-25 Tow Tractor Shown here are two of the many Taylor-Dunn tow tractors available. Contact you distributor for more information. Model E 4-55 Tow Tractor...
- Page 28 Regularly inspect and maintain in a safe working condition, brakes, steering mechanisms, speed and directional control mechanisms, warning devices, lights, governors, guards, and safety devices. • Inspect and maintain battery limit switches, protective devices, electrical conductors, and connections in conformance with Taylor-Dunn’s recommended procedures. ® •...
-
Page 29: Troubleshooting Guide
Maintenance, Service and Repair Troubleshooting Guide Symptom Probable Cause Front End Out of Alignment Steering Pulls in One Direction Low Tire Pressure Dry Lube Points in Steering Linkage Hard Steering Damaged King Pin/Ball Joint Low Tire Pressure Worn Ball Joints Excessive Steering Play Mis-Adjusted or Worn Steering Gear Loose Steering Linkage... -
Page 30: Lubrication Chart
Maintenance, Service and Repair Lubrication Chart Note: # 9 and #6 on chain case is not included on belt drives Drive view from left side Description Locations Lubricant Type General Purpose Grease King Pin General Purpose Grease Ball Joints General Purpose Grease Pedal Linkages General Purpose Grease Front Wheel Bearings... - Page 31 TABLE OF CONTENTS Inspect the Front Wheel Bearings and King Pin......... 2 Adjust Front Wheel Bearings .... 3 Front Axle Removal and Installation .. 4 Removal ..............4 Installation ............4 Front Axle Disassembly ..... 5 Replace Front Wheel Bearings ..6 Replace the King Pins and Bushings .
-
Page 32: Inspect The Front Wheel Bearings And King Pin
Maintenance, Service, and Repair Replace Front Wheel NOTE: Refer to the INSPECT THE FRONT WHEEL Bearings section for information regarding BEARINGS AND KING PIN the replacement of the wheel bearings. 9. Lower the vehicle. 10. Reconnect the main positive and negative cables at the batteries. -
Page 33: Adjust Front Wheel Bearings
Maintenance, Service, and Repair ADJUST FRONT WHEEL BEARINGS 1. Make sure the key-switch is in the “OFF” position, then remove the key. 2. Place the forward-reverse switch in the center “OFF” position. 3. Confirm the electric park brake is set. 4. -
Page 34: Front Axle Removal And Installation
Maintenance, Service, and Repair Installation FRONT AXLE REMOVAL AND INSTALLATION 1. Make sure the key-switch is in the “OFF” position, then remove the key. Removal 2. Place the forward-reverse switch in the center “OFF” position. 3. Confirm the electric park brake is set. 1. -
Page 35: Front Axle Disassembly
Maintenance, Service, and Repair FRONT AXLE DISASSEMBLY Disassembling and reassembling involves removing and replacing the left and right steering knuckles and king pin bushings. Refer to the following sections for information regarding these procedures: Replace the Steering Knuckle Replace the King Pins and Bushings Front Axle NOTE: The front axle does not have to be removed unless the axle beam must be replaced. -
Page 36: Replace Front Wheel Bearings
Maintenance, Service, and Repair 12. Assemble in reverse order, using new grease REPLACE FRONT WHEEL seals. BEARINGS NOTE: Refer to Adjust Wheel Bearings for information regarding proper tightening of the spindle nut 13. Install the hub dust cap. 1. Make sure the key-switch is in the “OFF” 14. -
Page 37: Replace The King Pins And Bushings
Maintenance, Service, and Repair REPLACE THE KING PINS AND BUSHINGS Failure to correctly broach or ream bronze bushings may result in steering difficulty There are different types of king pin bushings depending and loss of control of the vehicle causing on the configuration of your vehicle. -
Page 38: Replace The Steering Knuckle
Maintenance, Service, and Repair NOTE: Both the left and right side bushings and thrust REPLACE THE STEERING bearings should be replaced as a set. KNUCKLE 13. Assemble in reverse order. Refer to the illustration below for orientation of the thrust bearing. 14. - Page 39 TABLE OF CONTENTS Front End Alignment ......2 Inspect Ball Joints ......5 Inspect Rod Ends ......5 Adjust the Steering Gear ....6 Replace the Steering Shaft ....7 Replace the Steering Wheel ....8 Replace the Steering Gear ....8 Replace the Ball Joints, Tie Rods, and Drag Link ........
-
Page 40: Front End Alignment
Maintenance, Service, and Repair FRONT END ALIGNMENT This section will refer to two different types of ball joints. One type is has a grease fitting and a tapered shaft where it is fitted to the steering arm or pitman arm. The second type cannot be greased and has a straight shaft. - Page 41 Maintenance, Service, and Repair 12. Adjust the drag link so that it can be easily inserted into the pitman arm. 13. Tighten the ball joint or rod end nut as specified below: Ball joint - 40-45 ft-lbs. Rod end - 20-25 ft-lbs. 14.
- Page 42 Maintenance, Service, and Repair Front wheel alignment NOTE: It is recommended to center the steering before aligning the front wheels. Refer to the Center the Steering section for information. 1. Make sure the key-switch is in the “OFF” position, then remove the key. 2.
-
Page 43: Inspect Ball Joints
Maintenance, Service, and Repair INSPECT BALL JOINTS INSPECT ROD ENDS NOTE: A set of ball joints and/or rod ends will wear NOTE: A set of ball joints and/or rod ends will wear at the same rate. If a ball joint and or rod end at the same rate. -
Page 44: Adjust The Steering Gear
Maintenance, Service, and Repair ADJUST THE STEERING GEAR NOTE: In some vehicle configurations it may be necessary to remove the steering gear to Replace perform this procedure. Refer to the Steering Gear for information regarding removing the steering gear. 1. Make sure the key-switch is in the “OFF” position, then remove the key. -
Page 45: Replace The Steering Shaft
Maintenance, Service, and Repair REPLACE THE STEERING SHAFT 1. Make sure the key-switch is in the “OFF” position, then remove the key. 2. Place the forward-reverse switch in the center “OFF” position. 3. Confirm the electric park brake is set. 4. -
Page 46: Replace The Steering Wheel
Maintenance, Service, and Repair REPLACE THE STEERING REPLACE THE STEERING WHEEL GEAR 1. Make sure the key-switch is in the “OFF” 1. Make sure the key-switch is in the “OFF” position, then remove the key. position, then remove the key. 2. -
Page 47: Replace The Ball Joints, Tie Rods, And Drag Link
Maintenance, Service, and Repair REPLACE THE BALL JOINTS, TIE RODS, AND DRAG LINK This section will refer to two different types of ball joints. One type is has a grease fitting and a tapered shaft where it is installed on the steering arm or pitman arm. The second cannot be greased and has a straight shaft. -
Page 48: Replacing The Drag Link
Maintenance, Service, and Repair Replacing a Ball Joint 11. Install the new ball joint into the steering sleeve. Screw it into the sleeve the same number of turns counted in the previous step. Do not tighten the ball joint clamp at this time. 1. -
Page 49: Replacing The Tie Rod
Maintenance, Service, and Repair 9. Install in reverse order. 11. Lower the vehicle. 10. Realign the front wheels. 12. Reconnect the main positive and negative cables at the batteries. Steering NOTE: Refer to the section for information 13. Remove the blocks from behind the wheels. regarding realignment of the front wheels. -
Page 50: Pitman Shaft Alignment
Maintenance, Service, and Repair PITMAN SHAFT ALIGNMENT 1. Make sure the key-switch is in the “OFF” position, then remove the key. 2. Place the forward-reverse switch in the center “OFF” position. 3. Confirm the electric park brake is set. 4. Place blocks under the front wheels to prevent vehicle movement. -
Page 51: Repair The Steering Gear
Maintenance, Service, and Repair REPAIR THE STEERING GEAR Disassembly NOTE: The steering gear must be removed from the vehicle for this procedure. Refer to Replace the Steering Gear section for information regarding removing the steering gear. NOTE: The steering gear is packed with grease. Only perform maintenance on the steering gear in an area that will contain any grease that may spill out of the steering gear when it is disassembled. - Page 52 Maintenance, Service, and Repair Reassembly 1. Lightly lubricate all parts before reassembly. 2. Install a new worm shaft seal and pitman shaft seal into the housing. 3. Install the upper worm bearing cup. 4. Divide the ball bearing into two equal groups. 5.
-
Page 53: Exploded View Of Steering Gear
Maintenance, Service, and Repair Exploded View of Steering Gear Steering Page 15... - Page 55 TABLE OF CONTENTS Inspect the Service Brake ....2 Disc Brake Pads ............ 2 Disc Brake Rotor ..........2 Inspect the Parking brake ....3 Adjust the Service Brakes ....3 Two or Four Wheel Hydraulic Disc Brakes ..3 Adjust the Parking Brake ....
-
Page 56: Inspect The Service Brake
Disc Brake Pads Disc Brake Rotor NOTE: The front brake rotor is an integral part of the front hub. If the brake rotor is worn beyond Current Taylor-Dunn brakes are asbestos ® its service limits, then the front hub must be free. -
Page 57: Inspect The Parking Brake
Maintenance, Service, and Repair INSPECT THE PARKING ADJUST THE SERVICE BRAKE BRAKES Two or Four Wheel Hydraulic Disc Brakes NOTE: The parking brake is actuated through a pin in the center of the rear left and right brake The hydraulic disc brake system is automatically body on the rear axles. -
Page 58: Adjust The Parking Brake
Maintenance, Service, and Repair ADJUST THE PARKING BRAKE Wheel Park Brake The parking brake is actuated through a pin in the center of the rear left and right brake body on the rear axles. 1. Make sure the key-switch is in the “OFF” position, then remove the key. -
Page 59: Check Master Cylinder Fluid
Maintenance, Service, and Repair CHECK MASTER CYLINDER FLUID Do not ingest brake fluid or allow contact 1. Make sure the key-switch is in the “OFF” with skin or eyes. Always wear protective position, then remove the key. clothing and a face shield when working 2. -
Page 60: Bleed The Brake System
Maintenance, Service, and Repair BLEED THE BRAKE SYSTEM Always use brake fluid from a new sealed NOTE: Start this procedure at the wheel furthest from container. Never reuse any brake fluid that the master cylinder, then work toward the has been removed from the brake system. wheel closest to the master cylinder. -
Page 61: Flush The Brake System
7. If equipped with front brakes, raise the front wheels off of the ground and support with jack stands. 8. Release the park brake. Current Taylor-Dunn brakes are asbestos ® free. However, there is the possibility that 9. -
Page 62: Replace Front Disc Brake Pads
Maintenance, Service, and Repair REPLACE FRONT DISC BRAKE PADS Current Taylor-Dunn brakes are asbestos ® free. However, there is the possibility that NOTE: It is recommended that both the left and right the original brakes were replaced with brake pads be replaced as a set. -
Page 63: Replace Rear Brake Pads Or Shoes
Maintenance, Service, and Repair REPLACE REAR BRAKE PADS OR SHOES NOTE: It is recommended that both the left and right Current Taylor-Dunn brakes are asbestos ® brake pads be replaced as a set. free. However, there is the possibility that... -
Page 64: Replace The Wheel Cylinder
Maintenance, Service, and Repair REPLACE THE WHEEL CYLINDER Current Taylor-Dunn brakes are asbestos ® free. However, there is the possibility that the original brakes were replaced with Disc Brake Body Assembly (front or rear) aftermarket parts containing asbestos. Since this possibility exists, all brake parts should be handled as if they contain asbestos. -
Page 65: Repair The Brake Body
Maintenance, Service, and Repair REPAIR THE BRAKE BODY Hydraulic brake system components must be kept clean. Make sure your work area is free from dirt and debris and will contain any brake fluid spills. Any debris or contaminates left in the brake system could lead to brake failure and result in property damage and/or severe bodily injury. - Page 66 Maintenance, Service, and Repair 12. Install the o-rings into the brake body. Make sure that the o-rings are installed into the second groove and that they are not twisted. 13. Using tool #41-350-13, slide the rubber boots onto the pistons as shown. The boot should be hanging off of the end of the piston.
-
Page 67: Replace The Master Cylinder
Maintenance, Service, and Repair REPLACE THE MASTER CYLINDER Do not ingest brake fluid or allow contact with skin or eyes. Always wear protective NOTE: Most vehicle configurations do not require clothing and a face shield when working lifting the vehicle to remove the master with or around brake fluid. -
Page 68: Repair The Master Cylinder
Maintenance, Service, and Repair REPAIR THE MASTER CYLINDER NOTE: Hydraulic brake system components must be kept clean. Make sure your work area is free from dirt and debris and will contain any brake fluid spills. Remove the master cylinder from the vehicle. See Replace the Master Cylinder section . Drain all fluid from the master cylinder and discard. - Page 69 TABLE OF CONTENTS Throttle Linkage Adjustments .... 2 Magnetic Sensor Module ........2 Pot Box module ............ 3...
-
Page 70: Throttle Linkage Adjustments
Maintenance, Service, and Repair THROTTLE LINKAGE ADJUSTMENTS Magnetic Sensor Module The standard magnitic throttle module should not be used in areas that contain large NOTE: The magnetic sensor module and pot box magnetic fields. Large magnitic fields may module are not interchangeable. effect the operation of the module resulting in unexpected movement of the vehicle. - Page 71 Maintenance, Service, and Repair Pot Box module The pot box module is used on vehicles that are to be operated in areas with large magnetic fields. The linkage to the pot box should be adjusted so that the FS-1 switch closes just as the pedal is depressed and the output is at 5K with the pedal fully depressed.
- Page 73 TABLE OF CONTENTS Adjust the Drive Chain ...... 2 Check the Oil Level ......3 Change the Oil ........3 Drive Motor ........4 Remove ..............4 Install ..............4 Rear Axle .......... 5 Remove and Install ..........5 Replace the Axle Bearing ........5 Transmission Assembly .....
-
Page 74: Adjust The Drive Chain
Maintenance, Service, and Repair ADJUST THE DRIVE CHAIN NOTE: A small amount of oil may come out when the Tie the vehicle to an immovable object to prevent the vehicle from moving in forward drive motor mounting bolts are loosened. or reverse. -
Page 75: Check The Oil Level
Maintenance, Service, and Repair CHECK THE OIL LEVEL CHANGE THE OIL NOTE: The oil level in the chain case is maintained by the transmission. Oil is pumped from the 3rd member into the chain case housing. It Wear protective gloves when working with is not necessary to check the oil level in the petroleum lubricants. -
Page 76: Drive Motor
Maintenance, Service, and Repair 3. Install the motor mounting hardware but do not DRIVE MOTOR tighten until the chain adjustment is complete. 4. Adjust the drive chain. Refer to Adjust the Drive Remove for information regarding adjusting the Chain drive chain. NOTE: In most cases it is not necessary to 5. -
Page 77: Rear Axle
Maintenance, Service, and Repair Replace the Axle Bearing REAR AXLE NOTE: The axle must be removed from the vehicle to replace the axle bearing. Refer to section Remove and Install Rear Axle: Remove and Install information regarding removing the axle. NOTE: A 10-ton press is required to replace the axle bearing. -
Page 78: Transmission Assembly
Maintenance, Service, and Repair TRANSMISSION ASSEMBLY Remove and Install 1. Make sure the key-switch is in the “OFF” position, then remove the key. 2. Place the forward-reverse switch in the center “OFF” position. 3. Set the park brake. 4. Place blocks under the front wheels to prevent vehicle movement. -
Page 79: Chain Case
Maintenance, Service, and Repair CHAIN CASE NOTE: Some vehicle configurations may require that the transmission be removed to disassemble the chain case. Refer to section Transmission Assembly for information on removing the transmission. Disassemble 1. Make sure the key-switch is in the “OFF” Typical Chain Case position, then remove the key. - Page 80 Maintenance, Service, and Repair Motor Woodruf Key Adjusting screw Bolt 3rd Member O-Ring Motor Sprocket Washer Mounting Plate Spacer Drive Sprocket Backing Plate Drive Chain Bolt Washer Bolt Chain Case Housing Drain Plug Pinion Seal Brake Assembly Pinion Nut 8. Install the chain case housing onto the pinion shaft 10.
-
Page 81: Differential Assembly (3Rd Member)
Maintenance, Service, and Repair 7. While rotating the pinion shaft, tighten the pinion DIFFERENTIAL ASSEMBLY (3 nut to 100 ft-lbs. MEMBER) 8. Measure and record the ring and pinion gear backlash. This setting will be used during reassembly. Disassemble 9. Remove the pinion housing and pinion gear from the 3rd member. -
Page 82: Assemble
Maintenance, Service, and Repair Assemble NOTE: Thoroughly clean and inspect all parts before reassembly. Apply a small amount of differential oil to all gears and bearings before reassembly. NOTE: Depending on your vehicle config-uration, the rear pinion pilot bearing is not required and may not be installed. - Page 83 Maintenance, Service, and Repair NOTE: Be sure to continually rotate the ring gear while adjusting the bearings. This makes sure that the bearings and races remain seated Cross threading the nuts will damage the correctly. 3rd member housing and bearing caps. If NOTE: One hole on adjusting nut = approximately the housing and/or nuts are damaged, the 0.003"...
-
Page 84: Re-Shimming The Pinion Housing
Maintenance, Service, and Repair RE-SHIMMING THE PINION HOUSING The pinion housing shim may require replacement if the ring and pinion gear or pinion housing is replaced. Pinion housing shims are available from 0.005” to 0.021” in increments of 0.001”. Locate the number printed on the flat surface of the pilot bearing shaft of the pinion gear. -
Page 85: Exploded View
Maintenance, Service, and Repair EXPLODED VIEW F2/F3 Transmission Page 13... - Page 87 TABLE OF CONTENTS Inspecting the Motor Brushes .... 2 Motors with internal cooling fans ......2 Enclosed Motors (GE, no cooling fan) ....2 Motor Removal and Installation ..3 Motor Inspection ........ 3 Replacing the Brushes....... 5 Replacing the Bearings ..... 6 Repairing the Commutator ....
-
Page 88: Inspecting The Motor Brushes
Motor Service INSPECTING THE MOTOR BRUSHES Typical brush and brush holder Enclosed Motors (GE, no cooling fan) Typical motor with cooling fan indicated by the arrow Motors with internal cooling fans General Electric Motors NOTE: There are four brushes in the motor. The brushes will not wear at the same rate. -
Page 89: Motor Removal And Installation
Motor Service Advanced DC Motors Inspection The enclosed Advanced DC motors must be 1. Measure the length of each motor brush. disassembled to inspect the motor brushes. Refer to • If any one brush is less than or equal to the for information regarding Motor Inspection service limit specified in section... - Page 90 Motor Service 5. Inspect the commutator for burn marks. commutator segments and the armature frame. If it is not an open circuit, then the armature is • Burn marks and/or raised commutator segments shorted and the motor must be replaced. 90 or 180 degrees apart is evidence of a shorted armature.
-
Page 91: Replacing The Brushes
Motor Service Brush Spring Orientation 3. Install the new brushes in reverse order. REPLACING THE BRUSHES 4. Be certain that the brush springs do not rest up against the brush wires. Refer to illustrations in NOTE: It is recommended that all four brushes be for proper brush replaced as a set. -
Page 92: Replacing The Bearings
Motor Service 6. Measure the commutator undercut depth in 5- REPLACING THE BEARINGS places around the commutator. If any one of the measurements is less than the minimum undercut 1. The motor must be removed from the vehicle for depth specified in , then the Service Limits this procedure. -
Page 93: Service Limits
Motor Service SERVICE LIMITS Commutator Diameter Brush Length Wire Depth Undercut Depth Motor Specification (min) (min) (max) Number inches inches inches inches 5BC58JBS6129A 0.635 0.025 66.75 2.625 19.05 0.75 38.1 5BC58JBS6129B 0.635 0.025 66.75 2.625 19.05 0.75 38.1 5BC58JBS6129C 0.635 0.025 66.75 2.625... - Page 95 TABLE OF CONTENTS Replace the Rear Springs ....2 Replace the Front Springs ....3 Replace the Spring Bushings ..... 4 Replace the Shocks ......5 Front ..............5...
-
Page 96: Replace The Rear Springs
Maintenance, Service, and Repair 13. Install the new spring in reverse order. REPLACE THE REAR SPRINGS 14. If the spring hanger bolts do not have a grease If a spring has failed or is fatigued, then it is fitting, lube the spring bushings before installing recommended that both rear springs are replaced as a the spring. -
Page 97: Replace The Front Springs
Maintenance, Service, and Repair REPLACE THE FRONT SPRINGS Damaged or worn spring bolts or hangers could result in sudden failure of the suspension causing severe bodily injury or property damage. 10. Remove the lower bolt from the spring hanger. 11. Remove the spring bolt from the other end of the spring and remove the spring from the vehicle. -
Page 98: Replace The Spring Bushings
Maintenance, Service, and Repair 7. Remove the spring from the vehicle. REPLACE THE SPRING Replace the Front Springs NOTE: Refer to BUSHINGS section for information regarding removing the front springs. It is recommended that all front spring bushings are 8. If the vehicle is equipped with spring hangers, replaced as a set. -
Page 99: Replace The Shocks
Maintenance, Service, and Repair 7. Remove the upper and lower shock bolts. REPLACE THE SHOCKS 8. Remove the shock from the vehicle. NOTE: If the shock that was removed is to be reinstalled: A. Inspect the shaft where it enters the shock body for any signs of leakage. - Page 101 TABLE OF CONTENTS Tire Inflation ........2 Tire Inspection ........2 Replace the Front Tire/Wheel .... 3 Replace the Rear Tire/Wheel .... 3 Replace the Tire (pneumatic) ... 3 Repair the Tire (pneumatic) ....4...
-
Page 102: Steering Component Service
Maintenance, Service, and Repair TIRE INFLATION TIRE INSPECTION 6. Check the tire pressure. Refer to Tire Inflation section for information on checking the tire pressure. 1. Make sure the key-switch is in the “OFF” 7. Inspect the tire tread depth. Minimum position, then remove the key. - Page 103 Maintenance, Service, and Repair REPLACE THE TIRE/WHEEL REPLACE THE TIRE (PNEUMATIC) NOTE; To replace the tire, the tire/wheel assembly must be removed from the vehicle. Refer to 1. Make sure the key-switch is in the “OFF” Replace the Tire/Wheel section for position, then remove the key.
- Page 104 Maintenance, Service, and Repair 4-Bolt Pattern 5-Bolt Pattern 8-Bolt Pattern Pattern for tightening the wheel nuts Re-torque all wheel nuts to their final value after 1-week (20-hours) of operation. Failure to re-torque the wheel nuts may result in the wheel coming off of the vehicle causing severe bodily injury and/or property damage.
- Page 105 Maintenance, Service, and Repair REPLACE THE TIRE (PNEUMATIC) Replace NOTE; To replace the tire, the tire/wheel assembly must be removed from the vehicle. Refer to the Tire/Wheel section for information on removing the tire/wheel assembly. Explosion Hazard. Fully deflate the tire before attempting to remove the tire from the wheel.
- Page 107 TABLE OF CONTENTS Cleaning ..........2 Testing ..........3 Charging ........... 4 Watering ........... 5 Replacing (6-volt batteries only) ..6 Moist Charge Batteries ......... 7 Storage and Returning to Service ..8 Storage ..............8 Returning to Service ..........9...
-
Page 108: Cleaning
Maintenance, Service, and Repair CLEANING Explosive mixtures of Hydrogen gas are 1. Make sure the key-switch is in the “OFF” present within battery cells at all times. Do position, then remove the key. not work with or charge battery in an area 2. -
Page 109: Testing
Maintenance, Service, and Repair TESTING Explosive mixtures of Hydrogen gas are 1. Make sure the key-switch is in the “OFF” present within battery cells at all times. Do position, then remove the key. not work with or charge battery in an area 2. -
Page 110: Charging
Maintenance, Service, and Repair Clean the batteries. Refer to Cleaning the Batteries section for information on cleaning the batteries. Using part number 77-200-00 hydrometer, check and record the specific gravity of each cell in the battery pack. If, after charging, none of the cells exceed a hydrometer reading of 1250 then there may be a fault in the charging system. -
Page 111: Watering
Maintenance, Service, and Repair WATERING Explosive mixtures of Hydrogen gas are 1. Make sure the key-switch is in the “OFF” present within battery cells at all times. Do position, then remove the key. not work with or charge battery in an area 2. -
Page 112: Replacing (6-Volt Batteries Only)
Maintenance, Service, and Repair REPLACING (6-VOLT BATTERIES ONLY) NOTE: If the batteries are over one year old, it is recommended to replace them as a set. Explosive mixtures of Hydrogen gas are present within battery cells at all times. Do not work with or charge battery in an area 1. -
Page 113: Moist Charge Batteries
Maintenance, Service, and Repair 15. Install the batteries in reverse order. Refer to the Illustrated Parts List for battery cable routing. 16. It is recommended to replace the battery terminal Battery electrolyte is poisonous and hardware when replacing the batteries. dangerous. -
Page 114: Storage And Returning To Service
Maintenance, Service, and Repair STORAGE AND RETURNING TO SERVICE Explosive mixtures of Hydrogen gas are 1. Make sure the key-switch is in the “OFF” present within battery cells at all times. Do position, then remove the key. not work with or charge battery in an area 2. -
Page 115: Returning To Service
Maintenance, Service, and Repair Returning to Service 1. Make sure the key-switch is in the “OFF” position, then remove the key. 2. Place the forward-reverse switch in the center “OFF” position. 3. Set the park brake. 4. Place blocks under the front wheels to prevent vehicle movement. - Page 117 Table of Contents SYMPTOMS: ........2 READ THIS FIRST ......3 Test Equipment Required: ............3 IMPORTANT NOTES and INSTRUCTIONS ...... 3 Definitions: ................3 SYMPTOM TROUBLESHOOTING GUIDE ..........19 PMC CONTROL ..............20 PLUGGING DIODE .............. 22 FREEWHEEL DIODE ............23 ISO ................... 24 SOLENOIDS ................
-
Page 118: Symptoms
Curtis PMC Troubleshooting Note: Vehicles with Dana H12 transmission, Solenoids Forward solenoid is in the center. Circuit Breaker PMC Speed Control Typical Control Panel SYMPTOMS: If your vehicle exhibits any of the following symptoms then skip the main troubleshooting sequence and proceed to Symptom Troubleshooting later in this section. •... -
Page 119: Read This First
• This troubleshooting guide requires the use of a test light rated at the battery voltage of the truck and the Taylor-Dunn Throttle Module Analyzer. Troubleshooting CANNOT be completed without these tools. These test procedures must be performed in the order they were written. -
Page 120: Definitions
Curtis PMC Troubleshooting Definitions: • “MS-1” = The first switch in the accelerator module. • “Battery volts” = The voltage at the batteries at the time the test is completed. • “Pick up” = Energizing a solenoid or contactor. • “F&R”... - Page 121 Curtis PMC Troubleshooting Power Output Test The rear drive wheels may rotate during some of the following tests. Block the front wheels, raise the rear drive wheels off the ground, and support the vehicle with jack stands. Failure to do so may cause the vehicle to move and cause severe bodily injury and/or property damage.
- Page 122 Curtis PMC Troubleshooting Control Wire Inputs The rear drive wheels may rotate during some of the following tests. Block the front wheels, raise the rear drive wheels off the ground, and support the vehicle with jack stands. Failure to do so may cause the vehicle to move and cause severe bodily injury and/or property damage.
- Page 123 Curtis PMC Troubleshooting Connect a voltmeter across the PMC #2 terminal and battery negative. Close all interlock switches, turn the Key Switch ON, and The voltage shown is for illustration place the F&R Switch in Forward. only. The actual voltage may vary. Depress the accelerator pedal to engage MS-1 only.
- Page 124 Curtis PMC Troubleshooting Power Wire Inputs The rear drive wheels may rotate during some of the following tests. Block the front wheels, raise the rear drive wheels off the ground, and support the vehicle with jack stands. Failure to do so may cause the vehicle to move and cause severe bodily injury and/or property damage.
- Page 125 Curtis PMC Troubleshooting Motor The rear drive wheels may rotate during some of the following tests. Block the front wheels, raise the rear drive wheels off the ground, and support the vehicle with jack stands. Failure to do so may cause the vehicle to move and cause severe bodily injury and/or property damage.
- Page 126 Curtis PMC Troubleshooting Accelerator The rear drive wheels may rotate during some of the following tests. Block the front wheels, raise the rear drive wheels off the ground, and support the vehicle with jack stands. Failure to do so may cause the vehicle to move and cause severe bodily injury and/or property damage.
- Page 127 Refer to the option list for your truck or ® contact your Taylor-Dunn Representative for more information. If you do not know how to test for continuity, refer test to a qualified technician.
- Page 128 Curtis PMC Troubleshooting Forward and Reverse Side For your reference, shown at the right are the Forward and KSI Side White/Black Reverse switch wire connections for a typical control system. Violet/Black Green/Black Blue/Black Typical configuration of the terminals on a Forward and Reverse Switch as viewed from the back Connect a voltmeter across the HOT terminal of the KSI...
- Page 129 Curtis PMC Troubleshooting F/R switch The rear drive wheels may rotate during some of the following tests. Block the front wheels, raise the rear drive wheels off the ground, and support the vehicle with jack stands. Failure to do so may cause the vehicle to move and cause severe bodily injury and/or property damage.
- Page 130 Curtis PMC Troubleshooting Connect a voltmeter across the forward terminal of the The FORWARD terminal is forward and reverse side of the F&R switch and battery diagonally opposite the forward side of the rocker on the switch negative. FLUKE 79 SERIES II MULTIMETER Close all interlock switches, turn the Key Switch ON, F&R switch seen from...
- Page 131 Curtis PMC Troubleshooting Solenoids The rear drive wheels may rotate during some of the following tests. Block the front wheels, raise the rear drive wheels off the ground, and support the vehicle with jack stands. Failure to do so may cause the vehicle to move and cause severe bodily injury and/or property damage.
- Page 132 Curtis PMC Troubleshooting Forward (does not run in reverse) The voltage shown is for illustration Connect a voltmeter across the PMC KSI terminal and battery only. The actual voltage may vary. negative. Close all interlock switches, turn the Key Switch ON, and place the F&R Switch in reverse.
- Page 133 Curtis PMC Troubleshooting Connect the test light across the Normally Closed contacts of the Forward solenoid. Refer to your vehicles wiring FWD/REV diagram to identify the position of the forward solenoid. Close all interlock switches, turn the Key Switch ON, and place the F&R Switch in Reverse.
- Page 134 Curtis PMC Troubleshooting Set the test light voltage to the same voltage as the battery volts. Solenoids are shown for reference only. The type and position of the forward Connect the test light across the Normally Open contacts solenoid in your truck may be different of the Forward solenoid.
-
Page 135: Symptom Troubleshooting Guide
Curtis PMC Troubleshooting SYMPTOM TROUBLESHOOTING GUIDE This section is specific to the symptoms listed below. Each troubleshooting sequence assumes that all listed symptoms are present. Do not use this section unless the truck has all listed symptoms. SYMPTOMS GO TO Ø... - Page 136 Curtis PMC Troubleshooting PMC CONTROL 1. Make sure the key-switch is in the “OFF” position, then remove the key. 2. Place the forward-reverse switch in the center “OFF” position. 3. Set the park brake. 4. Place blocks under the front wheels to prevent vehicle movement. 5.
- Page 137 Curtis PMC Troubleshooting Connect a volt meter across the PMC B+ and PMC M- terminals. The voltage shown is for illustration Turn the key-switch on, close all interlock only. The actual voltage may vary. switches (if equipped), depress the accelerator pedal to engage the first micro switch only (creep speed), then perform the following tests: •...
- Page 138 Curtis PMC Troubleshooting PLUGGING DIODE 1. Make sure the key-switch is in the “OFF” position, then remove the key. 2. Place the forward-reverse switch in the center “OFF” position. 3. Set the park brake. 4. Place blocks under the front wheels to prevent vehicle movement. 5.
- Page 139 Curtis PMC Troubleshooting FREEWHEEL DIODE 1. Make sure the key-switch is in the “OFF” position, then remove the key. 2. Place the forward-reverse switch in the center “OFF” position. 3. Set the park brake. 4. Place blocks under the front wheels to prevent vehicle movement. 5.
- Page 140 Curtis PMC Troubleshooting 1. Make sure the key-switch is in the “OFF” position, then remove the key. 2. Place the forward-reverse switch in the center “OFF” position. 3. Set the park brake. 4. Place blocks under the front wheels to prevent vehicle movement. 5.
- Page 141 Curtis PMC Troubleshooting Connect the meter to each end of the resistor that was removed from the ISO solenoid and measure Reading is plus or minus 10% its resistance. ISO solenoid is shown for reference • The meter reading should be 250 Ohms only.
-
Page 142: Solenoids
Curtis PMC Troubleshooting SOLENOIDS There is a very slight possibility that a failure in the motor could cause these symptoms. Perform the tests covered in the MOTOR section first. If the motor is OK, continue with the following tests. 1. Make sure the key-switch is in the “OFF” position, then remove the key. - Page 143 Curtis PMC Troubleshooting Stop trouble shooting here and repair the problem. When the repair is completed, completely retest the vehicle before lowering the drive wheels to the ground, otherwise continue with the next test. • Check continuity from the motor ‘A2’ terminal to the wire that was connected to the motor ‘S2’...
- Page 144 Curtis PMC Troubleshooting With the key-switch on and the F&R switch in reverse, depress the accelerator pedal and perform the following tests: • Check continuity from the wire that was connected to the PMC ‘M-’ terminal to the wire that was connected to the motor ‘S1’ Motor shown for reference only.
-
Page 145: Motor
Curtis PMC Troubleshooting MOTOR High motor current in both the field and the armature, accompanied with a lack of power, would indicate a shorted armature and\or field. Another symptom that may exist is jumping or stuttering at low speeds and/or the motor will not run unless the armature is manually rotated. - Page 146 Curtis PMC Troubleshooting Check continuity from ‘S1’ to the frame of the motor. Motor shown for reference only. If you do not know how to test for continuity, Terminal positions on your motor may not be in the same location. refer test to a qualified technician.
- Page 147 TABLE OF CONTENTS Operating Instructions and Theory of Operation ......2 Testing the Charging Cycle....3 Test Equipment Required for Troubleshooting ......4 Important Notes and Instructions -------------------- 4 Troubleshooting for Built-in Charger..5 Troubleshooting for Portable Charger ..8 Testing The Timer Relay ......9 Testing the Interlock Relay .....10 Turn the Key switch OFF BEFORE disconnecting the batteries.
- Page 148 Electrical Troubleshooting OPERATING INSTRUCTIONS AND THEORY OF OPERATION The Lestronic II chargers are designed as semiautomatic chargers. The Lestronic II charger turns itself ® ® on when the “built- in” charger is plugged into the wall outlet, or when the “portable” charger is plugged into the batteries.
- Page 149 Electrical Troubleshooting TESTING THE CHARGING CYCLE In typical installations, the charger will remain on for up to 12 hours depending on the state of charge of the battery when the charge cycle was started. A charger could remain on for longer than 12 hours if: •...
- Page 150 Electrical Troubleshooting TEST EQUIPMENT REQUIRED FOR TROUBLESHOOTING Digital Multi Meter (DMM) with diode and capacitor test function, FLUKE 79 model ® shown at right and in the troubleshooting illustrations. Important Notes and Instructions • This troubleshooting guide assumes a familiarity with the use of a digital multimeter including, voltage tests, continuity tests and diode testing.
- Page 151 Electrical Troubleshooting TROUBLESHOOTING FOR BUILT-IN CHARGER 1. Make sure the key-switch is in the “OFF” position, then remove the key. 2. Place the forward-reverse switch in the center “OFF” position. 3. Set the park brake. 4. Place blocks under the front wheels to prevent vehicle movement. 5.
- Page 152 Electrical Troubleshooting • Disconnect the charger from the AC source. • Disconnect the batteries. • Disconnect the charger from the vehicle’s harness. • Remove the charger from the vehicle. HIGH VOLTAGE may be stored in the capacitor. Discharge the capacitor before continuing.
- Page 153 Electrical Troubleshooting • Test the voltage from the fuse assembly (-) to the diode block (+). This voltage should be equal to the battery voltage. If the voltage is less than the battery voltage, then the wires from the harness connectors to the charger are bad.
- Page 154 Electrical Troubleshooting TROUBLESHOOTING FOR PORTABLE CHARGER Disconnect the charger from the AC outlet and the batteries. 1. Test the voltage from the positive terminal on the vehicles DC receptacle to main battery negative. This voltage should be equal to the battery voltage. If the voltage is less than the battery voltage then this wire is broken or has a bad connection.
- Page 155 Electrical Troubleshooting 5. Reconnect the lead to the diode. 6. Connect the charger to the AC source. Insert the DC charger plug into the DC receptacle and perform the following tests: High Voltage inside the charger. Do not touch any internal components while the charger is plugged in.
- Page 156 Electrical Troubleshooting 4. Disconnect the wires from the contact terminals on the timer relay 5. Reconnect the batteries. 6. Wait 5 seconds, then test the continuity across the timer relay contact terminals. If this is a closed circuit, then the timer start up circuit is functioning normally. •...
- Page 157 Charger Models: HBS 600 HBS 1000 TABLE OF CONTENTS Definitions: ..........2 Test Equipment Required for Troubleshooting .......2 Important Notes and Instructions Operating Instructions and Theory of Operation ........3 Testing the Charging Cycle....4 Status Light Error Code Table....5 Troubleshooting ........6 Turn the Key switch OFF BEFORE disconnecting the batteries.
- Page 158 Electrical Troubleshooting DEFINITIONS: Volts Per Cell = Voltage for each cell in a battery pack. for example, one 6-volt battery has 3-cells. Term Value Condition V1: Voltages are temperature compensated See Chart Flooded batteries relative to the temperature of the charger at the 2.383 Volts Per Cell Gel Batteries time the charge cycle is started.
- Page 159 Electrical Troubleshooting OPERATING INSTRUCTIONS AND THEORY OF OPERATION Typical specification plate (reference only, specifications will vary for different chargers) The model HBS 600W and HBS 1000W chargers are designed as automatic chargers. The charger turns ® ® itself on when it is plugged into the wall outlet and turns off when the batteries are fully charged. Once the charging cycle is complete, the charger will monitor the battery voltage.
- Page 160 Electrical Troubleshooting TESTING THE CHARGING CYCLE In typical installations, The charge cycle will be completed in 8 to 12 hours depending on the state of charge of the batteries when the charge cycle was started. NOTE: The charge cycle time is limited to 20-hours (max). A fault will occur if charging time exceeds the time limit.
- Page 161 Electrical Troubleshooting STATUS LIGHT ERROR CODE TABLE If the Fault light is ON or flashing, it indicates a problem has occured during the charging cycle. If the light is flashing, it will flash from 2 to 6 times before a pause. This is the fault code. Refer to the table below.
- Page 162 Electrical Troubleshooting TROUBLESHOOTING NOTE: There are no internally serviceable components in the charger. To test charger operation: Connect a DC volt meter to the main battery positive and negative terminals. Attach a clamp on DC Ammeter to one of the charger DC output wires. Plug the charger into an AC outlet.
- Page 163 TABLE OF CONTENTS Operating Instructions and Theory of Operation ........2 HB/PT and GEL Indicator Lamps...3 Testing the Charging Cycle....3 Test Equipment Required for Troubleshooting .......4 Important Notes and Instructions Status LED Error Code Table ....5 Troubleshooting ........6 Turn the Key switch OFF BEFORE disconnecting the batteries.
-
Page 164: Operating Instructions And Theory Of Operation
Electrical Troubleshooting OPERATING INSTRUCTIONS AND THEORY OF OPERATION The model HB600W and HB1000W chargers ® ® are designed as semiautomatic chargers. The charger turns itself on when it is plugged into the wall outlet and turns off when the batteries are fully charged. -
Page 165: Hb/Pt And Gel Indicator Lamps
Electrical Troubleshooting HB/PT AND GEL INDICATOR LAMPS NOTE: Your charger may not be equipped with these lamps. HB/PT Lamp If the HB/PT lamp is “ON”, then the charger has overheated and has entered a proportionally reduced output. The charging cycle will terminate if the temperature continues to rise. -
Page 166: Test Equipment Required For Troubleshooting
Electrical Troubleshooting TEST EQUIPMENT REQUIRED FOR TROUBLESHOOTING Digital Multi Meter (DMM), FLUKE 79 model shown at right and in the troubleshooting ® illustrations. Clamp on DC ammeter to measure up to 20-Amps. Important Notes and Instructions • This troubleshooting guide assumes a familiarity with the use of a digital multimeter including, voltage tests, continuity tests and diode testing. - Page 167 Electrical Troubleshooting STATUS LED ERROR CODE TABLE There are three status lights (LED’s) on the charger name plate. These LED’s normally indicate the current operating state of the charge r. If all three LED’s are flashing, it indicate an error has occurred in the charging cycle.
-
Page 168: Troubleshooting
Electrical Troubleshooting TROUBLESHOOTING To test charger operation: Connect a DC volt meter to the main battery positive and negative terminals. Attach a clamp on DC Ammeter to one of the charger DC output wires. Plug the charger into an AC outlet. Wait for charger to start (up to15 seconds), the ammeter should display the DC Amp rating of the charger (plus or minus 10%) indicating that the charger is on (constant current mode). - Page 169 The vehicle wiring diaram is too large to be legible when printed at this size. A full size diagram (22 x 16) is inculded on the CD in PDF format. You can access the diagram from a button on the CD menu. The diagram # is SCH-00017...
-
Page 171: Suspension
Illustrated Parts TABLE OF CONTENTS Front Axle ........... 2 Options ............50 Front Suspension ........4 Directional Signals ............ 51 Seat Belts ..............51 FRONT SHOCKS (optional) ......5 Pole Mounted Strobe Light ........51 STEERING ..........6 Cowl Mounted Emergency Light ....... 51 STEERING GEAR ........ -
Page 172: Front Axle
Illustrated Parts Front Axle Parts Page 2... - Page 173 Illustrated Parts FRONT AXLE Item No. Part No. Description 15-210-00 Front Axle 14-210-98 Axle Yoke, Left 14-210-99 Axle Yoke, Right 14-210-88 Axle Yoke, Hydraulic Disc, Left (optional) 14-210-89 Axle Yoke, Hydraulic Disc, Right (optional) 32-240-55 Bushing, Metal Backed Teflon, 5/8” 97-180-55 Thrust Washer, Metal Backed Teflon, 5/8”...
-
Page 174: Front Suspension
Illustrated Parts Front Suspension FRONT SUSPENSION Item No. Part No. Description 85-512-10 Leaf Spring, 1-3/4” x 27-3/8” 16-870-10 Spring Link 32-213-00 Bushing, 3/4” OD x 1.656” Long 96-248-00 Bolt, 9/16NF x 3” 88-169-82 Locknut, 9/16NF, Grade C 96-123-00 U-Bolt, 3/8NC x 2” 88-109-81 Locknut, 3/8NC 16-865-02... -
Page 175: Front Shocks (Optional)
Illustrated Parts FRONT SHOCKS (optional) FRONT SHOCKS (optional) Item No. Part No. Description 86-602-00 Shock Absorber 88-128-60 Washer, 7/16 88-129-81 Locknut, 7/16NC 86-602-13 Lower Shock Mount 86-602-25 Upper Shock Mount (bolt on) 86-602-61 Kit, Front Shocks (includes #1,2,3,4,5) Parts Page 5... -
Page 176: Steering
Illustrated Parts STEERING Parts Page 6... - Page 177 Illustrated Parts STEERING Item No. Part No. Description 18-308-21 Steering Gear 21-031-13 Steering Shaft, 17.938” Long 17-110-00 Collar, 3/4” Shaft 88-080-04 Bolt, 5/16NC x 3/8” Hex Hd 80-400-10 Sealed Bearing, 3/4” (up to 4/1/2002) 32-248-10 Bushing, plastic (after 4/1/2002) 19-011-20 Steering Wheel 88-199-82 Jam Nut, 5/8NF...
-
Page 178: Steering Gear
Illustrated Parts STEERING GEAR Parts Page 8... - Page 179 Illustrated Parts STEERING GEAR (18-308-21) Item No. Part No. Description 18-308-70 Locknut, Worm Bearing Adjuster 18-308-71 Adjuster Assembly 18-308-72 Worm Assembly 18-308-23 Upper Worm Bearing 18-308-22 Upper Worm Bearing Race 18-308-77 Housing, Steering Gear 18-308-78 Seal, Pitman Shaft 18-308-80 Nut, Pitman Shaft 18-308-81 Lock Washer, Pitman Shaft 18-308-79...
-
Page 180: Park Brake
Illustrated Parts PARK BRAKE Parts Page 10... - Page 181 Illustrated Parts PARK BRAKE Item No. Part No. Description 51-344-10 Lever, Park Brake, w/Tab 05-210-86 Hand Brake Bar 96-763-00 Clevis, 5/16” 96-773-00 Clevis Pin, 5/16” x 1” Long 88-517-09 Cotter Pin, 3/32” x 3/4” Long 80-410-20 Bearing, Brake Shaft 00-210-05 Rotor, Brake Rod 06-210-11 Brake Cross Shaft...
-
Page 182: Deadman Seat Brake (Optional)
Illustrated Parts DEADMAN SEAT BRAKE (optional) Parts Page 12... - Page 183 Illustrated Parts DEADMAN SEAT BRAKE Item No. Part No. Description 00-210-24 Brake Push Rod 02-210-50 Seat Brake Link 02-210-60 Seat Link Arm 85-123-00 Spring, Deadman Seat 00-210-03 Seat Frame 96-773-00 Clevis Pin, 5/16” x 1” Long 88-517-09 Cotter Pin, 3/32” x 3/4” Long 96-773-10 Clevis Pin, 5/16”...
-
Page 184: Master Cylinder & Brake Linkage
Illustrated Parts MASTER CYLINDER & BRAKE LINKAGE Parts Page 14... - Page 185 Illustrated Parts MASTER CYLINDER & BRAKE LINKAGE Item No. Part No. Description 05-210-97 Brake Pedal 00-210-21 Mount, Brake Pedal 00-210-08 Rod, Hydraulic Brake 85-233-00 Spring, Extension, 1” OD x 5-1/2” 96-772-00 Clevis Pin, 3/8” x 1” 88-527-11 Cotter Pin, 1/8” x 1” 88-109-81 Locknut, 3/8NC 88-069-81...
-
Page 186: Hydraulic Brake Lines
Illustrated Parts HYDRAULIC BRAKE LINES Parts Page 16... - Page 187 Illustrated Parts HYDRAULIC BRAKE LINES Rear Item No. Part No. Description 99-607-51 Brake Line, 51 Long 99-605-55 Brake Line, Left 99-605-56 Brake Line, Right 99-564-00 T-Fitting 99-580-20 Brake Hose 99-576-00 Clip, Brake Hose Front (optional) 99-607-51 Brake Line, 51 Long 99-603-53 Brake Line, Front 99-580-20...
-
Page 188: Front Brakes (Optional)
Illustrated Parts FRONT BRAKES (optional) REAR BRAKES Parts Page 18... - Page 189 Illustrated Parts FRONT BRAKES (optional) Item No. Part No. Description Qty* 41-348-70 Pad, Disc Brake 41-348-52 Spacer, Disc Brake 32-240-40 Bushing, Mounting Bracket 88-067-21 Brake Body Bolt 41-350-70 Hydraulic Brake Body, Lt or Rt 99-588-01 Bleeder Fitting 99-588-00 Bleeder Valve 88-069-82 Locknut, 1/4NC, Grade 8;...
-
Page 190: Chargers, Lestronic (P1)
Illustrated Parts Chargers, Lestronic (P1) Parts Page 20... - Page 191 Illustrated Parts Parts Page 21...
-
Page 192: Chargers, Lestronic (P2)
Illustrated Parts Chargers, Lestronic (P2) Parts Page 22... - Page 193 Illustrated Parts Parts Page 23...
-
Page 194: Chargers, Signet
Illustrated Parts Chargers, Signet Model HBS series charger shown Model HBS for Flooded Batteries Model HB for Flooded Batteries PART # DESCRIPTION PART # DESCRIPTION 24 volt Charger Assembly (see note) 79-302-20 24 volt Charger Assembly (see note) 79-303-41 36 volt Charger assembly (see note) 79-303-40 36 volt Charger assembly (see note) 79-309-42... - Page 195 Illustrated Parts This page intentionally left blank Parts Page 25...
-
Page 196: Motors (P1)
Illustrated Parts Motors (P1) Parts Page 26... - Page 197 Illustrated Parts Parts Page 27...
-
Page 198: Motors (P2)
Illustrated Parts Motors (P2) Parts Page 28... - Page 199 Illustrated Parts Parts Page 29...
-
Page 200: Rear Axle
Illustrated Parts REAR AXLE REAR AXLE Item No. Part No. Description 97-236-00 Wheel Lug Nut Wheel Bolt 41-152-00 Axle (includes #2) 80-503-00 Axle Bearing, Ball Type 32-515-00 Bearing Retainer 45-301-00 Seal, Rear Axle Parts Page 30... -
Page 201: Belt Drive
Illustrated Parts BELT DRIVE BELT DRIVE Item No. Part No. Description 30-121-10 Pulley, 4 Belt, 10.6” OD 30-158-00 Pulley, 4 Belt, 2.43” OD (used on 10.5 mph drive) 30-159-00 Pulley, 4 Belt, 3.00” OD (used on 12.0 mph drive) 30-620-00 Belt, 3V x 400, R-Edge 88-239-82 Nut, Motor, 3/4NF Jam... -
Page 202: Power Traction Drive
Illustrated Parts POWER TRACTION DRIVE Parts Page 32... - Page 203 Illustrated Parts POWER TRACTION DRIVE Item No. Part No. Description 70-049-00 Motor, DC, 4.5/6.0 hp 70-054-00 Motor, DC, 6.7/10.0 hp 70-054-20 Motor, DC, 6.7/10.0 hp 97-100-00 Woodruff Key 88-087-11 Chain Adjusting Screw 88-069-80 Nut, 5/16NC 88-103-09 Motor Mounting Screw 80-703-00 O-Ring 70-454-00 Motor Mounting Plate...
-
Page 204: Rear Differential
Illustrated Parts REAR DIFFERENTIAL Parts Page 34... - Page 205 Illustrated Parts REAR DIFFERENTIAL Item No. Part No. Description 44-340-10 3rd Member-Complete, 2.69/2.70/2.75 Ratio 44-340-12 3rd Member-Complete, 3.00 Ratio 41-709-00 3rd Member Housing (small carrier bearing, 1.628”ID) 41-710-00 3rd Member Housing (large carrier bearing, 1.784”ID) 88-119-80 Nut, 3/8NF 41-712-00 Carrier Assembly (small bearing) 41-713-00 Carrier Assembly (large bearing) 80-127-00...
-
Page 206: Rear Suspension
Illustrated Parts REAR SUSPENSION REAR SUSPENSION Item No. Part No. Description 85-513-10 Leaf Spring 16-861-00 Spring Pad 88-101-18 Bolt, 3/8NC x 2-1/2” Hex Hd, Grade 5 88-109-81 Locknut, 3/8NC 16-870-10 Spring Link 32-213-00 Bushing, 3/4” OD x 1.656” Long 96-248-00 Bolt, 9/16NF x 3”... -
Page 207: Batteries
Illustrated Parts BATTERIES BATTERIES Item No. Part No. Description 75-231-00 Jumper, Battery, 10-1/4” long 50-250-00 Clamp, Battery Hold Down 50-243-10 Battery Rod 88-069-81 Locknut, 1/4NC 88-088-60 Washer, 5/16” Cut 88-081-12 Bolt, 5/16NC Square Hd, Tin-Lead 88-089-80 Nut, 5/16NC, Tin-Lead 01-534-43 Battery Box Angle 88-060-09 Bolt, 1/4NC x 3/4”... -
Page 208: Tires/Wheels
Illustrated Parts Tires/Wheels Ref., wheel hub 5 (assembly) Parts Page 38... -
Page 209: Tires And Wheels
Illustrated Parts Wheels and Tires ITEM # PART # DESCRIPTION Wheels 12-012-00 5 x 8" Tubeless 12-020-00 8.5 x 8 Tubeless Tires 10-081-00 5.70 x 8 LR B Pneumatic 10-082-00 5.70 x 8 Extra Grip 10-083-00 5.70 x 8 LR C 10-093-00 8.50 x 8 LR B 10-091-10... -
Page 210: Control Panel
Illustrated Parts CONTROL PANEL Parts Page 40... - Page 211 Illustrated Parts CONTROL PANEL Item No. Part No. Description 72-501-39 Forward or Reverse Solenoid 88-838-06 Sheet Metal Screw, #14 x 1/2” 01-534-80 Panel, Control Mounting 62-204-40 Speed Controller, 275 Plus 400 62-205-00 Speed Controller, 400A, 24/36V (optional) 72-501-38 ISO Solenoid 88-818-06 Sheet Metal Screw, #8 x 1/2”...
-
Page 212: Control Panel-Ee
Illustrated Parts CONTROL PANEL-EE Parts Page 42... - Page 213 Illustrated Parts CONTROL PANEL-EE Item No. Part No. Description 72-501-39 Forward or Reverse Solenoid 88-838-06 Sheet Metal Screw, #14 x 1/2” 04-210-20 Panel, Control Box Floor 62-205-00 Speed Controller, 400 amp 72-501-38 ISO Solenoid 88-818-06 Sheet Metal Screw, #8 x 1/2” 79-840-00 Circuit Breaker, 10 amp 79-844-20...
-
Page 214: Accelerator Module
Illustrated Parts ACCELERATOR MODULE ACCELERATOR MODULE Item No. Part No. Description 98-254-00 Accelerator Pedal, Aluminum 98-254-25 Mount, Accelerator Pedal 03-210-96 Mounting Plate, Accelerator 62-033-00 Accelerator Module 88-060-09 Bolt, 1/4NC x 3/4” Hex Hd. 88-065-08 Screw, 1/4NC x 5/8” Truss Hd. 88-069-81 Locknut, 1/4NC Parts... -
Page 215: Instrumentation
Illustrated Parts INSTRUMENTATION INSTRUMENTATION Item No. Part No. Description 71-120-00 Ignition Switch, Keyed Alike 71-121-00 Ignition Switch, Keyed Unalike (optional) 71-039-00 Switch, Forward/Reverse 74-009-00 Battery Status Indicator 74-000-00 Hourmeter (optional) 71-039-10 Headlight Switch 94-304-10 Instrument Panel 88-817-07 Screw, #8 x 1/2” Tapping 71-039-20 Plug, Rocker Switch Hole 71-039-10... -
Page 216: Decals & Miscellaneous Standard Parts
Illustrated Parts DECALS & MISCELLANEOUS STANDARD PARTS Parts Page 46... - Page 217 Illustrated Parts DECALS & MISCELLANEOUS STANDARD PARTS Item No. Part No. Description 94-373-10 Decal, Vehicle Data 94-319-00 Decal, Battery Disconnect 94-313-00 Decal, Battery Warning 94-313-20 Decal, Safety Warning 94-309-00 Decal, Brake Warning 94-384-01 Decal, Not Motor Vehicle 71-501-00 Horn Button 88-025-06 Screw, 8-32 x 1/2”...
-
Page 218: Miscellaneous Standard Parts-Cont'd
Illustrated Parts MISCELLANEOUS STANDARD PARTS-Cont’d Parts Page 48... - Page 219 MISCELLANEOUS STANDARD PARTS-Cont’d Item No. Part No. Description 94-050-10 Headlight, Left 94-050-11 Headlight, Right 72-082-01 Bulb, Headlight 94-201-10 Taylor-Dunnâ Name Plate 94-201-11 Fastener Strip, Plastic 88-817-07 Screw, #8 x 1/2” Self Tapping 94-050-04 Retainer, Headlight 90-444-00 Deckboard, 75-1/4” x 41” 90-179-00 Backrest 90-174-00 Seat Cushion, 17”...
-
Page 220: Options
Illustrated Parts Options Parts Page 50... -
Page 221: Directional Signals
Illustrated Parts Directional Signals Item No. Part No. Description 75-141-20 Turn Signal Switch 76-352-00 Flasher Receptacle 71-900-05 Flasher, 12V 72-082-10 Turn Signal Bulb, 12V 72-082-20 Socket, Turn Signal Seat Belts 90-199-10 Seat Belt, Black 88-151-13 Bolt, 1/2NC x 1-1/4” Hex Hd, Grade 5 88-148-61 Washer, 1/2”... - Page 222 Illustrated Parts Parts Page 52...
-
Page 223: Cowl W/Windshield
Illustrated Parts Cowl w/Windshield Item No. Part No. Description 91-013-64 Kit, Windshield, Orange (requires fiberglass or surrey top cover) 1 91-013-65 Kit, Windshield, Specify Color (requires fiberglass or surrey top cover) 91-010-77 Cowl w/Windshield (unpainted) 90-852-30 Windshield 98-310-00 Window Channel, Rubber 12 ft 88-102-13 Bolt, 3/8NC x 1-1/4”... - Page 224 Illustrated Parts Parts Page 54...
-
Page 225: Strobe Light On Cab
Illustrated Parts Strobe Light On Cab Item No. Part No. Description 72-023-20 Strobe Light, Amber 88-025-06 Screw, #8-32 x 1/2” Truss Hd 88-028-62 Lockwasher, #8 88-029-80 Nut, #8-32 98-606-00 Grommet, 3/16” ID 75-114-15 Harness, Wiper & Light 71-100-00 Toggle Switch Mirrors, Cowl, Cab, or Door Mounted 92-201-00 Mirror, 4-1/2”... - Page 226 Illustrated Parts Parts Page 56...
-
Page 227: Cab Doors, Naugahyde
Illustrated Parts Cab Doors, Naugahyde Item No. Part No. Description 90-924-60 Kit, Naugahyde Door, Left 90-924-61 Kit, Naugahyde Door, Right 90-923-98 Door Frame, Left 90-923-99 Door Frame, Right 90-924-98 Side Curtain, Left 90-924-99 Side Curtain, Right 97-315-53 Handle Assembly, Outer 97-315-51 Door Latch 97-315-54... - Page 228 Illustrated Parts Parts Page 58...
-
Page 229: Surrey Top Cover
Illustrated Parts Surrey Top Cover Item No. Part No. Description 91-101-61 Kit, Surrey Top Cover 91-028-20 Tubular Top Frame 91-028-24 Post, Top Frame 88-102-11 Bolt, 3/8NC x 1” Carriage 88-109-81 Locknut, 3/8NC 91-101-00 Surrey Top, White Fiberglass Top Cover 91-151-61 Kit, Fiberglass Top Cover 91-028-20 Tubular Top Frame... - Page 230 Illustrated Parts Parts Page 60...
-
Page 231: Fixed 2Nd Seat
Illustrated Parts Fixed 2nd Seat Item No. Part No. Description 90-010-61 Kit, 2nd Seat, Orange 90-010-64 Kit, 2nd Seat, Specify Color 00-210-01 Seat Bulkhead (unpainted) 90-175-00 Seat Cushion, Black 90-179-00 Seatback, Black 88-837-09 Screw, #14 x 3/4” Phillips Sheet Metal 88-065-09 Screw, 1/4NC x 3/4”... - Page 232 Illustrated Parts Parts Page 62...
-
Page 233: Deck Cover, Diamond Plate, 2 Pc., Std. Bed
Illustrated Parts Deck Cover, Diamond Plate, 2 Pc., Std. Bed Item No. Part No. Description 90-440-45 Kit, Diamond Cover, Std Bed, Black (does not include #1 & 2) 90-444-20 Deckboard, 41” x 38-1/2” x 5/8” 90-444-30 Deckboard, 41” x 36-5/8” x 5/8” 90-440-46 Deck Cover, Diamond Plate, Rear 90-440-47... - Page 234 Illustrated Parts Parts Page 64...
-
Page 235: Foldaway 2Nd Seat
Illustrated Parts Foldaway 2nd Seat Item No. Part No. Description 90-010-59 Kit, Foldaway 2nd Seat, Specify Color 90-010-60 Kit, Foldaway 2nd Seat, Black 00-210-92 Seat Base Frame 00-210-93 Seat Back Frame 00-210-91 Seat Pivot Plate 90-179-00 Backrest, Black 88-837-11 Screw, #14 x 1” Phillips Sheet Metal 90-178-00 Seat Cushion, 12”... -
Page 236: Deckboard, Lockable, 2 Piece
Illustrated Parts Deckboard, Lockable, 2 Piece Item No. Part No. Description 90-444-20 Deckboard, 41” x 38-1/2”, Black 90-444-30 Deckboard, 41” x 36-5/8”, Black 03-210-25 Plate, Deck Side Lock 03-210-24 Plate, Deck Center Lock 88-082-13 Bolt, 5/16NC x 1-1/4” Carriage 88-088-62 Lockwasher, 5/16”... -
Page 237: Box, Double Doors, Side & Rear Windows
Illustrated Parts Box, Double Doors, Side & Rear Windows Item No. Part No. Description 91-333-60 Kit, Box, Doors Lt & Rr, w/Glass, Orange 91-333-61 Kit, Box, Doors Lt & Rr, w/Glass, Specify Color 90-333-02 Box, Doors Left & Rear, Glass Front & Rear (unpainted) 90-471-00 Deckboard, Front, 40”... - Page 238 Illustrated Parts Parts Page 68...
-
Page 239: Tools Box Doors, Side
Illustrated Parts Tools Box Doors, Side Item No. Part No. Description 91-340-62 Kit, Side Tool Box Doors, Orange 91-340-64 Kit, Side Tool Box Doors, Specify Color 02-210-12 Tool Box Door, Left (unpainted) 02-210-13 Tool Box Door, Right (unpainted) 02-210-15 Tool Box Top, Black 88-737-08 Rivet, 3/16”... -
Page 240: Stake Sides, Standard Bed
Illustrated Parts Stake Sides, Standard Bed Item No. Part No. Description 90-545-61 Kit, Stake Sides, 2 Passenger, Std Bed 90-545-02 Side Gate, Black 90-545-01 End Gate, Black 90-540-00 Gate Hook 88-065-08 Screw, 1/4NC x 5/8” Phillips Truss Hd 88-069-87 Nut, 1/4NC Keps Parts Page 70... -
Page 241: Stake Sides, Fixed 2Nd Seat
Illustrated Parts Stake Sides, Fixed 2nd Seat Item No. Part No. Description 90-545-62 Kit, Stake Sides, 4 Passenger 90-545-03 Side Gate, Left, Black 90-545-04 Side Gate, Right, Black 90-545-01 End Gate, Black 90-540-00 Gate Hook 88-065-08 Screw, 1/4NC x 5/8” Phillips Truss Hd 88-069-87 Nut, 1/4NC Keps Parts... -
Page 242: Stake Sides, Foldaway 2Nd Seat
Illustrated Parts Stake Sides, Foldaway 2nd Seat Item No. Part No. Description 90-545-12 Side Gate, Front Left, Black 90-545-13 Side Gate, Front Right, Black 90-545-14 Side Gate, Rear Left, Black 90-545-15 Side Gate, Rear Right, Black 90-545-01 End Gate, Black 90-540-00 Gate Hook 88-065-08... -
Page 243: Reverse Warning/Motion Beeper
Illustrated Parts Reverse Warning/Motion Beeper Item No. Part No. Description 73-005-05 Alarm, Pulsating Hitches 97-804-01 Hitch, Pintle Type 97-808-00 Hitch, Automatic Coupling 88-140-14 Bolt, 1/2NC x 1-1/2” Hex Hd 88-148-62 Lockwasher, 1/2” 88-149-80 Nut, 1/2NC 88-140-11 Bolt, 1/2NC x 1” Hex Hd 97-835-10 Plate, Hitch Mounting 97-835-00... - Page 244 Illustrated Parts Parts Page 74...
-
Page 245: Nurse's Seat, Black Cushions
Illustrated Parts Nurse’s Seat, Black Cushions Item No. Part No. Description 00-210-51 Nurse’s Seat Frame (unpainted) 90-000-00 Backrest, 6-1/8” x 16-3/4”, Black 88-837-13 Screw, #14 x 1-1/4” Phillips Sheet Metal 90-191-00 Seat Cushion, 17” x 18”, Black 88-065-08* Screw, 1/4NC x 5/8” Phillips Truss Hd 88-069-87* Nut, 1/4NC Keps Deck, Galvenized, Ambulance... -
Page 247: Brake Lining Handling Precautions
Contents Appendix A: Special Tools ....2 Appendix B: Suggested Torque Limits for Standard Hardware ..3 Hardware Identification ...... 3 Standard Head Markings ........3 Hex Bolts .............. 3 Other Bolts ............3 Hex Nuts ............... 4 Hex Lock Nuts (stover) ........4 Other Nuts ............. -
Page 248: Appendix A: Special Tools
Appendixes APPENDIX A: SPECIAL TOOLS DESCRIPTION PURPOSE PART NUMBER Used to install the pinion seal on all chain drive trucks with Pinion Seal Installation Tool the band style brake or the speed sensor on the chain case 43-201-50 cover. Used to center the chain case on the pinion shaft on all chain Chain Case Centering Tool drive trucks with the band style brake or the speed sensor 41-532-50... -
Page 249: Appendix B: Suggested Torque Limits For Standard Hardware
Appendixes APPENDIX B: SUGGESTED TORQUE LIMITS FOR STANDARD HARDWARE HARDWARE IDENTIFICATION Standard Head Markings NOTE: Torque value used should be for lowest grade of hardware used. If a grade 2 nut is used on a grade 8 bolt, use grade 2 torque value. NOTE: Toque values specified are for clean dry threads. -
Page 250: Hex Nuts
NOTE: Nuts with no markings are to be treated as S.A.E. Grade A S.A.E. Grade B S.A.E. Grade C Grade L’9 Other Nuts Other nuts used by Taylor-Dunn should be treated as S.A.E. grade A ® Appendixes Appendix B Page 4... -
Page 251: Suggested Torque Values (Non-Critical Hardware)
Appendixes Suggested Torque Values (non-critical hardware) Diameter Grade 2 Grade 5 Grade 8 and TPI Tightening Tightening Tightening Tightening Torque Torque Torque Torque (ft-lb) (ft-lb) (ft-lb) (ft-lb) 1/4-20 7-10 10-14 1/4-28 8-12 11-16 5/16-18 9-14 14-21 20-29 5/16-24 10-15 15-23 22-33 3/8-16 16-24... - Page 252 Appendixes Suggested Torque Values (critical hardware) Torque Table Torque Range Group Description Ft-Lbs In-Lbs Brakes - - - - - - - - - - - - - - - - - - - - - - - - Brake bolt (disc brake body) 11 - 11 132 - 132 15 - 15...
-
Page 253: Appendix C: Brake Lining Handling Precautions
Appendixes APPENDIX C: BRAKE LINING HANDLING PRECAUTIONS Taylor-Dunn does not currently supply asbestos fiber-brake pads/ shoes with any vehicle. However, there is the possibility that the original brake pads/shoes were replaced with aftermarket pads/shoes containing asbestos. Since this possibility does exist, the brake pads/ shoes should be handled as if they do contain asbestos. - Page 254 Taylor-Dunn Mfg. ® 2114 W. Ball Rd. Anaheim, CA 92804 (800)-688-8680 (714) 956-4040 (FAX) (714) 956-0504 Visit our Website: www.taylor-dunn.com...
Need help?
Do you have a question about the B0-012-10 and is the answer not in the manual?
Questions and answers