TRENDnet TEW-WLC100 User Manual
5 x gigabit ports
Hide thumbs
Also See for TEW-WLC100:
- Quick installation manual (14 pages) ,
- User manual (55 pages) ,
- Quick installation manual (14 pages)
Table of Contents
Advertisement
Quick Links
Advertisement
Table of Contents

Subscribe to Our Youtube Channel
Related Manuals for TRENDnet TEW-WLC100


Summary of Contents for TRENDnet TEW-WLC100
- Page 1 Cover Page TRENDnet User’s Guide...
-
Page 2: Table Of Contents
Troubleshooting ................28 Change your controller administrative login password ..........10 Appendix ..................29 Check the controller system information ..............10 View your controller system log .................. 11 Basic Connectivity Test ....................11 © Copyright 2016 TRENDnet. All Rights Reserved. -
Page 3: Product Overview
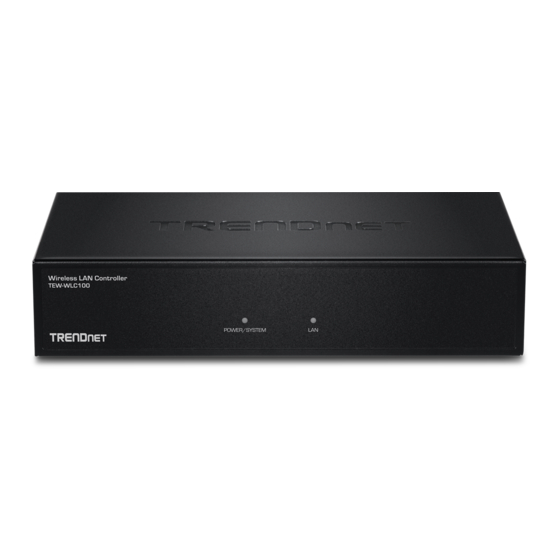
TRENDnet User’s Guide Features Product Overview TRENDnet's Wireless LAN Controller, model TEW-WLC100, lets you easily setup and manage access points across your network from a single interface. Intelligent radio resource manamagement ensures your mobile wifi clients have optimal roaming conditions when wirelessly transitioning between access points within the network. -
Page 4: Product Hardware Features
Gigabit ports (1-5). : Indicates no physical Ethernet connection or no network devices physically connected to any of the Gigabit ports (1-5). © Copyright 2016 TRENDnet. All Rights Reserved. -
Page 5: Controller Installation
When installing the Controller on a level surface, attach the rubber feet to the bottom of each device. The rubber feet cushion the hub and protect the hub case from scratching. Then, use screws provided with the equipment rack to mount each controller in the rack. © Copyright 2016 TRENDnet. All Rights Reserved. -
Page 6: Basic Installation
Also, make sure your network is using a DHCP server to distribute IP addresses to the access points. By default, TRENDnet access point models listed below will obtain an IP address automatically through DHCP or otherwise default back to 192.168.10.100 / 255.255.255.0 if a DHCP server is not available on your network. - Page 7 11. Click Check to check for available online firmware upgrades. 8. Using an Ethernet cable, connect one of the five Gigabit Ethernet ports located on the back of the wireless controller to your network (e.g. router, switch, etc.) © Copyright 2016 TRENDnet. All Rights Reserved.
-
Page 8: Connect Your Wireless Access Points
Ethernet (PoE), you can connect your access points to your network or to the wireless controller using a separate PoE injector or PoE switch (not included). 3. After your access points have been found, they will automatically appear in the Device List. © Copyright 2016 TRENDnet. All Rights Reserved. - Page 9 6. After modifying the settings, scroll down to the Password field, enter the access point(s) management password (default access point password: admin) and click OK to apply the settings to the access points. © Copyright 2016 TRENDnet. All Rights Reserved.
-
Page 10: Configure Your Wireless Controller
(e.g. 192.168.200.20) Note: The default gateway and primary DNS settings need to be entered in order for NTP server time resolution and online firmware upgrade check functions to work properly. 4. Click Apply. © Copyright 2016 TRENDnet. All Rights Reserved. -
Page 11: Upgrade Your Controller Firmware
TRENDnet controller model and version. To check if Manual Firmware Upgrade there is a firmware upgrade available for your device, please check your TRENDnet 1. If a firmware upgrade is available (http://www.trendnet.com/support) , download the model and version using the link. -
Page 12: Change Your Controller Administrative Login Password
MAC Address – The current MAC address of your controller’s wireless or interface configuration. IP Address - Displays your controller’s current IP address. Subnet Mask – Displays your controller’s current subnet mask. © Copyright 2016 TRENDnet. All Rights Reserved. -
Page 13: View Your Controller System Log
3. Next to Function, select Enabled or Disabled to enable or disable logging. Then click Note: Host name connectivity tests require the IP default gateway and primary DNS Apply. The logging will display in the log window. server settings to configured properly. Log Window © Copyright 2016 TRENDnet. All Rights Reserved. -
Page 14: Backup And Restore Your Controller Configuration Settings
2. Click on Advanced and click on Administrator, then click on Settings Management. settings default download folder. (Default Filename: backup-TEW-WLC100-YYYY-MM- DD.tar.gz) 3. Next to System Reboot, click Reboot. -
Page 15: Reset Your Controller To Factory Defaults
2. Click on Advanced and click on Administrator, then click on Settings Management. 3. Next to Reset to Factory Default Settings and Reset, click Load Default. When prompted to confirm this action, click OK. © Copyright 2016 TRENDnet. All Rights Reserved. -
Page 16: Set Your Controller Date And Time
3. Review the Time settings. To save changes to this section, click Apply when finished. Time: Displays the current device time and date information. Enable Daylight Saving: Check the option to enable daylight savings time and set the annual range when daylight saving is activated. © Copyright 2016 TRENDnet. All Rights Reserved. -
Page 17: Ap Management And Monitoring
Discover and configure access points AP management and monitoring Basic > AP Management > Device List This section allows you to discover TRENDnet access points on your network, apply AP Compatibility configuration settings, deploy batch firmware upgrades and deploy configuration to Before you proceed, please ensure you are using one of the access point models in the multiple access points simultaneously. - Page 18 Important Note: For any changes to be applied under device settings, you must enter the access point management password before clicking OK and applying the changes. By default, the compatibility TRENDnet access point user name and password is set to admin / admin.
- Page 19 Secondary DNS – Sets the access point(s) secondary DNS server IPv4 will automatically push wireless clients to the less congested 5GHz address for name resolution. wireless network. System Name – Sets the access point(s) device or network name. © Copyright 2016 TRENDnet. All Rights Reserved.
- Page 20 TEW-WLC100 TRENDnet User’s Guide Note: Applies only to TRENDnet dual band access point models: TEW- Wireless devices that only support 802.11a will not be able to 821DAP connect to a wireless network that is set to 802.11n only Band – Click the drop-down list to select which band configuration mode.
- Page 21 Check the option to enable the feature and 64-bit key length 10 characters 5 characters uncheck to disable. 128-bit key length 26 characters 13 characters WPA/WPA2-Personal Passphrase Format: 8-63 alphanumeric characters (a,b,C,?,*, /,1,2, etc.) © Copyright 2016 TRENDnet. All Rights Reserved.
- Page 22 Setting up wireless security is very important. Leaving your wireless network open and and the action/tolerance. The lower the value, the less connection unsecure could expose your entire network and personal files to outsiders. TRENDnet strength the client device has with the access point (ex. a client device...
-
Page 23: Batch Configuration Upload And Firmware Upgrade
The configuration file Note: Check the specifications of your wireless network adapters and wireless must be backed up from one of the wireless access points directly. On TRENDnet appliances to verify the highest level of encryption supported. Below is brief... - Page 24 6. Next to Config Path, click on Browse or Choose File, and navigate to the previously backed up configuration file to upload and select it. Note: Default backup configuration filename for TRENDnet access points is TRENDnet EAP_config.bin. The file should have a .bin extension.
-
Page 25: Batch Firmware Upgrade Deployment
Basic > AP Management > Device List The controller allows you to upgrade firmware on multiple access points. Firmware upgrades for the access points can be downloaded from the TRENDnet support site http://www.trendnet.com/support and selecting the access point model under Product Downloads. - Page 26 A success message indicated that the process was successfully completed. After the process is complete you can close this window. You can also verify that the new firmware version has been upgraded listed in the Firmware Version column. © Copyright 2016 TRENDnet. All Rights Reserved.
-
Page 27: Ap And Client Status Monitoring
(MB). Download (Mbytes) – Displays the total amount of bandwidth currently being received by the access point for each wireless network in megabytes (MB). © Copyright 2016 TRENDnet. All Rights Reserved. -
Page 28: Clients List
(ex. A signal strength reception of -41dBm is better than -48dBm) Uptime – Displays the total amount of time the client device has been connected. If a client device disconnects and reconnects from the wireless network, the uptime will reset to zero. © Copyright 2016 TRENDnet. All Rights Reserved. -
Page 29: Technical Specifications
68 g (1.5 lbs.) IP address, gateway, and DNS settings SSID/Network name Certifications Wireless channel Wireless encryption: WEP, WPA/WPA2-Personal, WPA/WPA2-Enterprise 802.1X 802.11 mode Channel width Transmit power © Copyright 2016 TRENDnet. All Rights Reserved. -
Page 30: Troubleshooting
Then click Use the following IP address, and make sure to assign your network adapter an IP address in the subnet of 192.168.10.x. Click OK Note: If you are experiencing difficulties, please contact your computer or operating system manufacturer for assistance. © Copyright 2016 TRENDnet. All Rights Reserved. -
Page 31: Appendix
From the Location drop-down list, select Automatic. 2. In the Network Preference window, next to "Show:", select Network Status. You'll see d. Select and view your Ethernet connection. your network status and your IP address settings displayed. © Copyright 2016 TRENDnet. All Rights Reserved. - Page 32 1. Apple Menu > System Preferences > Network 2. Select Ethernet from the list on the left. 3. Click the Advanced button. 3. On the Ethernet tab, the Ethernet ID is your MAC Address. © Copyright 2016 TRENDnet. All Rights Reserved.
- Page 33 This is a Class A product. In a domestic environment, this product may cause radio Country Code selection feature to be disabled for products marketed to the US/CANADA interference, in which case the user may be required to take adequate measures. © Copyright 2016 TRENDnet. All Rights Reserved.
- Page 34 An RMA number is required in order to initiate warranty service support the event that the RMA unit needs to be replaced, TRENDnet may replace it with a for all TRENDnet products. Products that are sent to TRENDnet for RMA service must refurbished product of the same or comparable model.
- Page 35 OF SUCH DAMAGES, AND LIMITS ITS LIABILITY TO REPAIR, REPLACEMENT, OR REFUND evidence of the original purchaser's date of purchase. Replacement products may be OF THE PURCHASE PRICE PAID, AT TRENDNET'S OPTION. THIS DISCLAIMER OF LIABILITY refurbished or contain refurbished materials. If TRENDnet, by its sole determination, is...
Need help?
Do you have a question about the TEW-WLC100 and is the answer not in the manual?
Questions and answers