
Subscribe to Our Youtube Channel
Related Manuals for Vacron VVG-CBN39


Summary of Contents for Vacron VVG-CBN39
- Page 1 Vehicle Video Recorder External Camera(optional) User Manual TYPE A : Built-in GPS TYPE B : W/O GPS (optional for G-mouse) 2016 DEC V1.0 optional...
-
Page 2: Safety Precautions
User Manual Safety Precautions Before using Product, please read instruction & safety precautions. Follow all steps and instruction, operate it correctly. • Keep device away from children. • Use recommended Power source. • Do not open device or modified or heat up. •... -
Page 3: Table Of Contents
User Manual Index Features ..................... 1 Specification ..................... 2 Accessories ....................4 Installation Guide ..................5 External Camera ..................8 Product Appearance ................9 SD Card Installation ................11 SD card Format ..................13 SD card Restore ..................15 Remote Controller Function ............... 17 Operate Instruction ................ -
Page 4: Features
User Manual A. Features Built-in 1080P SONY CMOS Sensor, Viewing angle approx 100 degrees. External Camera 720P, Horizontal angle 110 degrees. (Depend on Cameras you choose) Suitable for all types of vehicles use. Small Design, Easy Installation. ... -
Page 5: Specification
User Manual B. Specification 1CH:Forward facing lens SONY_IMX323 CMOS Sensor 1080p FULL HD Sensor Device 2CH:Shoud equip PHOME JACK-4P 3.5mm exteranl 720P (AHD Interface) (optional) CH1:Outside vehicle approx100 degree View Angle CH2 is optional accordingly to the camera spec Stable current consumption of 850mA Voltage Start at 5V±5%;1A The machine needs 4.8v to start... - Page 6 User Manual GMT time, use the built-in calendar clock GMT time when there is no GPS signal. No GPS software version can be corrected with player local time. Time setting: using native menu or the player to adjust the set time. AREA SET: You must use the software to set the time zone.
-
Page 7: Accessories
User Manual C. Accessories Standard: 1. 5V cigarette Power adapter (miniUSB 3.5M) 2. PHONE JACK 4 ports 90 deg turn to micro din with extra wire 2.5M 3. Remote controller 4. Product Disc 5. Suction cup bracket 6. Bracket holder 7. -
Page 8: Installation Guide
User Manual D. Installation Guide 1. To install the device on the windshield by “Suction Cups” or “Stick- Holder” Type. Sticker Adhesive Spot Suction Cups Type Stick-Holder Type 2. The best position to install the 3. To adjust the recording angle device on the windshield properly... - Page 9 User Manual Plug in DC5V Power Supply 5. Plug in the Cigarette Charger 6. VVR Installation Note: GPS positioning speed will be affected by weather, window films, etc. Window film may contain metal substances and have impact on GPS positioning. Mini USB Port reserved for USB PC Link.
- Page 10 User Manual Notice This device should be installed in the area where the windshield will be able to be cleaned. Formatting SD card on the device before beginning to use. Set time zone and timing on OSD, or auto-calibrating by GPS. NTSC or PAL setting through OSD.
-
Page 11: External Camera
User Manual E. External Camera Installation diagram To stall External Camera with 4P Phone Jack Connect (1 Vp-p Composite Video Output) in front or rear of the car. Note: To avoid camera damage, please power off the vehicle video recorder before plug the camera in. Definition of 4P Phone Jack connect Negative Signals... -
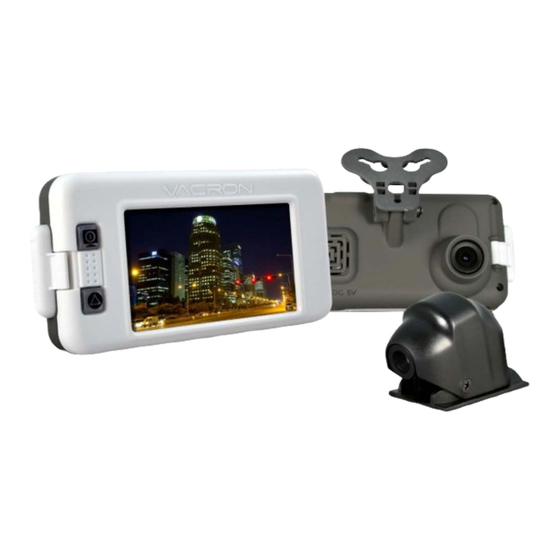
Page 12: Product Appearance
User Manual F. Product Appearance AV output/ GPS Mouse extra slot(optional)/ Extra wire for MIC(optional ) Monitor On/Off CH1 1080P Lens Screen DC5V Power Force recording input USB cover Reserved for USB PC Link SD card Slot CH2 External camera plug... - Page 13 User Manual Unit:mm...
-
Page 14: Sd Card Installation
User Manual G. SD Card Installation Open SD card cover on the device to insert of remove SD card. When not using SD card, please close the cover to avoid dust or other items get into device. SD card Format / SD card Restore. Note:Memory Card is optional. - Page 15 User Manual Notice (1). Recommend Memory Card class 10 or above (Minimum of 8GB). (2). If SD card did not format by Player before using, device will delete all data inside and format it automatically (take 1~5mins). After it’s done will start to record. (3).
-
Page 16: Sd Card Format
User Manual H. SD card Format When should you (format)the SD card? When you purchase a new SD card, you have to format it for vehicle video recorder to record properly. *Notice : Before Format SD card, make sure it’s not locked. ... - Page 17 User Manual Windows XP Windows 7...
-
Page 18: Sd Card Restore
User Manual SD card Restore After backup all data from SD card, if need it for other use. Most restore SD card before using it. *Notice: Before restore SD card, please make sure it’s not locked. If it’s not locked and still cannot been restored, use admin system to do it. - Page 19 User Manual...
-
Page 20: Remote Controller Function
User Manual J. Remote Controller Function Playback Full screen/ Manual Force Half screen spilt shift Audio Recording On/Off Menu Up/down/right/left Confirm Stop... -
Page 21: Operate Instruction
User Manual K. Operate Instruction Power on / Record: Turn on device and wait for around 20 sec ready for recorded. Power off / Stop record: After power off, wait for superconductor’s supply is off, when the power are all off. Take out SD card for backup or format. Display ◆Screen &... - Page 22 User Manual 1. Event Record: On LIVE VIEW will show at right hand side on top, means G-sensor is working. When push forced recorded on the right hand side will show up means it force recorded. When this show means G-sensor detected abnormal impact. 2.
- Page 23 User Manual OSD MENU...
- Page 24 User Manual Menu Content Set up for display CH1 / CH2 Screen Spilt Note: if there is no external camera connect to device display will base on 1 CH. Set for sleep mode Sleep mode Count by second, minimum 10 sec. Time Setup Setup Time &...
- Page 25 User Manual Manual Format Format SD Cancel Format card Confirm Format Restore Restore Restore confirm. Version Version Information...
-
Page 26: Player
User Manual L. Player Built-in Player in SD card, choose player click to start, like display below. ★Note:Use software must install DirectX 9.0 or above. Support for:WINDOWS XP、VISTA、7、8、10, Not for MAC OS Suggest for hardware : i5 or higher level 3.1GHZ, RAM:4G or better、with independent graphic card. - Page 27 User Manual Control Panel: Software operating Google Map Key Exit Minimize Display Play video Event calendar Backup Screenshot tool Setting Tools, Format、language setting G-sensor Video Playback Pause key Play key Stop key...
- Page 28 User Manual Playback key Forward playback Forward playback Return to last file key Rearward playback Volume Volume control...
- Page 29 User Manual File playback Play speed Backup control Play BAR Quick backup (1) Play BAR:Use mouse to move BAR. BAR’s top banner mark, control it to quick saving. (2) Speed:2X、4X、8X fast turn and -2X、-4X、-8X playback. Quick backup:Move banner for quick backup.
- Page 30 User Manual Playback file Choose『open file』 , choose SD card or save in disk for play. Video playback operating: 1. Choose source 2. Choose the video, click it twice. Video Play Back...
- Page 31 User Manual Backup Transfer video from SD card to PC, select to backup will show the diagram below. Backing up Backup Step1. Select SD card Source Step2.Select Video For Backup...
- Page 32 User Manual Step3.Select Format Type Backup Type: (1)SD card original format Adjunct *.sd file (2)AVI File Backup(*.avi) ch1 is front camera data, adjunct*.avi file ch2 is back camera data, adjunct*.avi file ★Note:Use original format to record will include all data even G-sensor, if use *.avi format to backup there will only be date, video and voice data without G- sensor’s information.
- Page 33 User Manual Setup photo save Screen snapshot save route setting Setting Before using SD card, please format it by Player on PC. Finished all setting for device. After setup SD card, insert SD card into device and start to recorded.
- Page 34 User Manual Setting Page 1. Resolution 3 modes for choose Insert Driver’s name or car plate number for easy Device tracking. (use for company detail car, taxi, fleet management). Setup Password for safety. Passwords character limited is 15. e.g. :123456789123456 After password setup when using player to Password...
- Page 35 User Manual During vehicle moving, G-sensor use G-sensor to detect Sensitivity the impact. To decide (Impact force recorded or not. sensor Different types of car analyzer) will use different setting. Voice Voice Record ON/OFF Record...
- Page 36 User Manual Snap shot Tool When playing back video from SD card, click will show up the page like down below. After screen snapshot , save at /Snapshot file. File type *.bmp.
-
Page 37: Appendix: The Indication Of Bright And Dark Spot Of Lcd
User Manual M. Appendix: the Indication of Bright and Dark Spot of LCD Q: What is Bright/Dark Spot? A: Bright Spot: At dark background, we found the abnormal bright spots, we called those spot are “Bright Spot” Dark Spot: At multiple color background (excluded dark background), we found the abnormal dark spot, we called those spot are “Dark Spot”... - Page 38 User Manual Notice There is 30 days exchanges refer to the indication of bright and dark. Please keep the receipt and contact your local dealer for exchanging merchandise. The maximum valid date is 30 days. LCD panel, backlight board is a light-emitting element which will under degeneration by time and environment changes.
- Page 39 For More Information Please check VACRON Website http:/ww.vacron.com Made in Taiwan...
Need help?
Do you have a question about the VVG-CBN39 and is the answer not in the manual?
Questions and answers